Introduction
Dimdim app is very advanced App Source Script having many advanced features like Live streaming, One to One Video calls, Text chats, Host login and much more. This package contains android project having 30+ beautifully designed and developed screens. Using this template, developers can create high quality dating and livestreaming app easily and can save 100s of hours.
Here is the easy documentation to set the app and ready to launch. Please follow all the instructions carefully and don’t skip any step. Feel free to contact us if you face any problem while set-up.
Change App Bundle
-
Extract the folder you downloaded from the codecanyon.
-
Open iOS project (Sphere.xcworkspace) in Xcode.
-
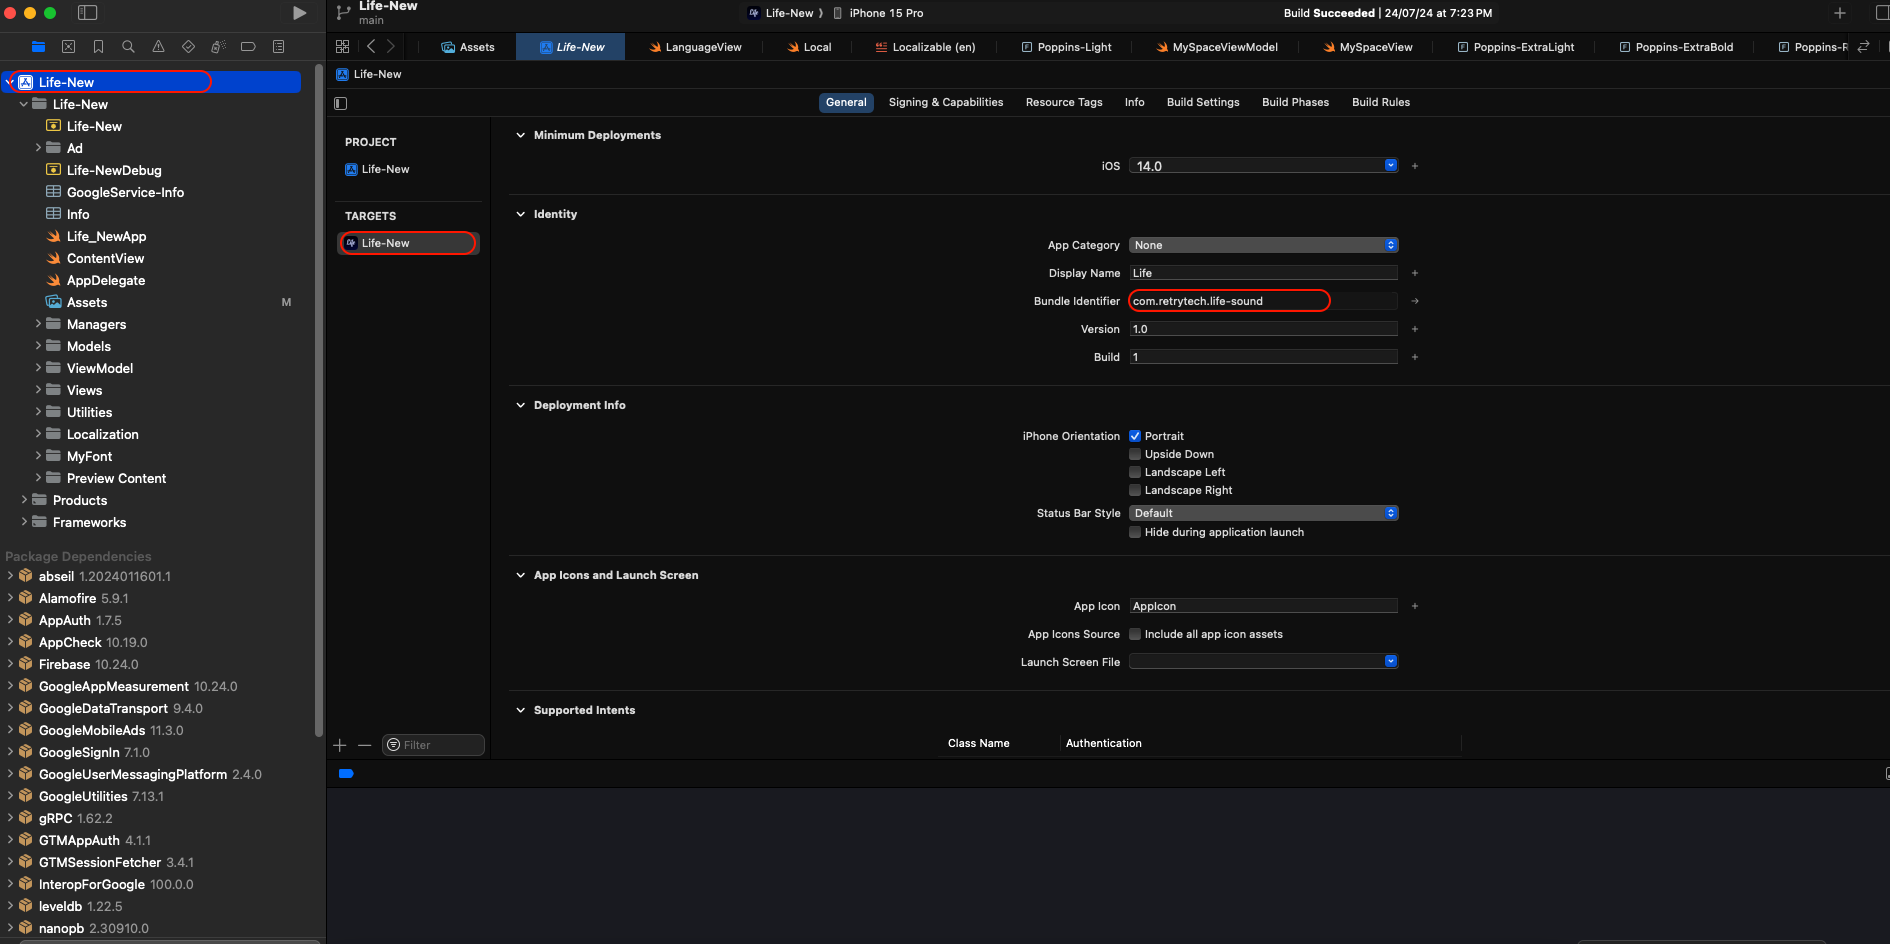
Find bundle identifier and change with your bundle identifier
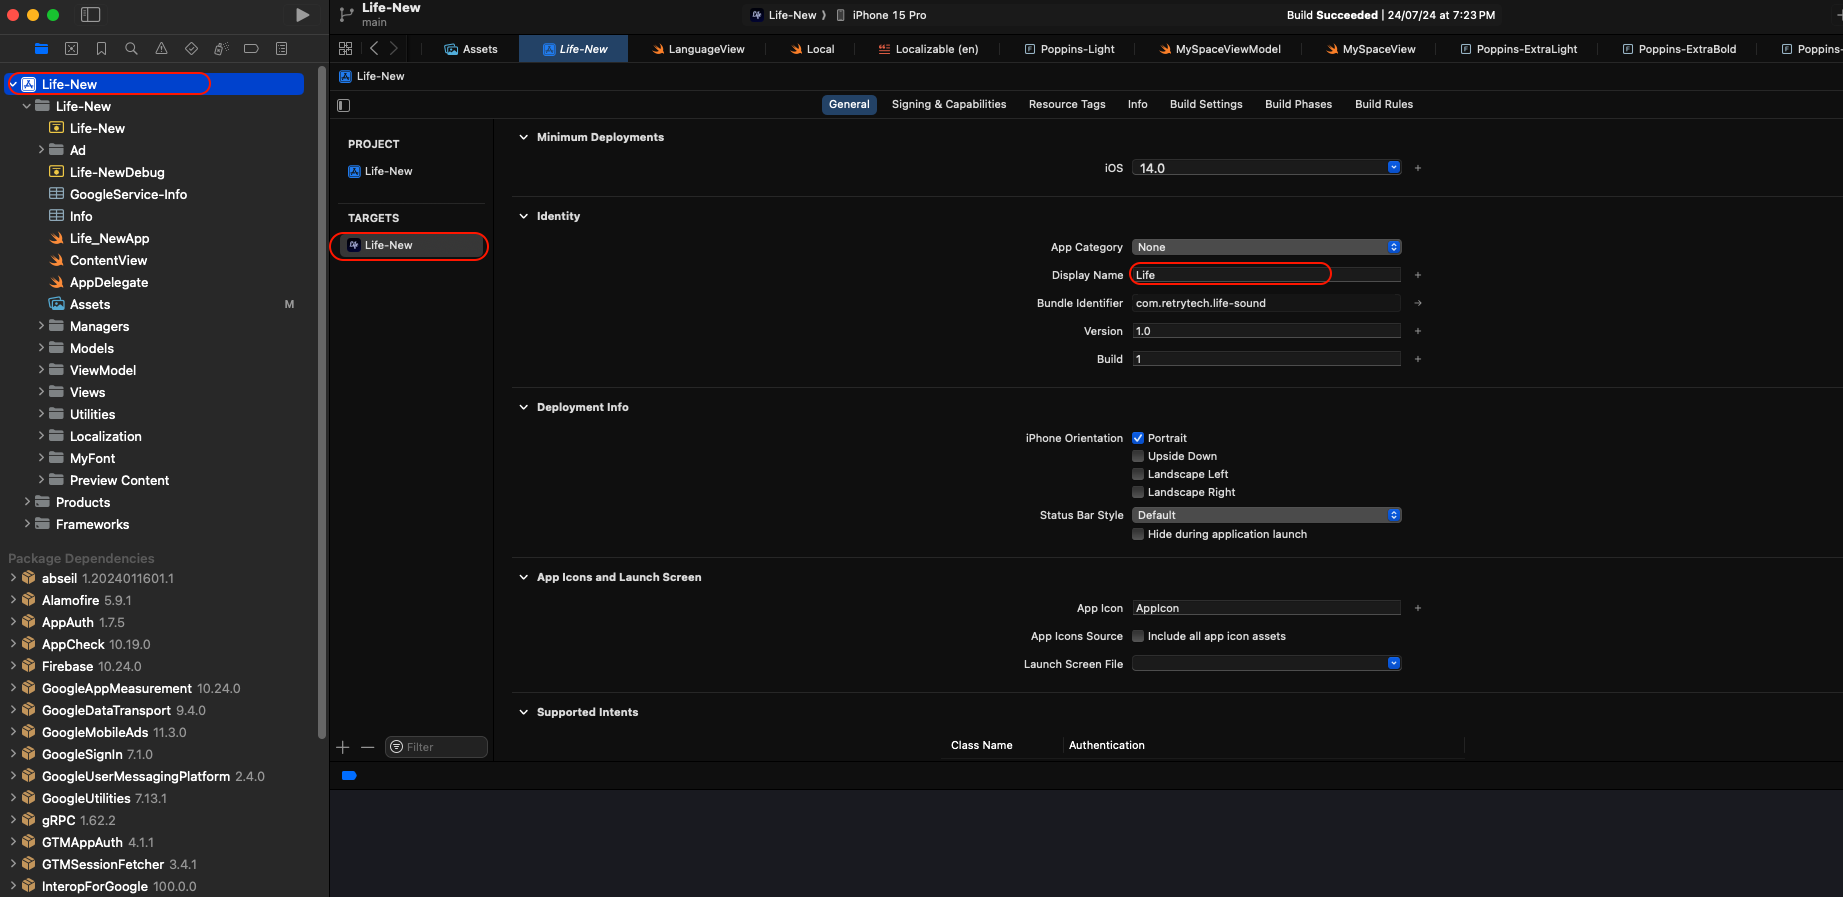
Change app name
Change app icon
-
Create an app logo from this website https://appicon.co/
-
Drag and drop all images according to size.
Setup your Credentials
-
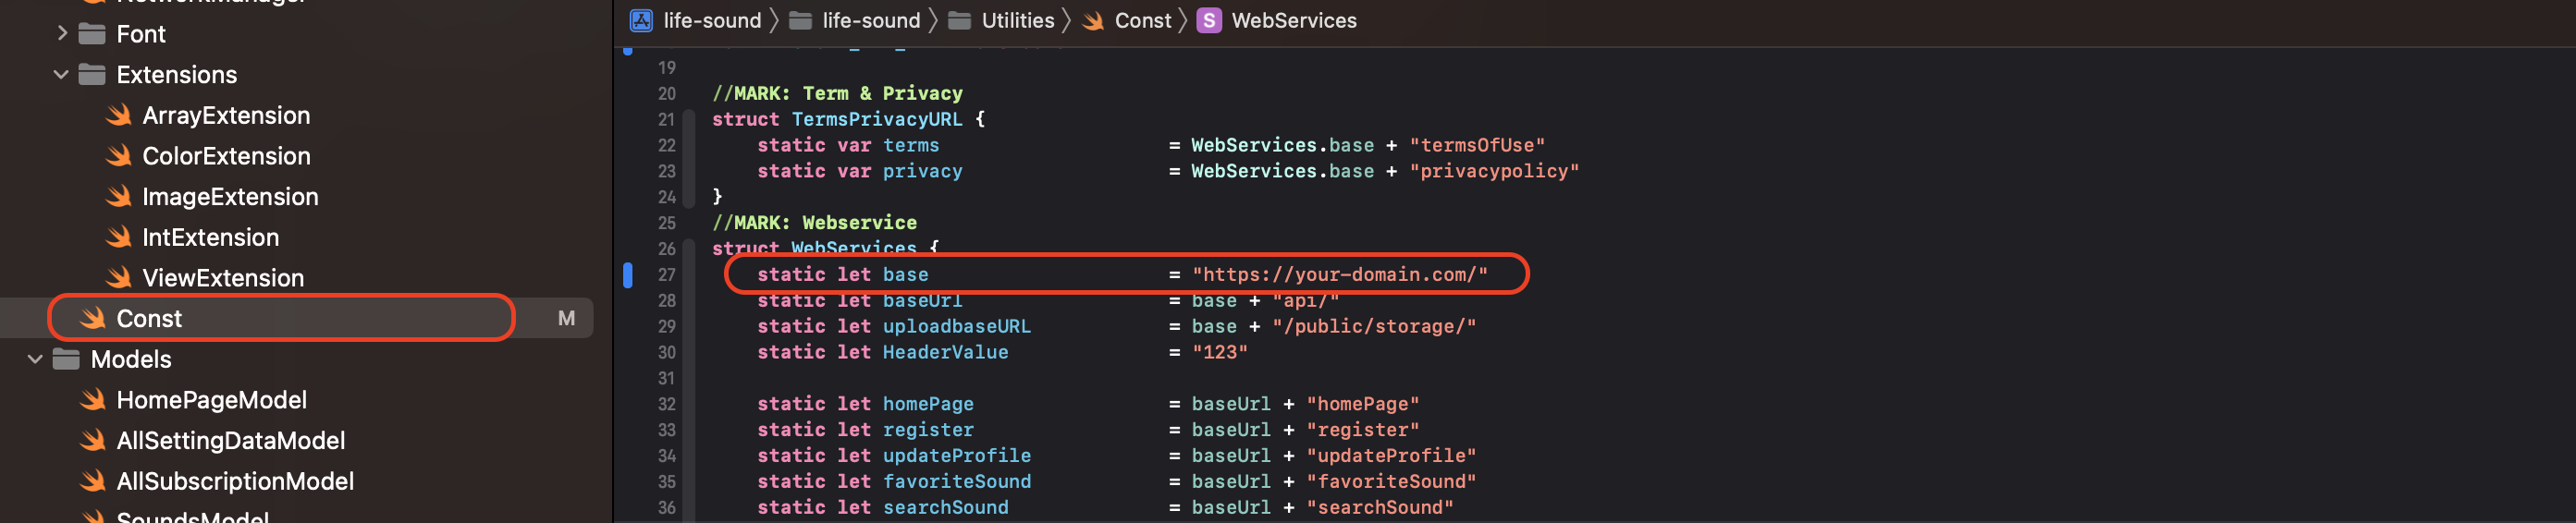
Open Constant.swift file
-
Replace url https://your-domain.com/ with your baseURL (which you got, when you was setting up backend).
Installing COCOAPODS
-
Follow the documentation
-
⚠️ Note : Once pods are downloaded as shown in the video, Double click on .xcworkspace (Not .xcodeproj)

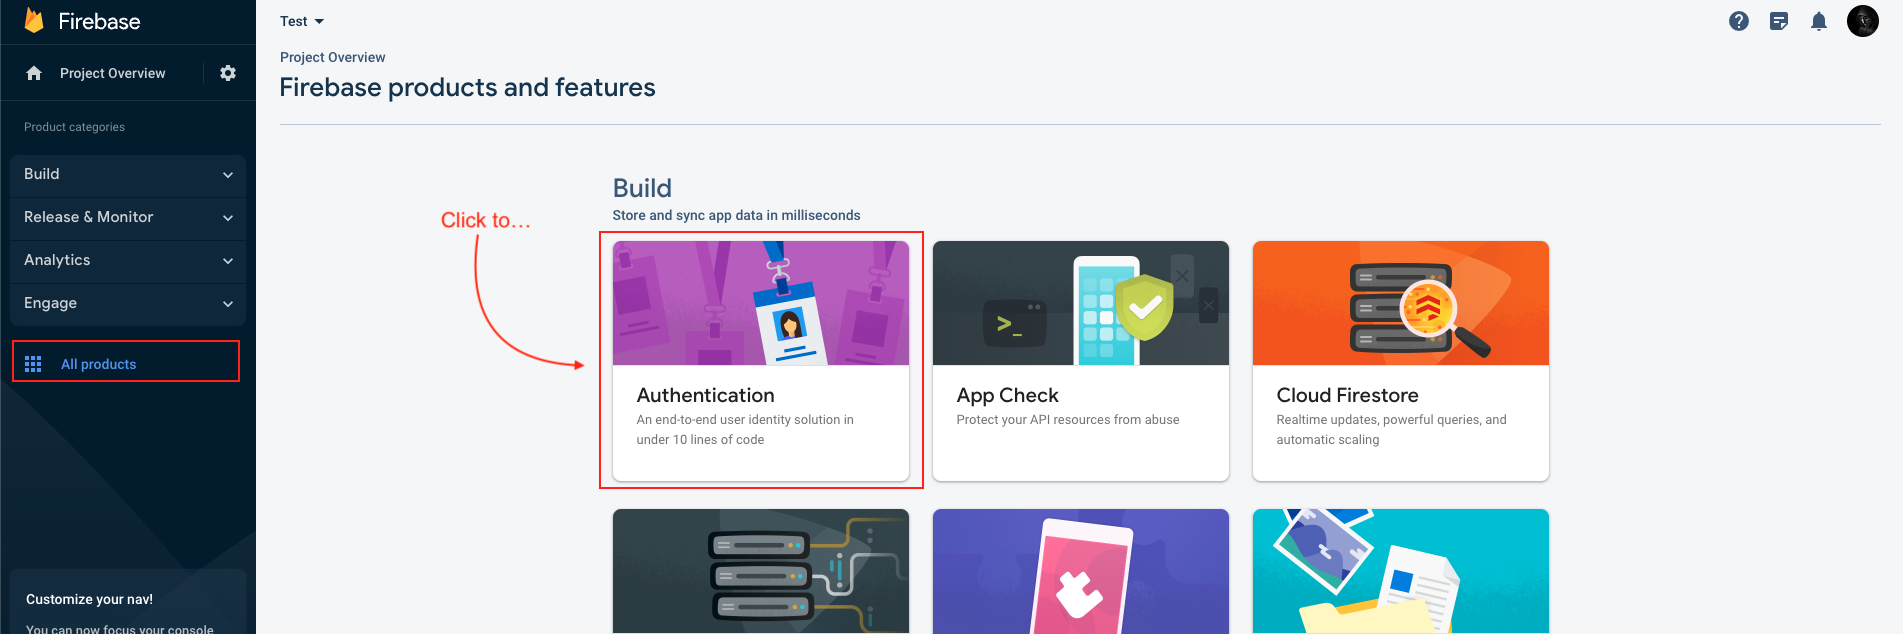
Configure Firebase
-
Go to the firebase project you might created while following backend documentation.
-
If you don't have, follow the steps below and create one project.
-
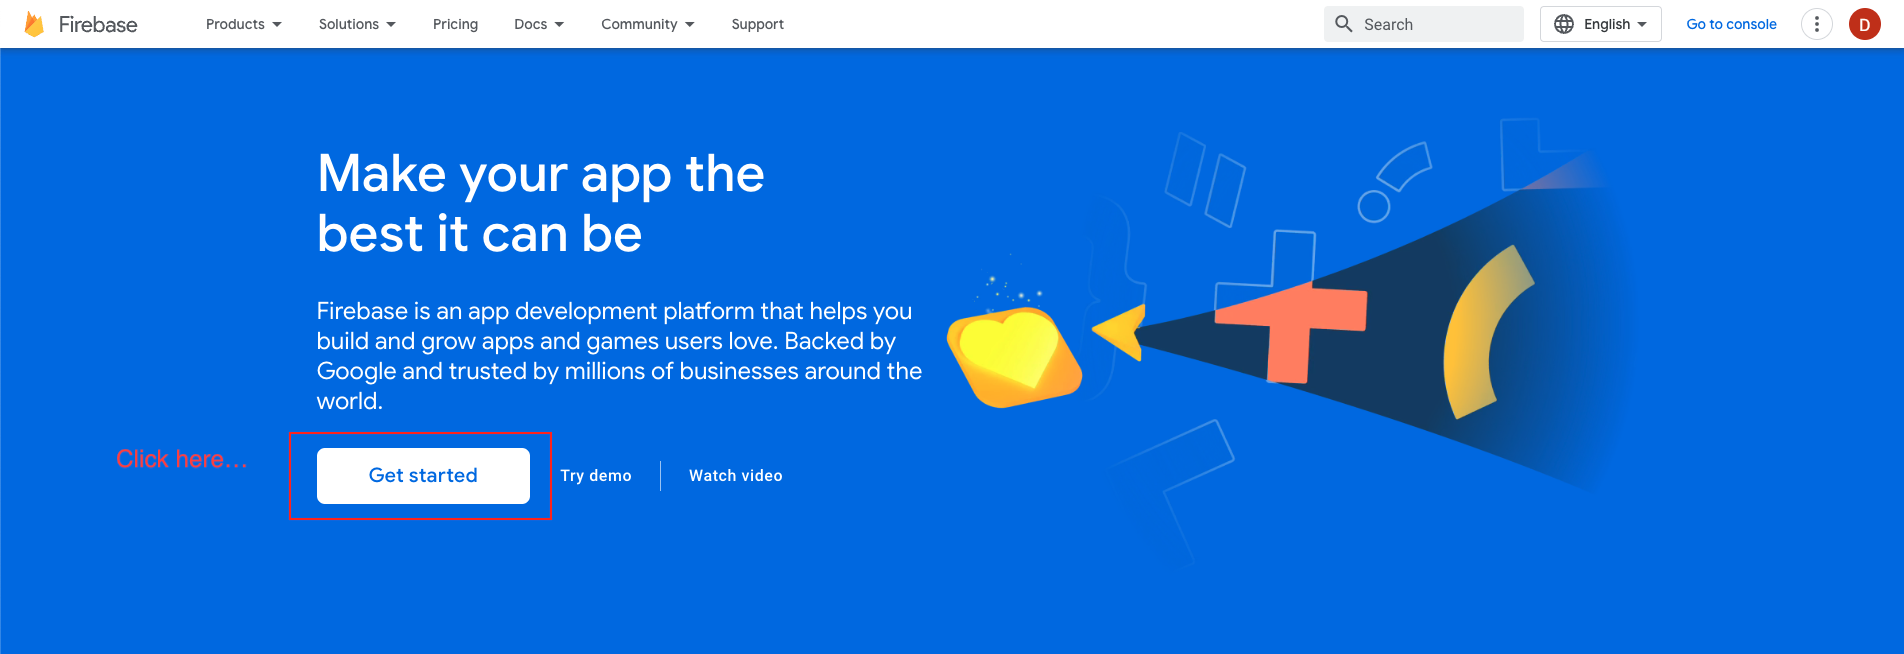
At first, follow this link https://firebase.google.com/
-
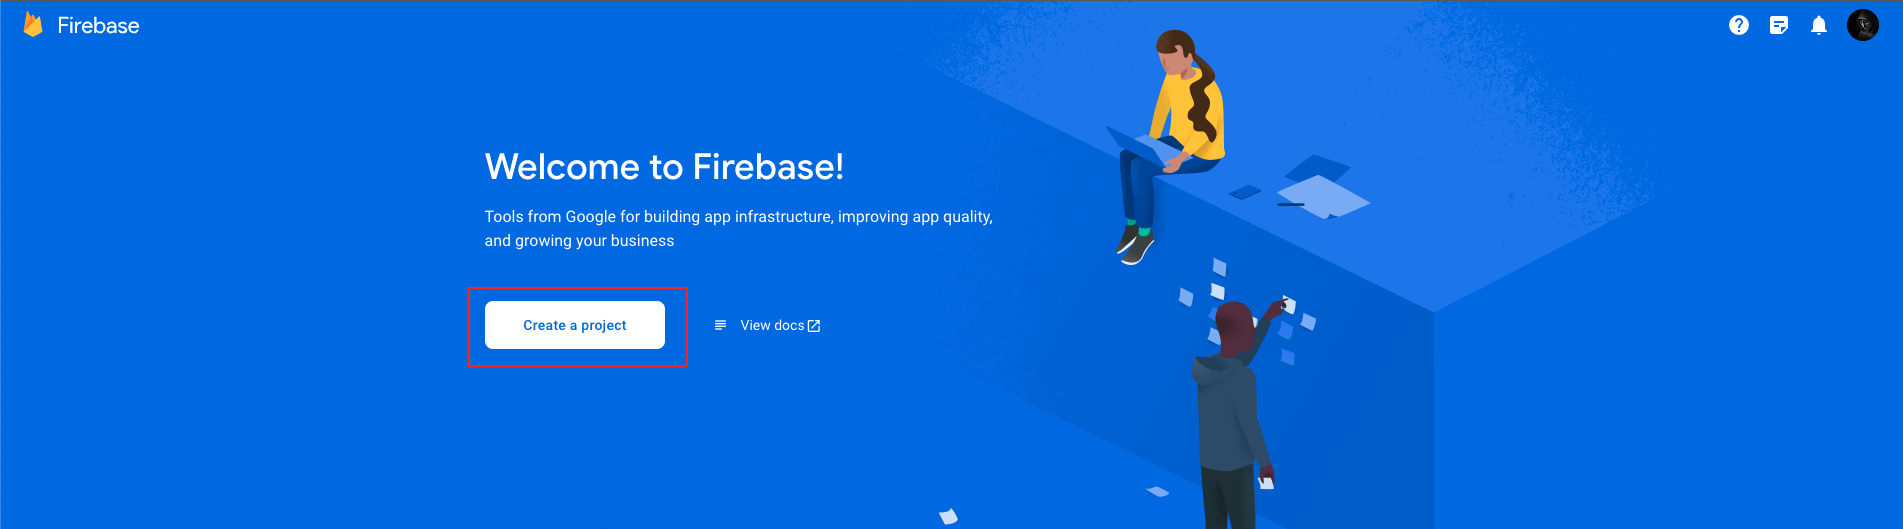
Now, we first have to create a Firebase project. Firebase project will go through and describe what it is. This allows us to add an app to that project. It can have many projects inside of Firebase.
-
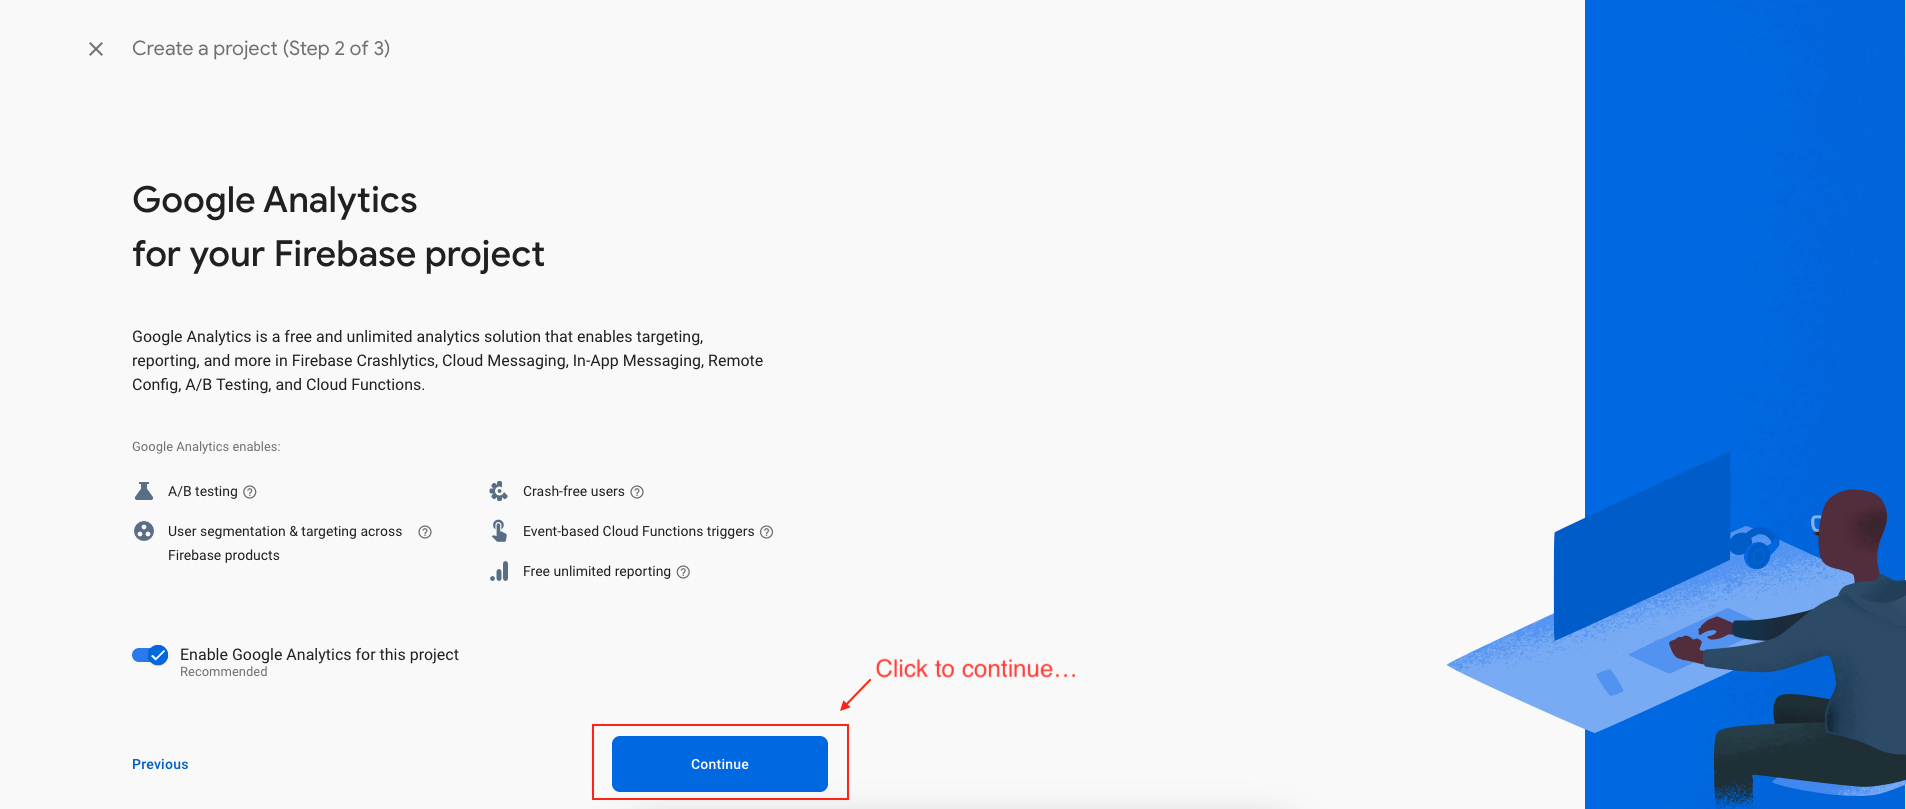
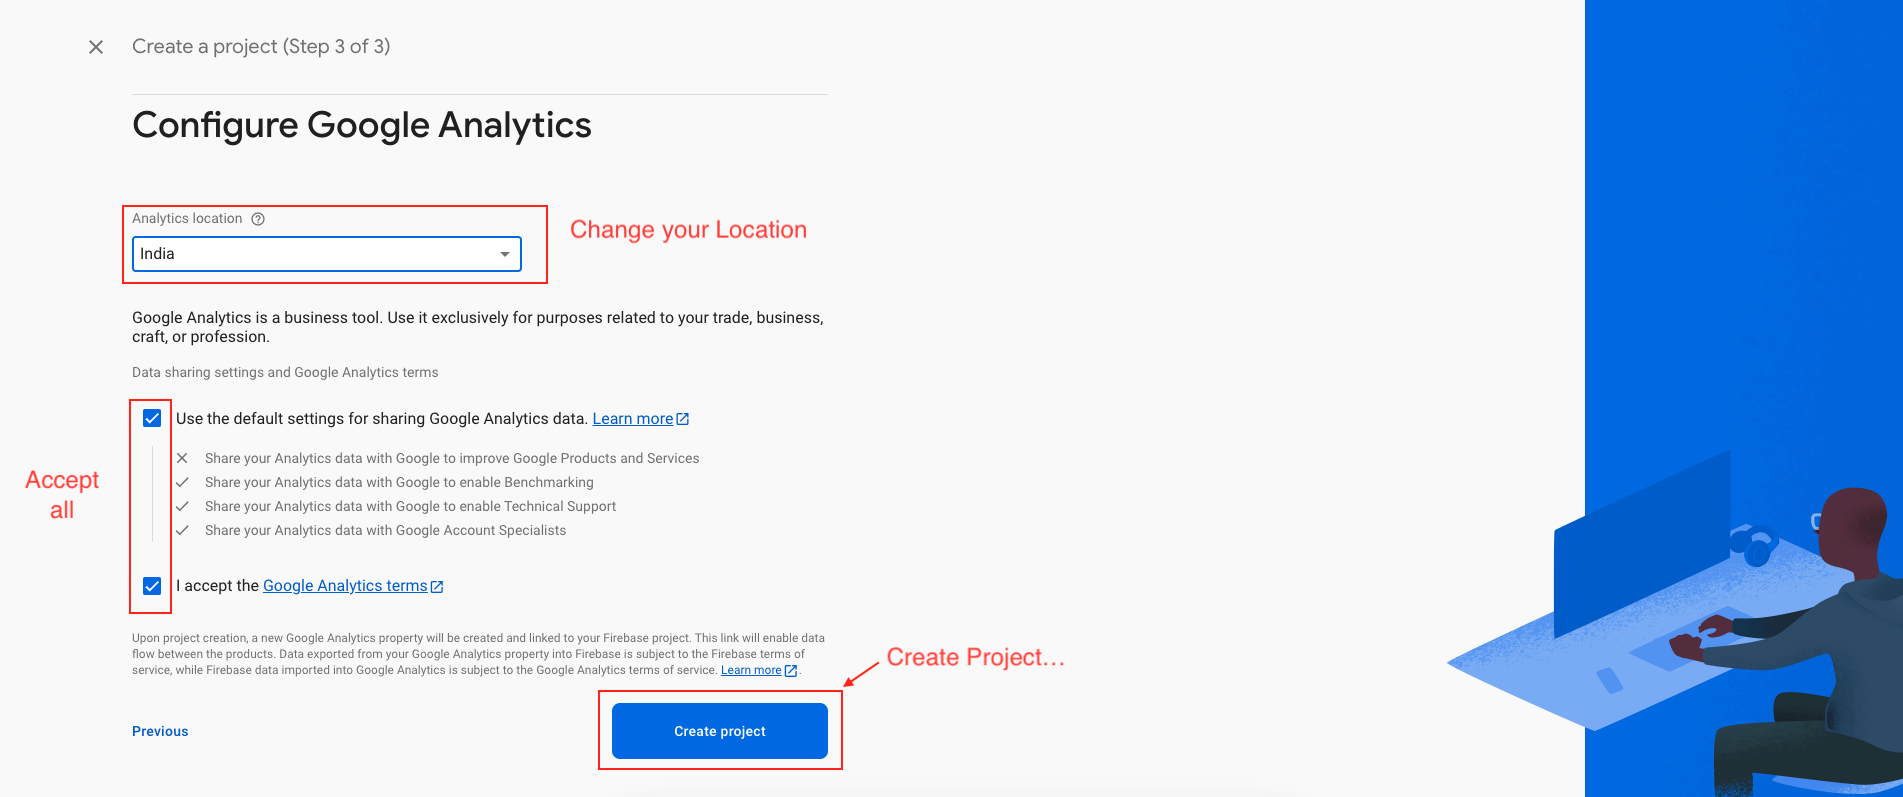
Now, we have to give a name and id to the project, enable Google Analytics for the project, set an analytics location, and accept all the terms and conditions. Firebase console automatically creates a unique id for the project.
-
Step 1 : Giving a name to the project
-
Step 2 : Enable Google analytics for the project
-
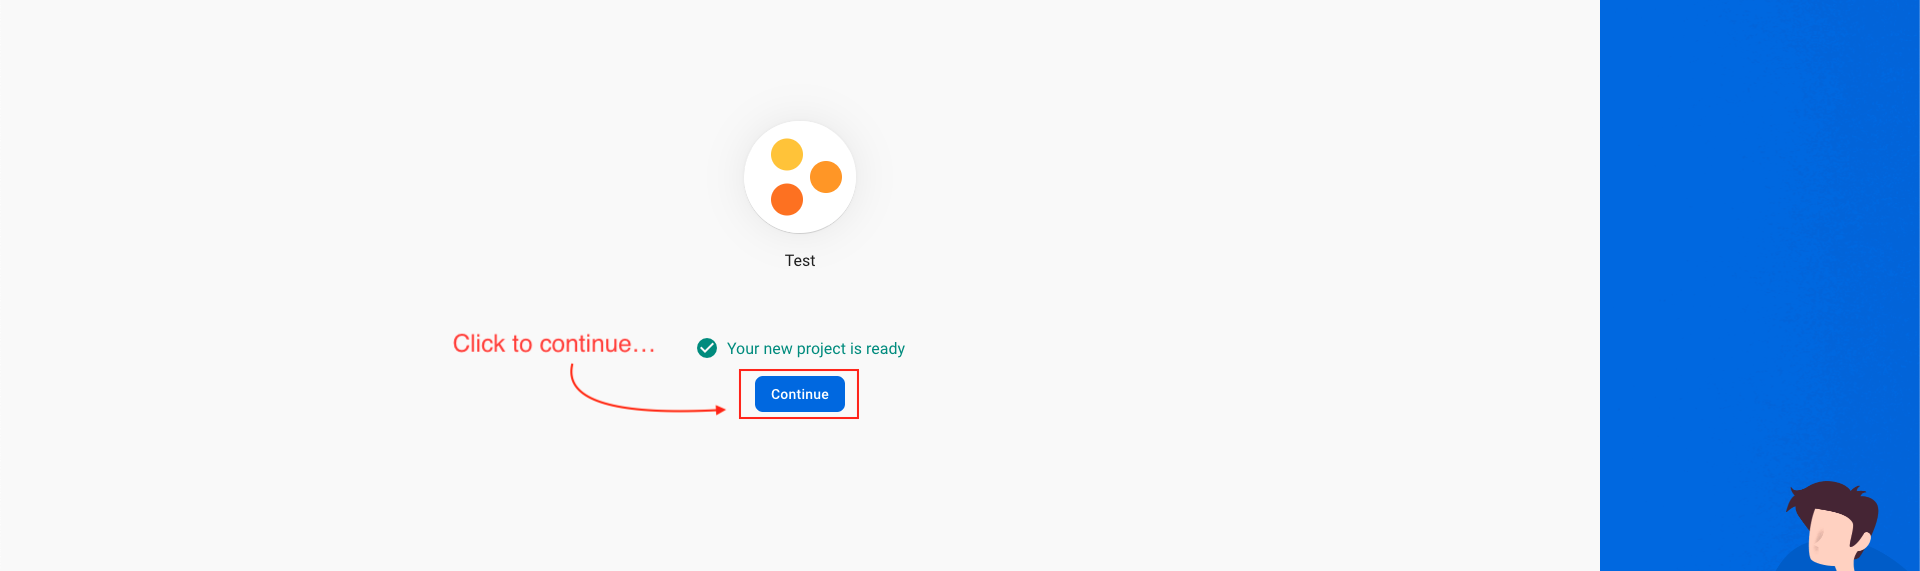
Step 3 : First Choose default Firebase account and then create project

Add iOS app in Firebase
-
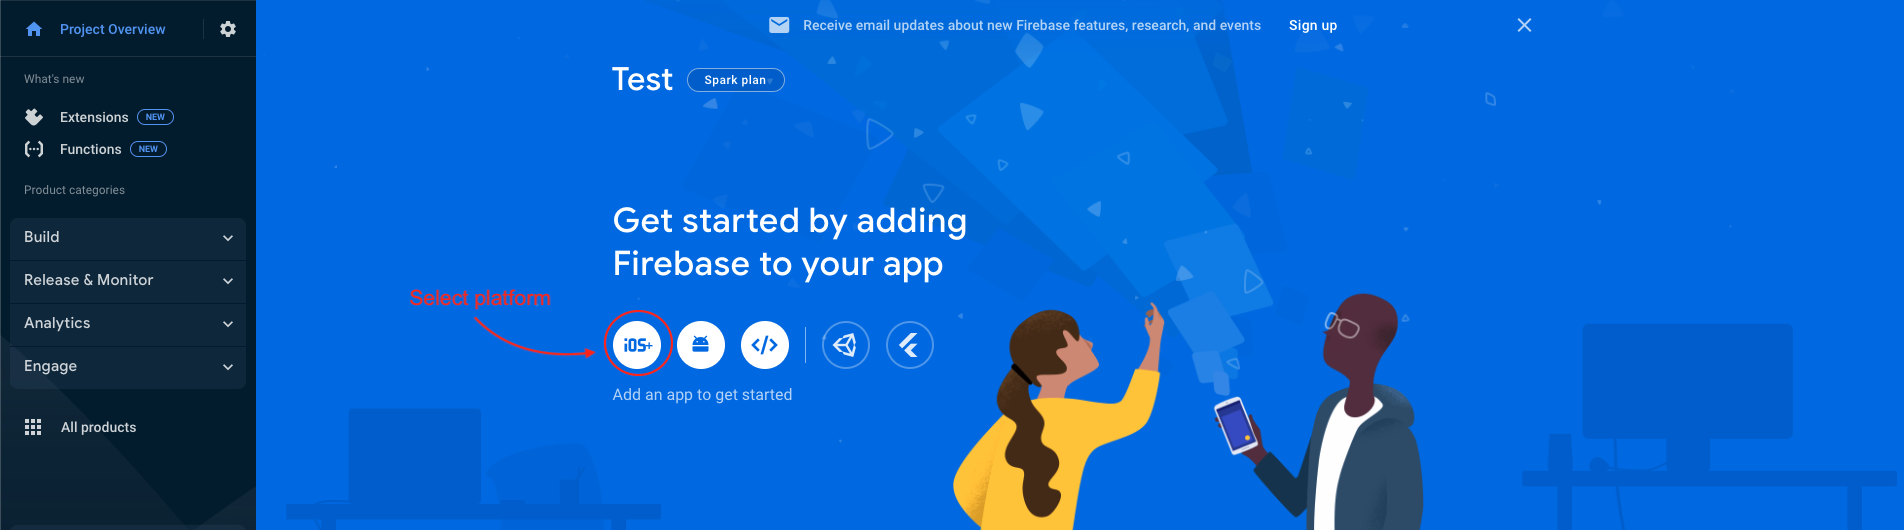
We have to choose the platform to add Firebase to our application. Click on iOS.
-
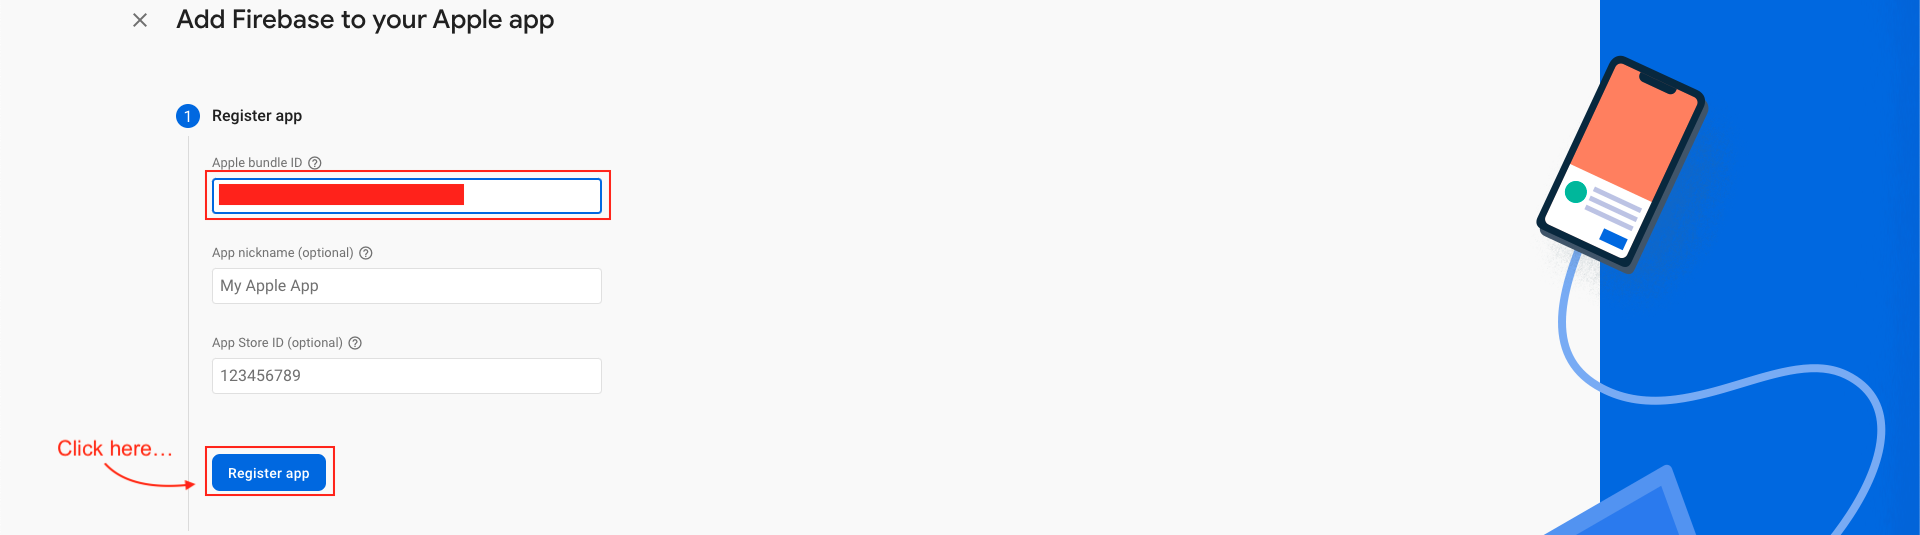
On the next screen, enter your iOS bundle ID & App nickname and click on Register App. You can find your bundle ID in the General tab for your app's primary target in Xcode. If specified, the app nickname will be used throughout the Firebase console to represent this app. Nicknames aren't visible to users.
-
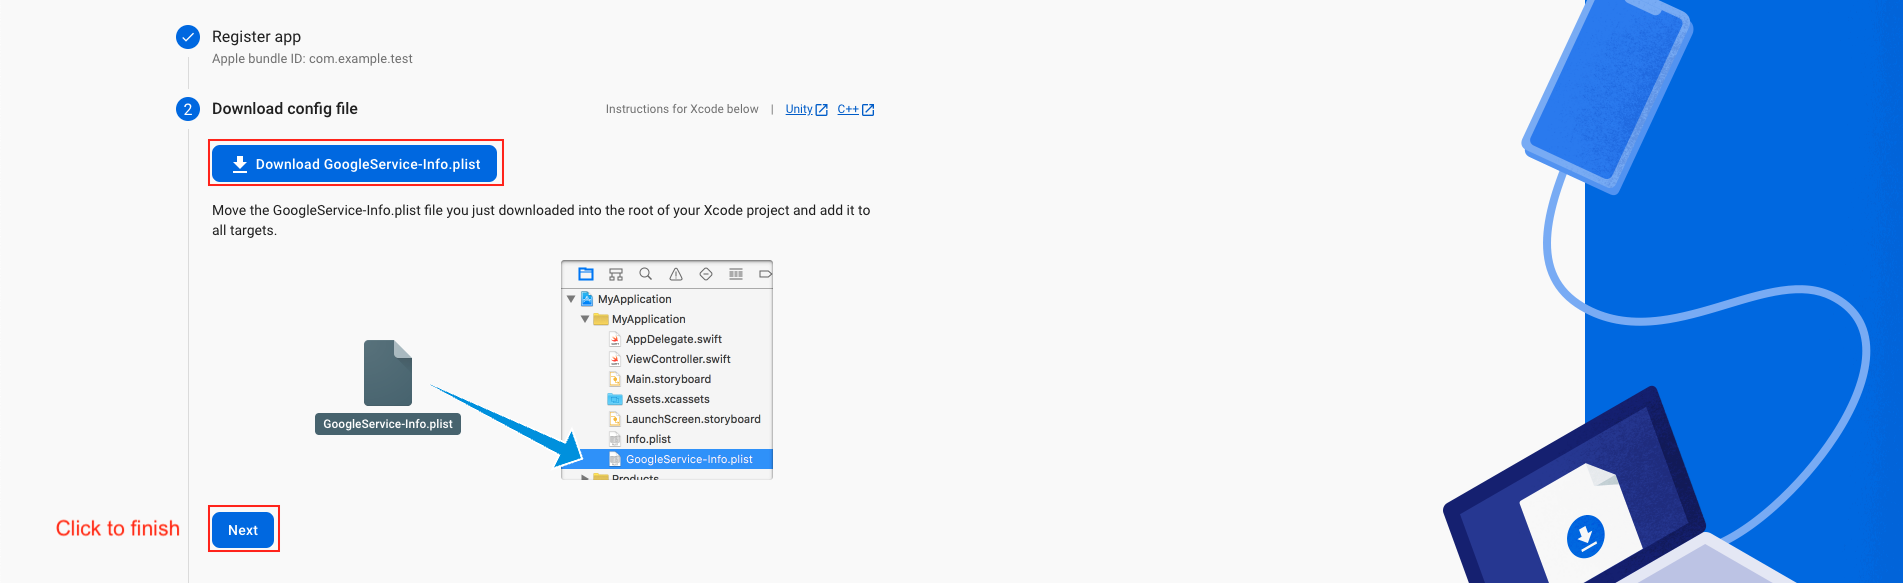
Download the GoogleService-Info.plist file & move the GoogleService-Info.plist file you just downloaded into the root of your Xcode project and add it to all targets. Make sure the config file is not appended with additional characters, like (2).
-
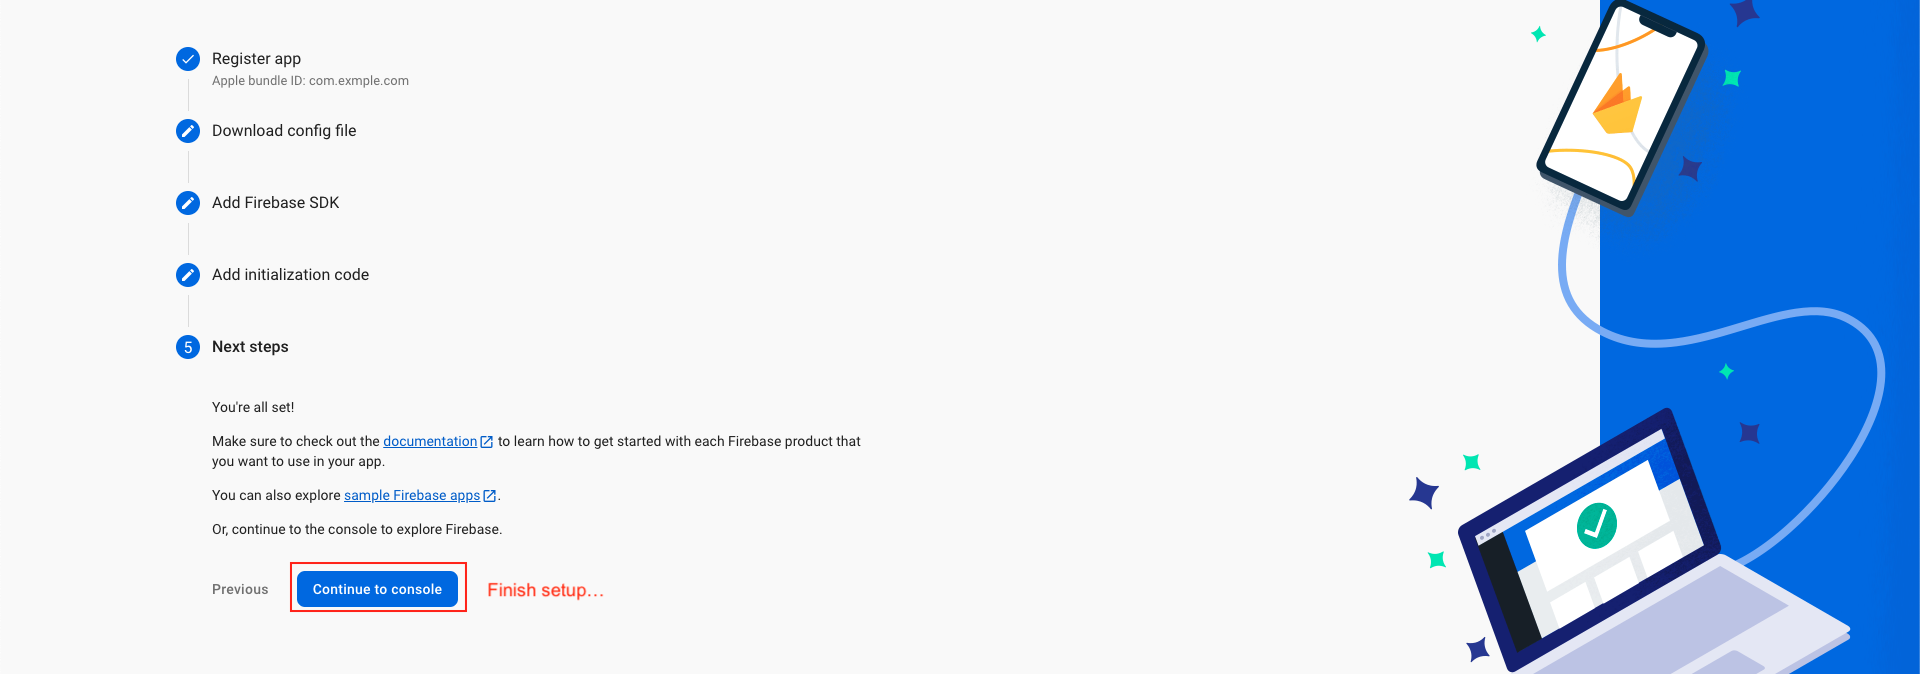
Back in the Firebase console-setup workflow, click Next to skip the remaining steps and the finish.
-
Follow This guide and setup project at firebase and collect Server key.
-
Go to .env file of the backend project again and make the changes like below.
-
Once this gets completed, Please subscribe to the Pay as you go Plan of Firebase, it is required for Chat to use a real-time database for more than 100 users. If you don't do that, app will stop working for chats and some other features once it reaches more than 100 users.
-
Login to Apple Developer Account
-
- Go to Apple Developer Account
-
- Log in with your Apple Developer credentials.
-
-
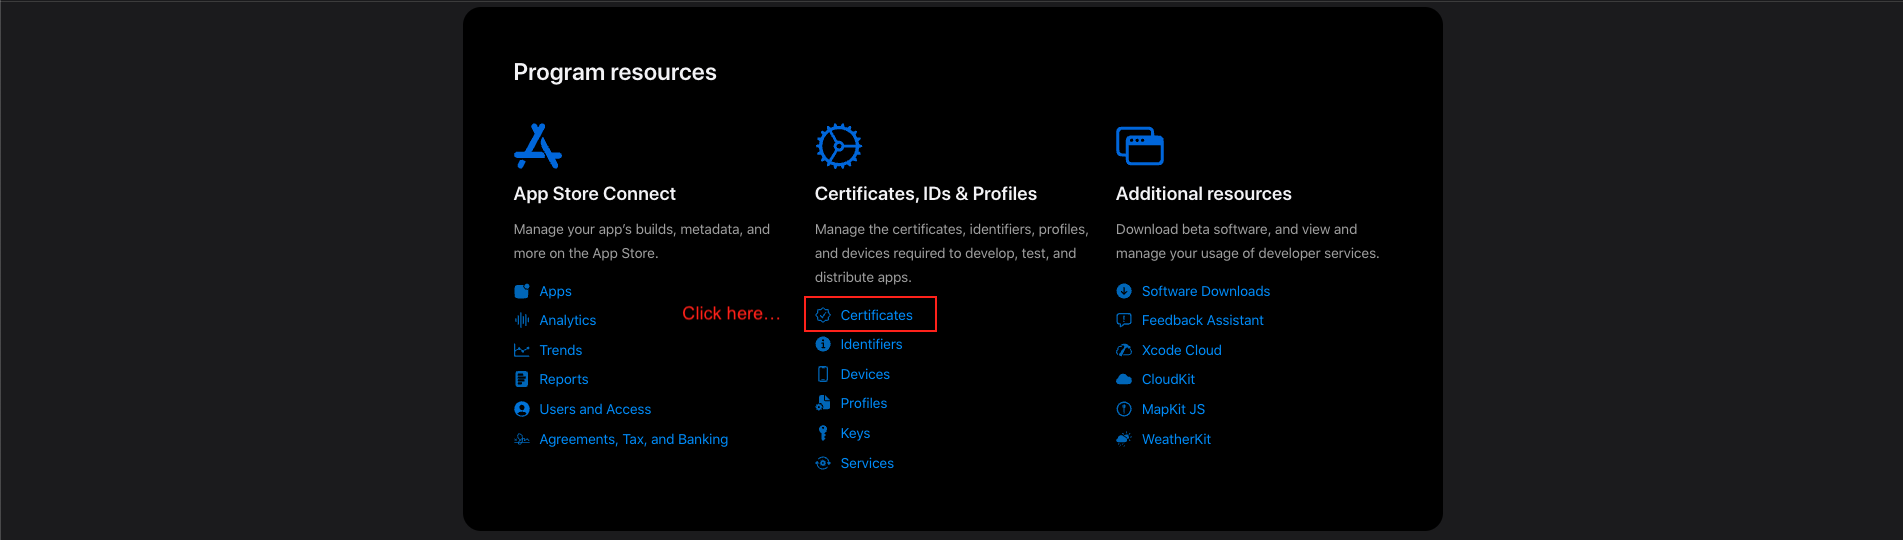
Navigate to Keys Section
-
- Click Certificates, Identifiers & Profiles.
-
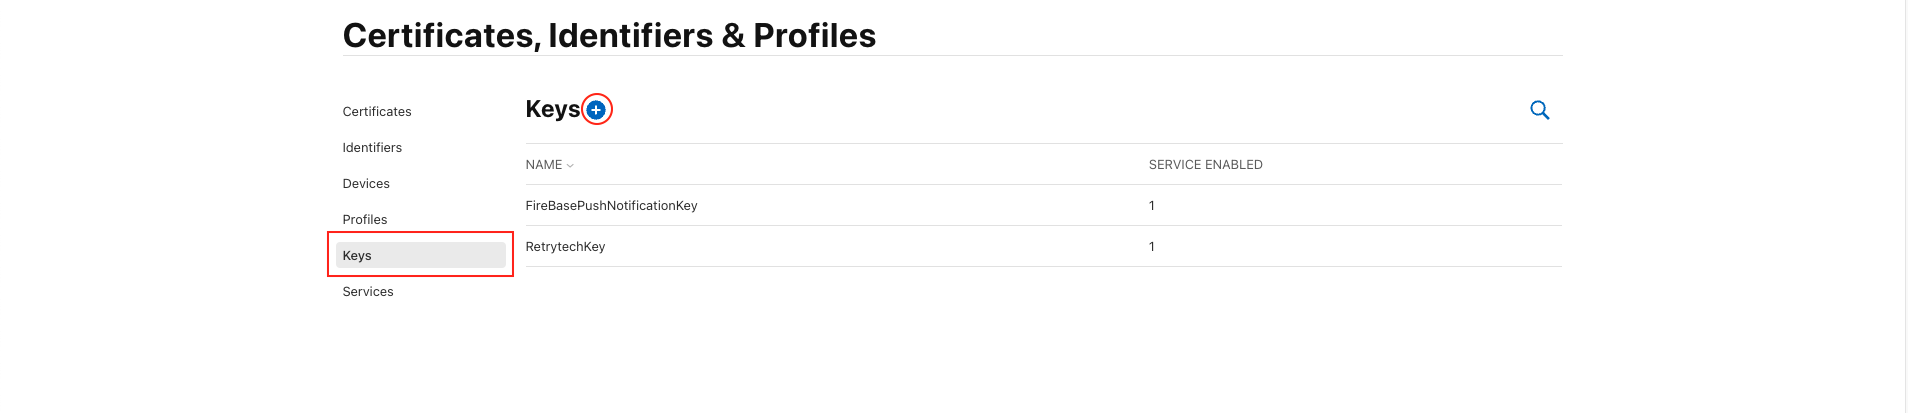
- In the left sidebar, click Keys.
-
-
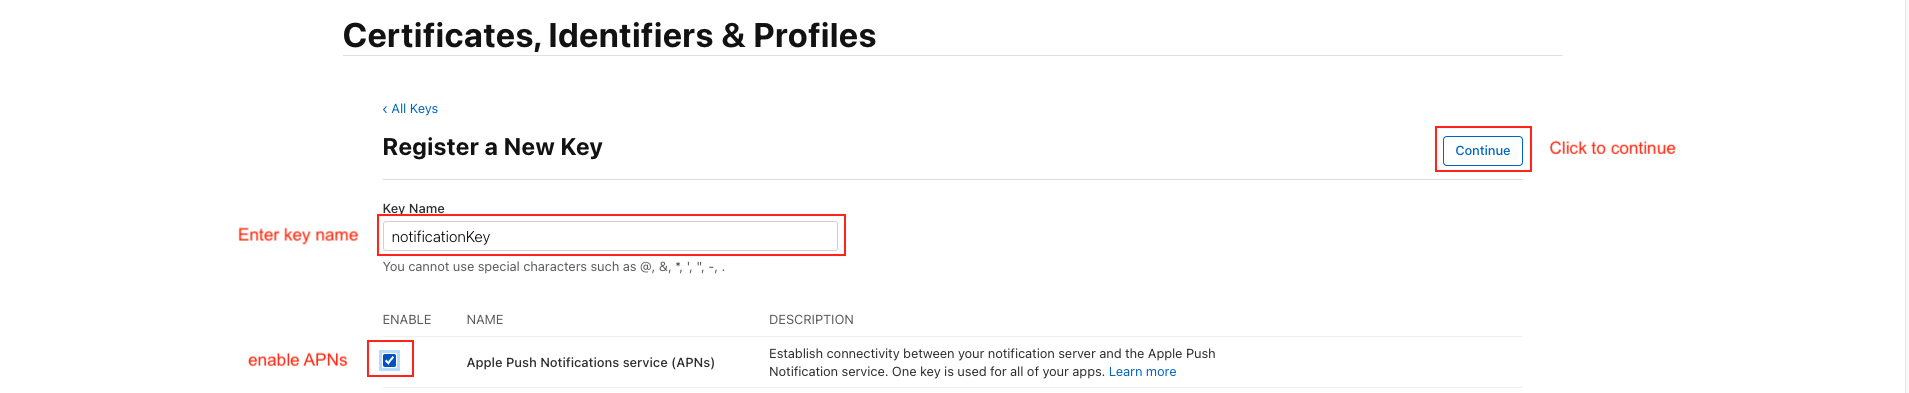
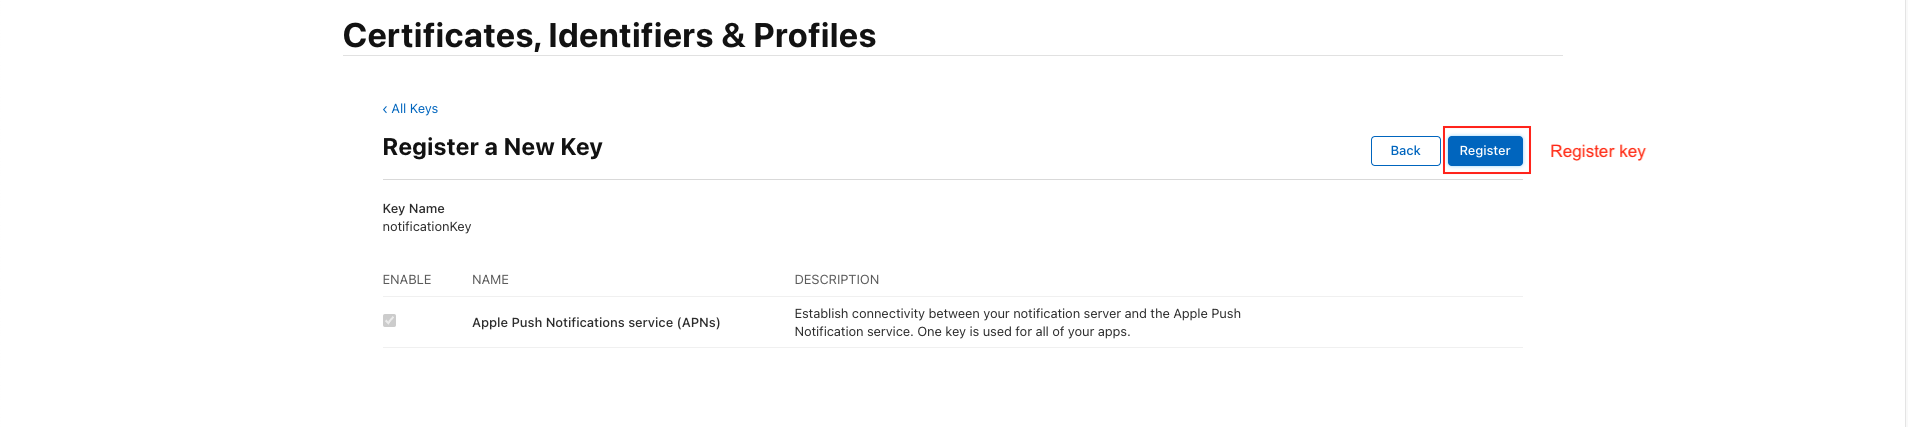
Enter a name (e.g., NotificationKey ).
-
Check the box for Apple Push Notifications service (APNs). then Configure button press
-
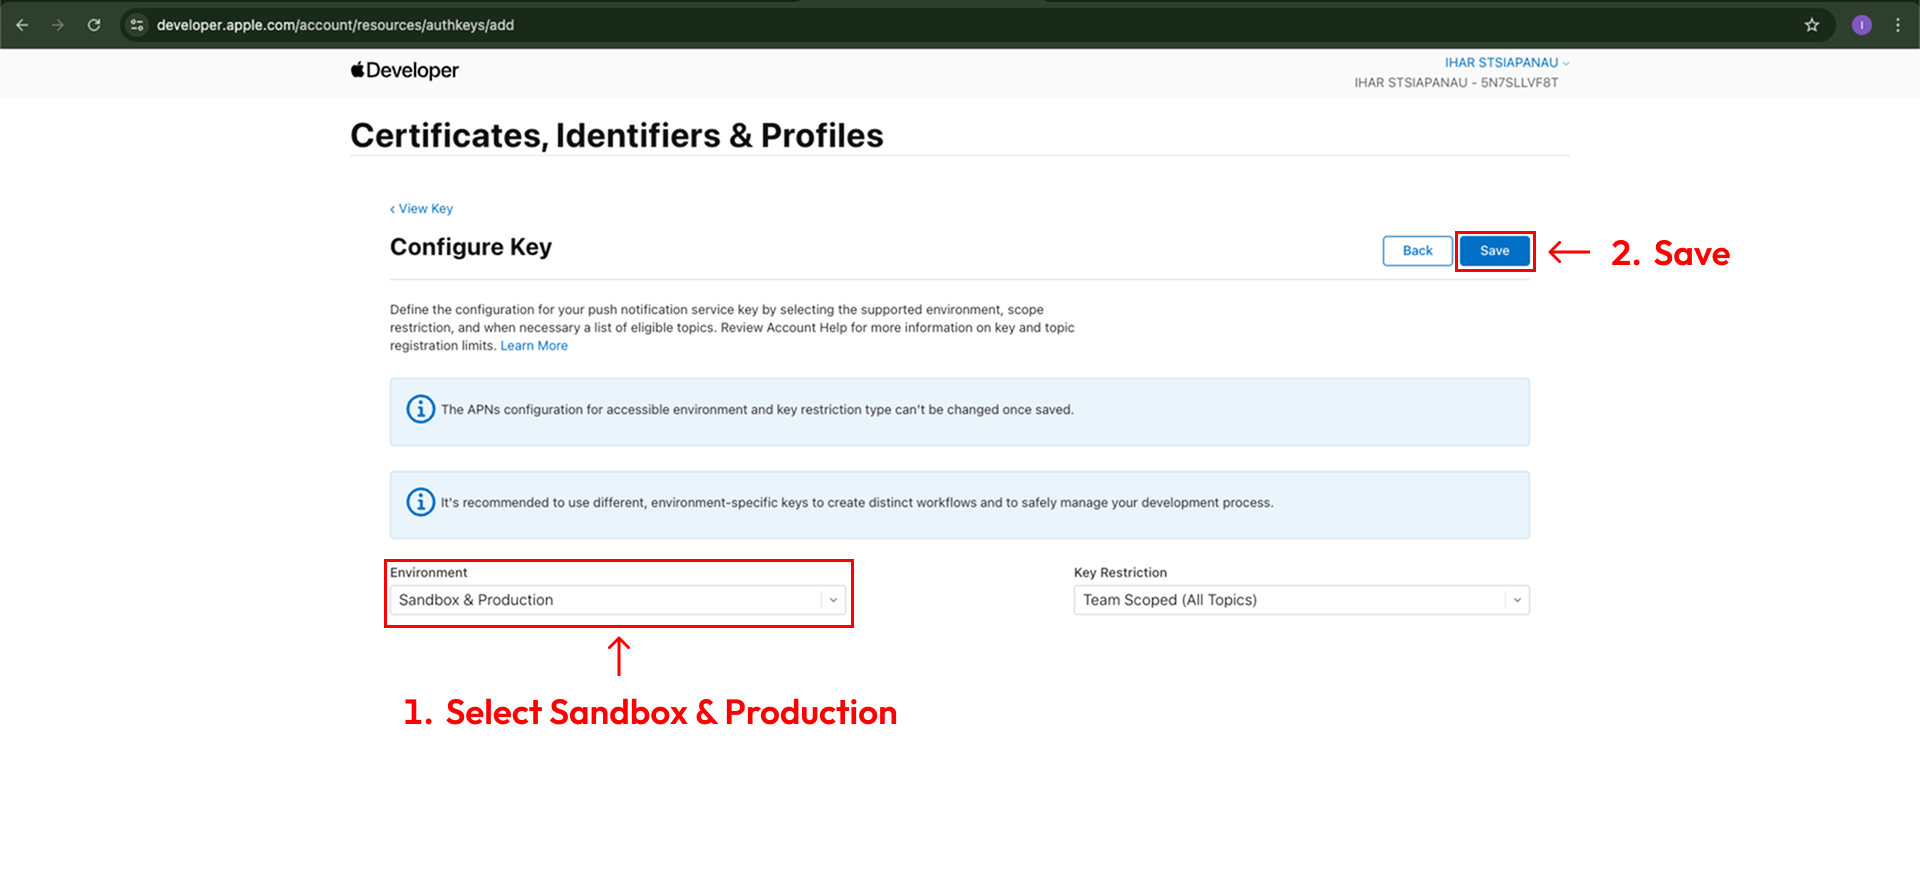
Select Environment section Select "Sandbox & Production" and Key Restriction section select "Team Scoped (All Topics)"
-
Click "Continue" & then "Save". Once saved, you will be presented with a screen displaying the private "Key ID" & the ability to download the key. Copy the ID, and download the file to your local machine:
-
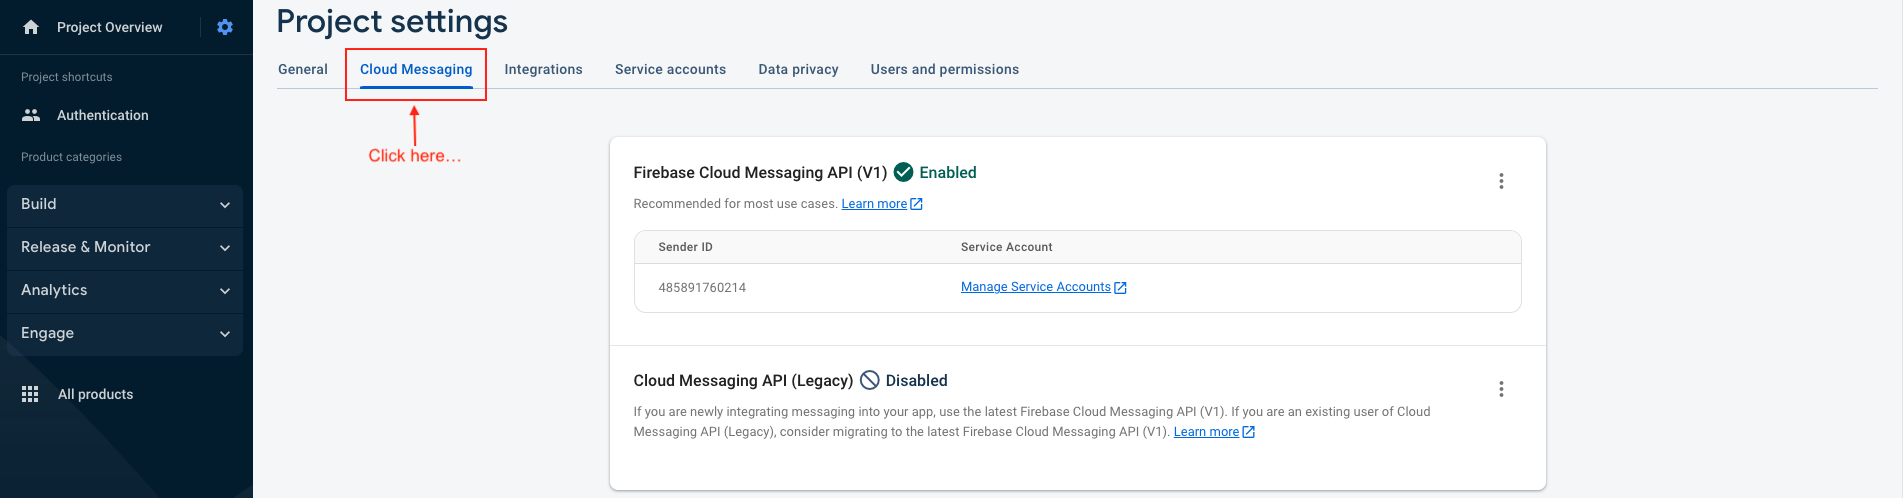
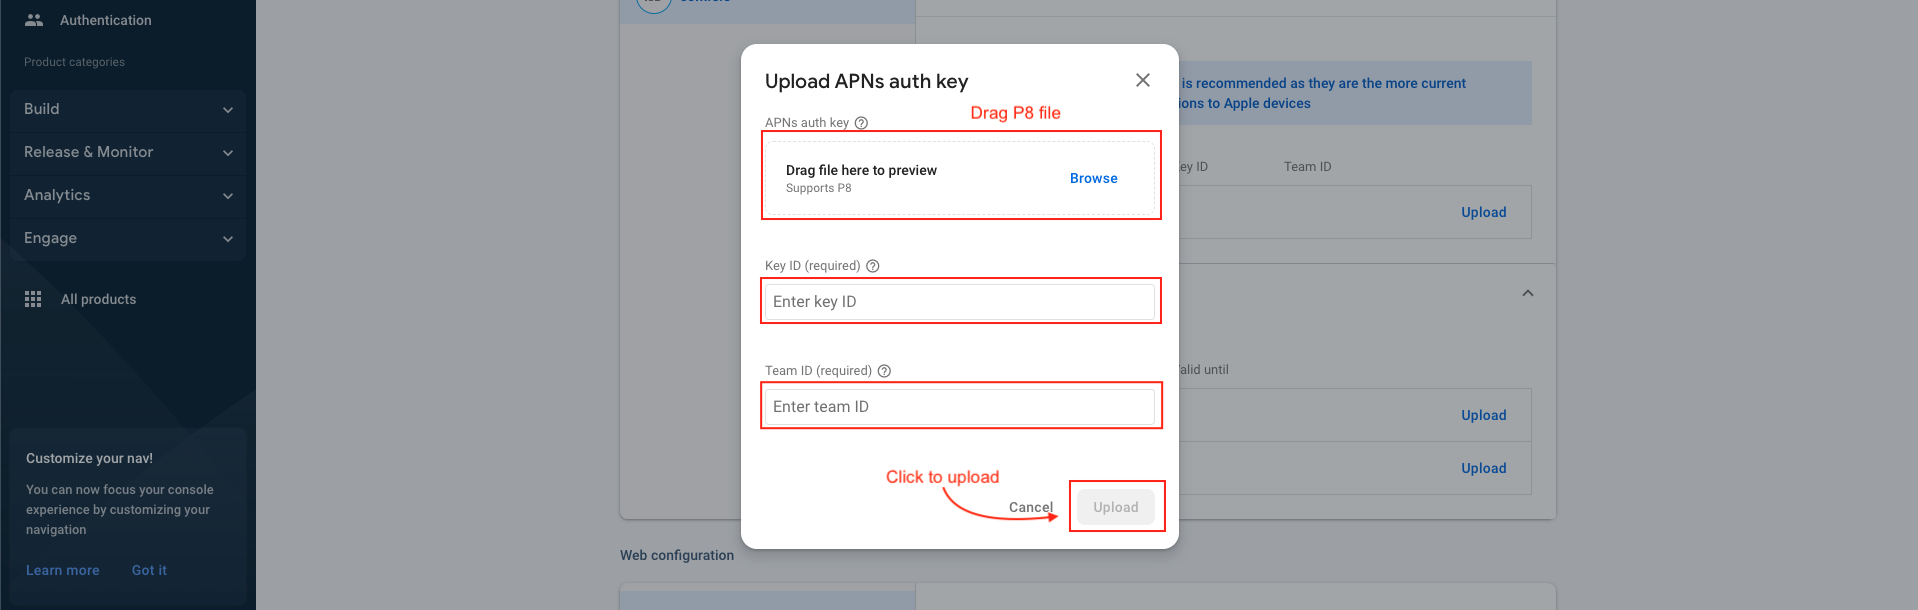
The file & Key ID can now be added to your Firebase Project. On the Firebase Console, navigate to the "Project settings" and select the "Cloud Messaging" tab. Select your iOS application under the "iOS app configuration" heading.s
-
Upload the downloaded file and enter the Key & Team IDs;
-
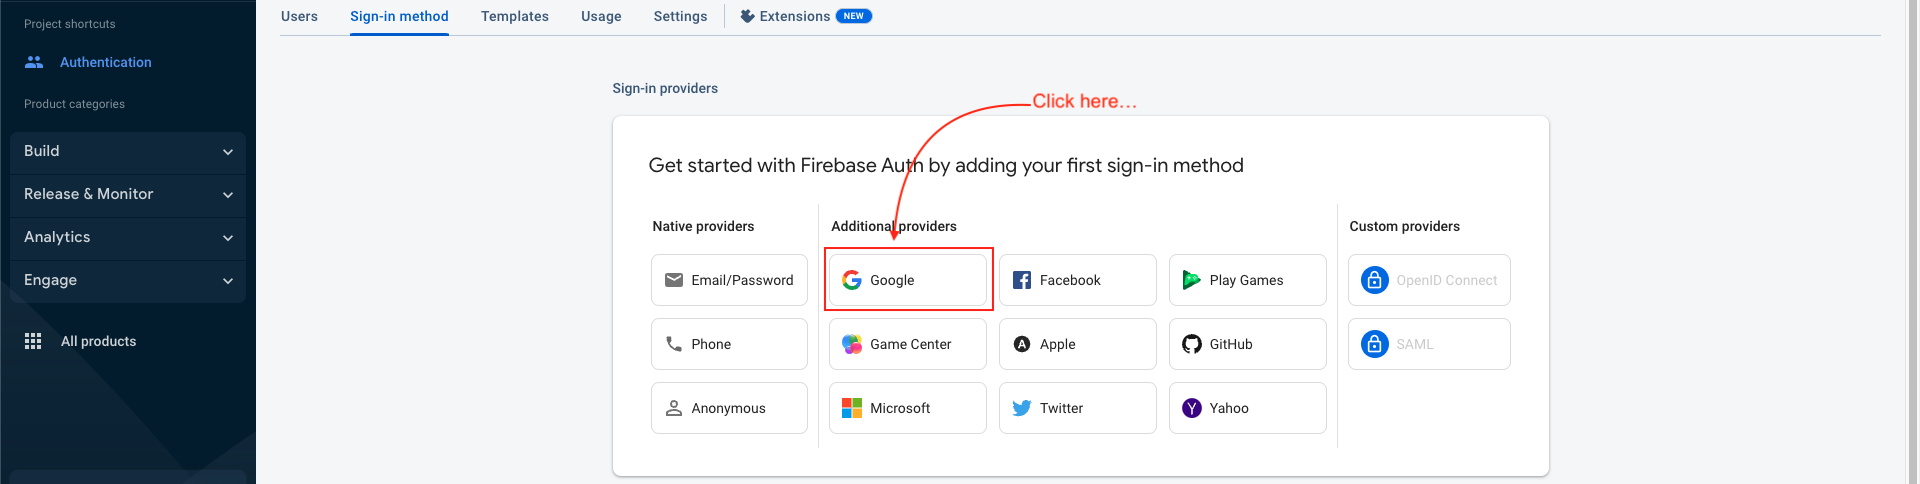
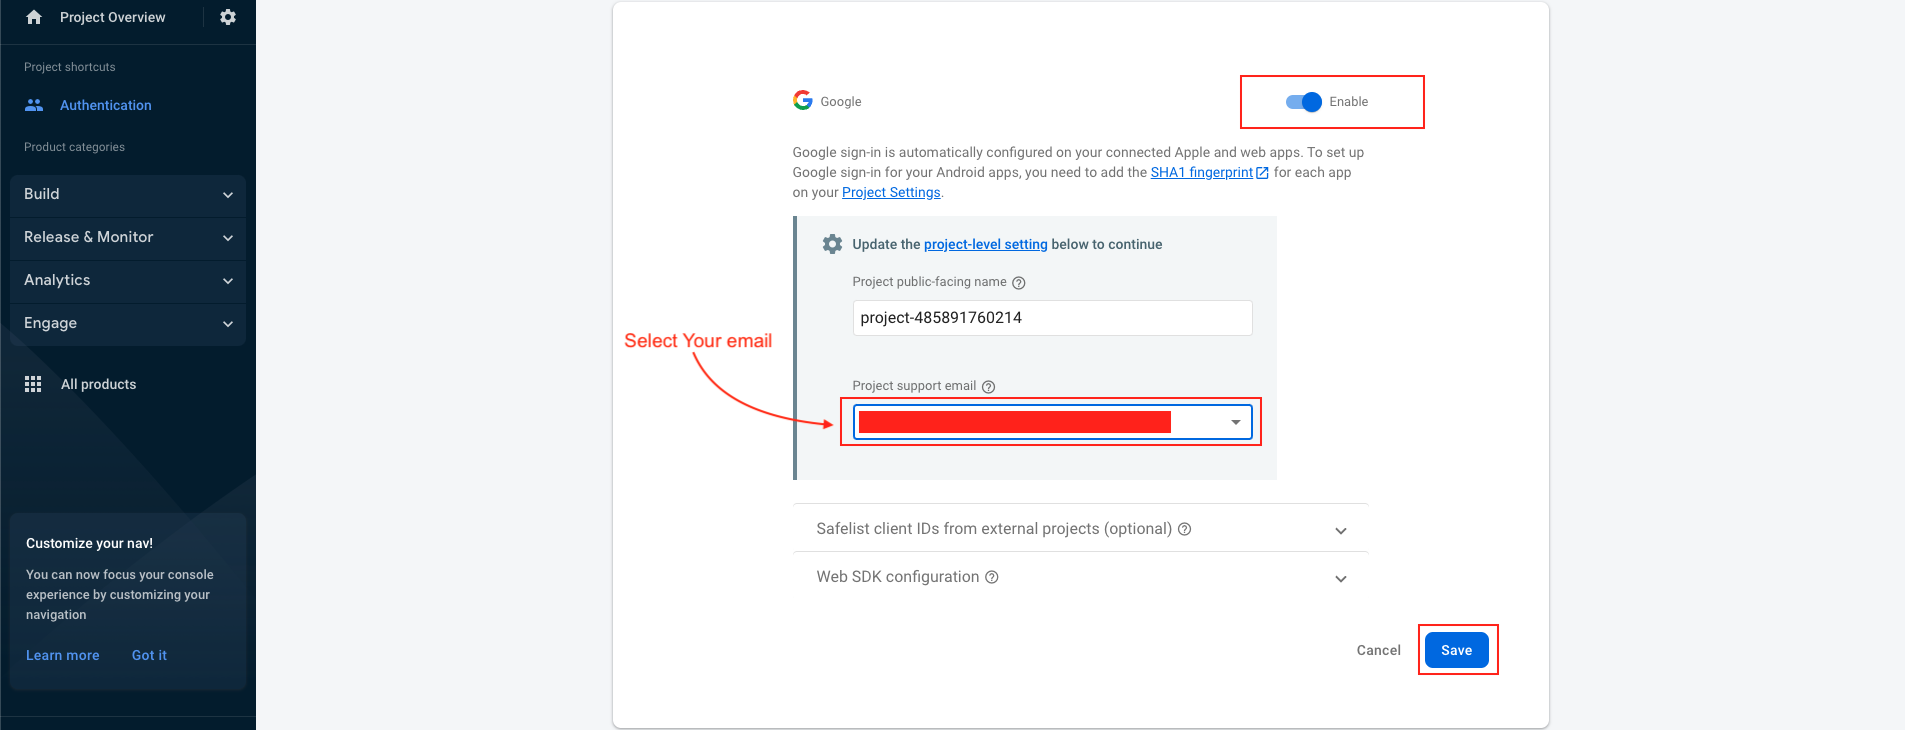
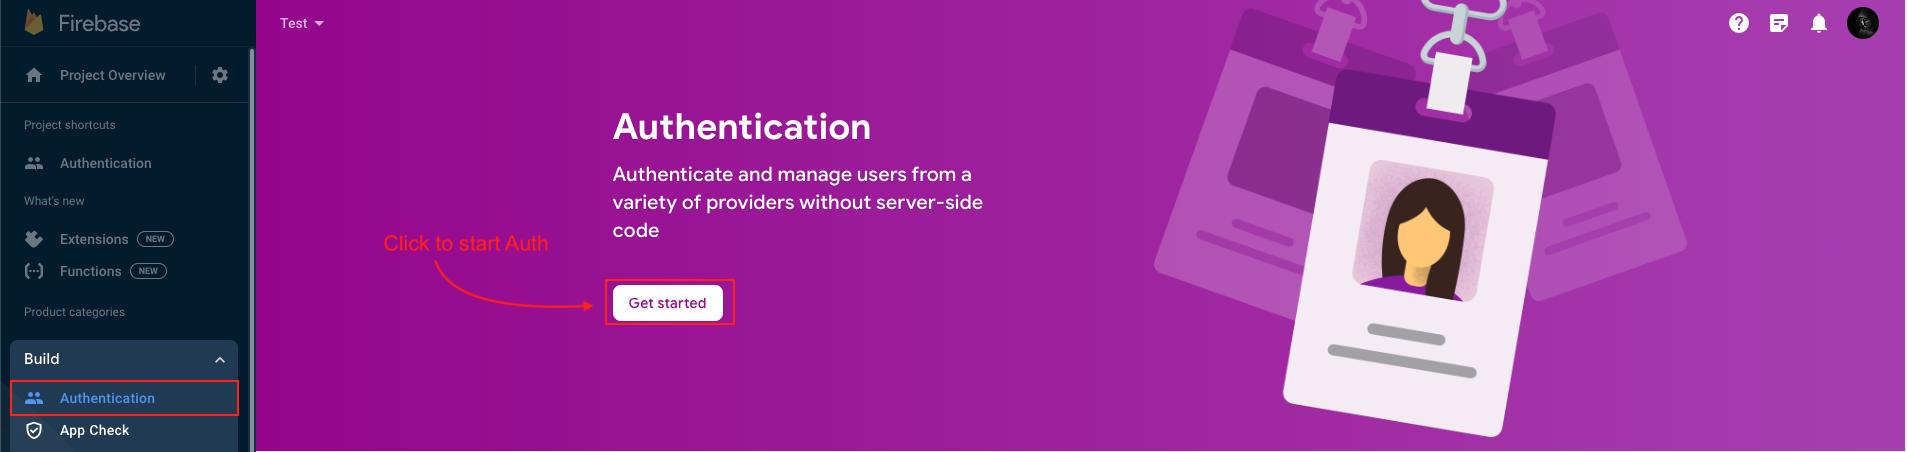
Click to Authentication and sign in mathod tab
-
Click to Enable
-
Select your support email and save
-
Successfully Enable google sign in method
-
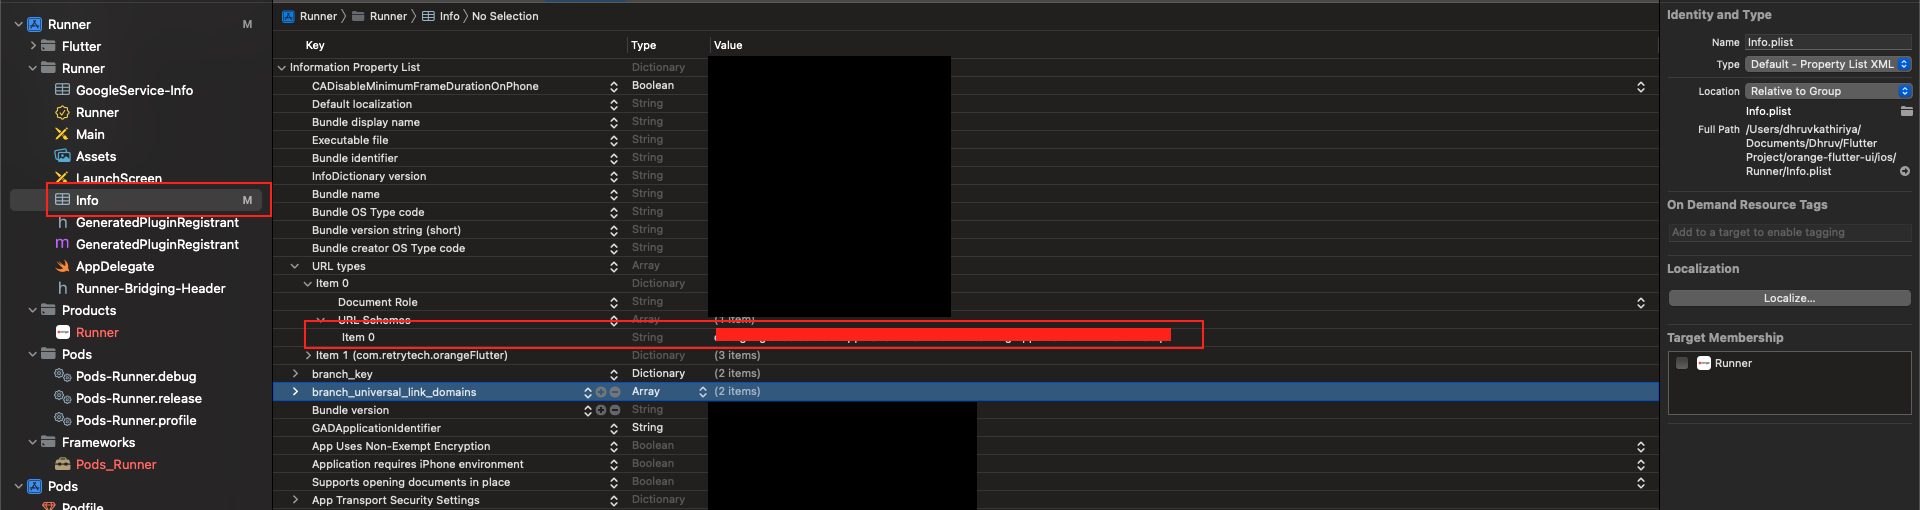
Set Google ‘REVERSED_CLIENT_ID’
-
Open GoogleService-Info.plist file and find ‘REVERSED_CLIENT_ID’ and Copy it.
-
And paste it in project > target > info > URL Types
-
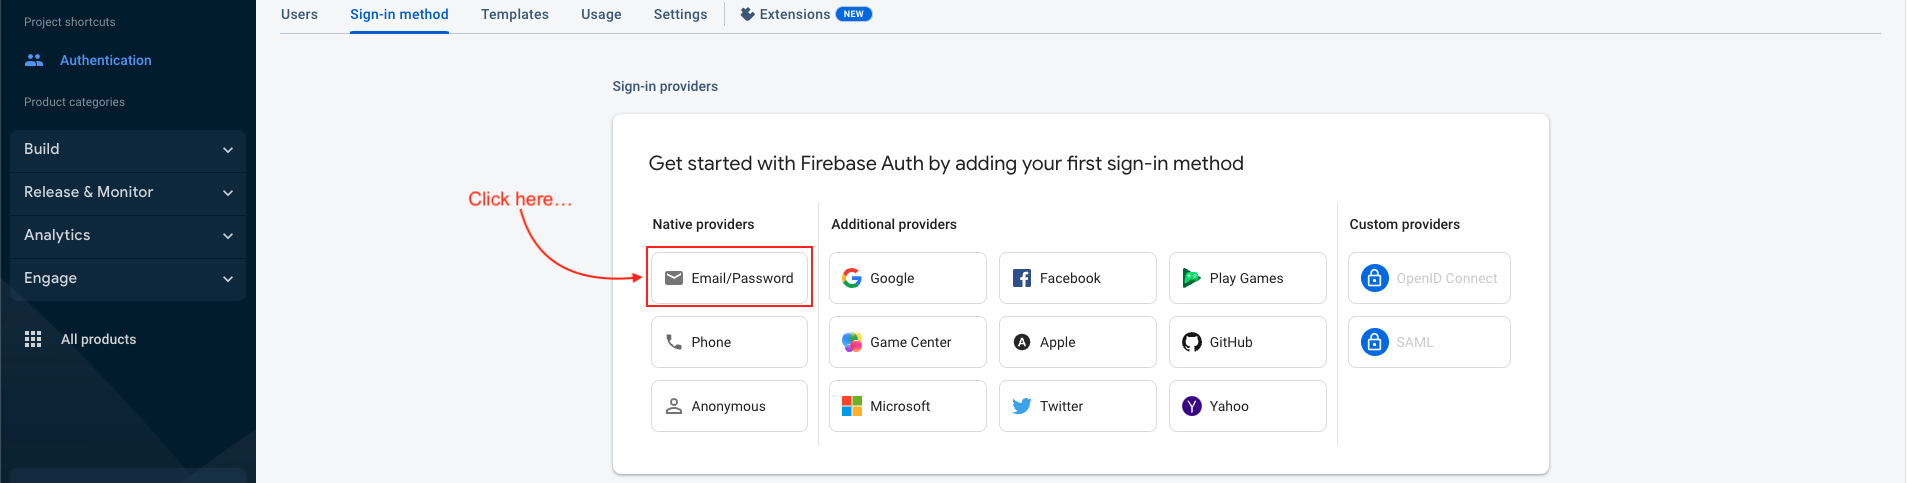
Click to Authentication and sign in mathod tab
-
Then click on email/password provider
-
Then both button switch to enable and save
-
Your email and password successfully Enable
-
Follow This guide and setup project at Branch.io.
-
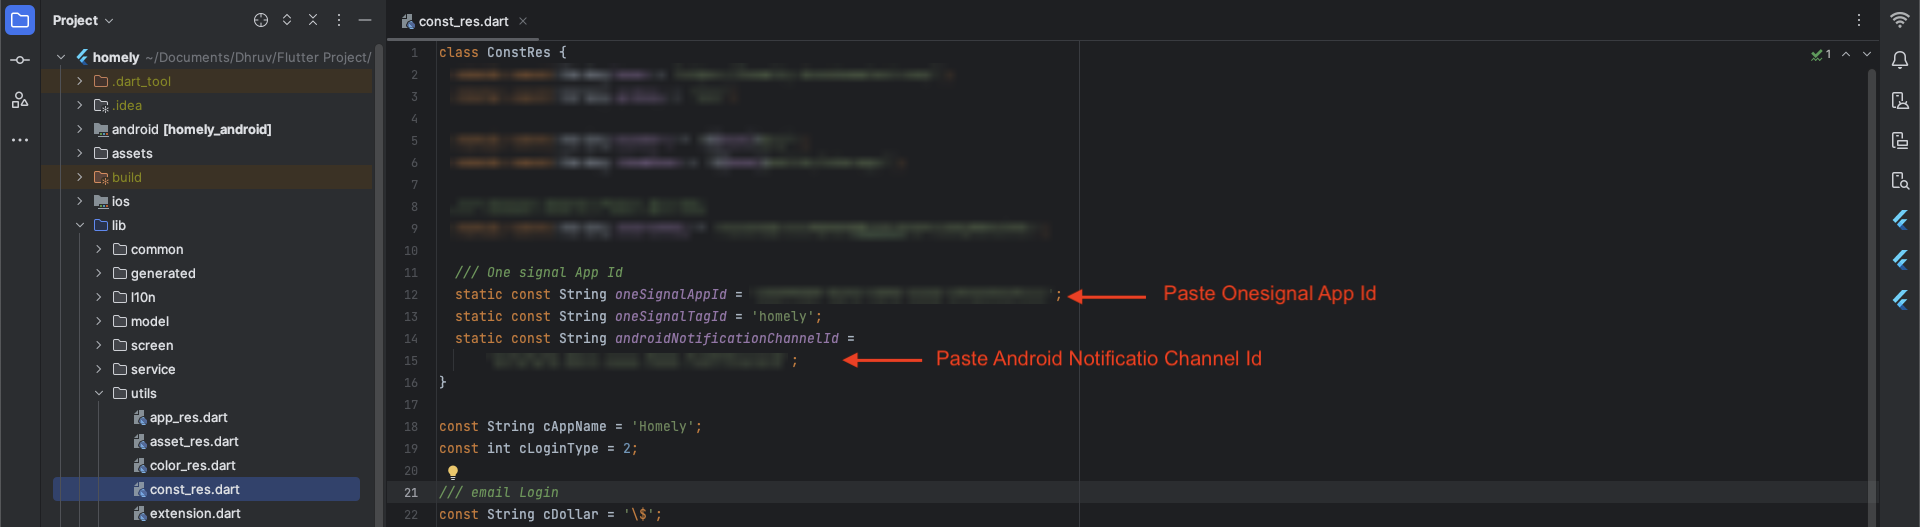
Follow This guide and setup OneSignal account.
-
⚠️ Note : : androidNotificationChannelId (Optional)
-
Set up In-App Purchase by following Documentation .
-
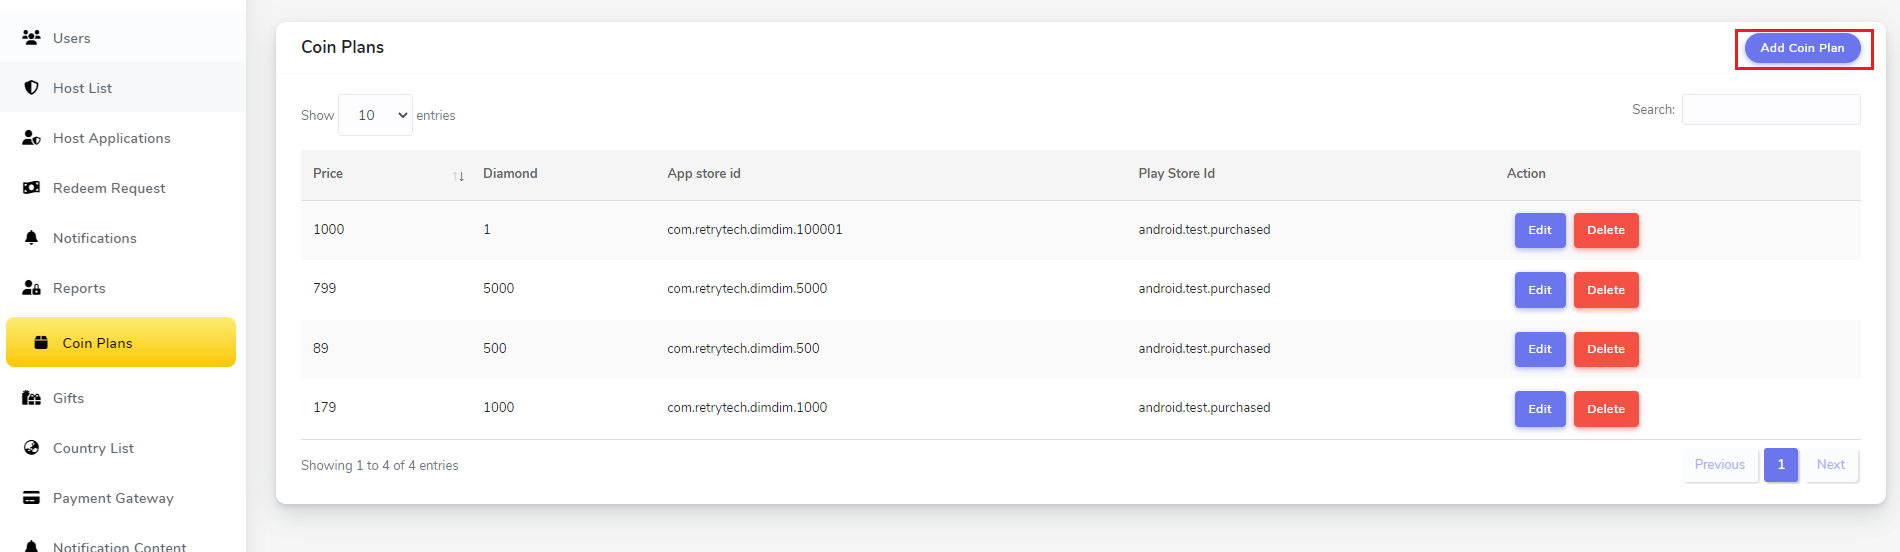
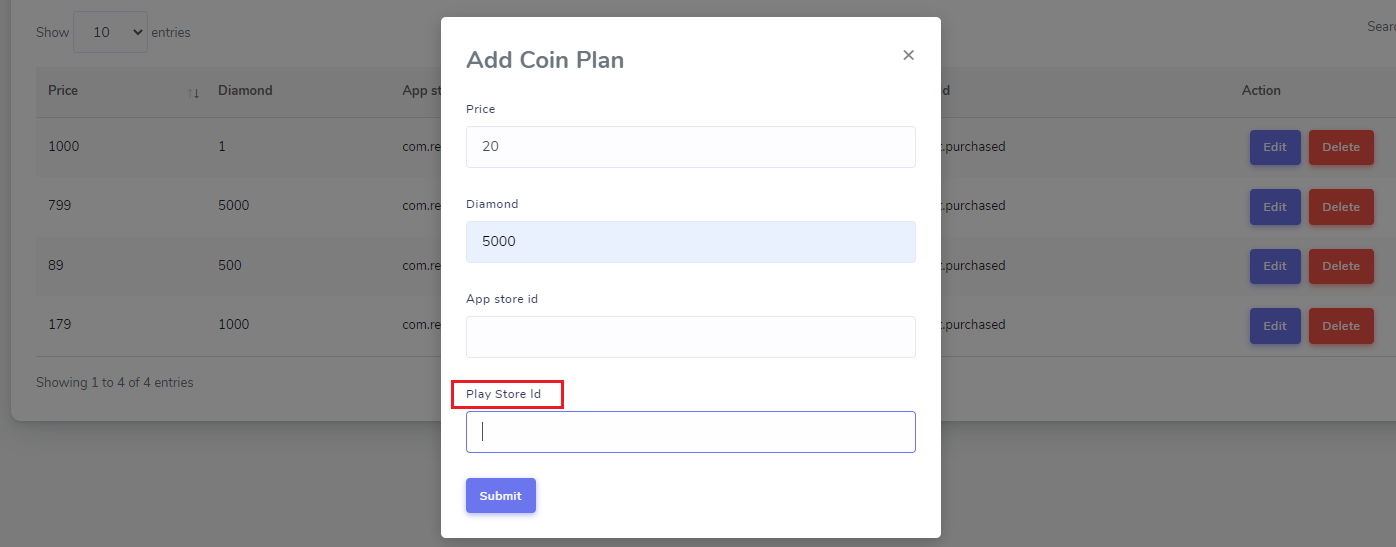
Create Coin Plans in Admin Panel.
-
Click Add Coin Plan.
-
Set Price , Diamond and Play Store Id (a unique Product Id you created while following above Documentation).
-
Click Submit.
-
Open Constants.swift file
-
Enter baseUrl & uploadbaseURL
- Telegram (Support Desk) : +91 7990425274
- Email : help.retrytech@gmail.com
- Whatsapp (No Support Here) : +91 7990425274
Setup Notification (FCM)
FCMKEY =”Your Firebase Server Key”
Create APNs Auth key for push notification

Copy Key ID & Download File

Google sign in

Email sign in


Branch.io Setup
Setup OneSignal
Configure In-App Purchase
Setup your Credentials