Introduction
Dimdim app is very advanced App Source Script having many advanced features like Live streaming, One to One Video calls, Text chats, Host login and much more. This package contains android project having 30+ beautifully designed and developed screens. Using this template, developers can create high quality dating and livestreaming app easily and can save 100s of hours.
Here is the easy documentation to set the app and ready to launch. Please follow all the instructions carefully and don’t skip any step. Feel free to contact us if you face any problem while set-up.
Import Android Project
-
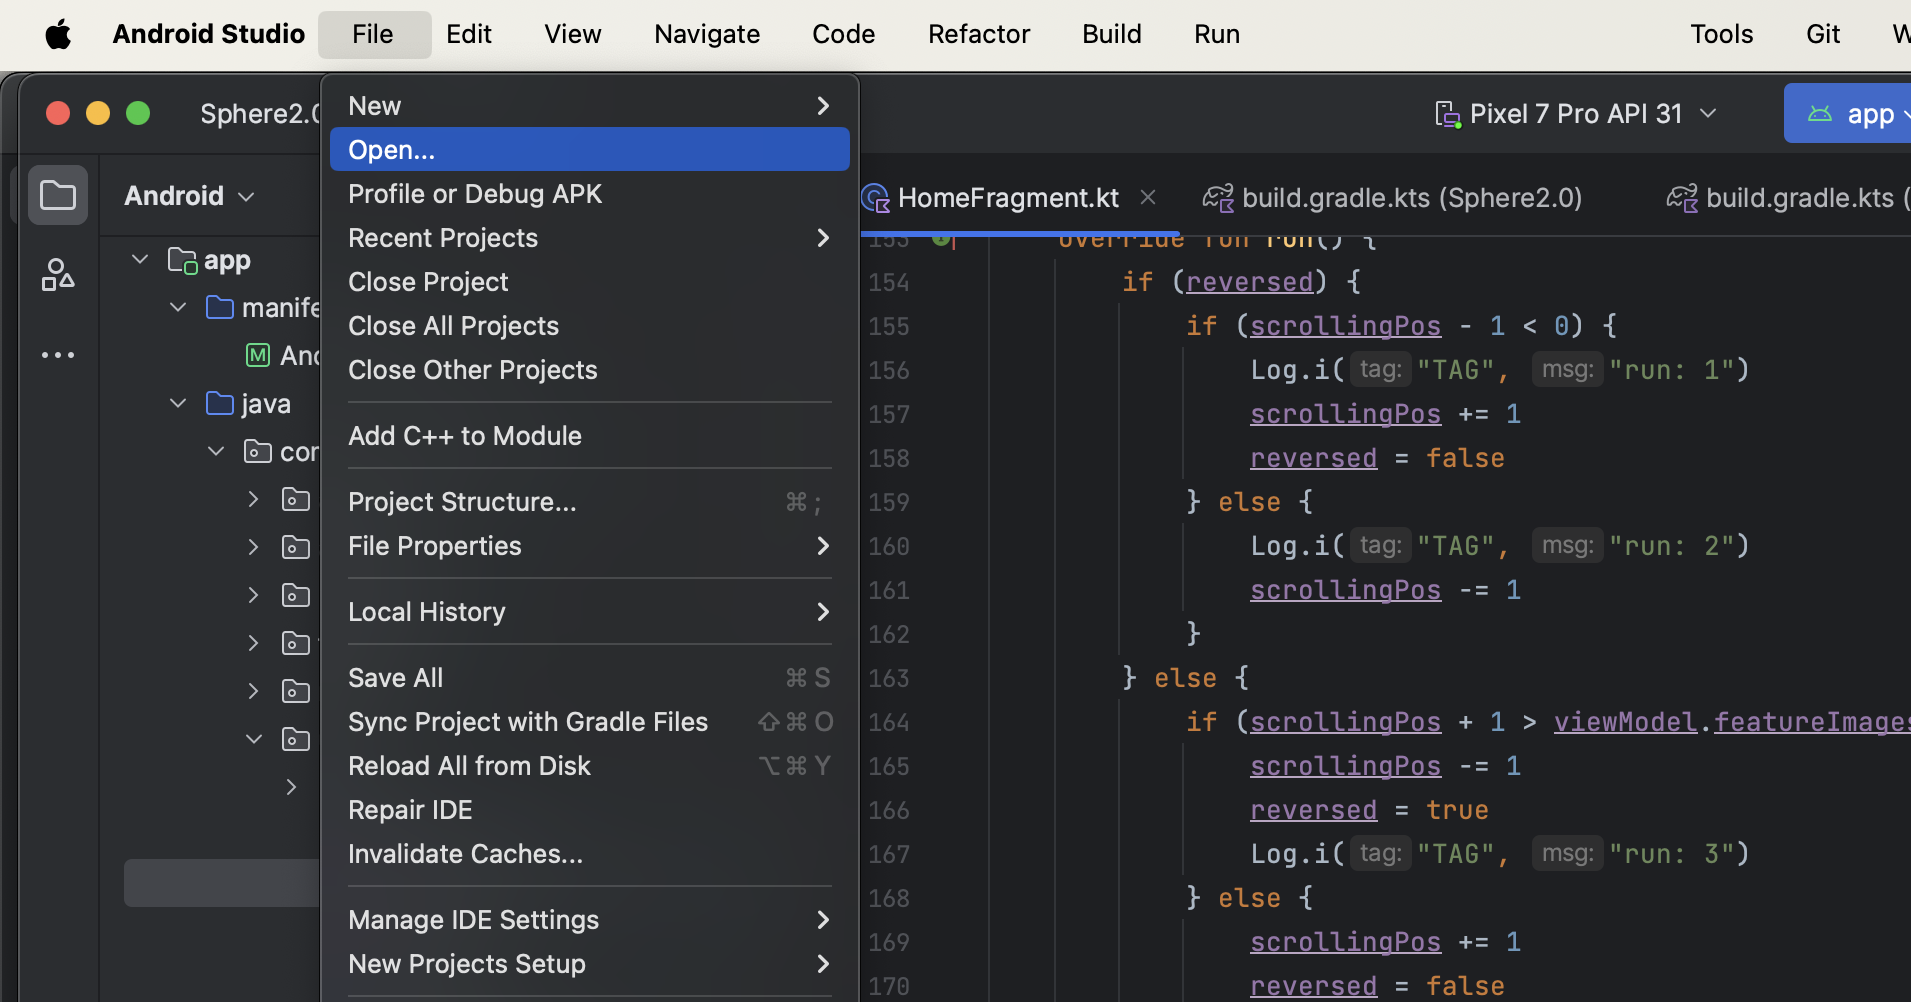
Open android project in android studio.
Change package name
-
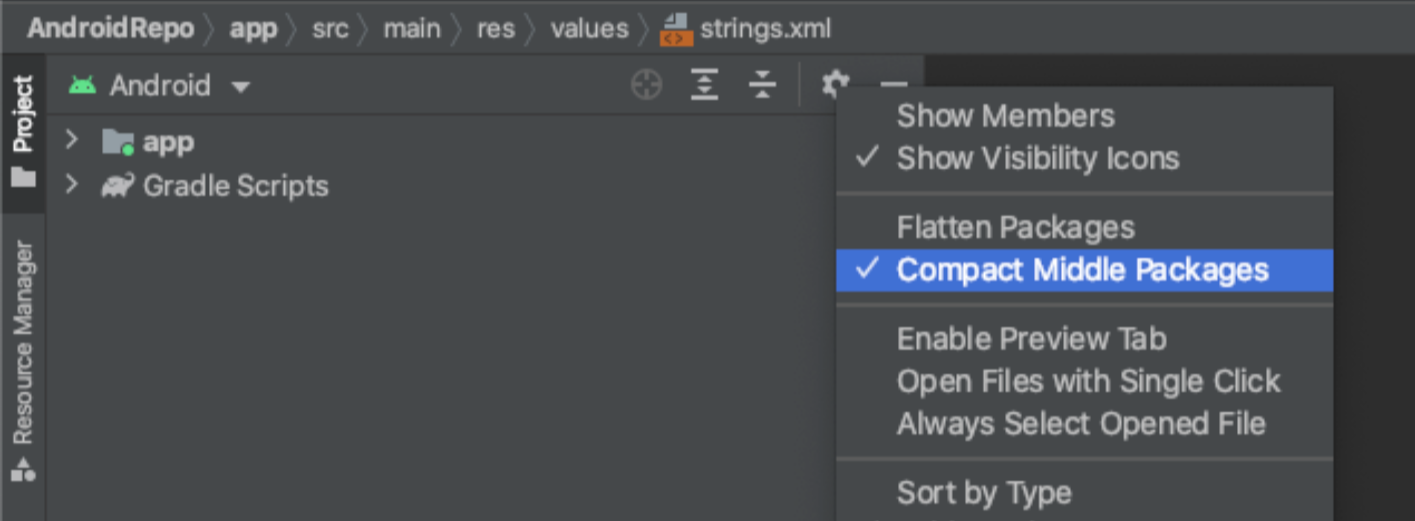
In your Project panel, click on the little gear icon
-
Uncheck the Compact Middle Packages option
-
Your package directory will now be broken up into individual directories
-
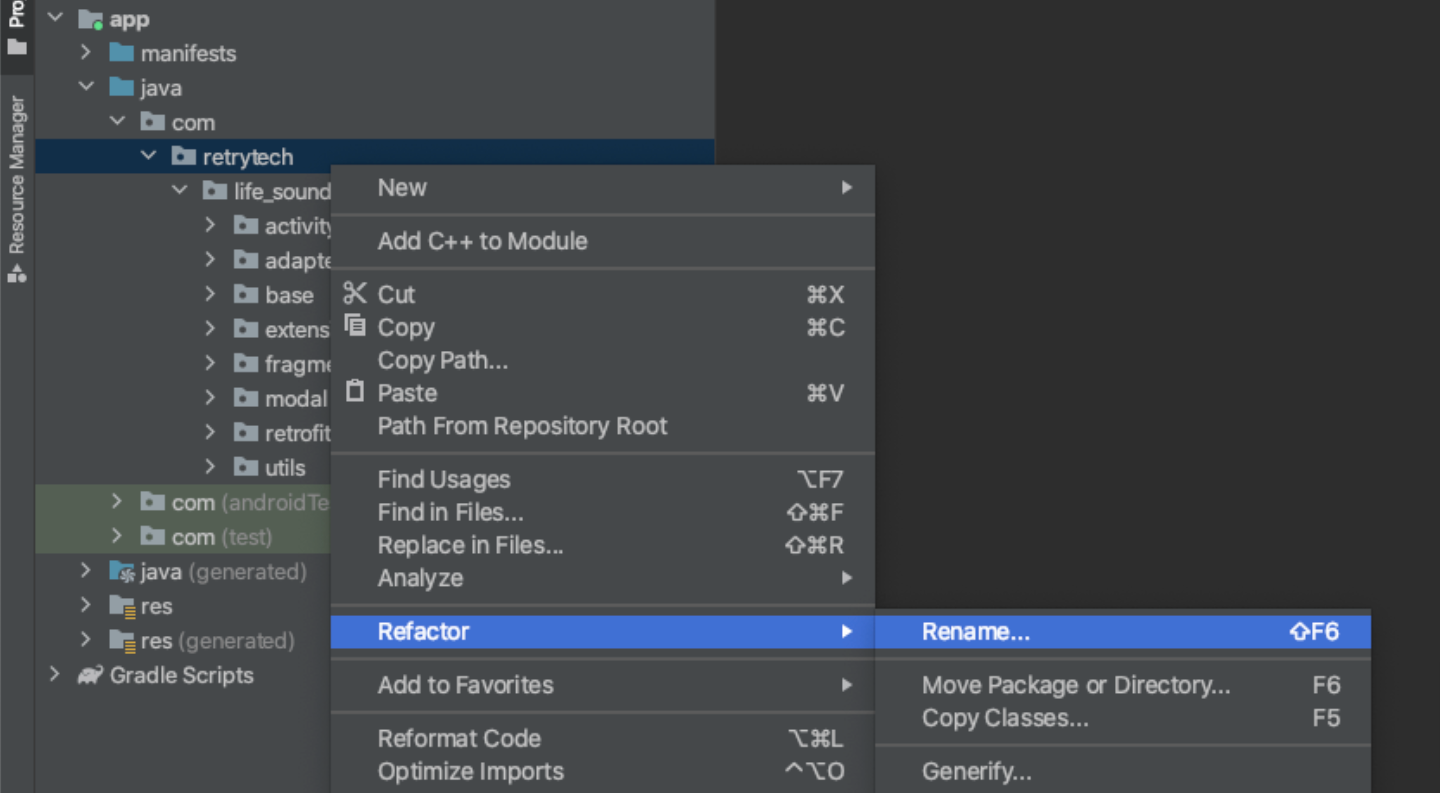
Individually select each directory you want to rename
-
Right-click it
-
Select Refactor
-
Click on Rename
-
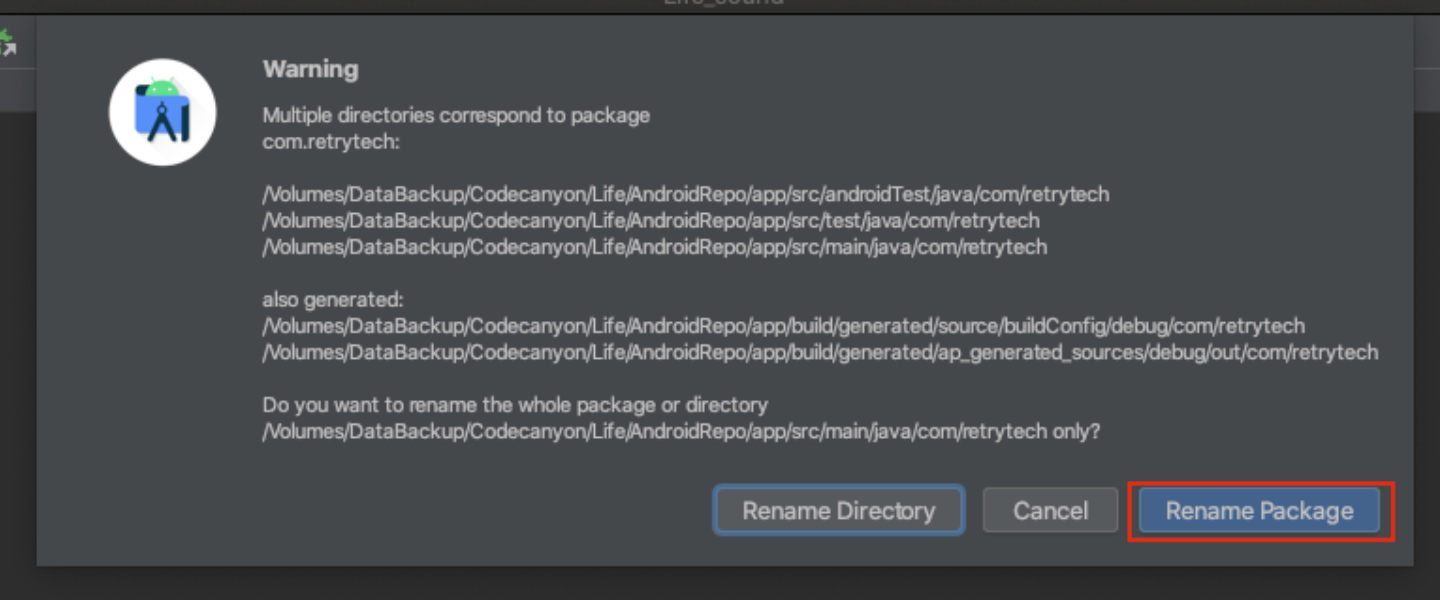
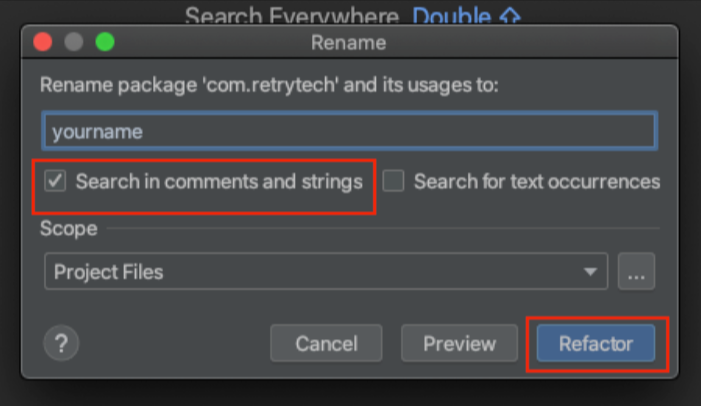
In the pop-up dialog, click on Rename Package instead of Rename Directory
-
Enter the new name
-
Don't forgot to check Search in comments and strings option
-
Hit Refactor
-
Click Do Refactor in the bottom
-
Allow a minute to let Android Studio update all changes
-
Note: When renaming com in Android Studio, it might give a warning. In such case, select Rename All
-
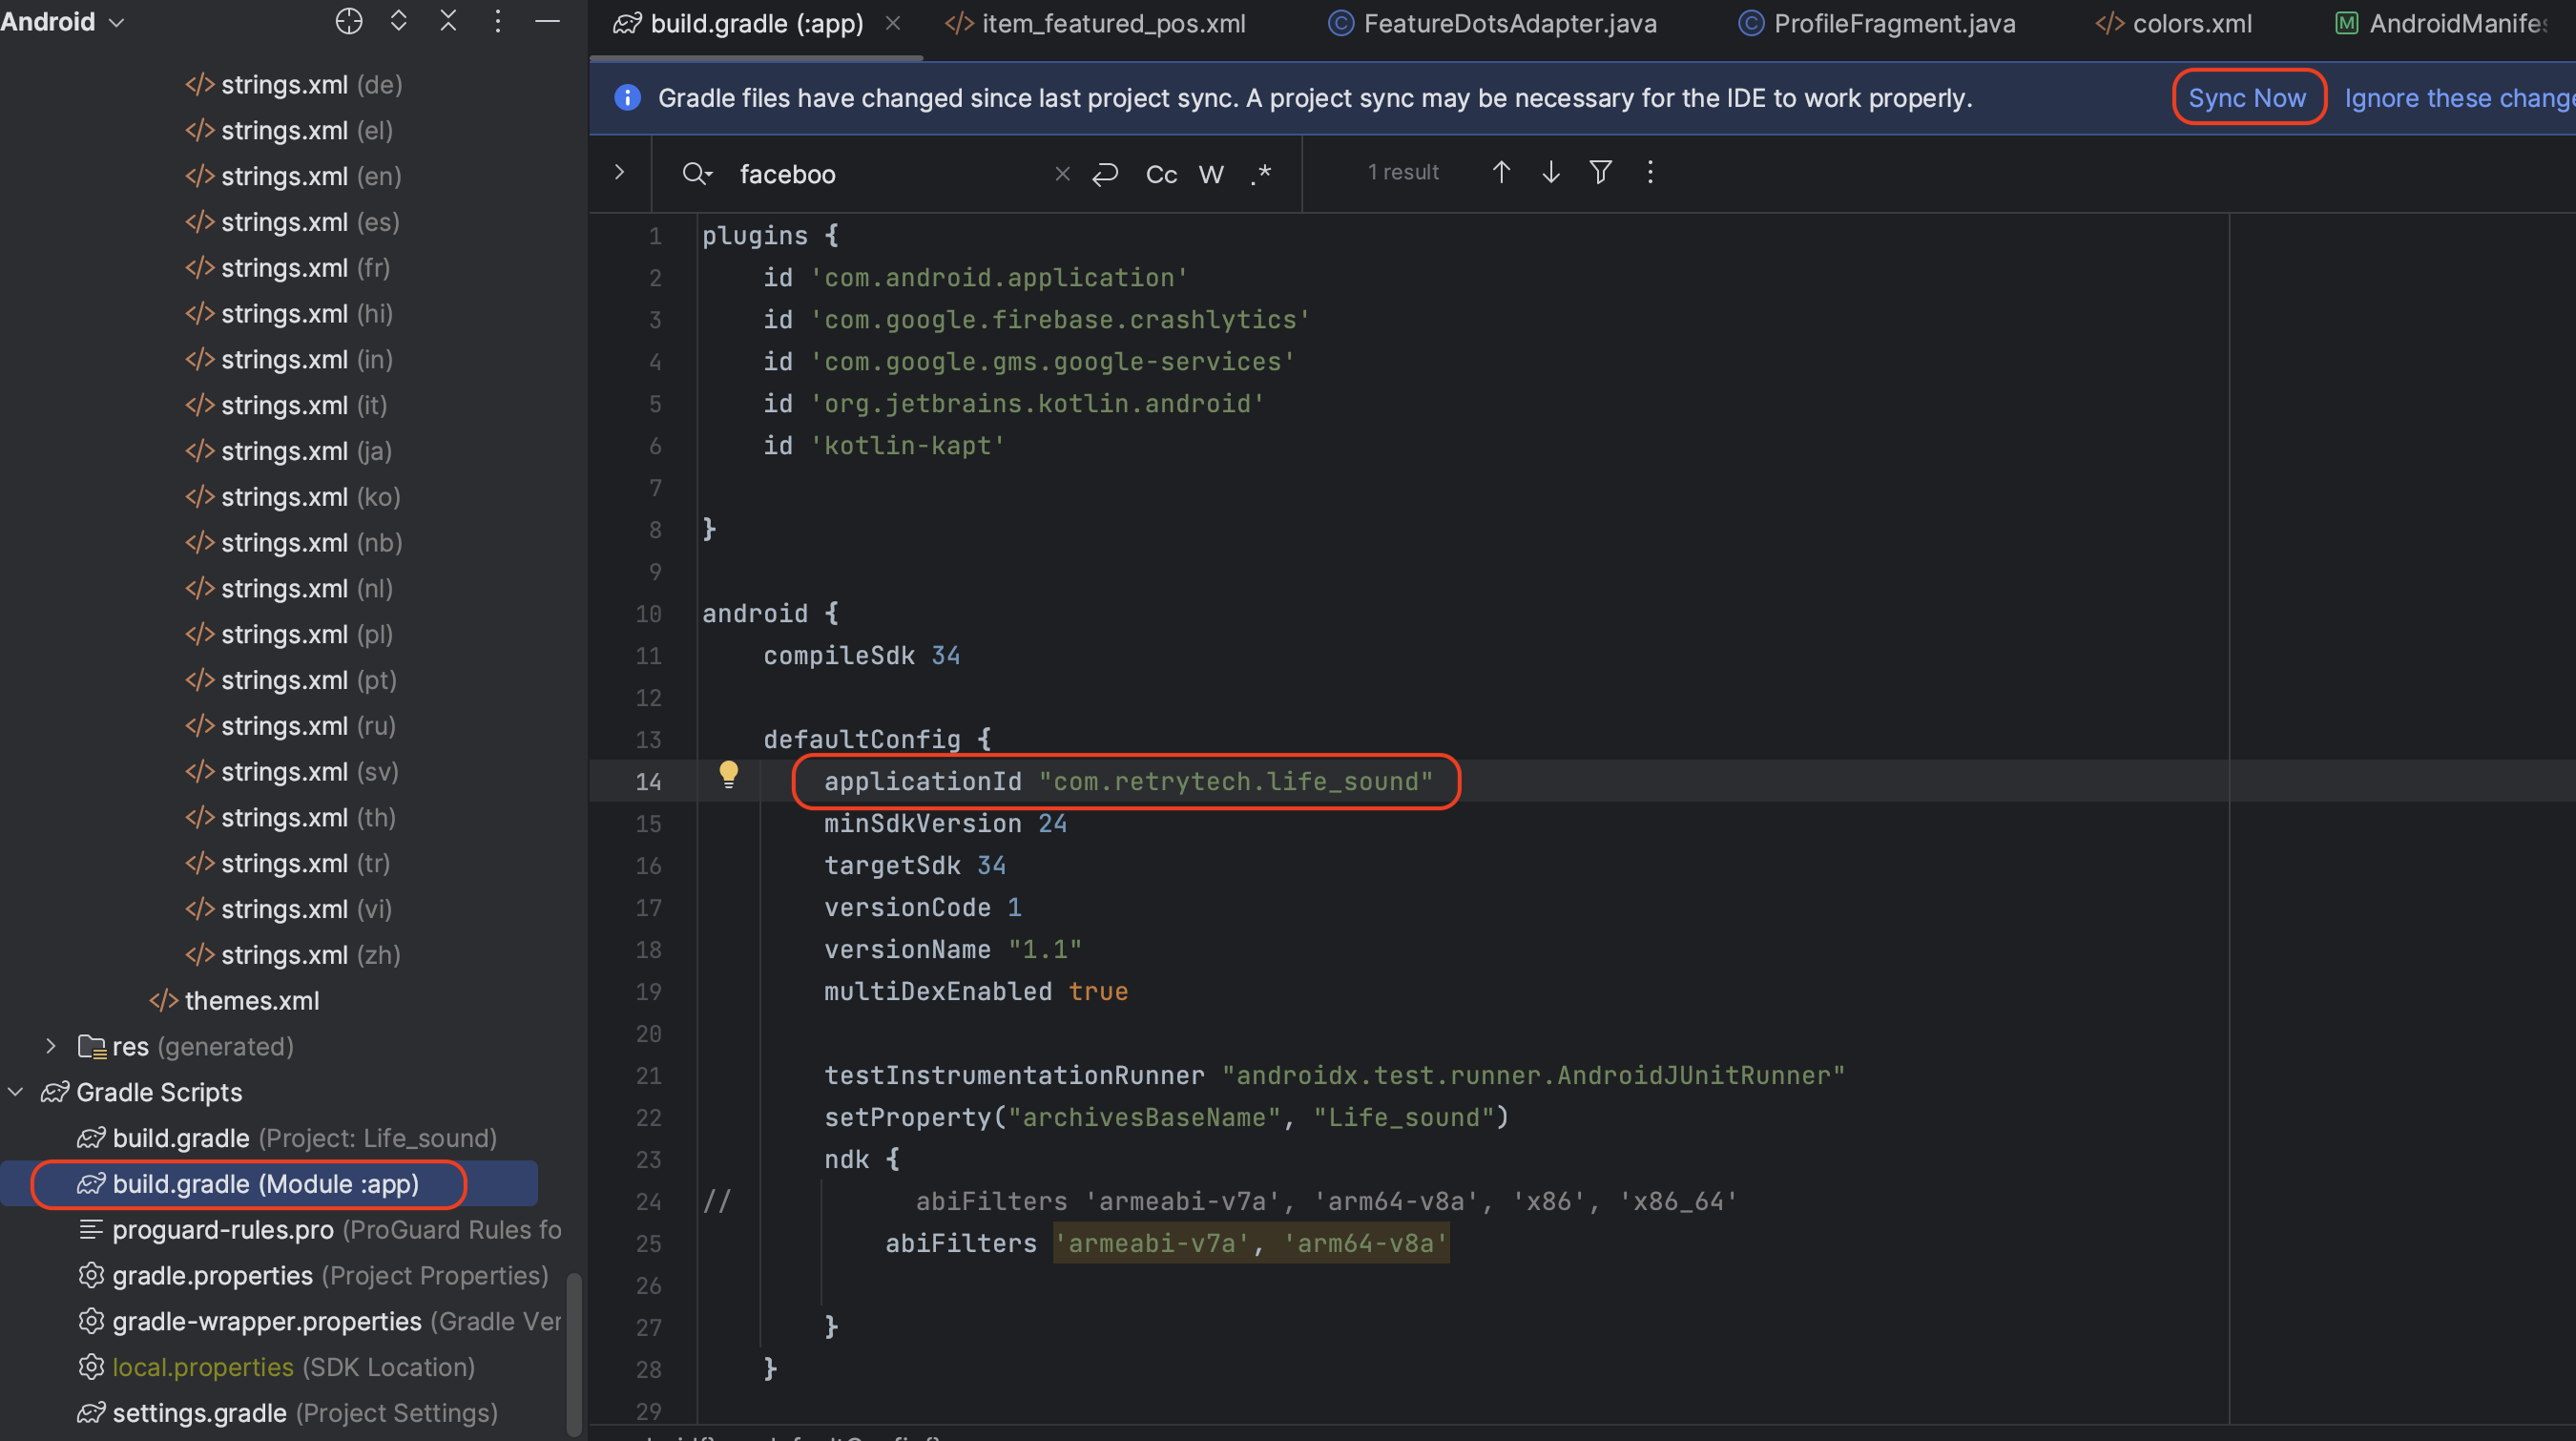
Now open your Gradle Build File (build.gradle - Usually app or mobile). Update the applicationId in the defaultConfig to your new Package Name and Sync Gradle, if it hasn't already been updated automatically.
-
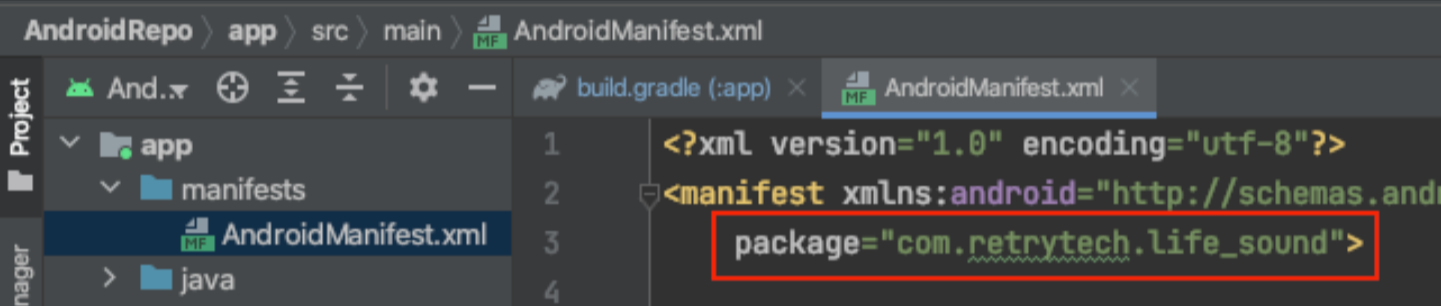
You may need to change the package= attribute in your manifest.
Change App Icon and Name
-
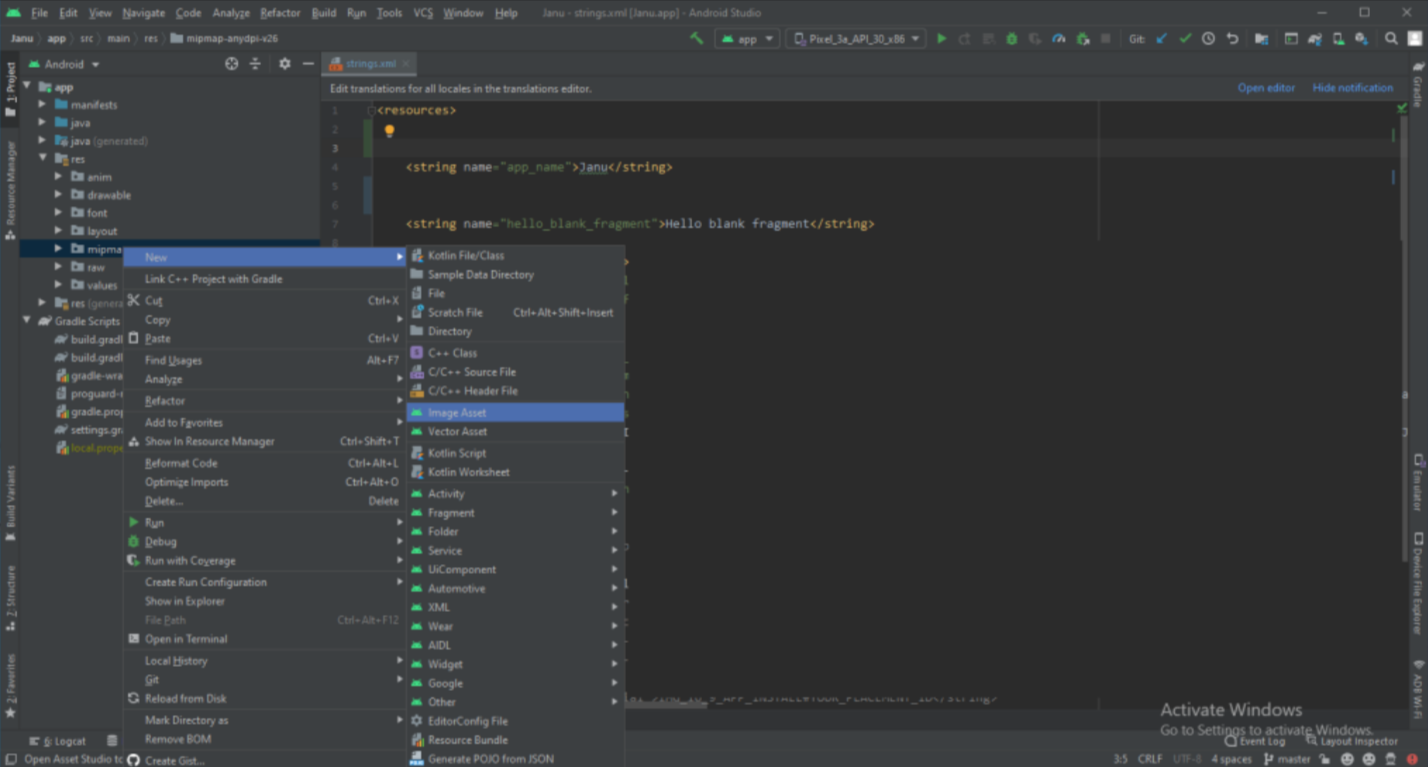
app > res > right click on mipmap folder shown as below:
-
And replace current logo with your new logo
-
Change name in strings.xml file

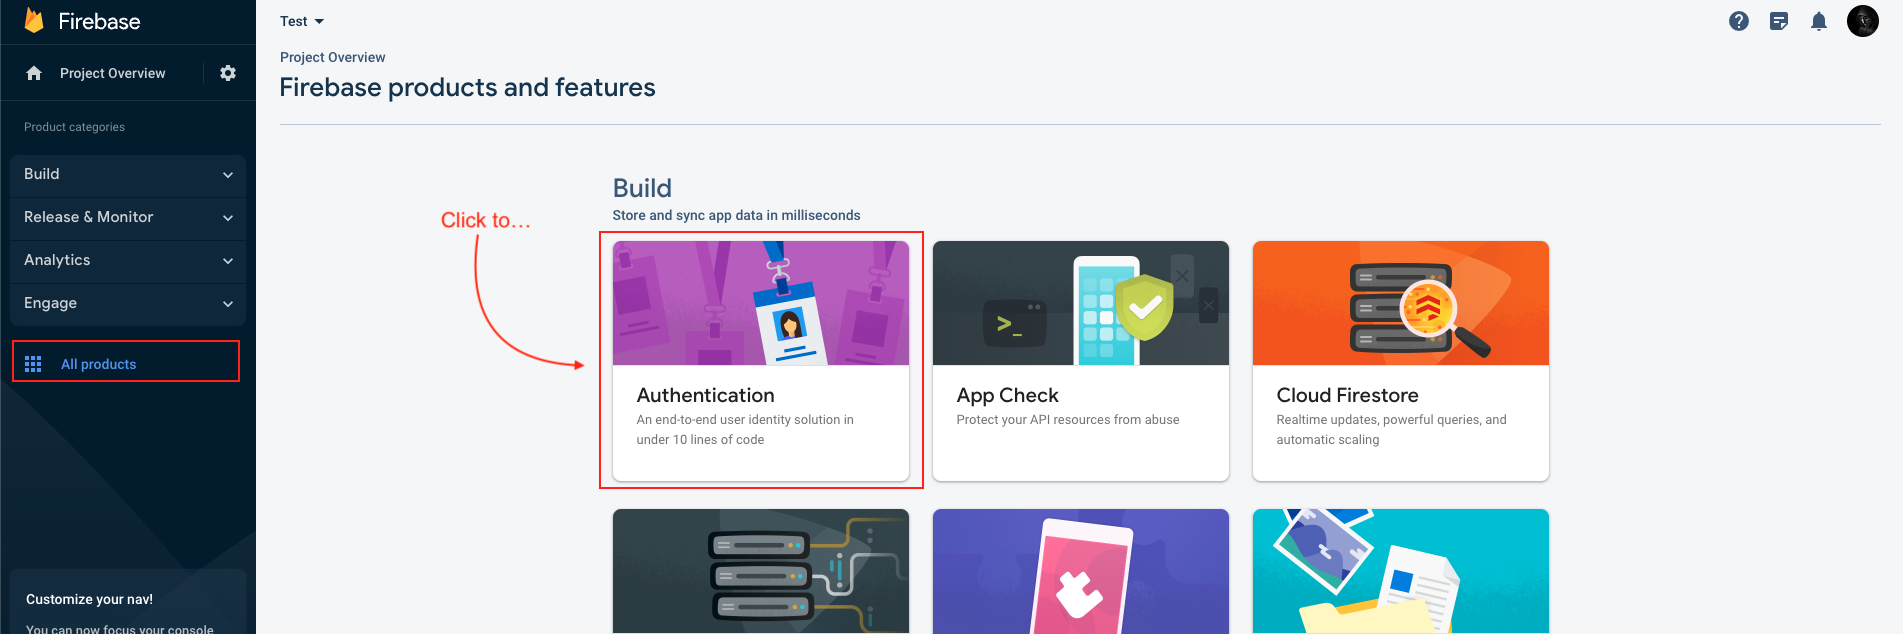
Add Android app to Firebase
-
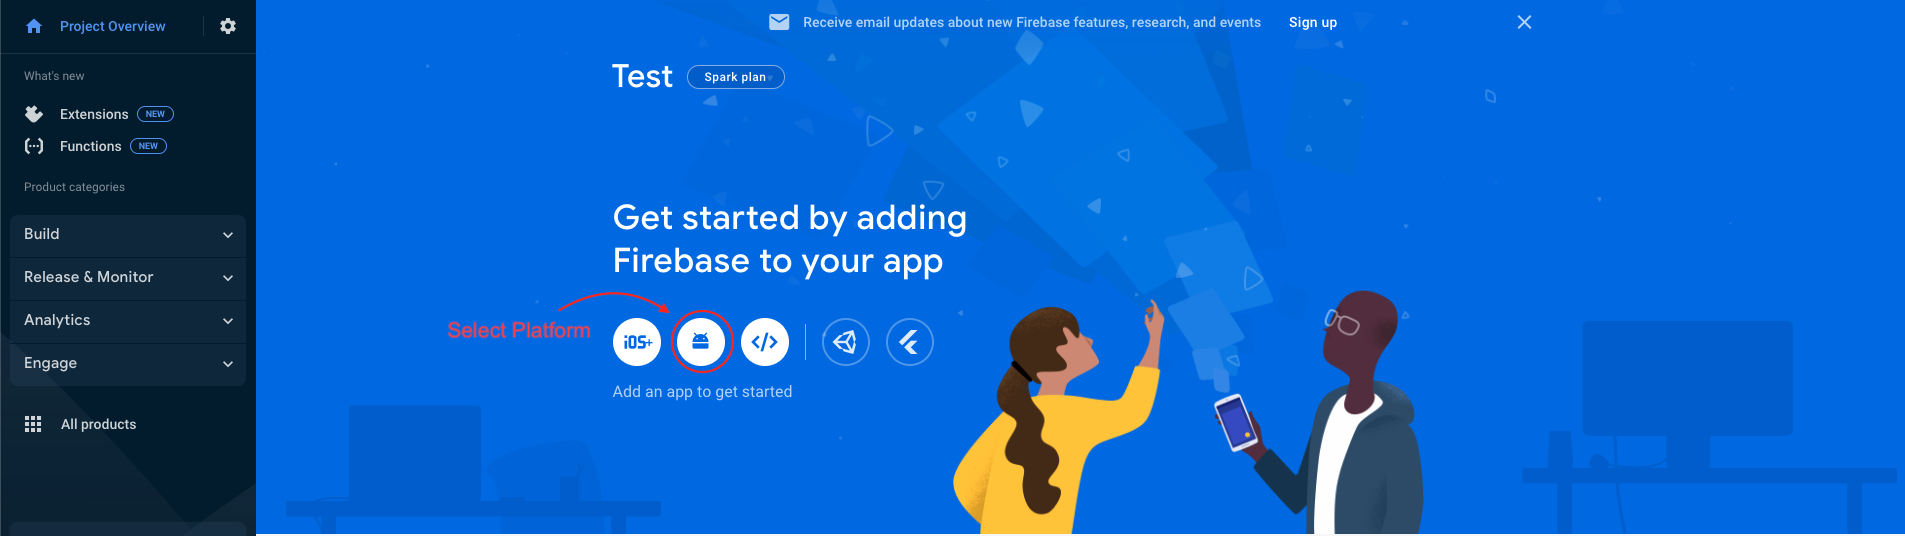
In the next step, we have to choose the platform to add Firebase to our application. The platform can be Android, iOS, Web etc..
-
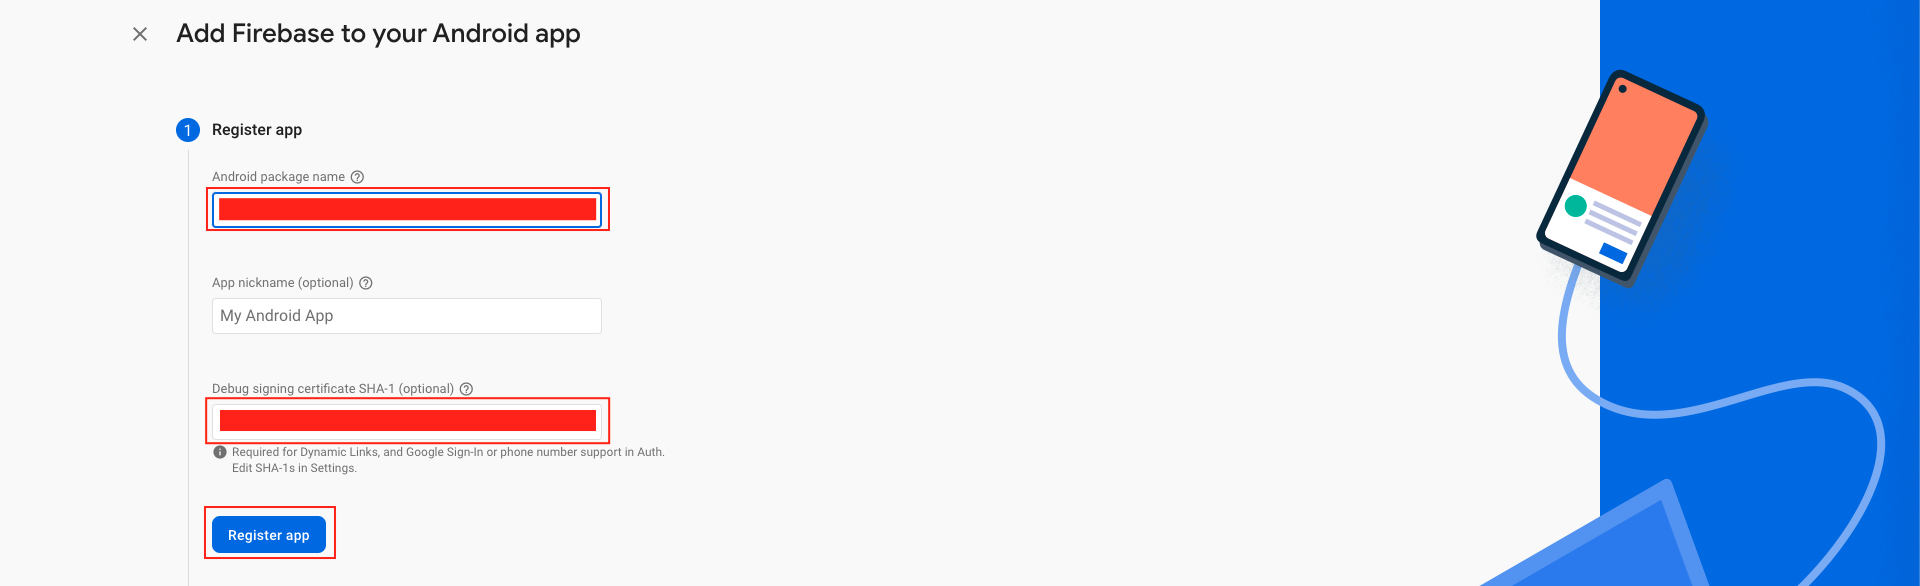
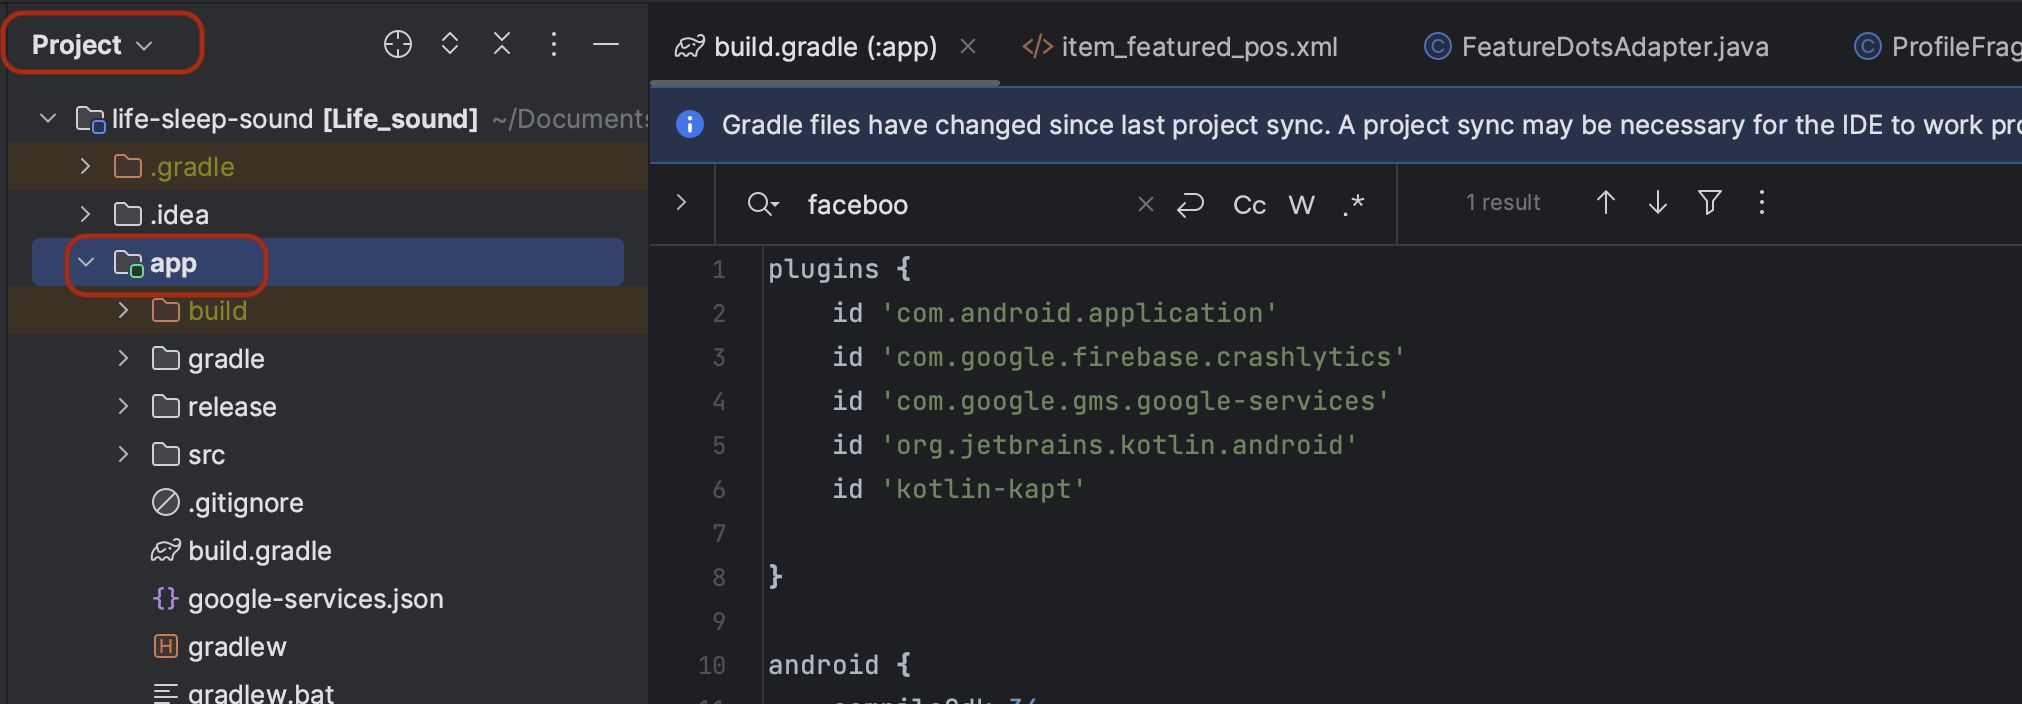
Your package name is generally the applicationId in your build.gradle (app-level) file
-
See this page for information on using keytool to get the SHA-1 hash of your signing certificate
-
Add your applicationid in the first field and SHA-1 to the third field as shown in the image below.
-
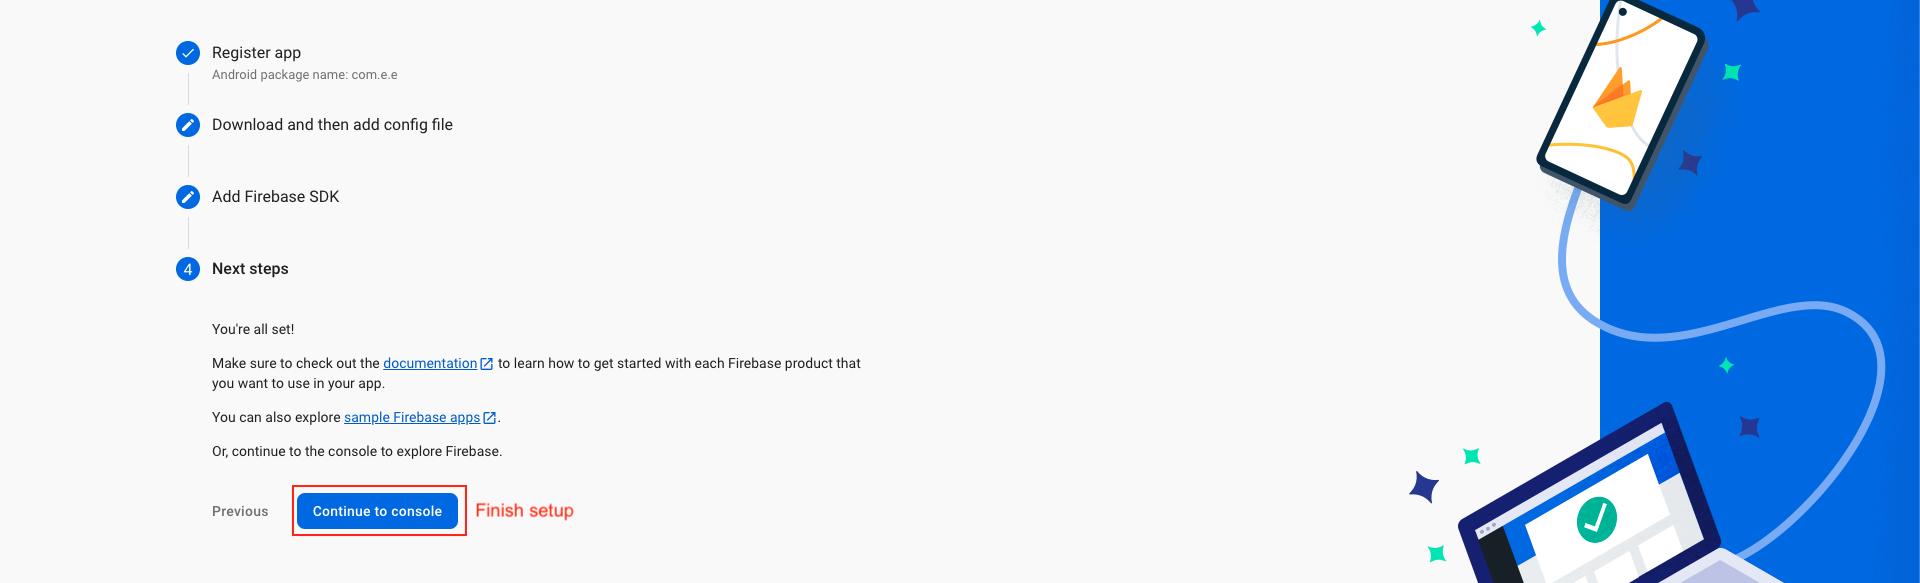
Download the google-services.json file & place it in your project's app root directory.
-
Back in the Firebase console-setup workflow, click Next to skip the remaining steps and then finish and complete

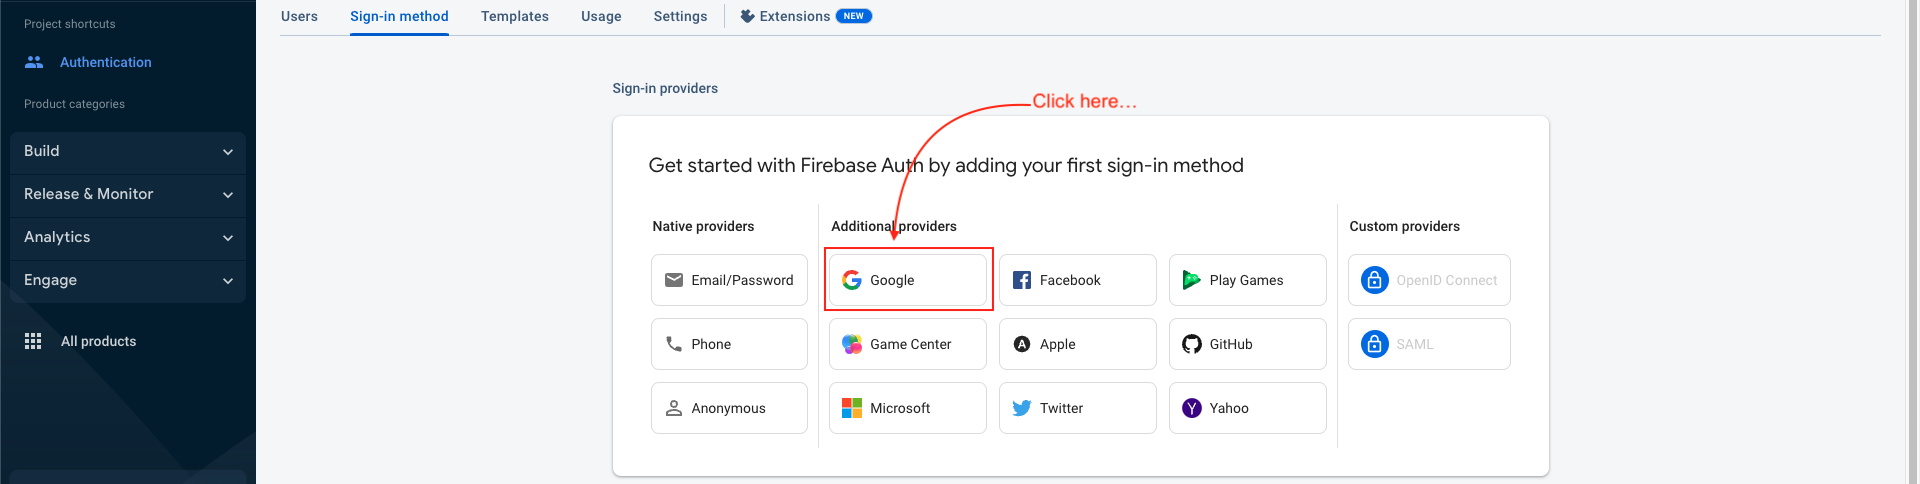
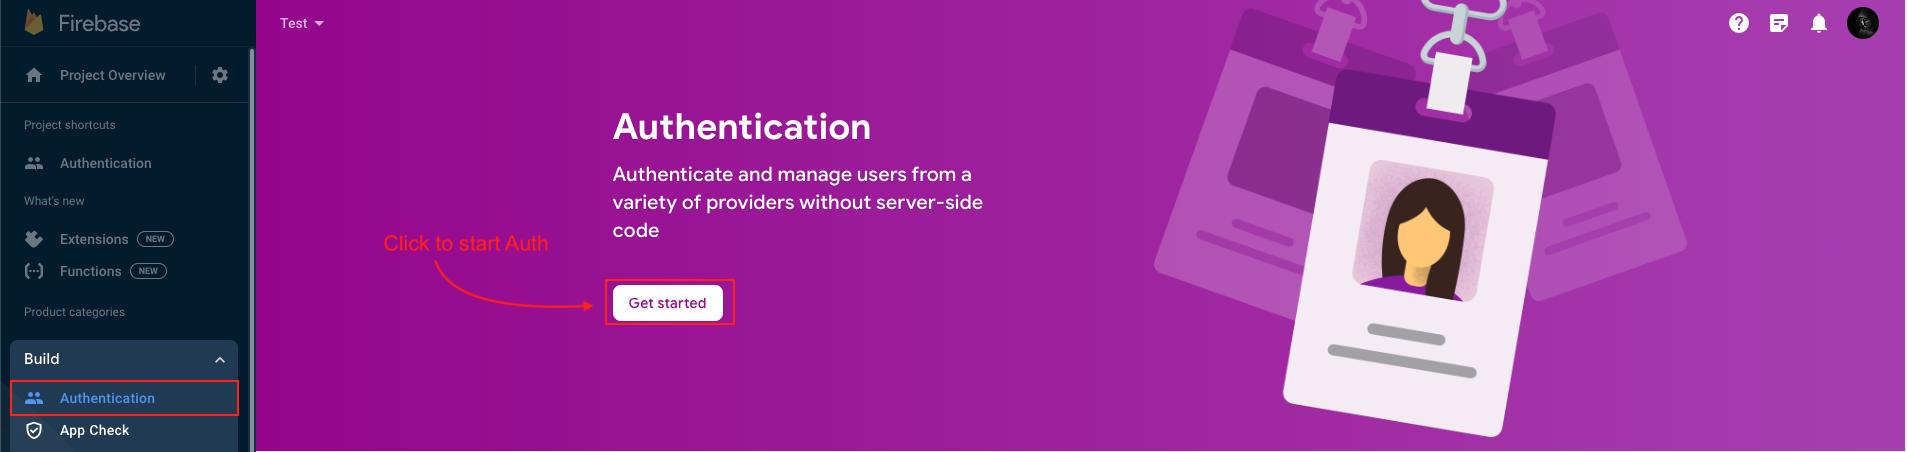
Google sign in
-
Click to Authentication and sign in mathod tab
-
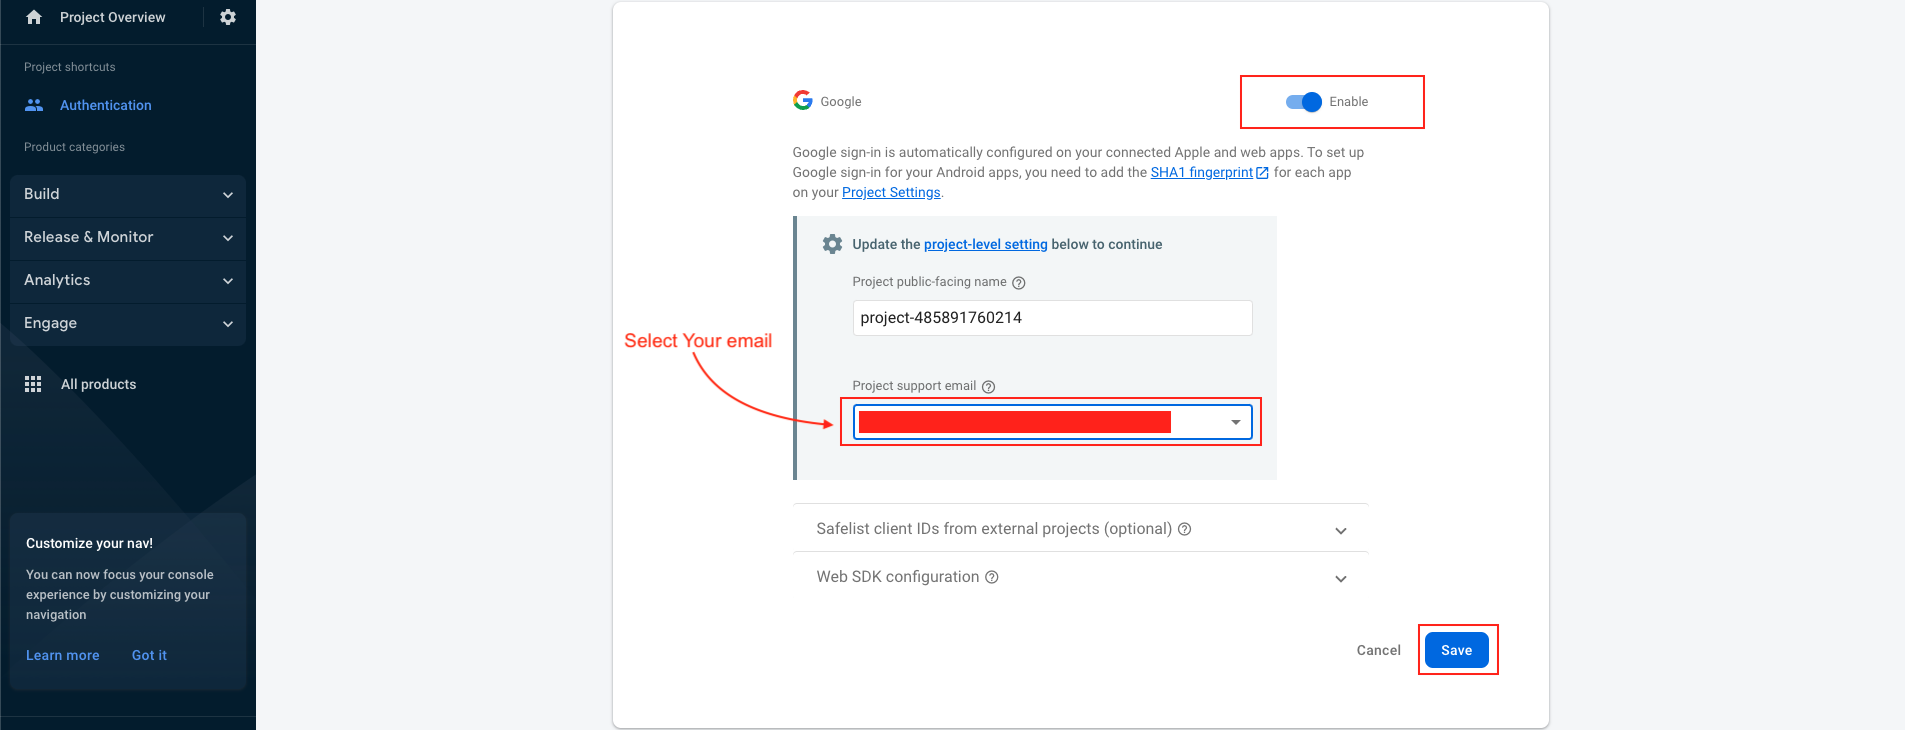
Click to Enable
-
Select your support email and save
-
Successfully Enable google sign in method
-
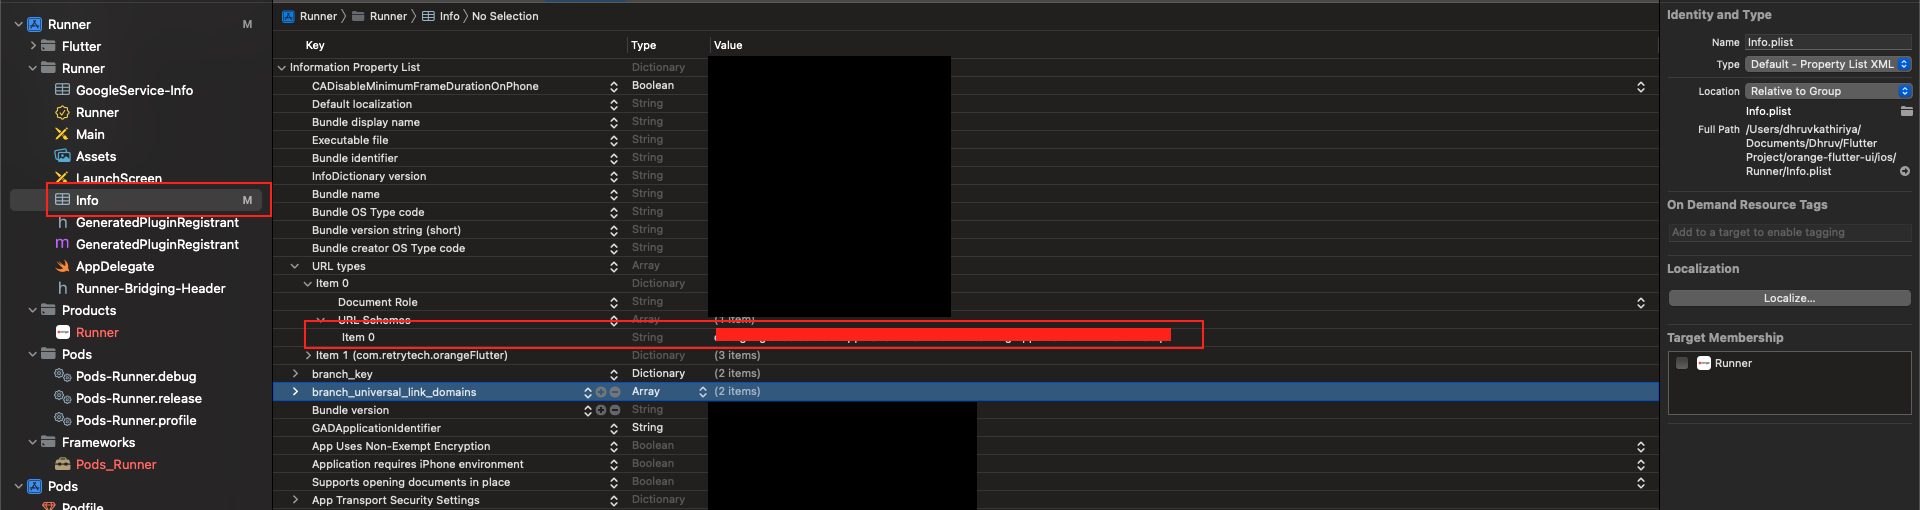
Set Google ‘REVERSED_CLIENT_ID’
-
Open GoogleService-Info.plist file and find ‘REVERSED_CLIENT_ID’ and Copy it.
-
And paste it in project > target > info > URL Types

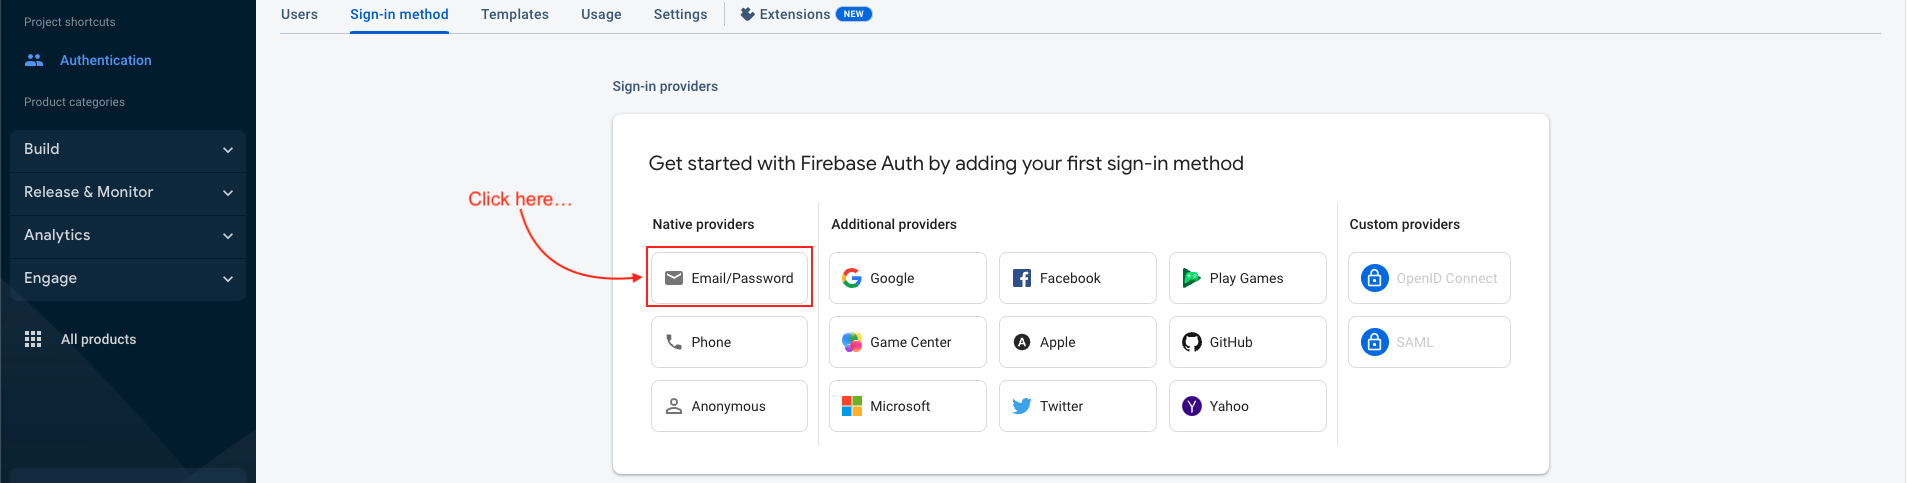
Email sign in
-
Click to Authentication and sign in mathod tab
-
Then click on email/password provider
-
Then both button switch to enable and save
-
Your email and password successfully Enable


Setup Notification (FCM)
-
Follow This guide and setup project at firebase and collect Server key.
-
Go to .env file of the backend project again and make the changes like below.
-
Once this gets completed, Please subscribe to the Pay as you go Plan of Firebase, it is required for Chat to use a real-time database for more than 100 users. If you don't do that, app will stop working for chats and some other features once it reaches more than 100 users.
FCMKEY =”Your Firebase Server Key”
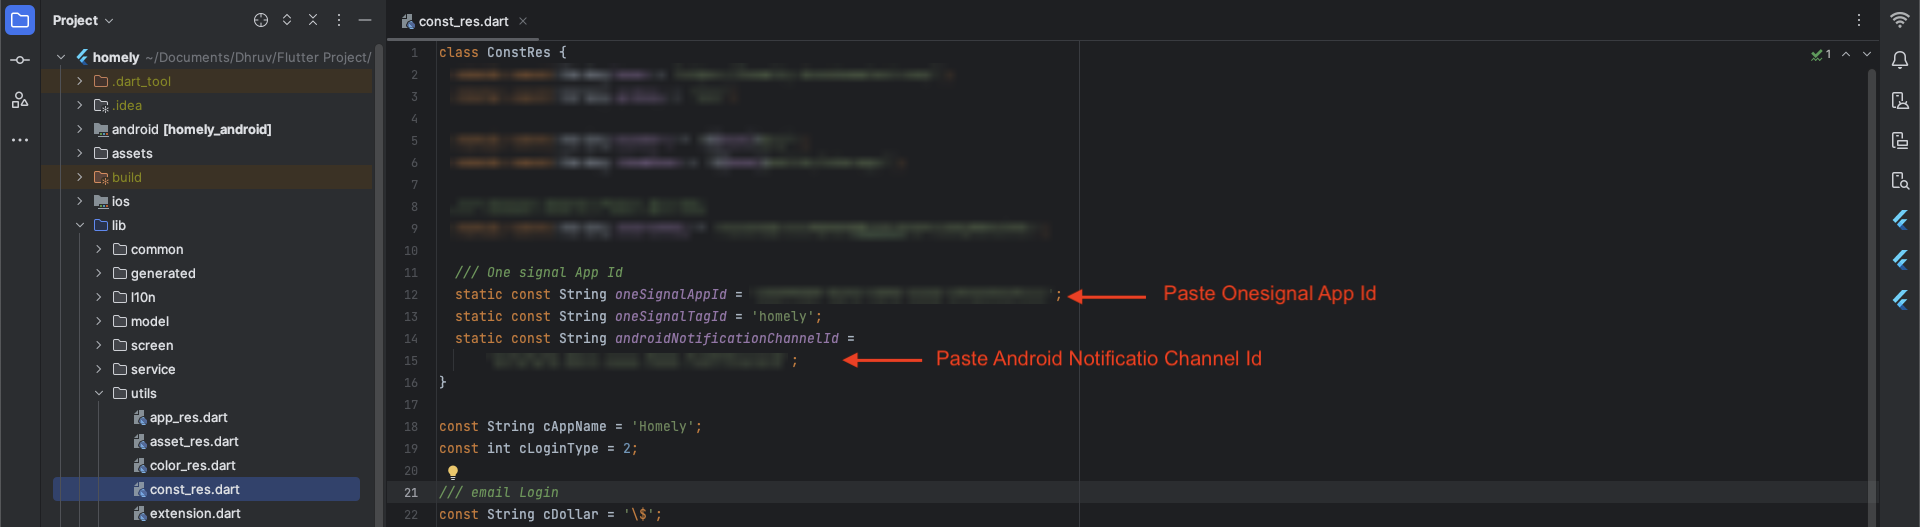
Setup OneSignal
-
Follow This guide and setup OneSignal account.
-
Note : androidNotificationChannelId (Optional)
Branch.io Setup
-
Follow This guide and setup project at Branch.io.
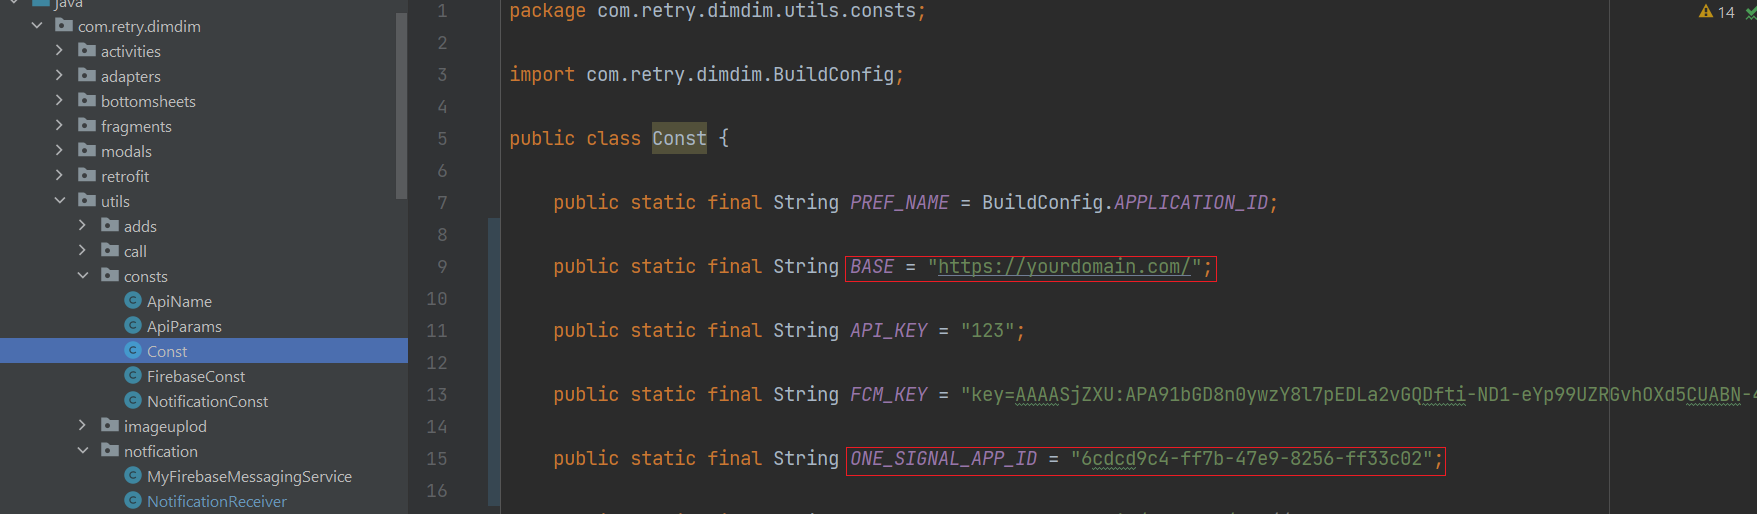
Change Credentials in your project
-
Change a BASE value (which you've got while following the backend documentation) in java > your packages >utils > consts > Const.java file .
-
If you have purchased the ios app too, change the ONE_SIGNAL_APP_ID value (which you've got while following the ios documentation ) in the same file.
Start releasing Your Apk
-
Clean project by clicking : Menubar > Build > Clean Project
-
Then Generate Signed bundle by clicking : Menubar > Build > Generate Signed bundle / Apk
-
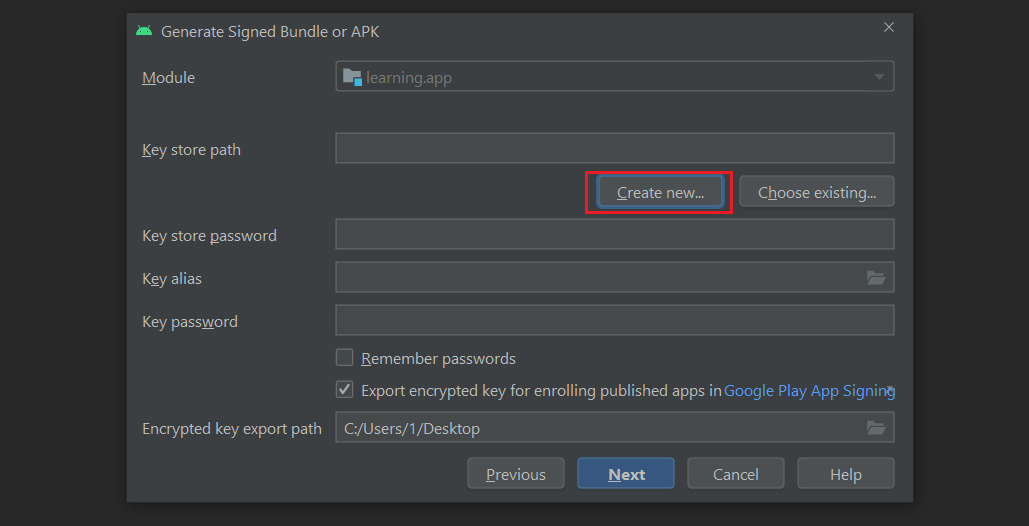
A Dialogue will pop-up like below, click next by selecting Android App Bundle .
-
Click on Create new button.
-
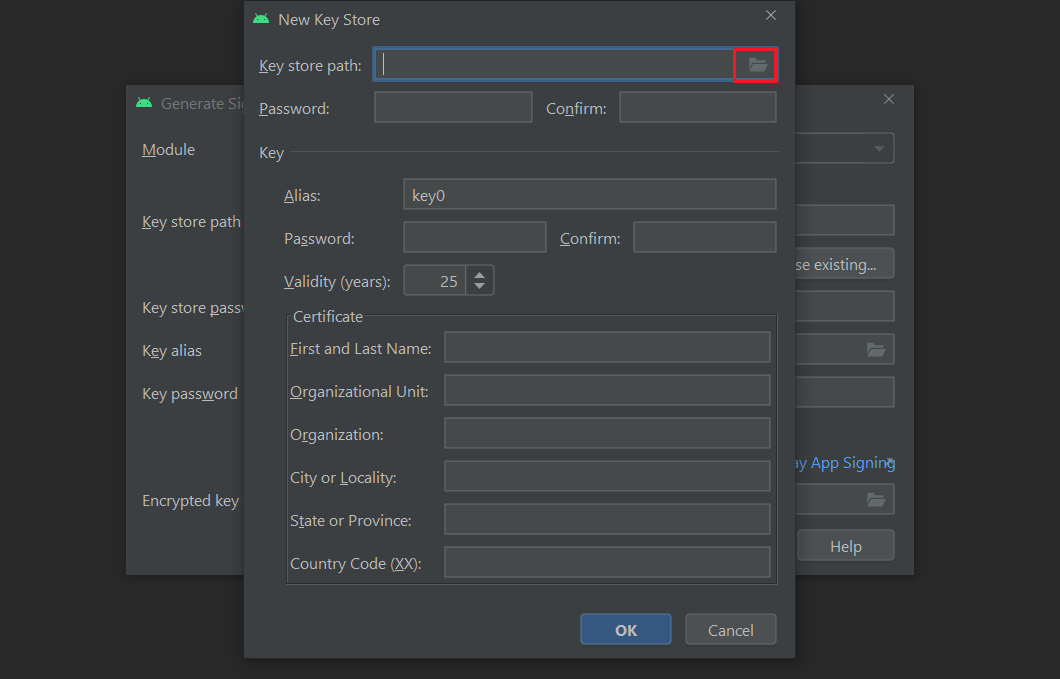
Click on the folder icon to choose path where you want to save the keystore file.
-
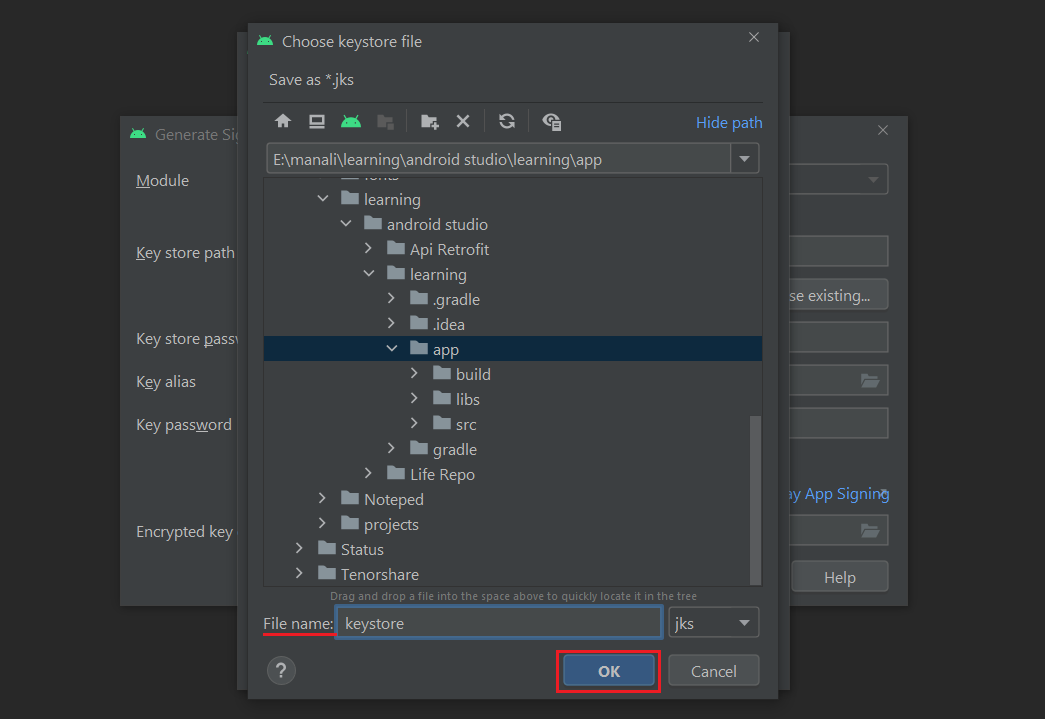
Select the keystore path,
-
After that, give file name and click OK .
-
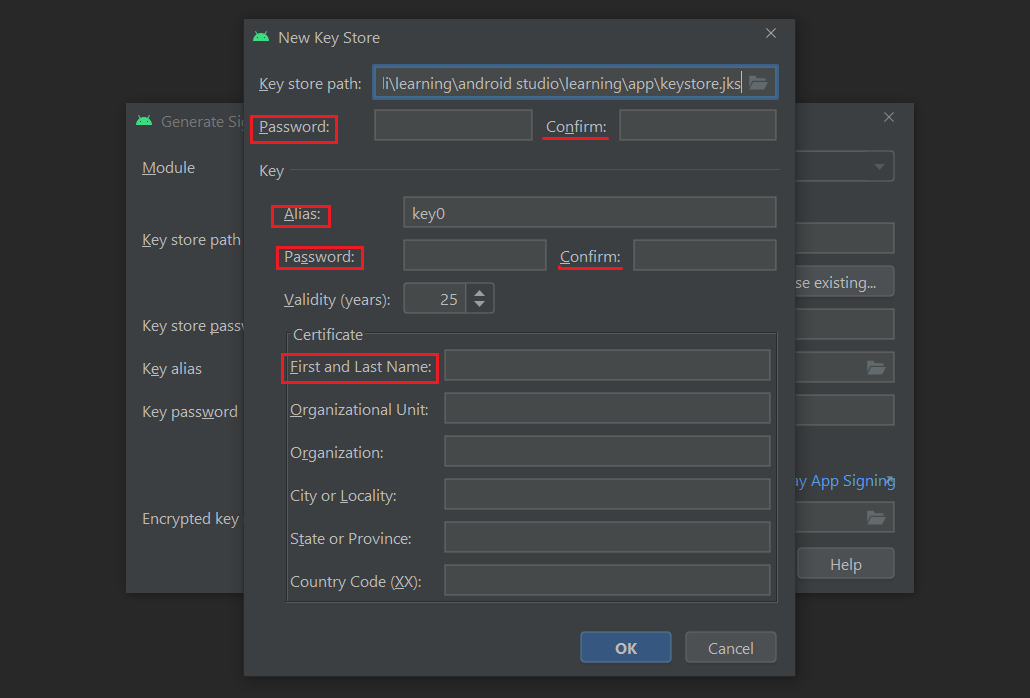
Set password for that file under the path field and confirm it.
-
Enter name in the "Alias" field. (You can choose any name)
-
Set password for the Alias and confirm it.
-
Enter Your Full name in the "First and Last Name" field.
-
NOTE: Make sure you remember all the credentials we have just created.
(keystore path, Password of Keystore file, Alias name , Alias password etc. They will be used again while updating your app)
-
Click OK
-
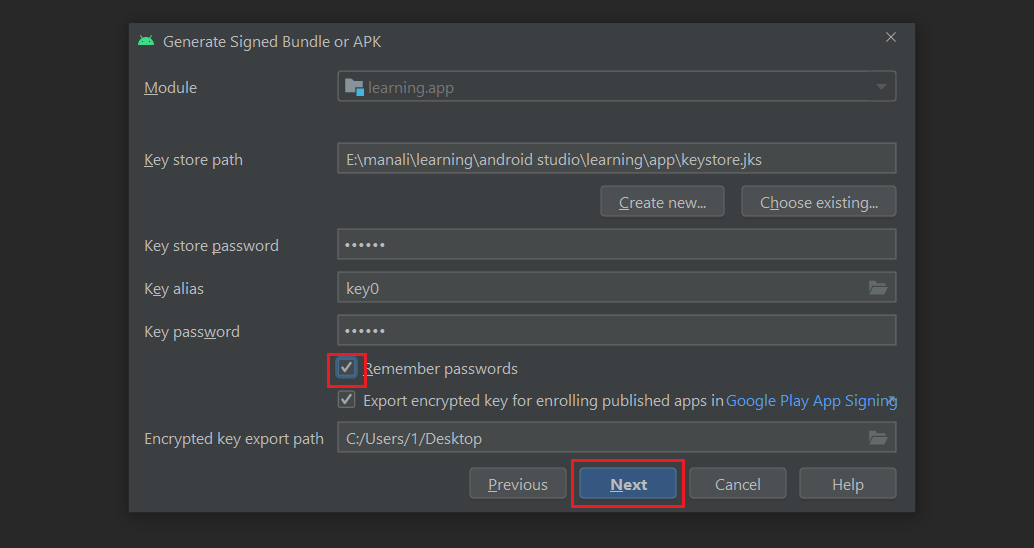
Check Remember Password and click Next
-
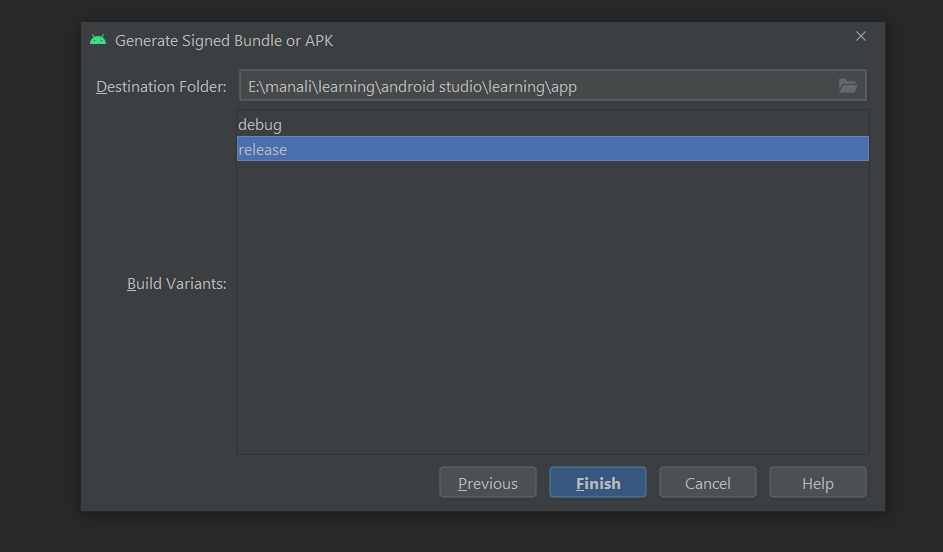
Select release and click Finish
-
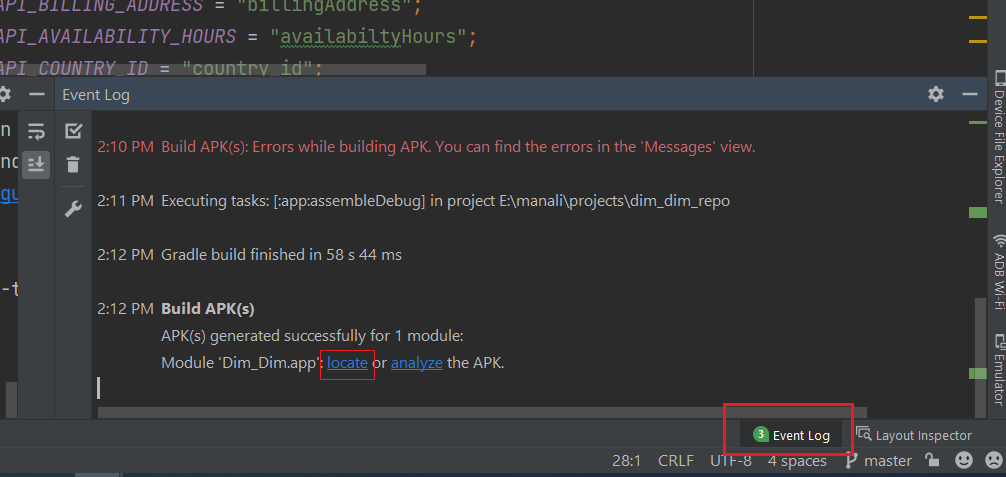
Click on Event Log at bottom and get your Released Apk by clicking on locate.

Configure In-App Purchase
-
Set up In-App Purchase by following Documentation .
-
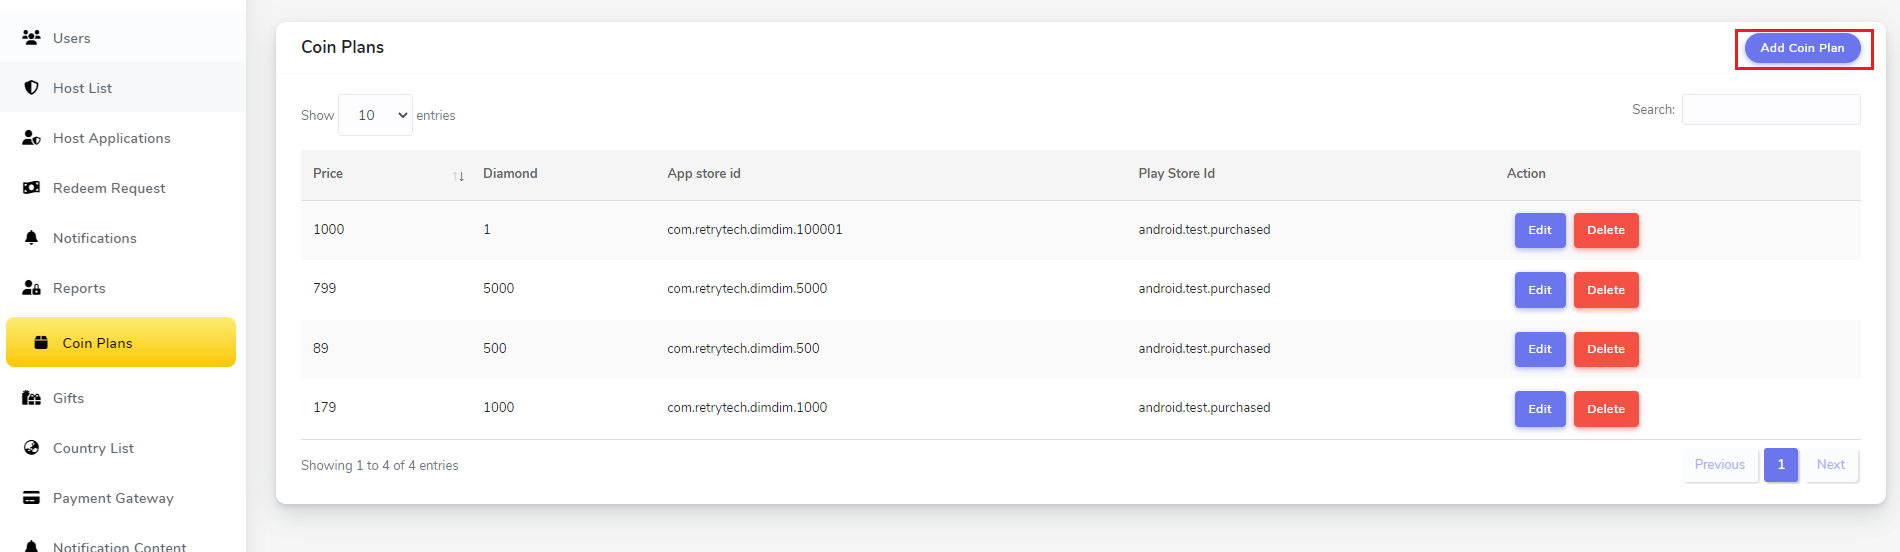
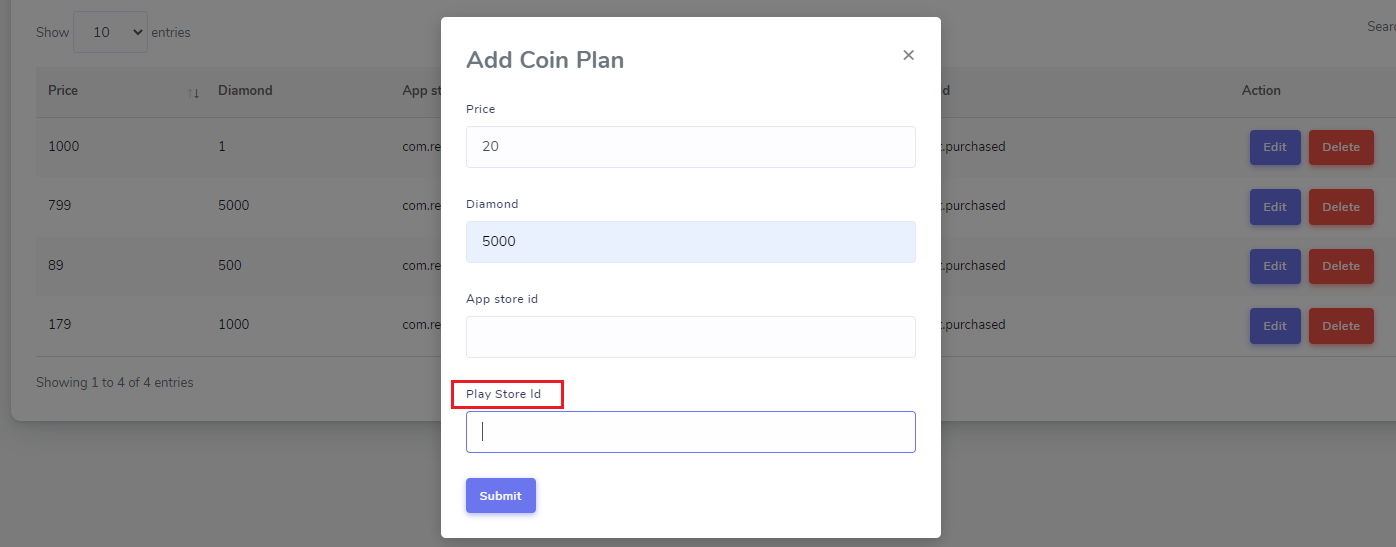
Create Coin Plans in Admin Panel.
-
Click Add Coin Plan.
-
Set Price , Diamond and Play Store Id (a unique Product Id you created while following above Documentation).
-
Click Submit.
-
Once your app get’s published on the Playstore, Some of google authentication might stop working as methods as mentioned below.
-
Log in with gmail.
-
Or any other authentication methods firebase offers.
-
Google resign the app whenever we publish the app to the Playstore and to make it working, we have to retrieve the SHA1 Fingerpring from Playstore from our app, and add that to the firebase.
Want to talk with us?
- Telegram (Support Desk) : +91 7990425274
- Email : [email protected]
- Whatsapp (No Support Here) : +91 7990425274