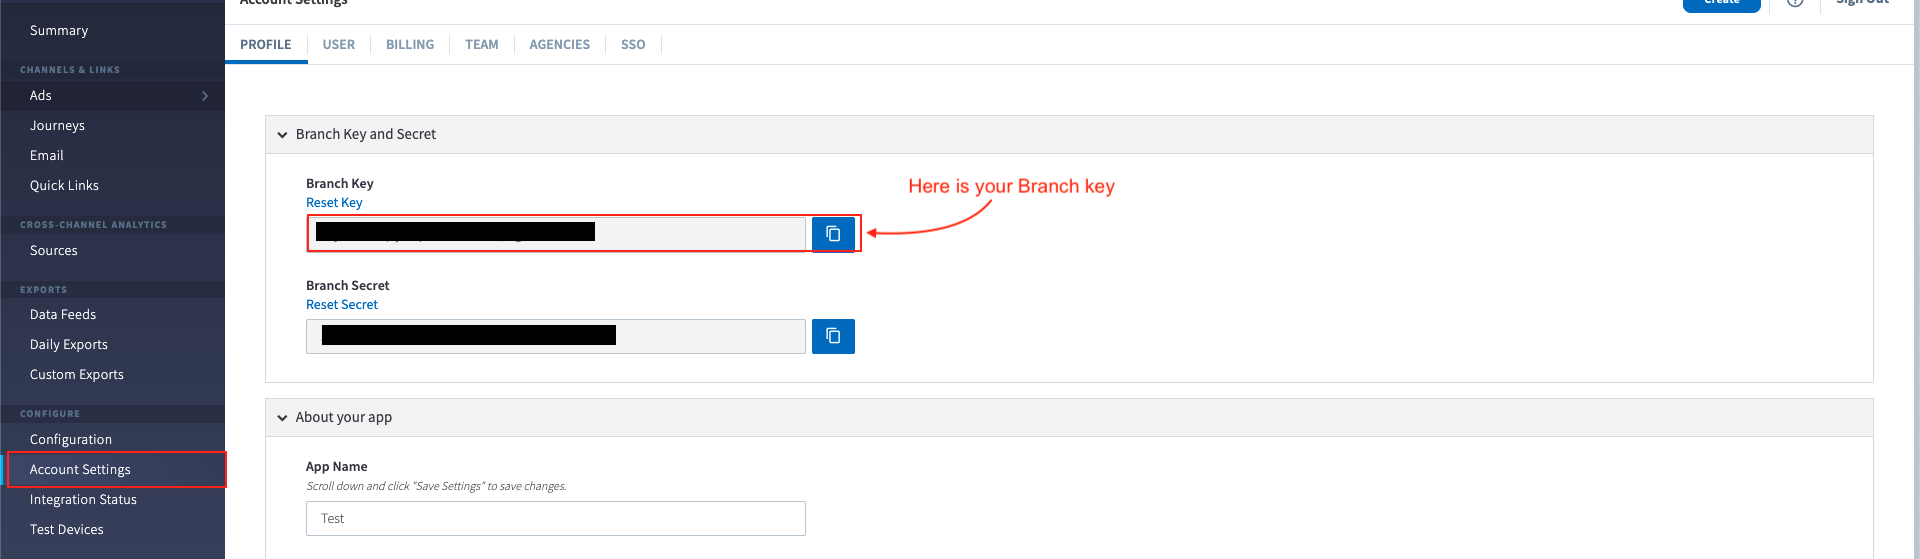
How to get Branch key
In the sidebar, click the Settings tab.
- Click on Profile Tab
- You will see the Branch Key and Secret section.
- Copy the Branch Key and store it in a safe place (you'll need it in your project).
Retrieve and Store Link Domains for Integration
Next, go to App Settings from the sidebar.
- In GENERAL tab, Scroll down to the Link Domain section.
- Here, you’ll find both the Default Link Domain and Alternate Link Domain.
- Copy both domains and store them securely, as they are required for your integration.
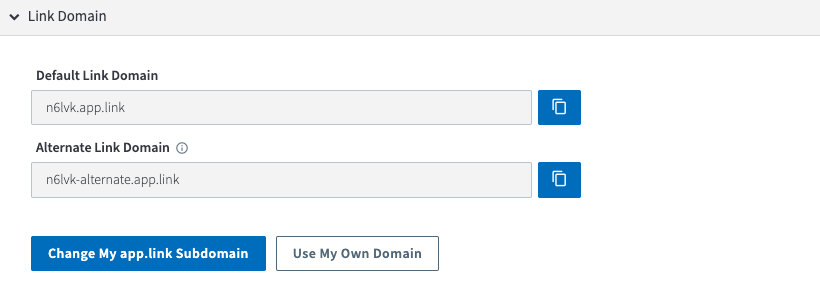
How to Change Your app.link Subdomain in Branch
- In the Branch Dashboard, navigate to the App Settings page.
- Click on the “Change My `app.link` Subdomain” button.

- In the input field, enter your desired subdomain name.
- Click the Get button to apply and reserve your new subdomain.
- And Copy both new domains and store them securely, as they are required for your integration.

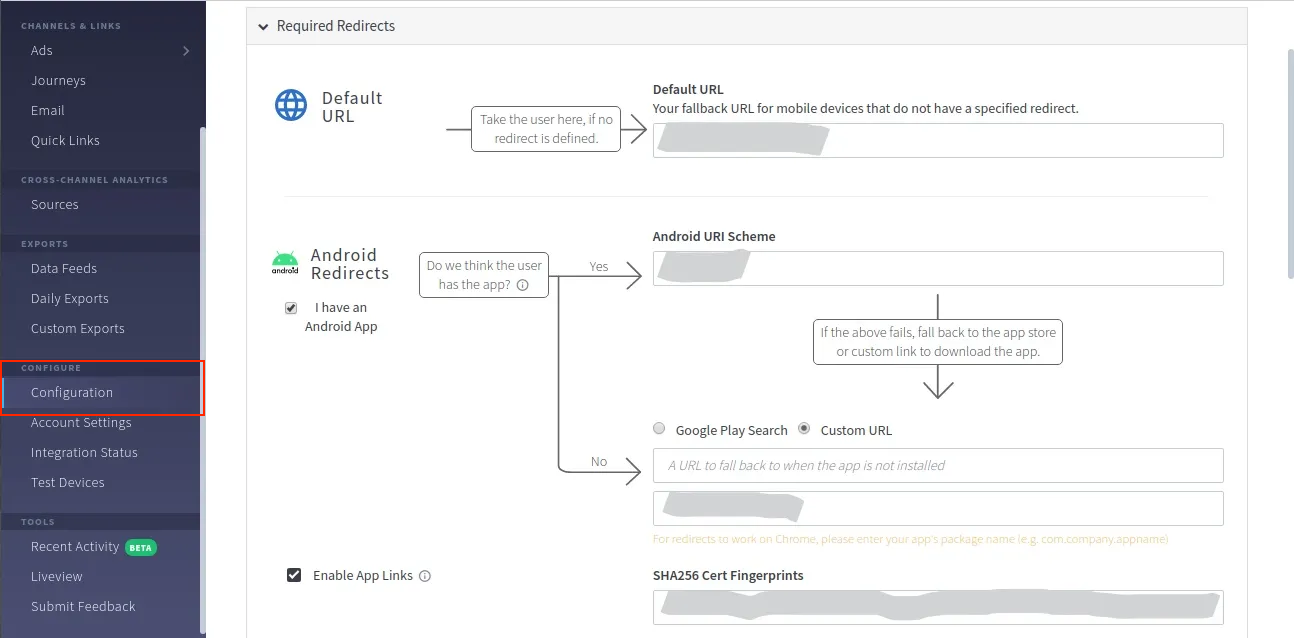
In the sidebar, go to App Settings.
Under the GENERAL tab, scroll down to the Required Redirects section.
In the Android Redirects section:
- Check the box for "I have an Android app".
- Enable the "Enable App Links" option.
On the right-hand side:
- In the Android URI Scheme field, enter your scheme name (e.g., shortzz).
Get Android applicationId : Follow this link
At the bottom, select Custom URL radio button:
In the second input field, Enter your applicationId (e.g., com.example.myapp).
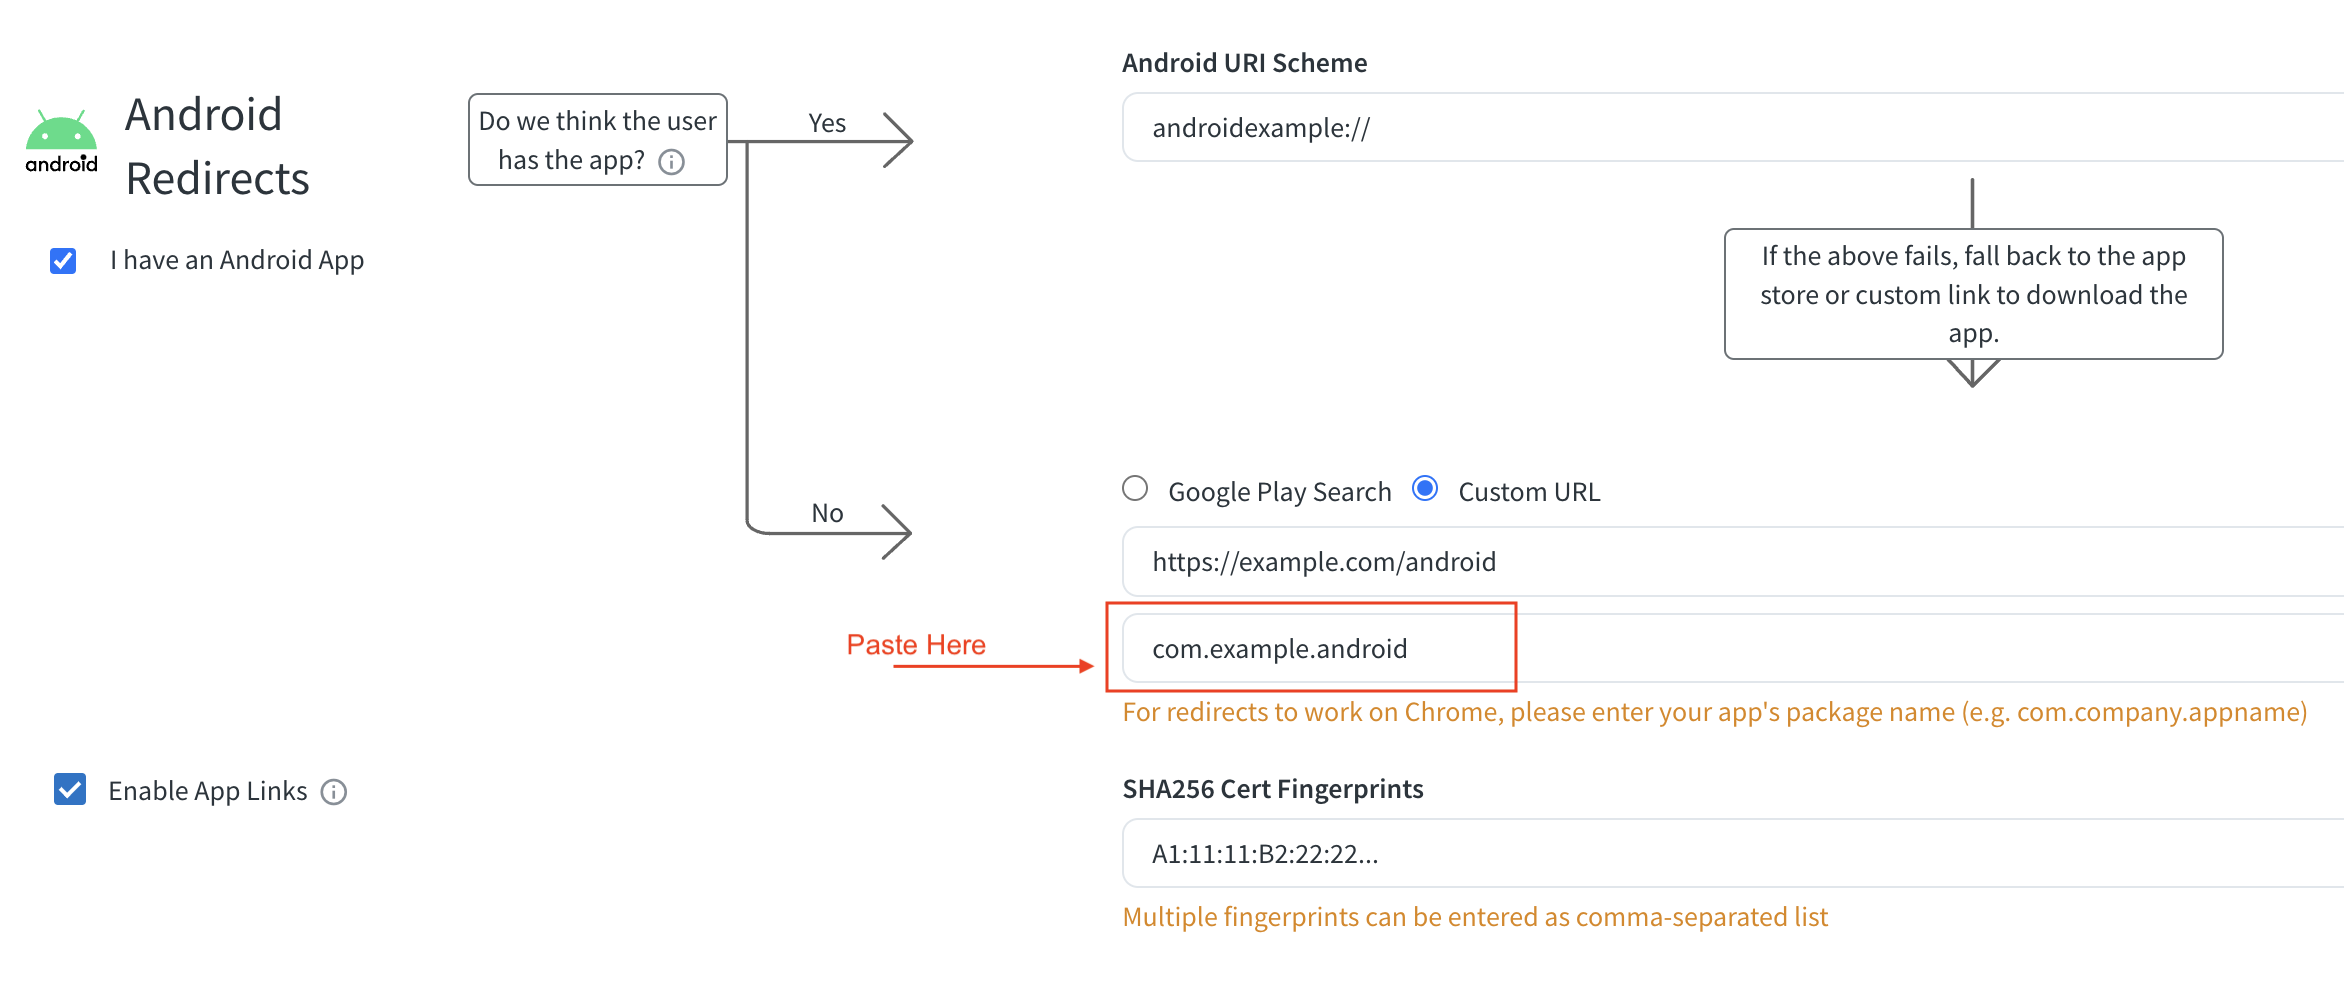
SHA256 cert Fingerprints
Go to the project folder in the terminal.
Mac:
keytool -list -v -keystore ~/.android/debug.keystore -alias androiddebugkey -storepass android -keypass android
Windows:
keytool -list -v -keystore "\.android\debug.keystore" -alias androiddebugkey -storepass android -keypass android
if you're using PowerShell or a Unix-based system like mac.
Go to the terminal view and paste: gradlew signingReport or ./gradlew signingReport

Press enter and scroll to "Variant: debug" to get the SHA-256 key

⚠️ Note : If you still can't find SHA-256 key, Please follow the Link and complete the setup as asked.
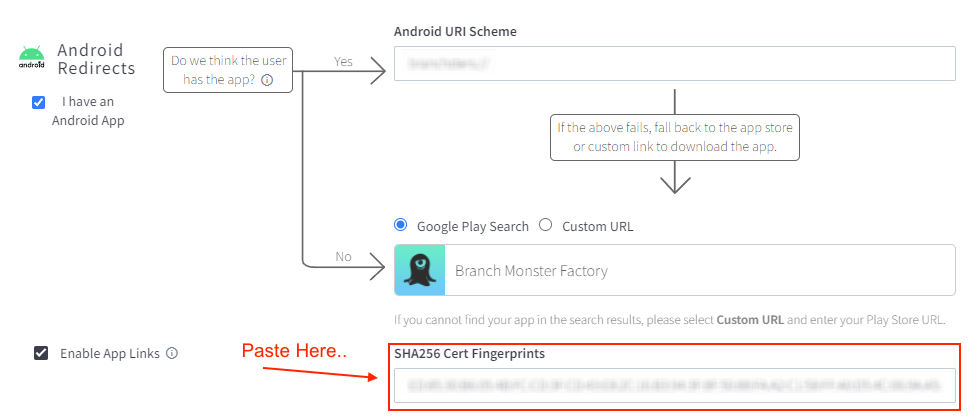
Then save button
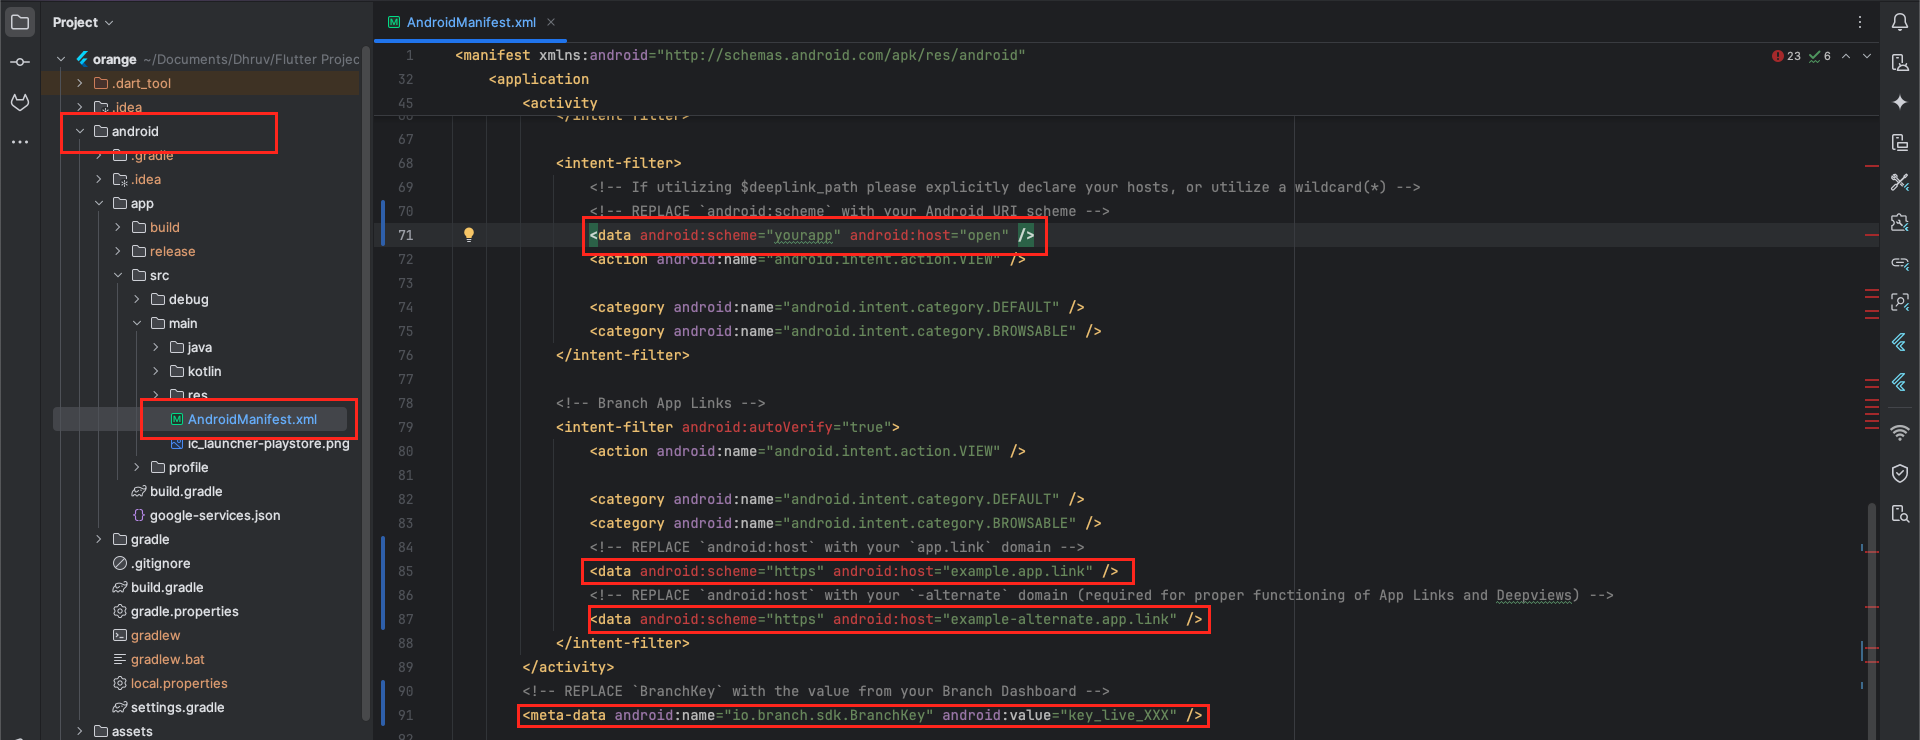
Navigate to the following file in your project: android/app/src/main/AndroidManifest.xml
Refer to the image provided below for guidance on where to add the configuration.
Paste the necessary information into the `
- Your Branch URI Scheme
- Branch Key
- Default Link Domain
- Alternate Link Domain
In the Branch dashboard, go to App Settings from the sidebar.
At the top, click on the GENERAL tab.
Scroll down to the Required Redirects section.
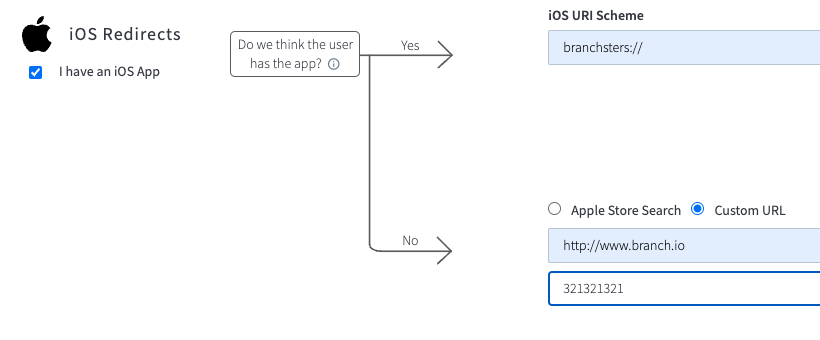
Under the iOS Redirects section:
- Check "I have an iOS App".
- Also check "Enable Universal Links".
On the right-hand side, in the iOS URI Scheme field, enter your app’s URI scheme (e.g., shortzz).
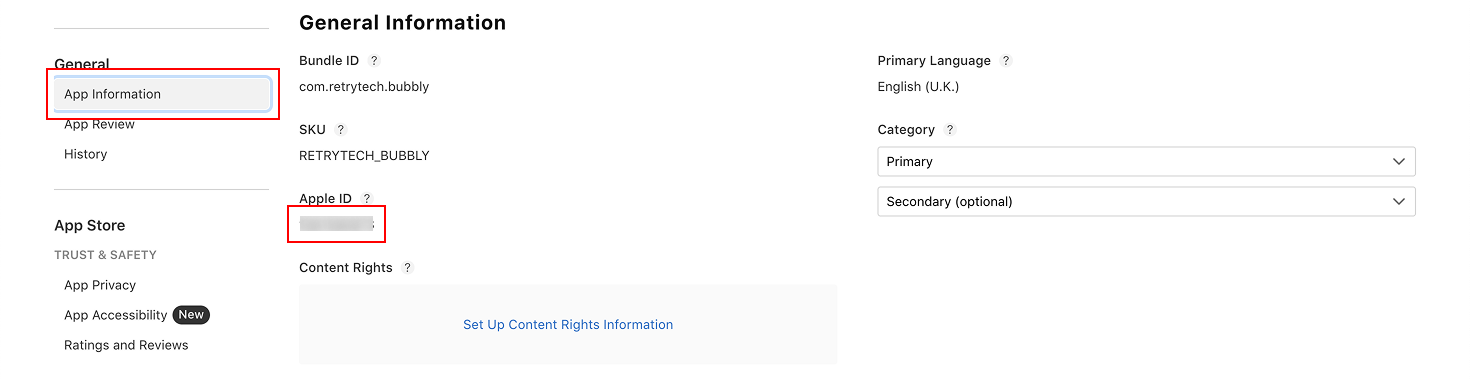
How to Find and Use Your Apple ID for Custom URL Setup
Go to App Store Connect .
In the dashboard, go to My Apps and select your app.
From the left sidebar, click App Information.
Scroll down to the General Information section.
Locate the Apple ID and copy it.
How to Find and Use Your Apple ID for Custom URL Setup
How to Use Apple ID in Custom URL Setup
In the Branch Dashboard, go to the Required Redirects section under App Settings.
Select the Custom URL radio button.
In the second input field, paste your Apple ID that you copied from App Store Connect.

Get iOS BundleId : Follow this link
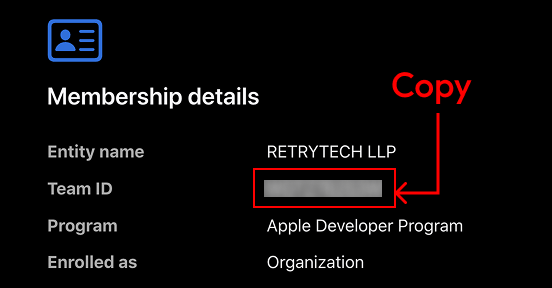
How to Find Your Apple Team ID and Use It in Branch iOS Redirects
Go to the Apple Developer Portal and log in to your account.
In the top menu, click on your Account.
Under the Membership section, click Membership Details.

You will see your Team ID listed there — copy this Team ID.
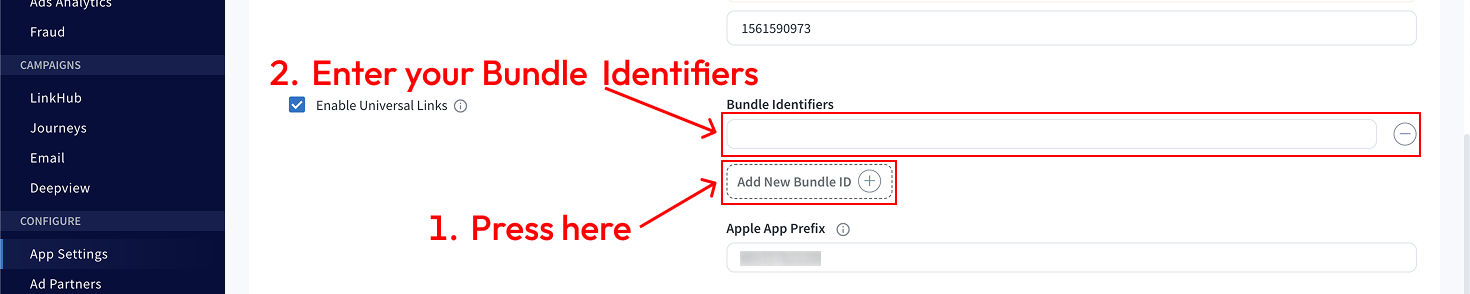
How to Use Team ID in Branch Dashboard
Go to the Branch Dashboard.
Navigate to App Settings > GENERAL Tab > Required Redirects.
Under the iOS Redirects section, locate the field labeled Apple App Prefix.
Paste the Team ID into the Apple App Prefix field.
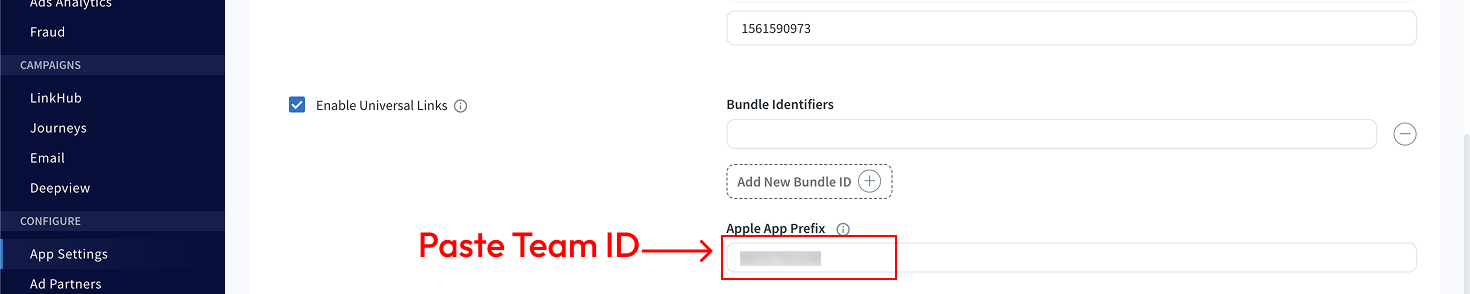
Then save
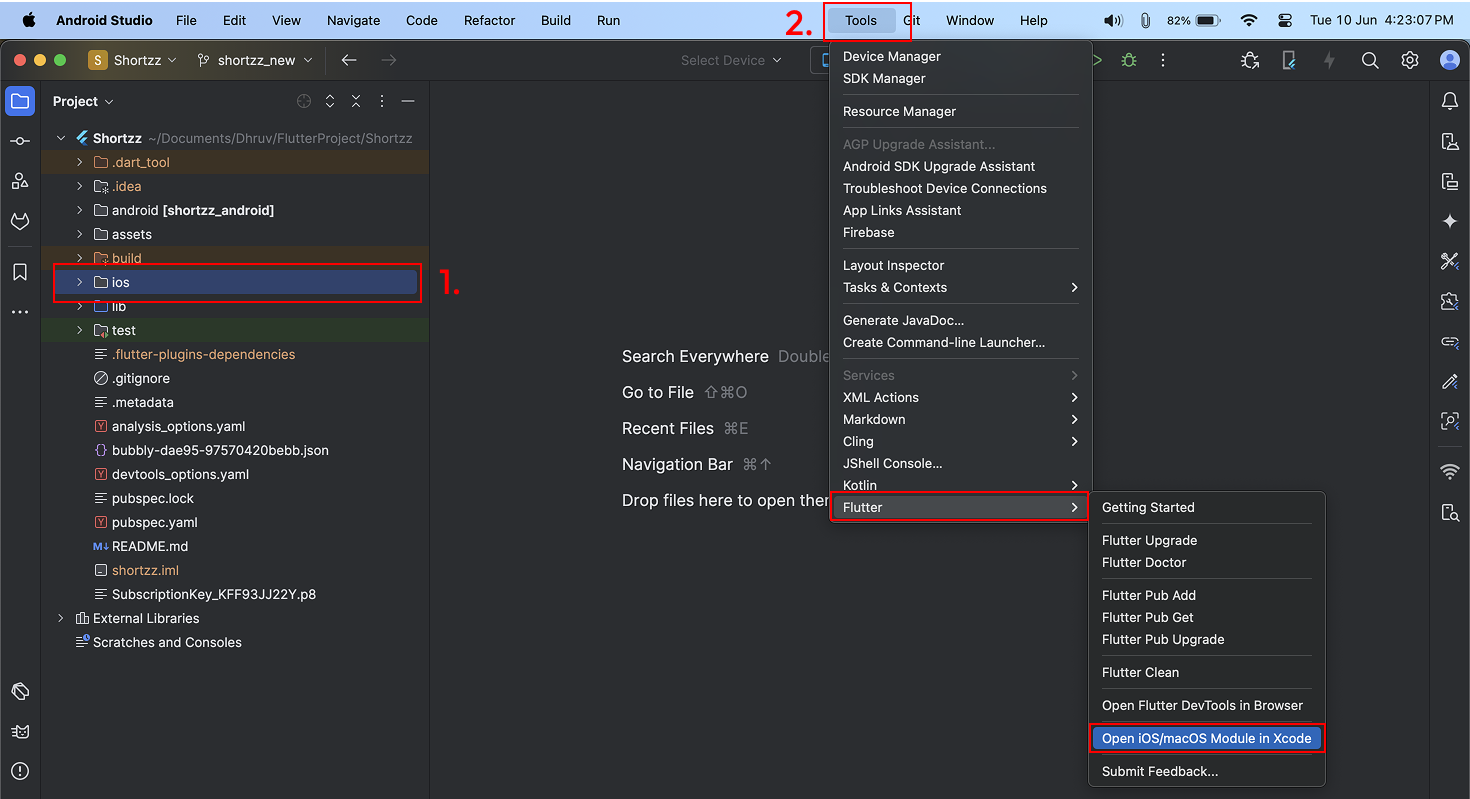
Open your project in Android Studio.
Then navigate to the project panel and select the ios folder.
From the top menu bar, go to Tools > Flutter > Open iOS/macOS module in Xcode to launch the iOS module in Xcode.
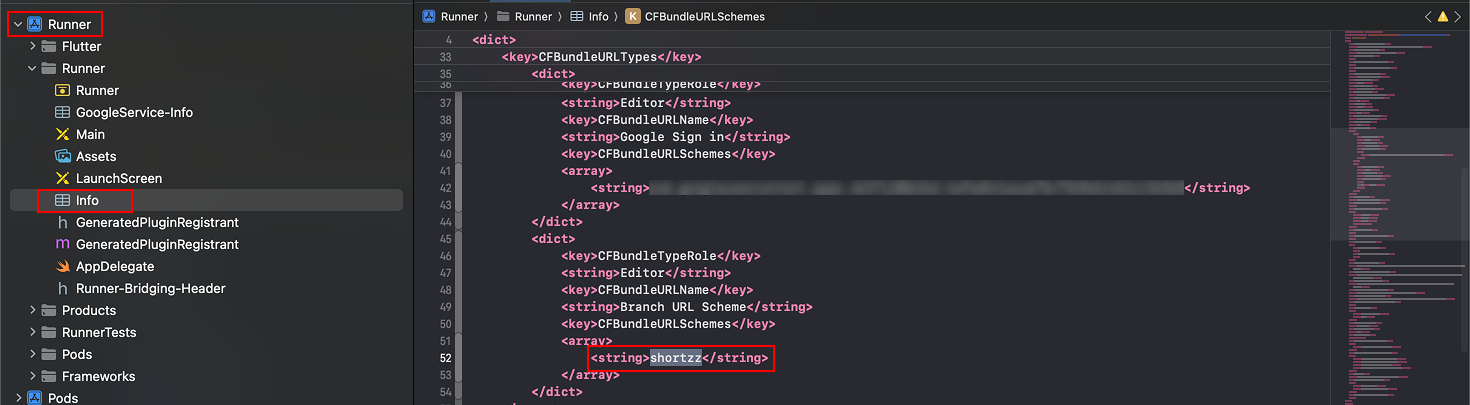
In the Project Navigator, open the Runner folder.
Locate the Info file.
Right-click on Info and choose Open As > Source Code.
In the source code, search for the key: CFBundleURLTypes.
Under this key, you'll find CFBundleURLSchemes.
Inside the array, add your iOS Scheme (used for deep linking).
<key>CFBundleURLTypes</key>
<array>
  <dict>
    <key>CFBundleURLSchemes</key>
    <array>
      <string>your_ios_scheme</string>
    </array>
  </dict>
</array>
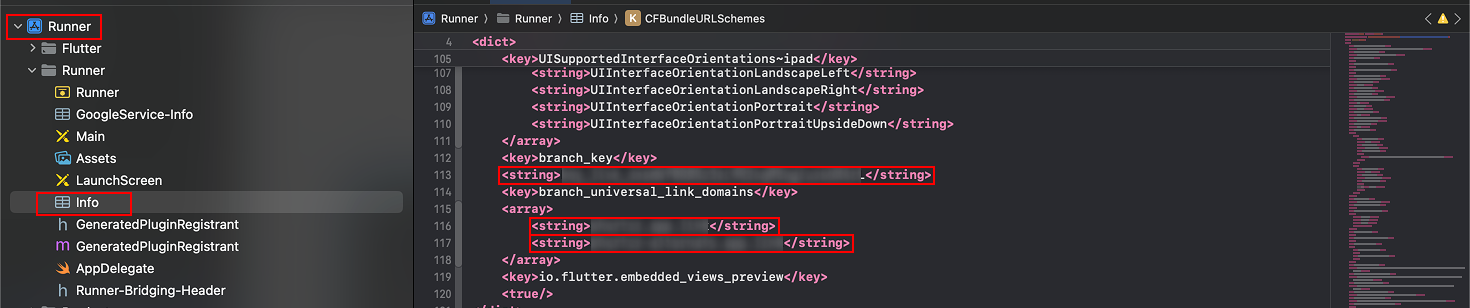
Scroll down in the Info.plist file.
Add the following keys if they don’t already exist:
<key>branch_key</key>
<string>your_branch_key</string>
<key>branch_universal_link_domains</key>
<array>
    <string>your_default_link_domain</string>
    <string>your_alternate_link_domain</string>
</array>
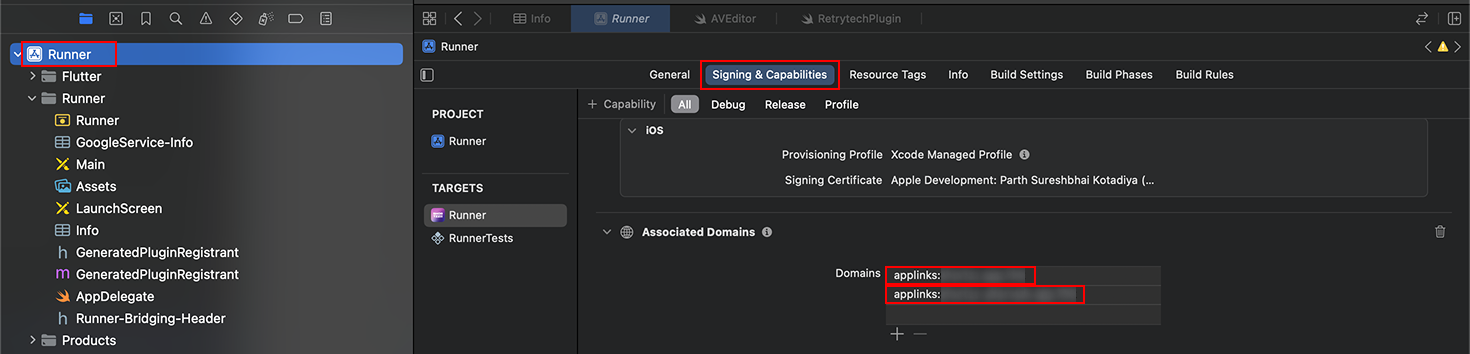
In the Project Navigator, select the Runner project.
Select the Runner target, then go to the Signing & Capabilities tab (on the right panel).
Under the Associated Domains section, replace the existing entries with your Branch domains using the following format:
- applinks:your-default-link-domain
- applinks:your-alternate-link-domain