
Introduction
Chatter app is an ultimate social media script built with flutter and Laravel as backend. It offers many advanced features and functions like Feed (Images, Videos, Text), Stories, Chat, Chat Rooms, Manage Chat Rooms & Members, Random Profiles, Interests, Push Notifications And Lot more... This package contains fully functional Chatter flutter app, Backend, Database file & documentation. Using this script, any individual or company can save 100s of hours and publish twitter like social media app within couple of hours.
System Required
-
Gmail Account credentials for Firebase
-
Apple developer account credentials : Create Account
-
Android Studio : Download
-
Flutter Sdk : Download
-
Agora Account : Create Account
-
Branch.io Account : Create Account
-
Xcode (Only Mac Users).
-
RevenueCat Account : Create Account
Change Base URL
-
Find the chatter_backend.zip from the folder downloaded from codecanyon and open in android studio.
-
Open chatter>lib/utils/const.dart
-
Replace "baseURL" with your Admin Panel URL (https://yourdomain.com/)
-
⚠️ Note : : Make sure you have added "/" at the last.
Change package name
-
Android
-
Step 1 : Go to android > app
-
Step 2 : Click to build.gradle
-
Step 3 : Here, change the only applicationId And it's done.

-
iOS
-
Step 1 : Select the ios folder
-
- In the Android Studio Project panel , locate the ios folder under your Flutter project.
-
-
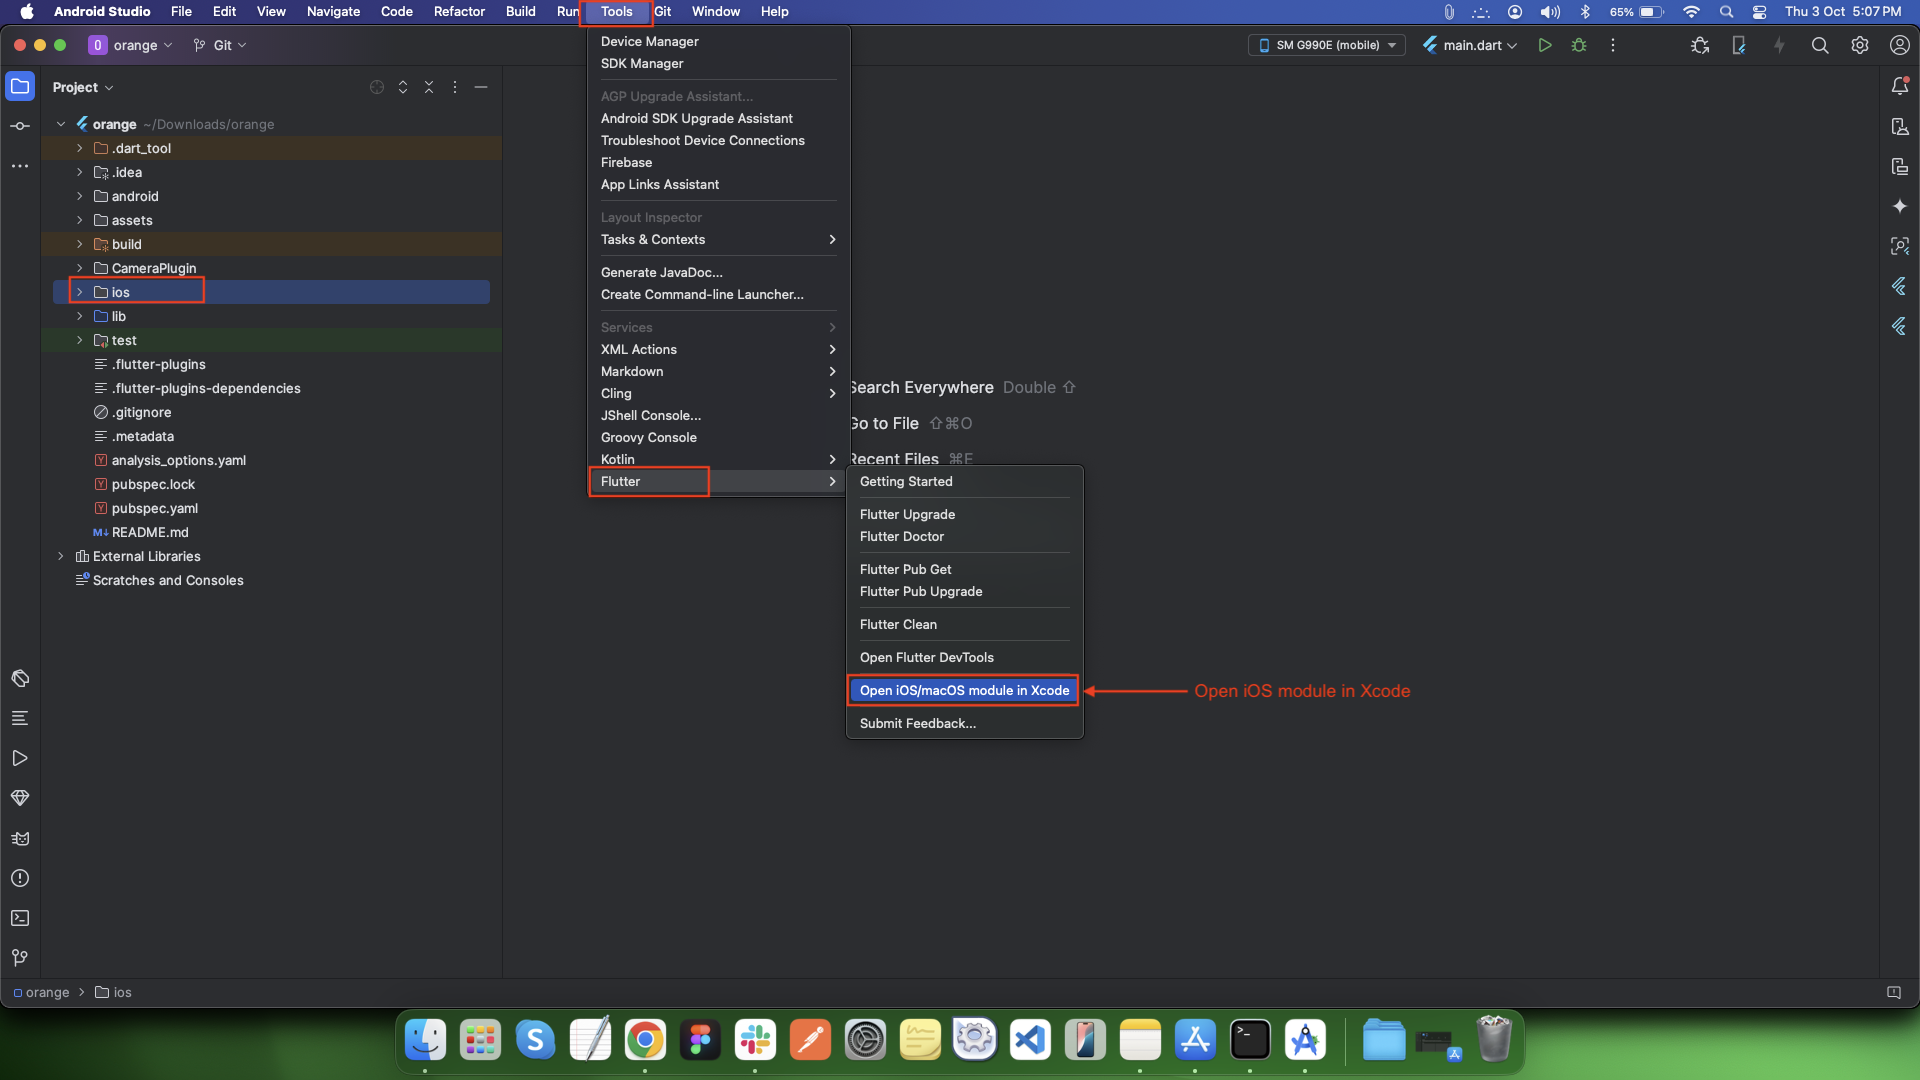
Step 2 : Navigate to Tools > Flutter
-
- On the top menu bar, go to: Tools → Flutter → Open iOS/macOS module in Xcode
-
-
Step 3 : Xcode Opens Automatically
-
- This will launch Xcode, opening your Flutter project's iOS module.
-
- From there, you can configure signing, capabilities, launch screen, etc.
-
-
Step 4 : Go to runner > Signing & Capabilities
-
Step 5 : Change your bundle identifier as you want, and it's done.
Once the project gets opened in Xcode successfully, follow the steps below.

Change app name
-
Android
-
Step 1 : Go to android > app > src > main > AndroidManifest.xml and make changes shown in the below image.

-
iOS
-
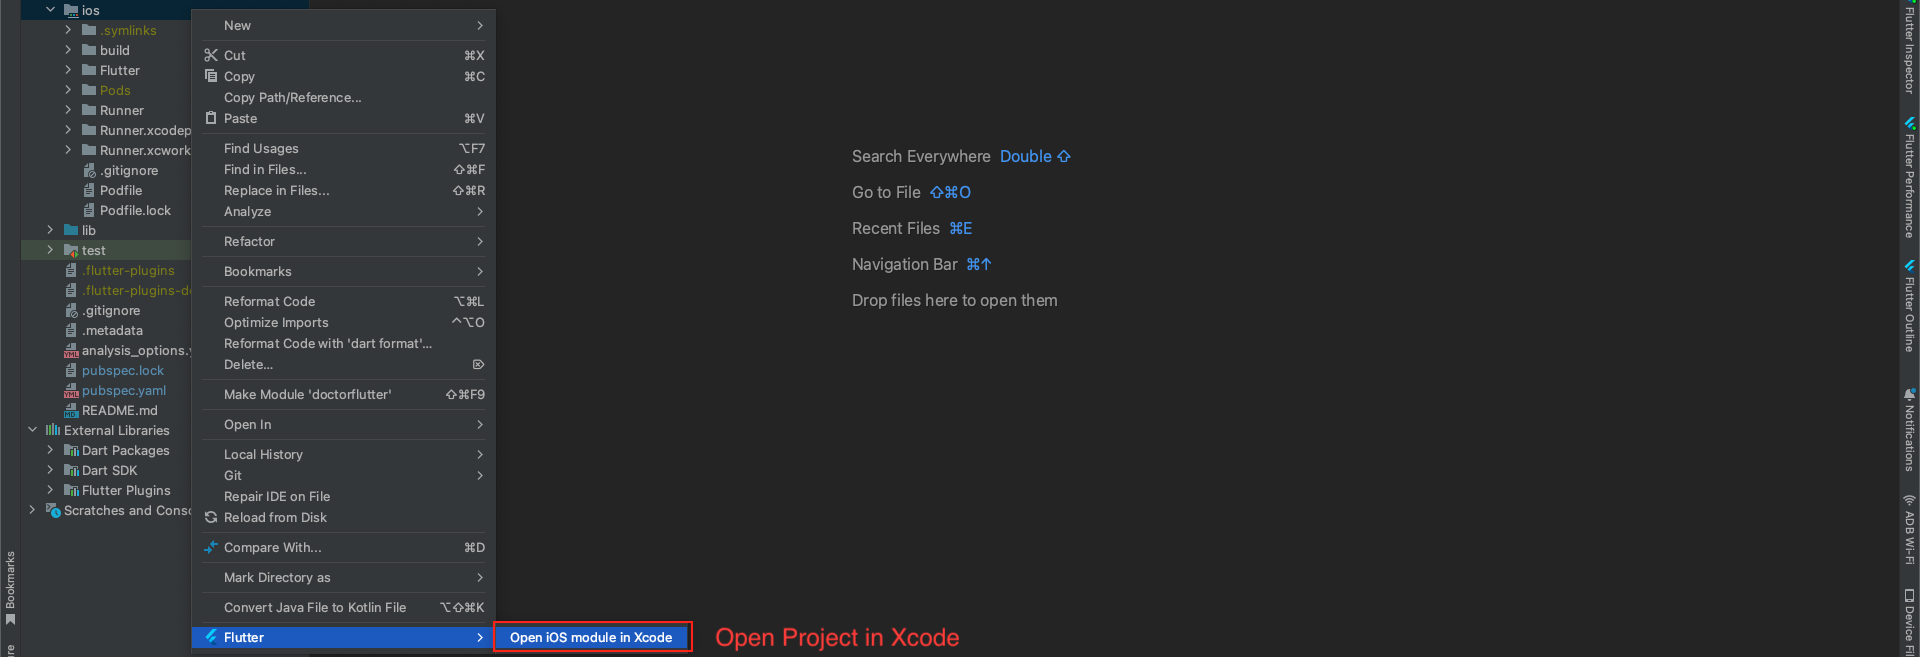
Step 1 : Now right click on iOS directory flutter > Open iOS module in Xcode
-
Step 2 : Now go to Runner > General > Display Name, change it as you want.

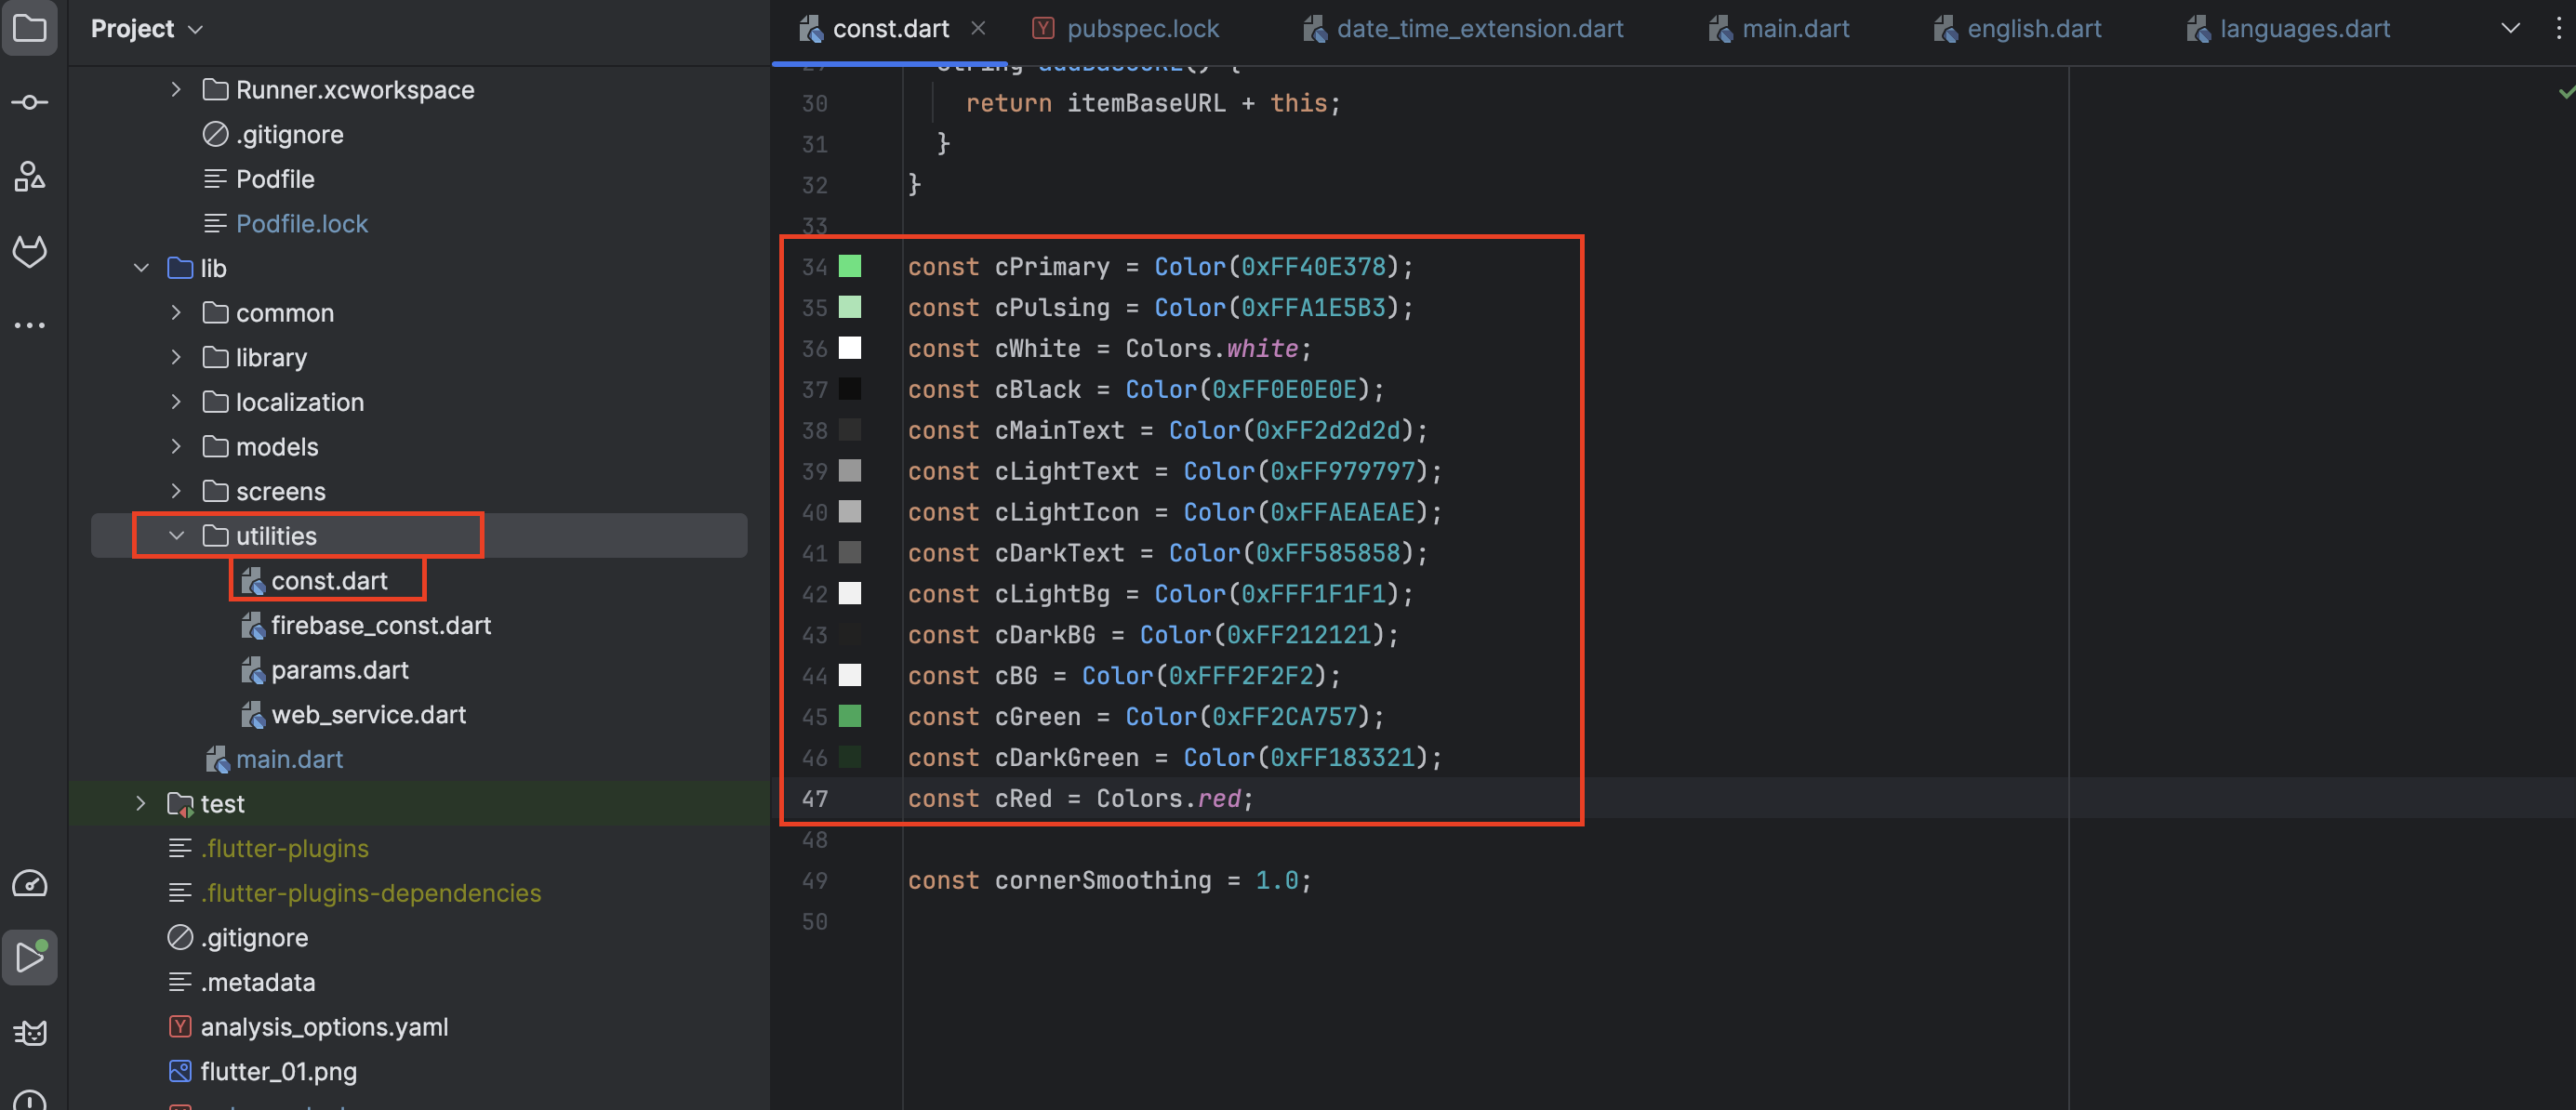
Change app color
-
Step 1 : Now go to your project lib > utilities > const.dart as shown in the below image.
Change app font family
-
Step 1 : Select any font from google font
-
Visit the https://fonts.google.com/
-
Search for your font.
-
Once you find it, click to open.
-
Click on the Download Family button on the top right side of your screen.
-
Extract the compressed file.
-
Step 2 : Import the Font into Project
-
Copy-Paste [font].ttf file into the fonts folder.
-
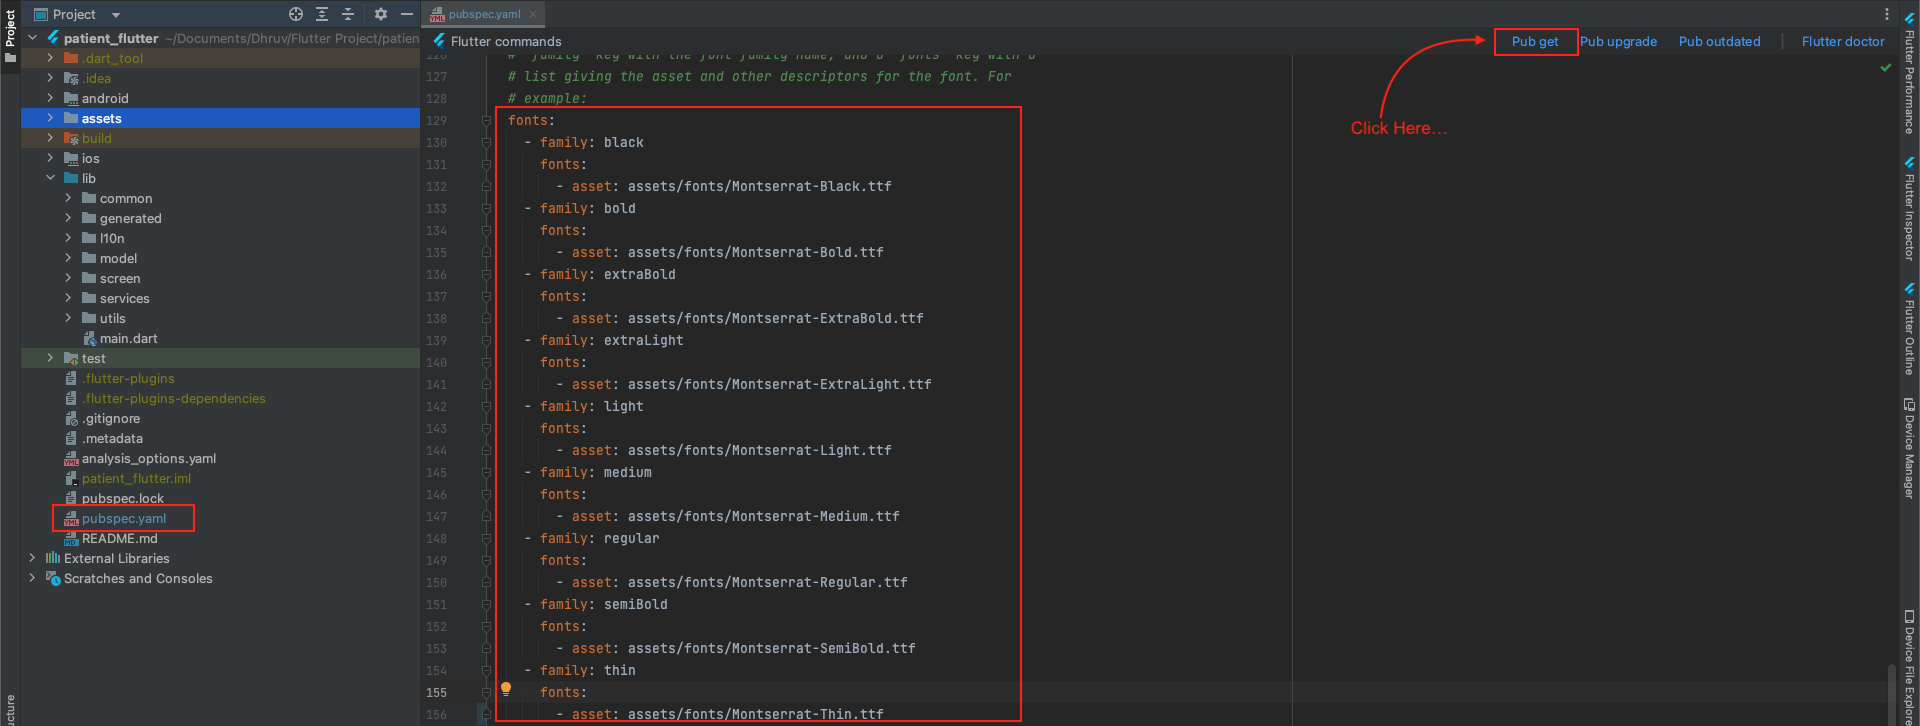
Step 3 : Add Font to Pubspec.yaml
-
Replace the family name with your font family. To get the family name, simply take the first part before the dash sign (-). For example, if the downloaded font name is Montserrat-Regular , take the Montserrat as your family name
-
Go to pubspec.yaml file:
-
Replace the asset path with the path where your font is residing.
-
Then pub get to successfully load your font
Here’s how you download the font:

To import the Font in your project:

To add Font to pubspec.yaml file:
Change app icon
-
Step 1 : Generating Different Sized Icons
-
Step 2 : Adding Icons in Android.
-
Step 3 : Adding Icons in IOS
-
Step 4 : Run the Application
Go to https://www.appicon.co/ and upload the icon image and tick the iPhone and Android options and click on Generate. This site generates different sized Icons for both android and IOS at the same time.
It will Download the Zip file named AppIcons with the android and Assets.xcassets named folders along with images for appstore and playstore which can be directly uploaded as an icon in both the stores
Now, open your Project in Android Studio.
Navigate to android/app/src/main/res and right-click on res folder and click "open in Finder". Now delete all the mipmap folders in res folder and paste the mipmap folders from AppIcon/android folder which you have downloaded.
Now navigate to the ios/Runner/Assets.xcassets. Now after you are in Runner folder, right-click on Runner folder and click “open in Finder”. Now delete the Assets.xcassets folder and paste the Assets.xcassets folder from AppIcon/Assets.xcassets which you have downloaded.
After manually changing the images in android and IOS folders now go to lib/main.dart and run the flutter project using the below command in the flutter console.
flutter run
Configure Firebase
-
Go to the firebase project you might created while following backend documentation.
-
If you don't have, follow the steps below and create one project.
-
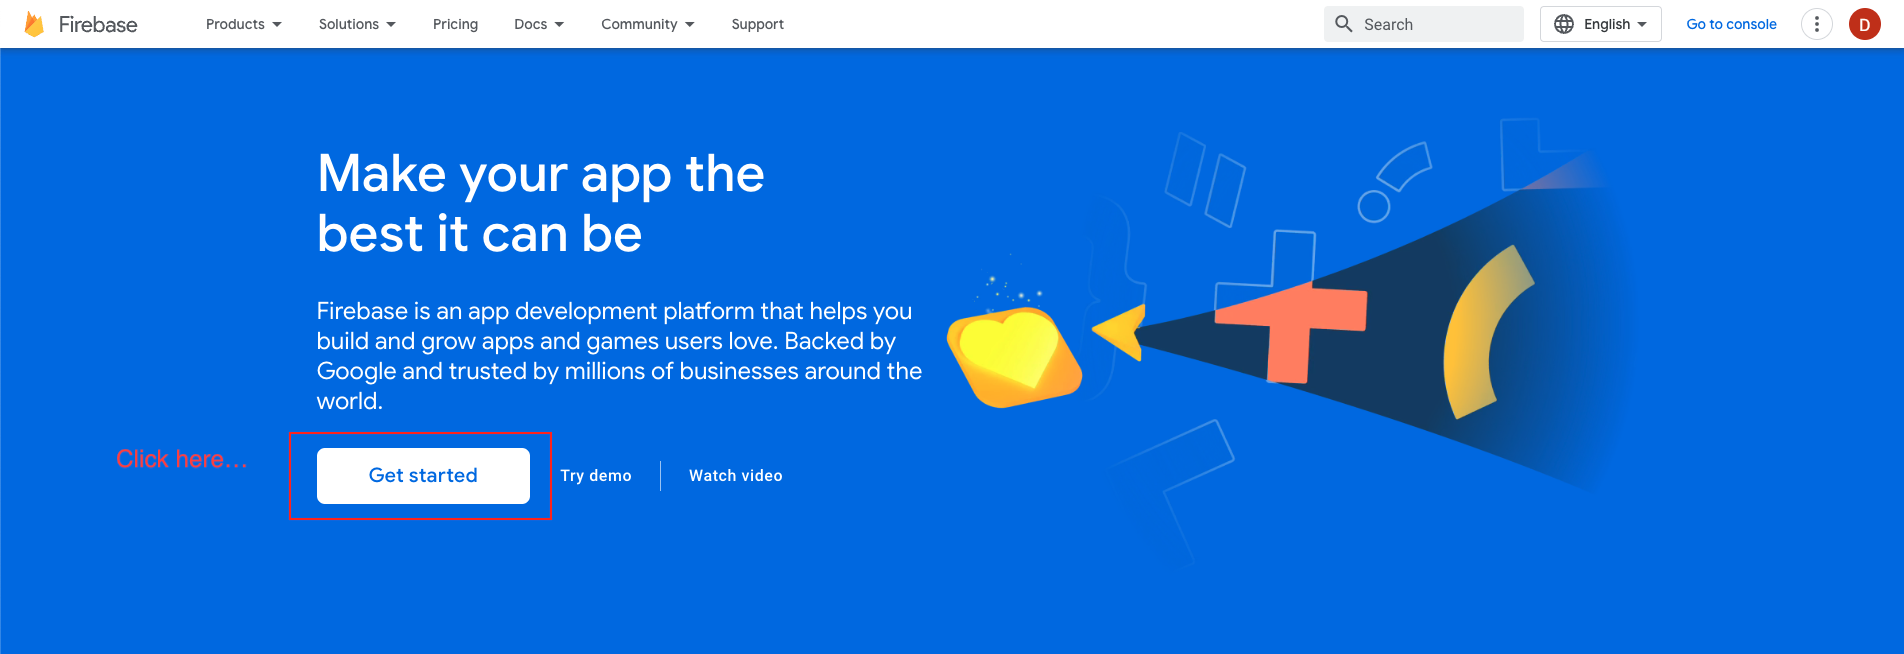
At first, follow this link https://firebase.google.com/
-
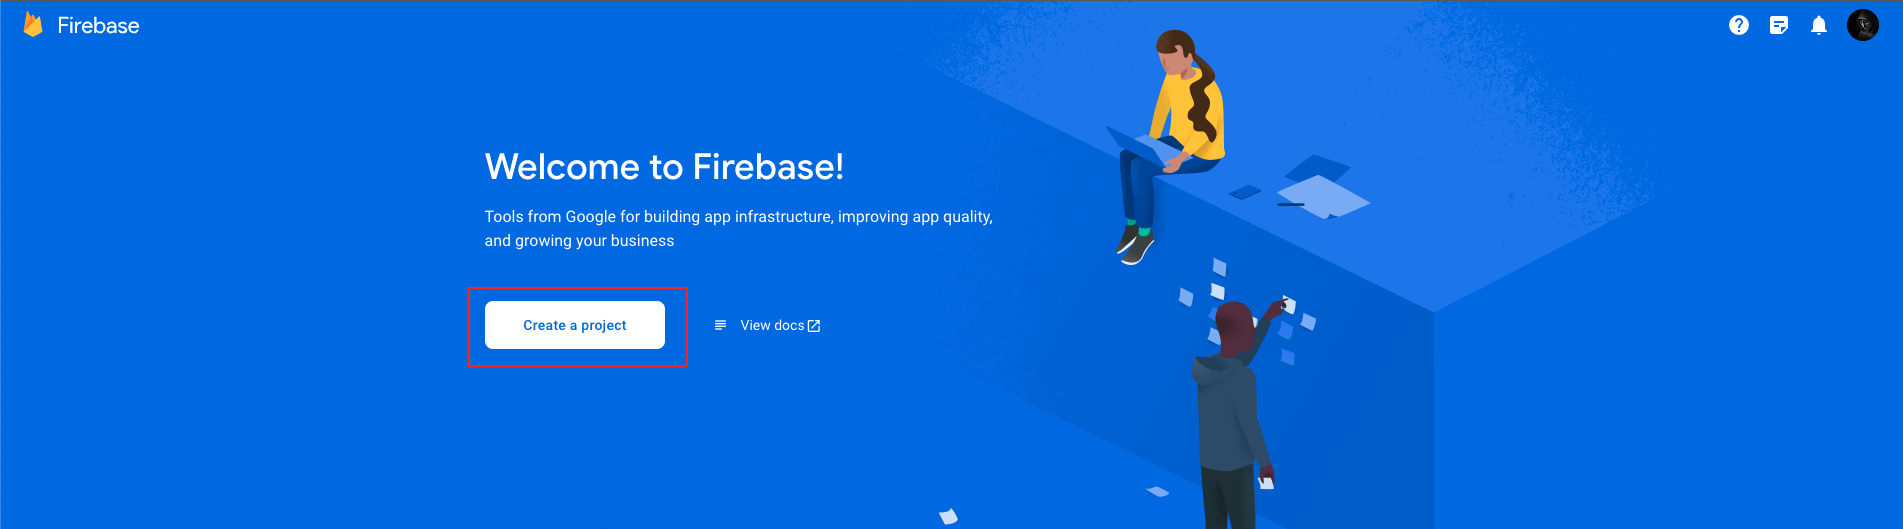
Now, we first have to create a Firebase project. Firebase project will go through and describe what it is. This allows us to add an app to that project. It can have many projects inside of Firebase.
-
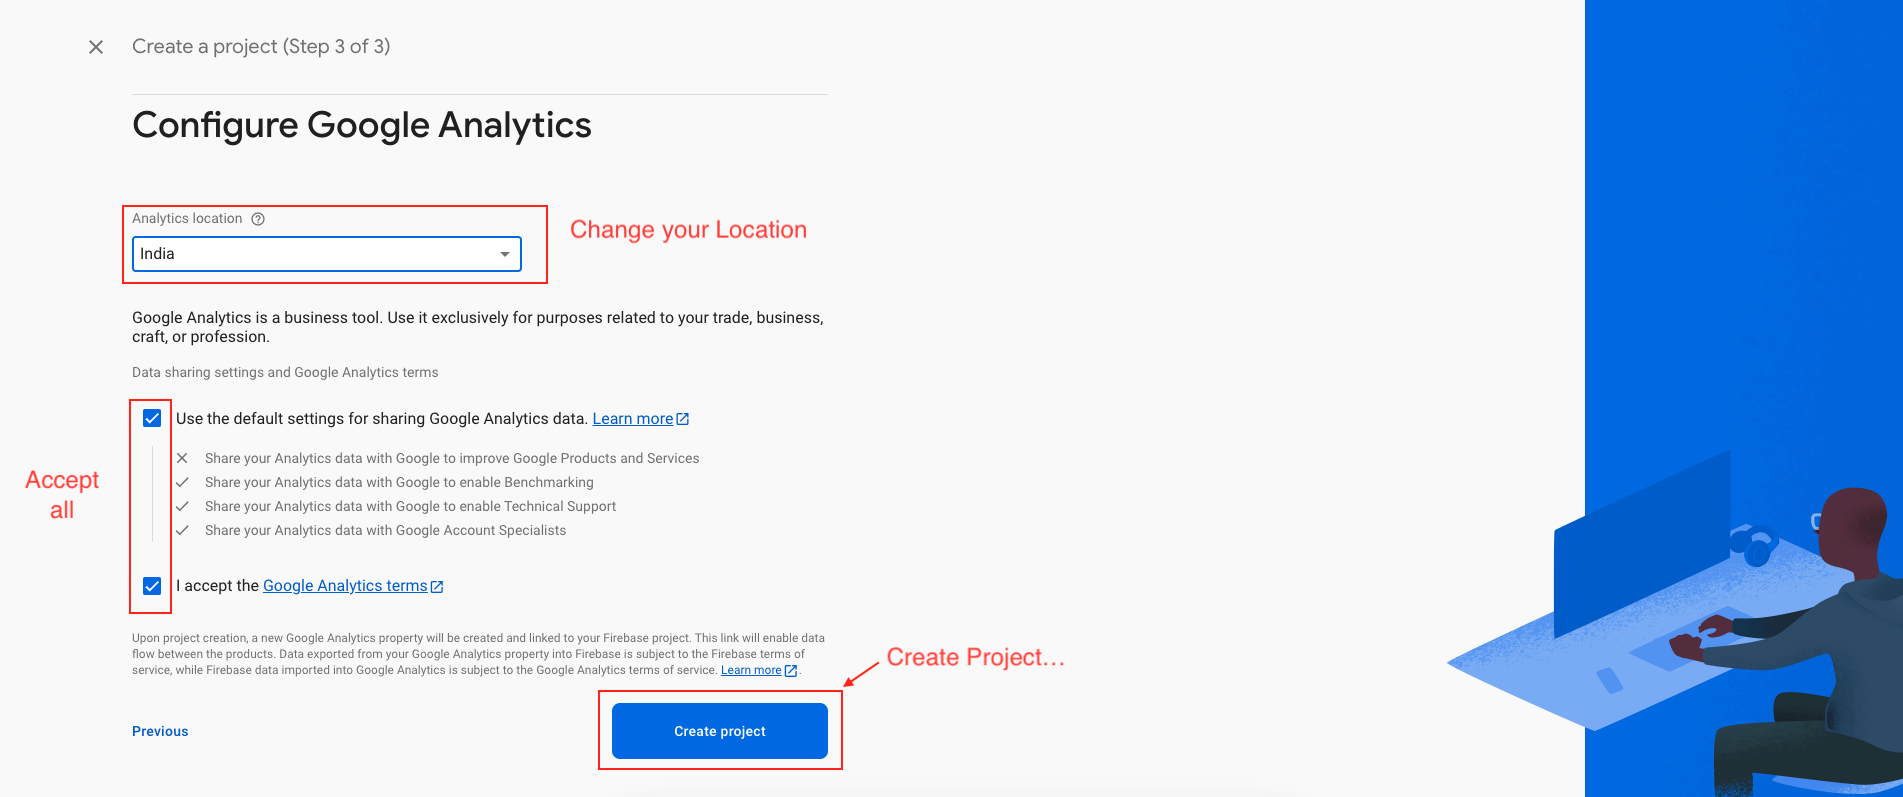
Now, we have to give a name and id to the project, enable Google Analytics for the project, set an analytics location, and accept all the terms and conditions. Firebase console automatically creates a unique id for the project.
-
Step 1 : Giving a name to the project
-
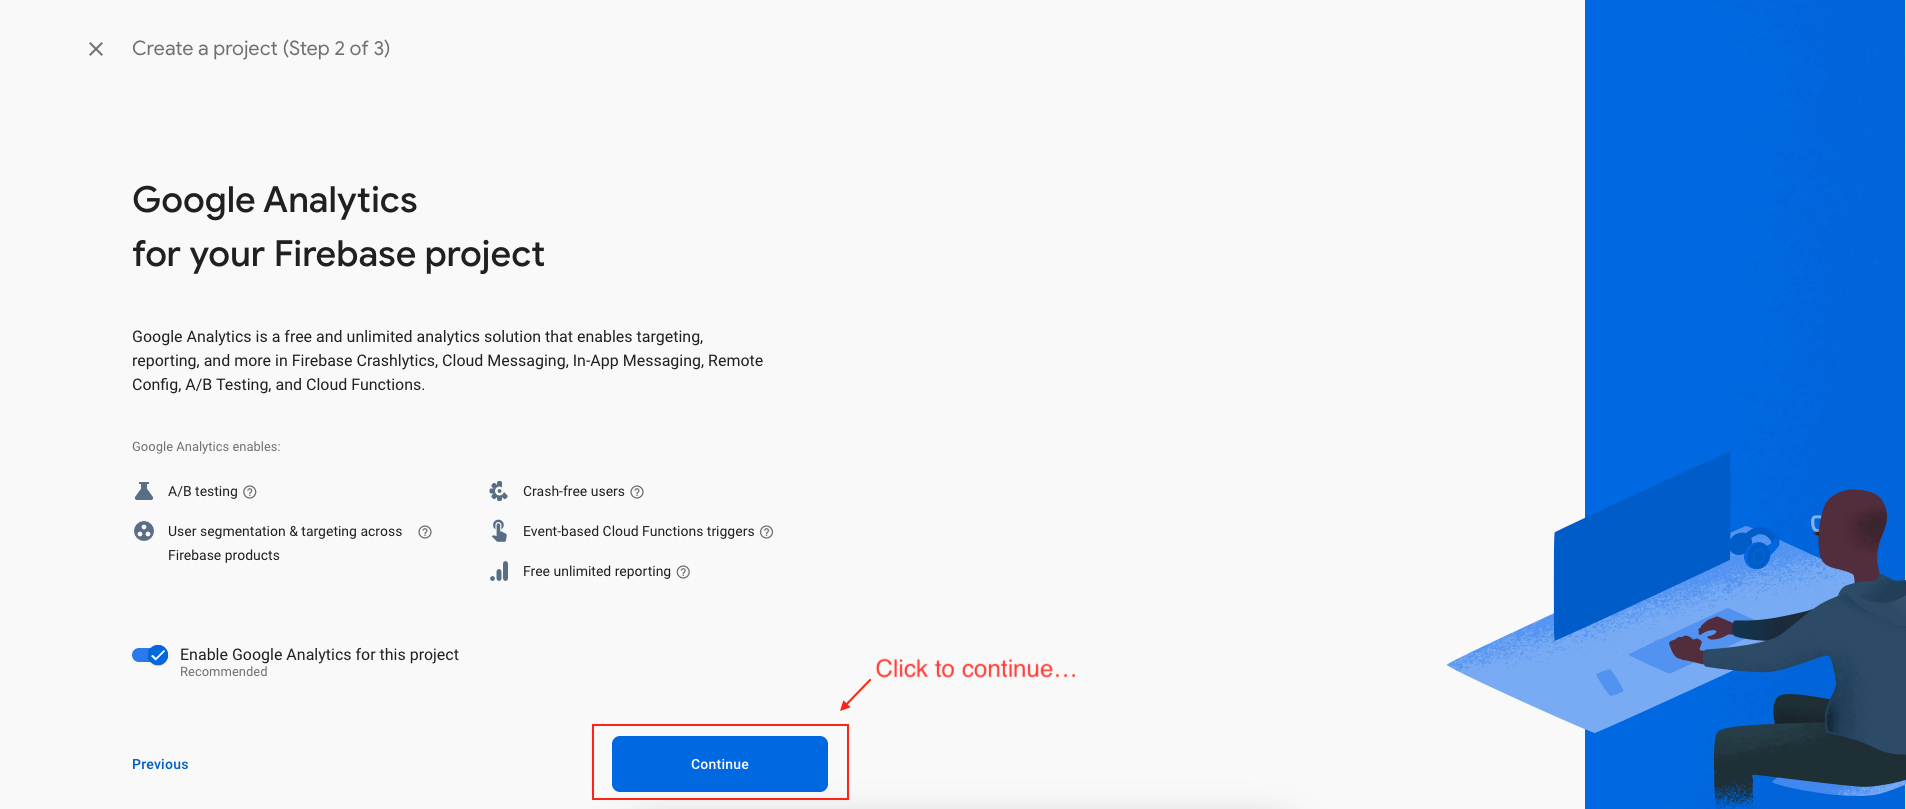
Step 2 : Enable Google analytics for the project
-
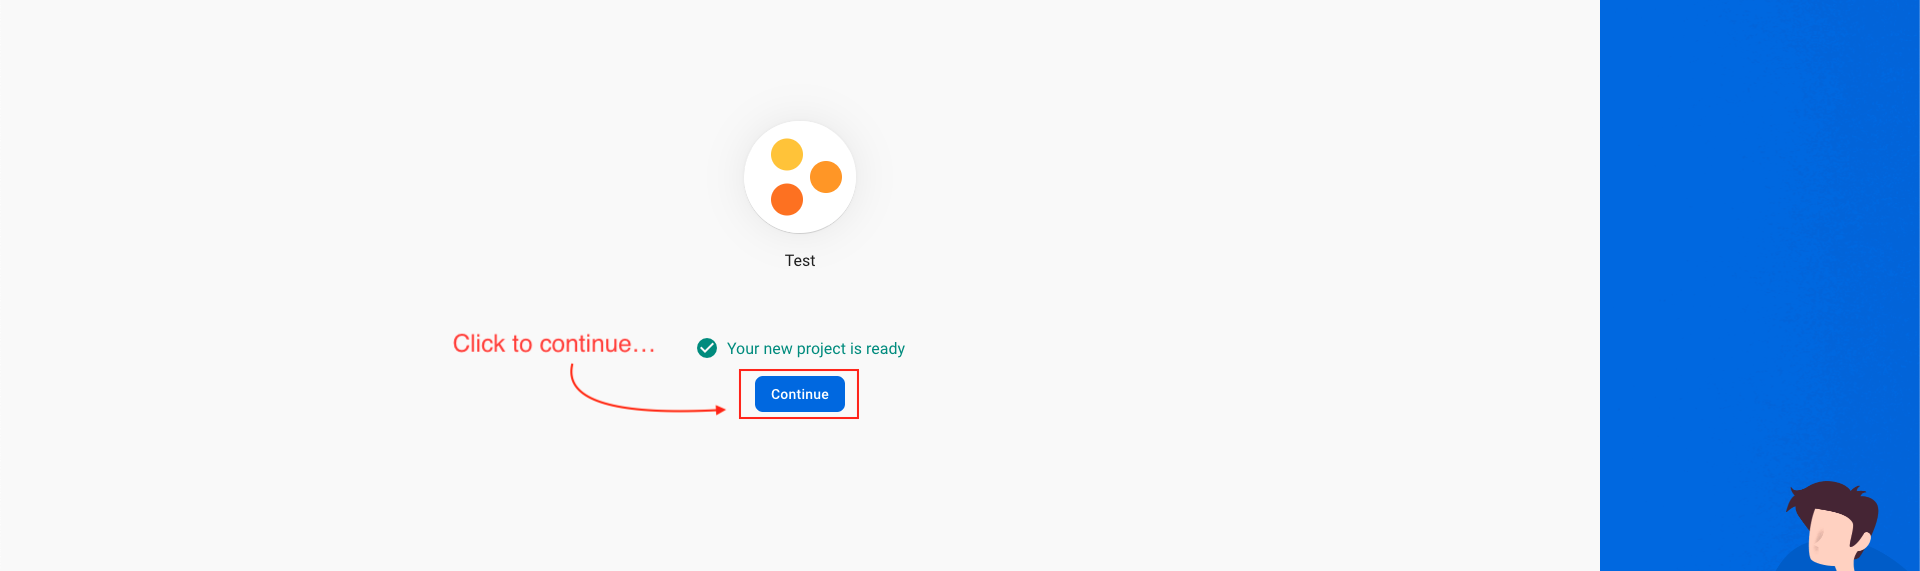
Step 3 : First Choose default Firebase account and then create project

Add Android app to Firebase
-
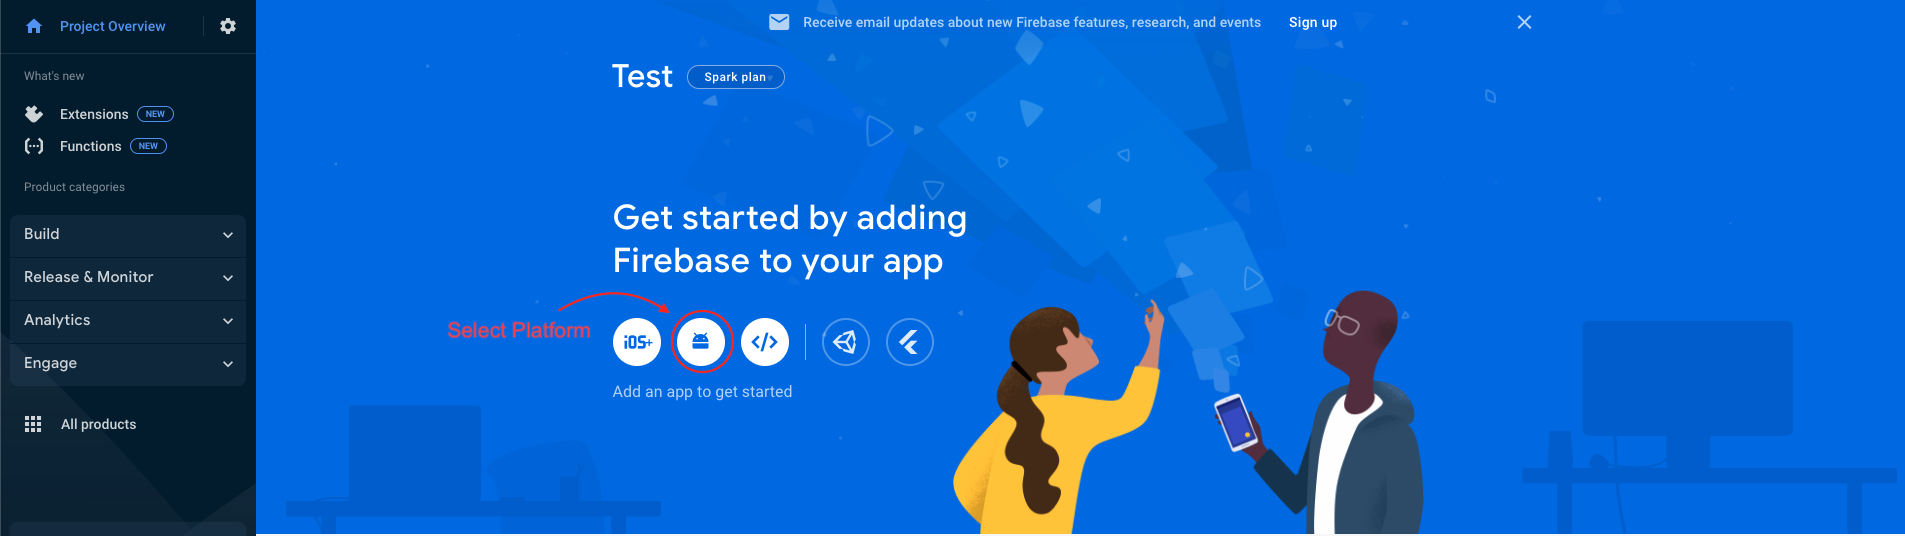
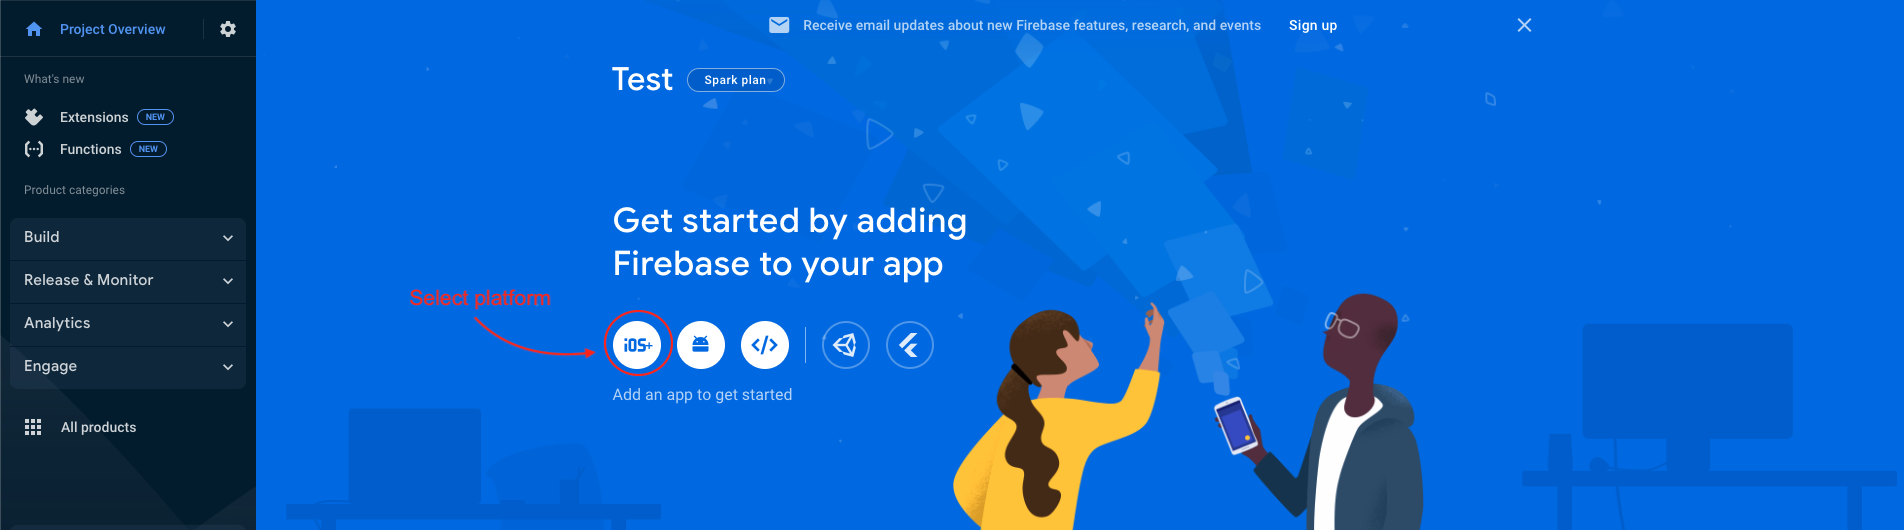
In the next step, we have to choose the platform to add Firebase to our application. The platform can be Android, iOS, Web etc..
-
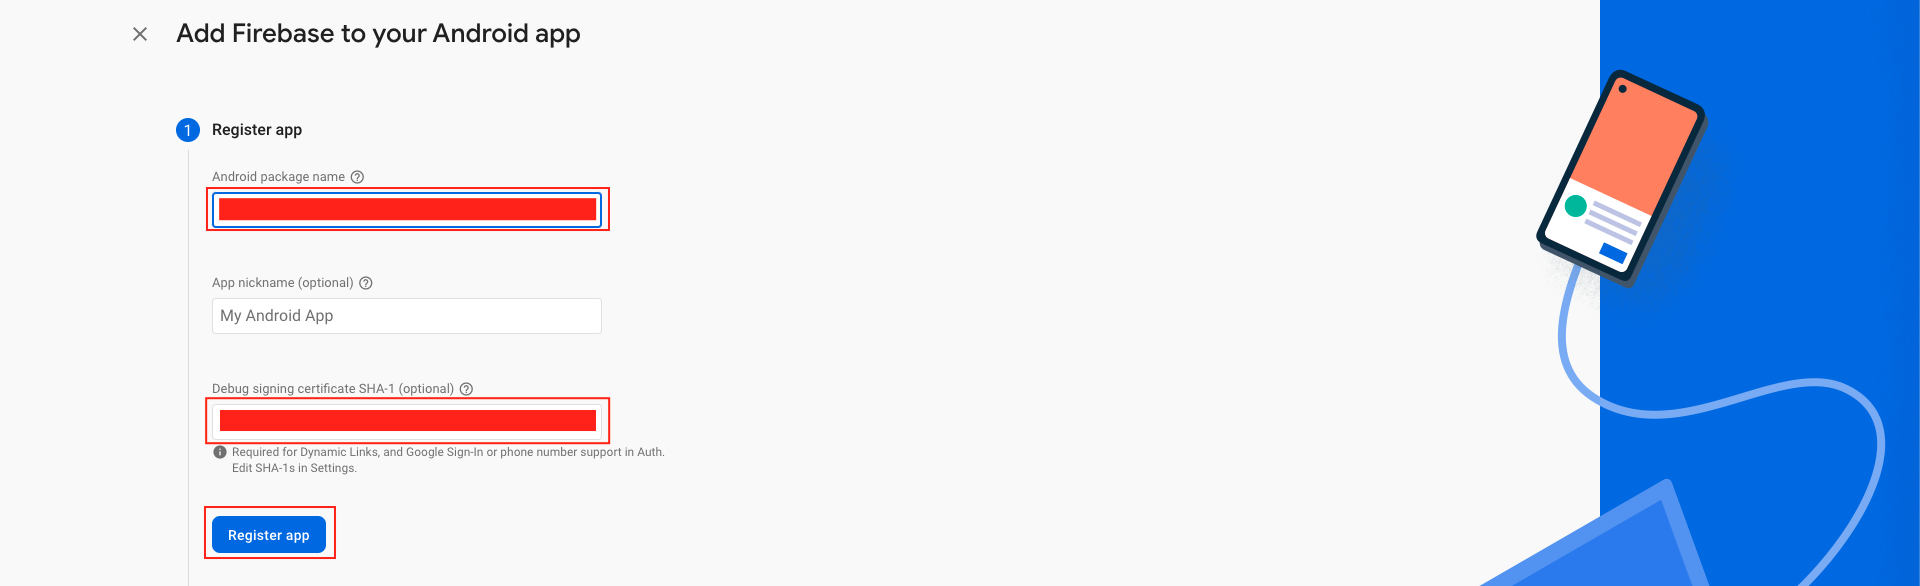
Your package name is generally the applicationId in your build.gradle (app-level) file
-
See this page for information on using keytool to get the SHA-1 hash of your signing certificate
-
Add your applicationid in the first field and SHA-1 to the third field as shown in the image below.
-
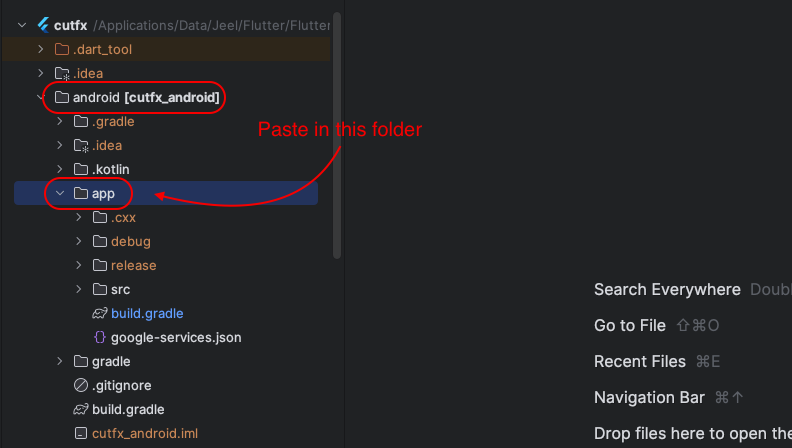
Download the google-services.json file & place it in your project's app root directory.
-
Back in the Firebase console-setup workflow, click Next to skip the remaining steps and then finish and complete

Add iOS app in Firebase
-
We have to choose the platform to add Firebase to our application. Click on iOS.
-
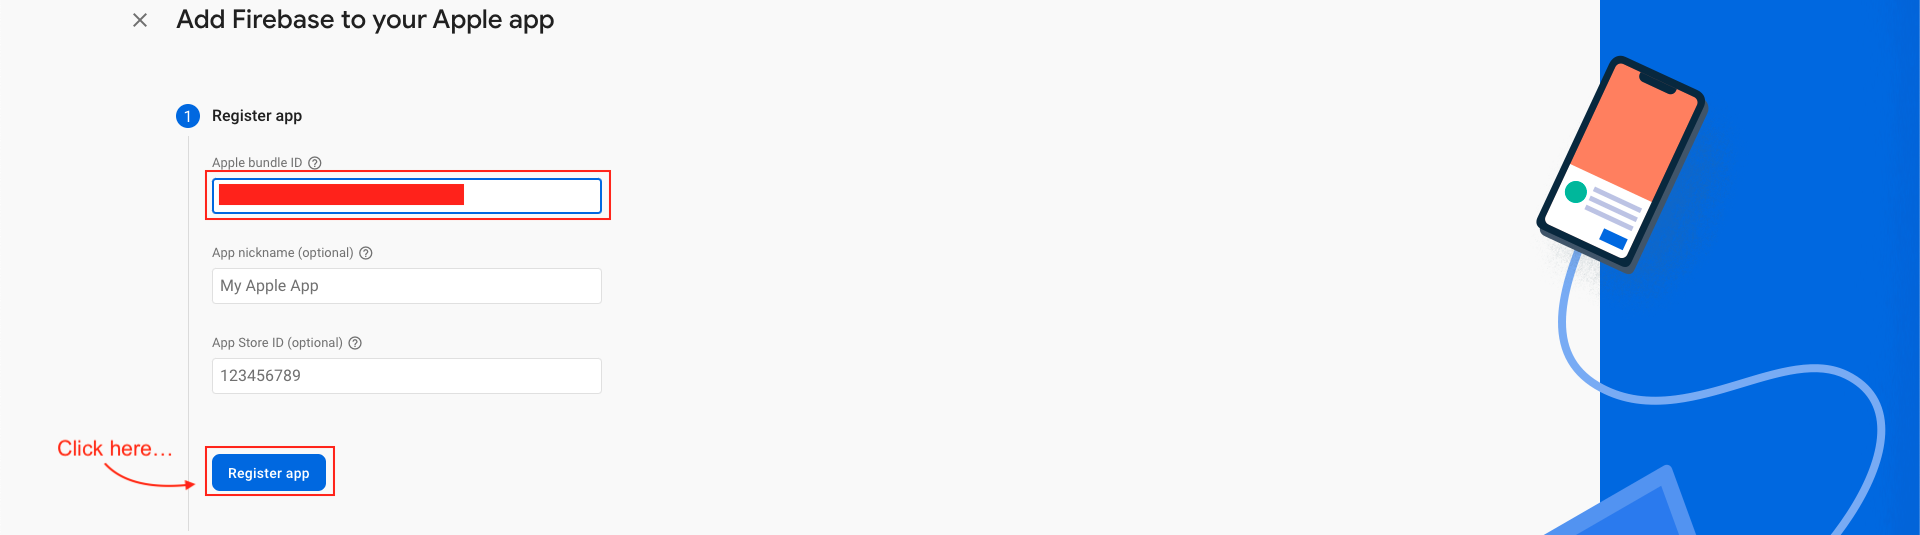
On the next screen, enter your iOS bundle ID & App nickname and click on Register App. You can find your bundle ID in the General tab for your app's primary target in Xcode. If specified, the app nickname will be used throughout the Firebase console to represent this app. Nicknames aren't visible to users.
-
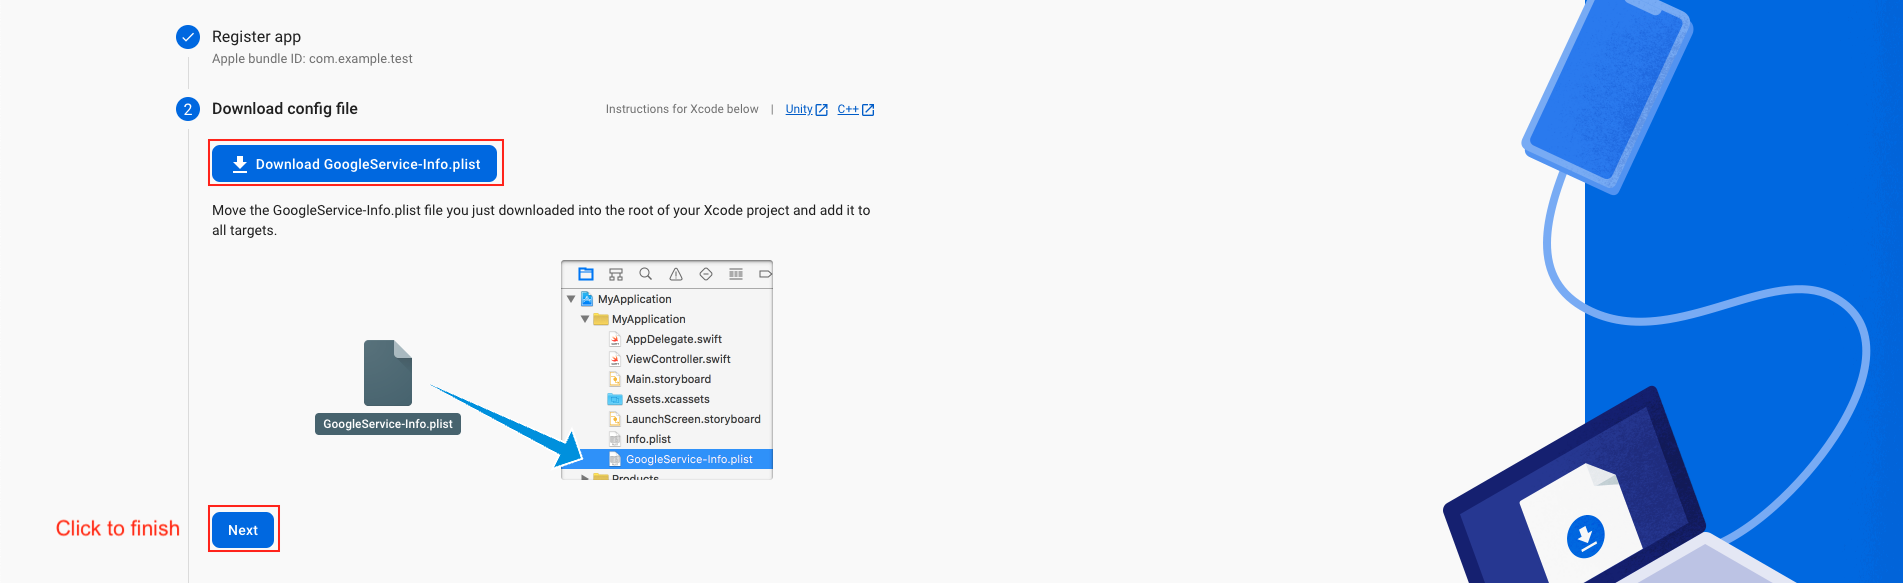
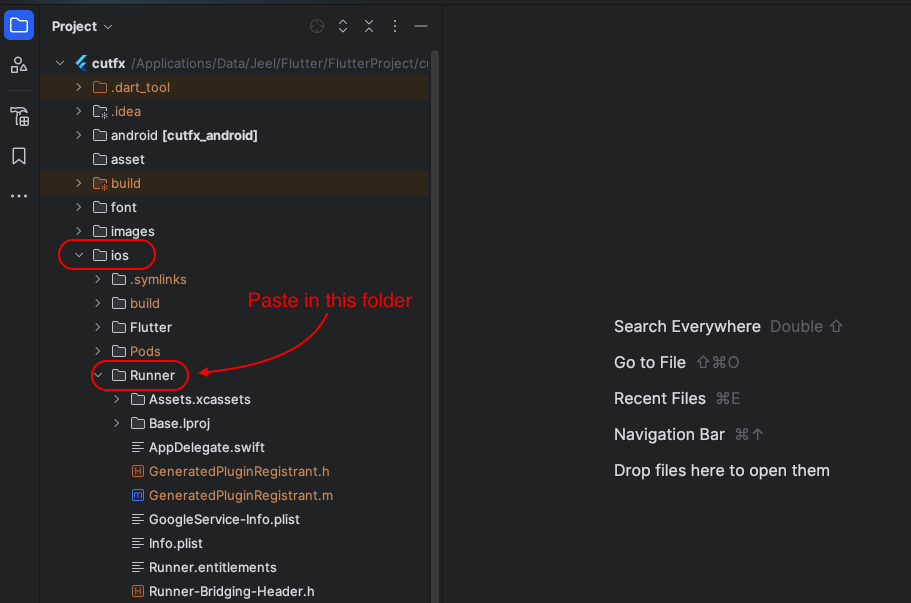
Download the GoogleService-Info.plist file & move the GoogleService-Info.plist file you just downloaded into the root of your Xcode project and add it to all targets. Make sure the config file is not appended with additional characters, like (2).
-
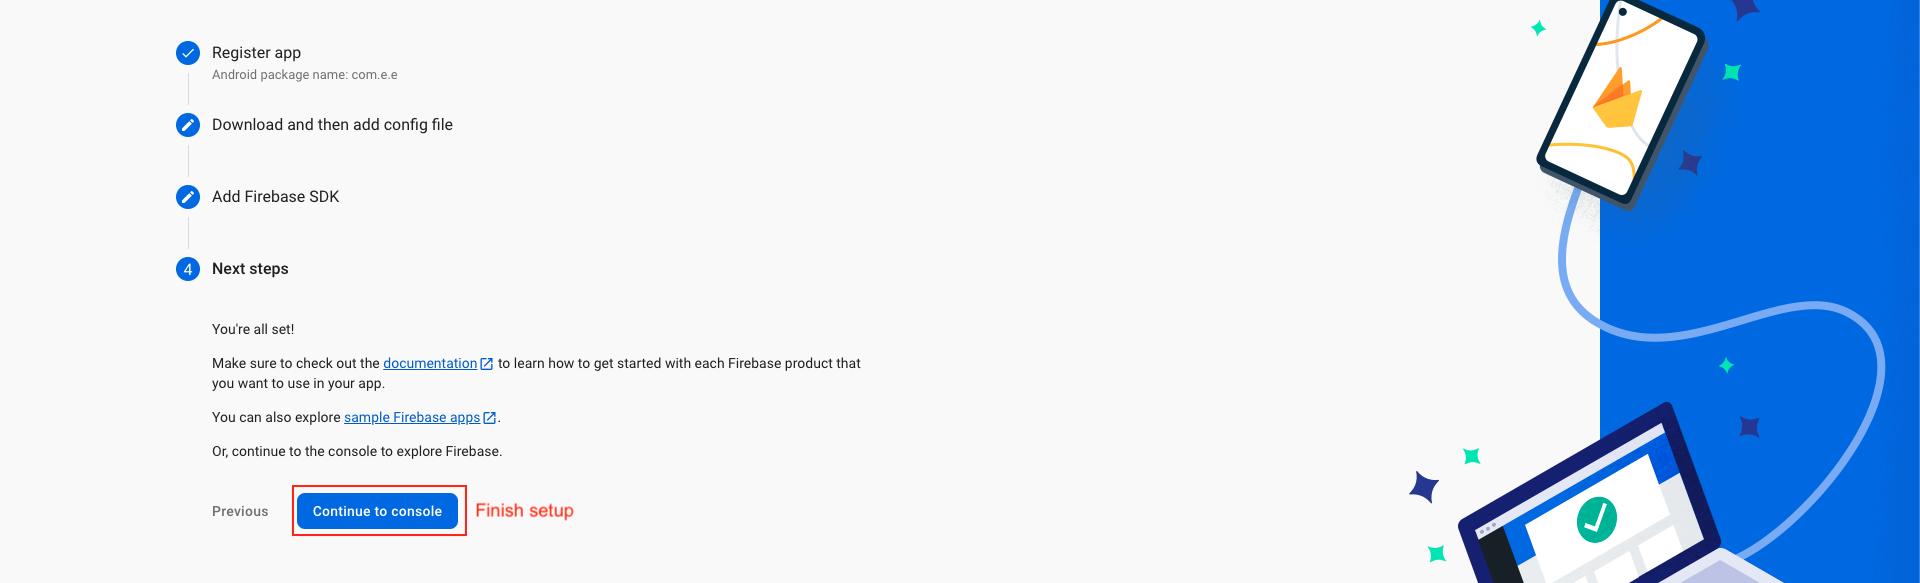
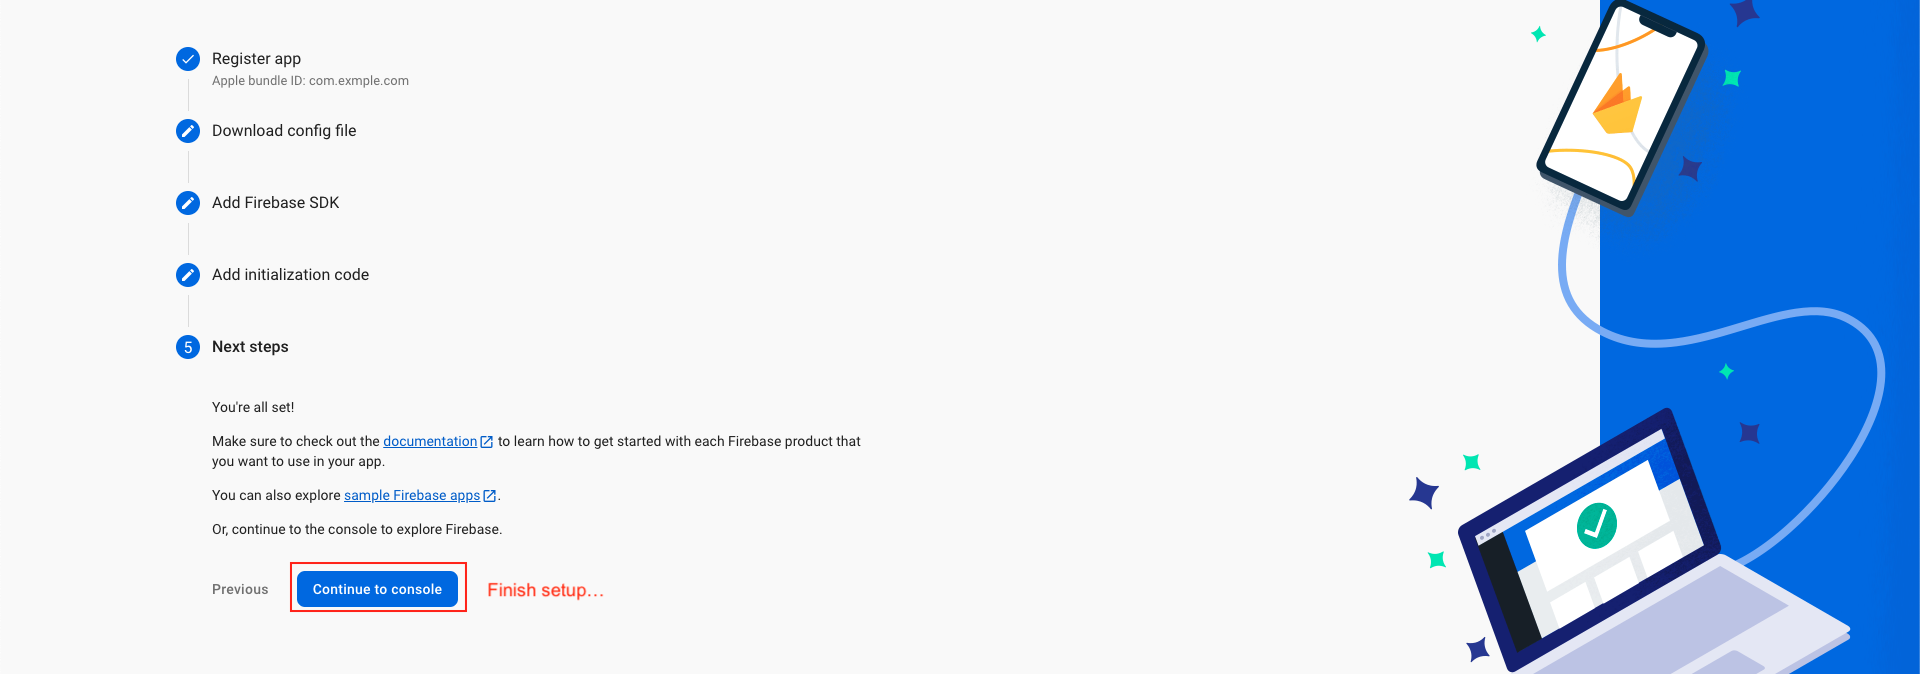
Back in the Firebase console-setup workflow, click Next to skip the remaining steps and the finish.
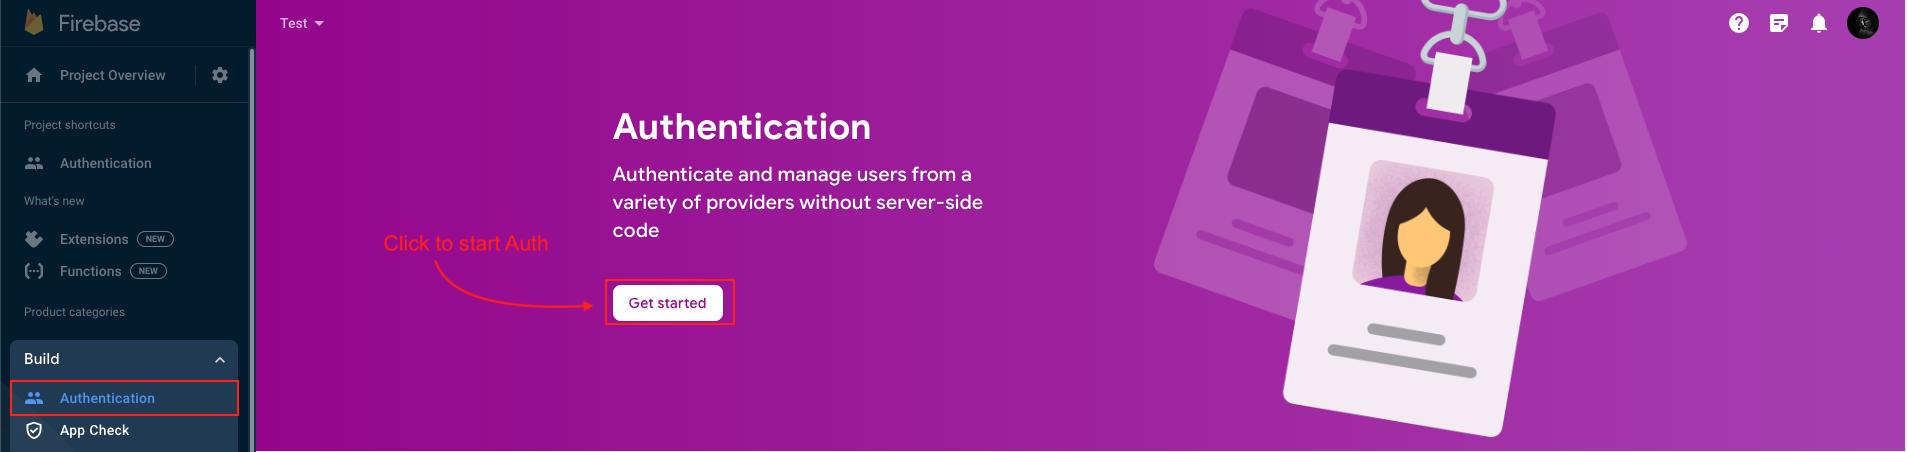
-
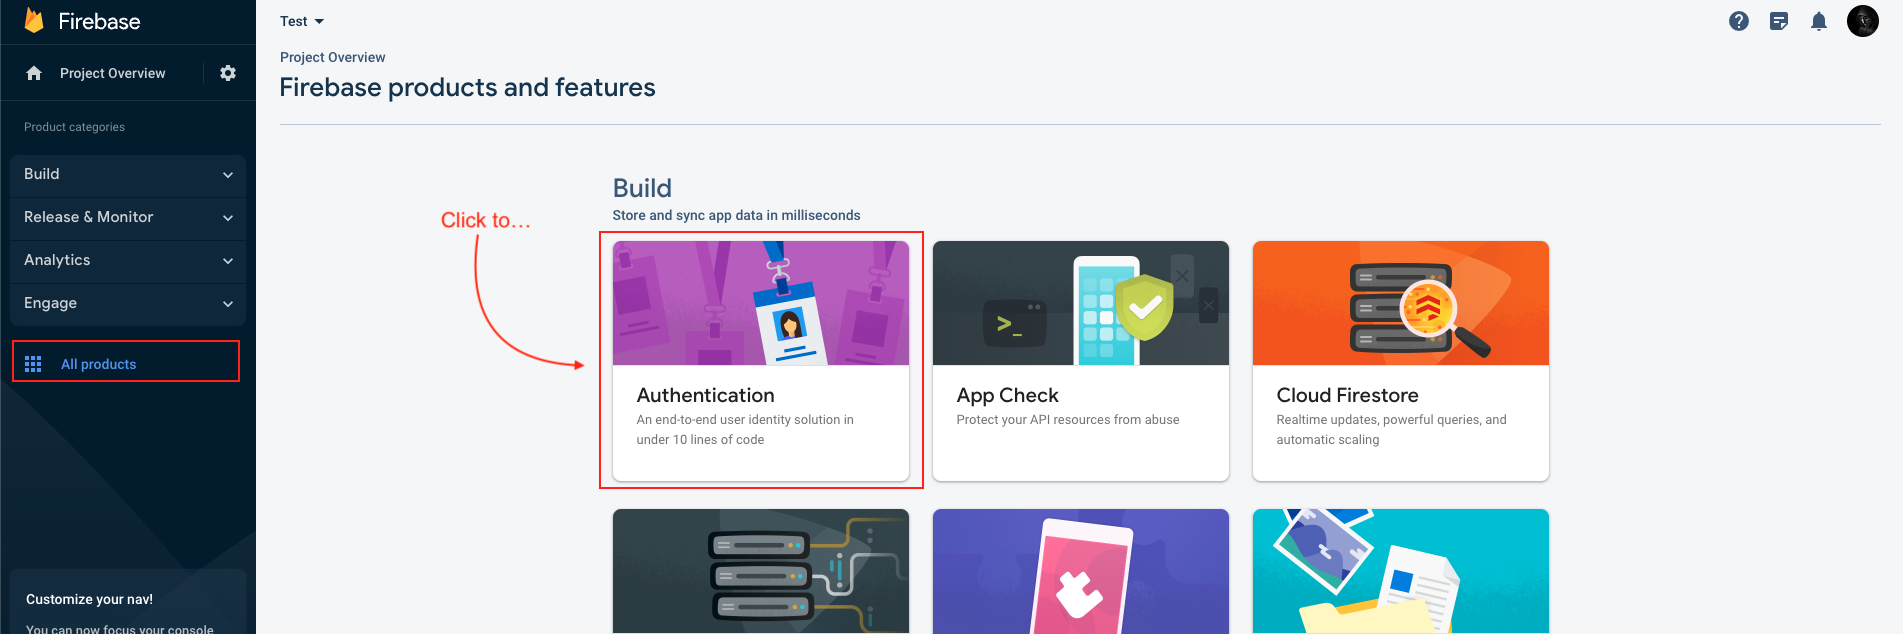
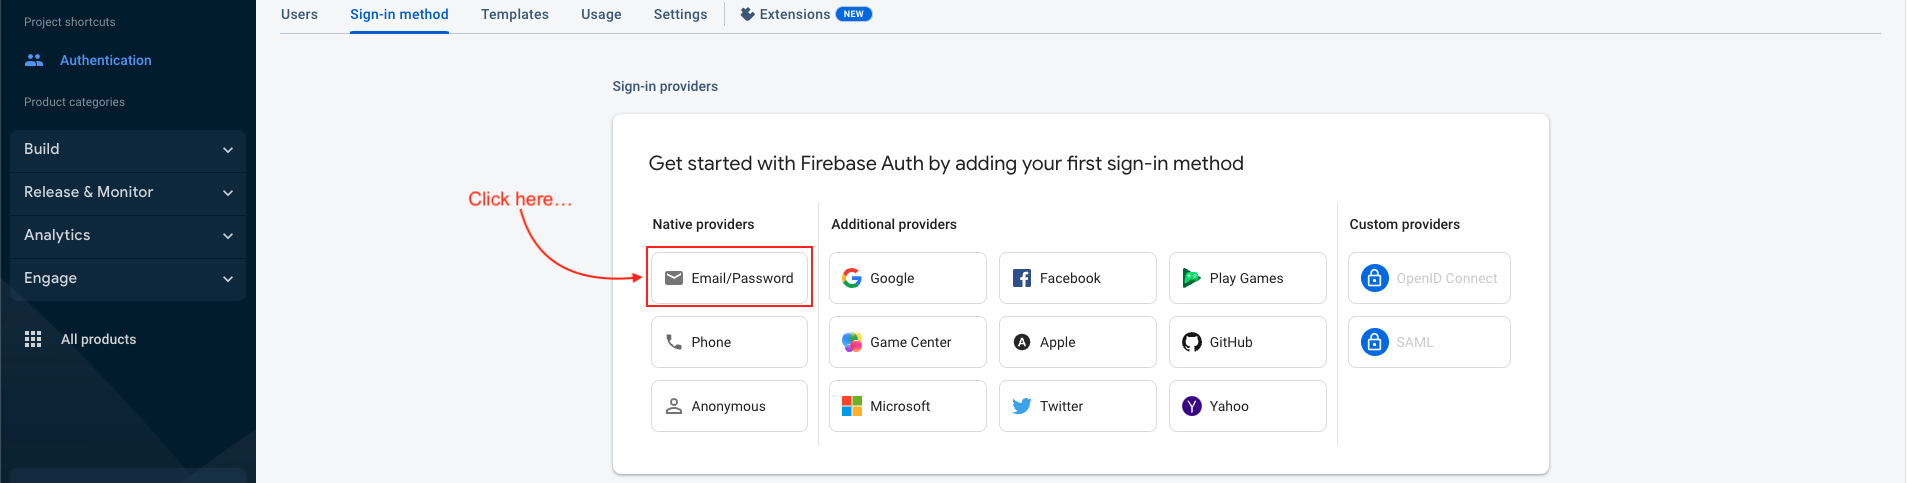
Click to Authentication and sign in mathod tab
-
Then click on email/password provider
-
Then both button switch to enable and save
-
Your email and password successfully Enable
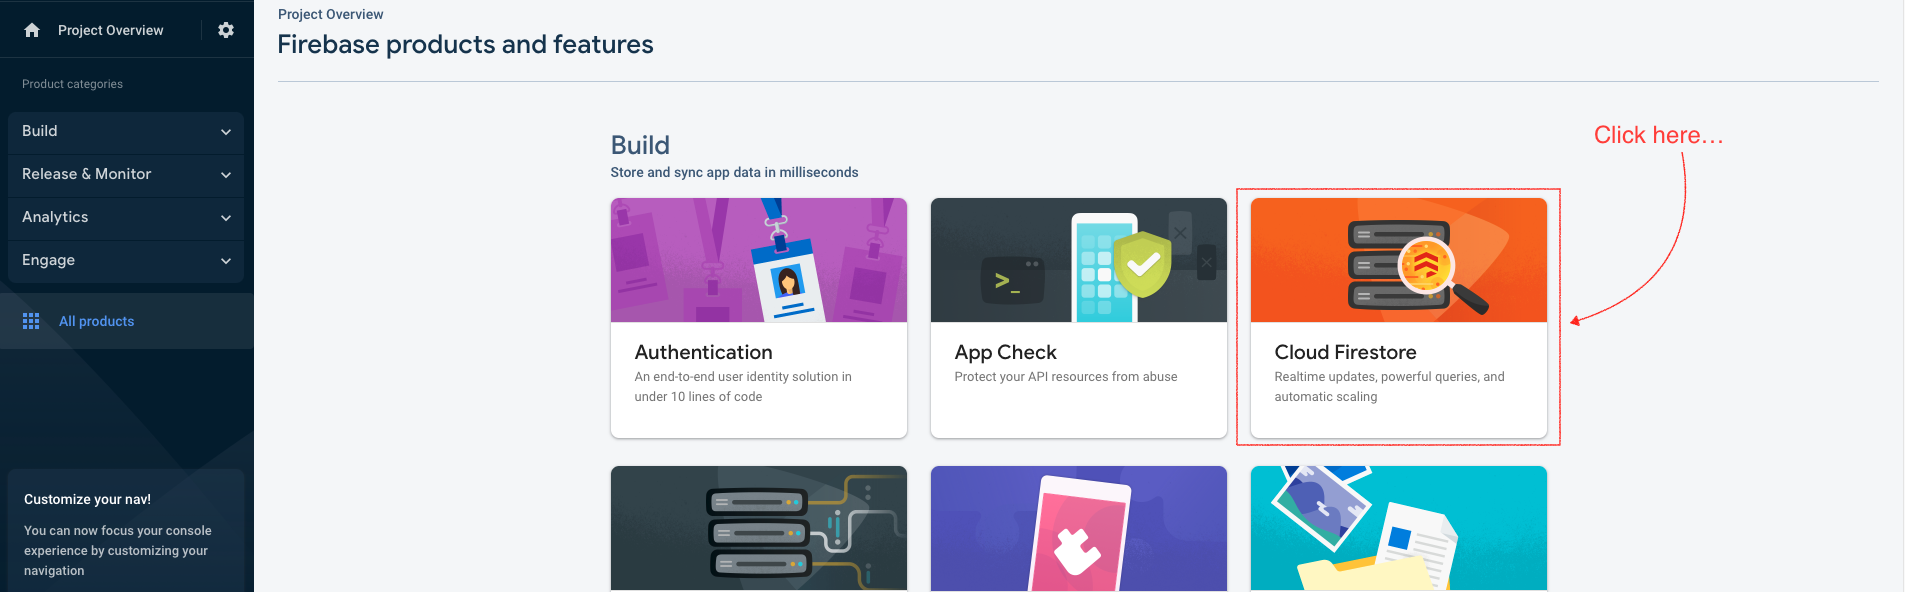
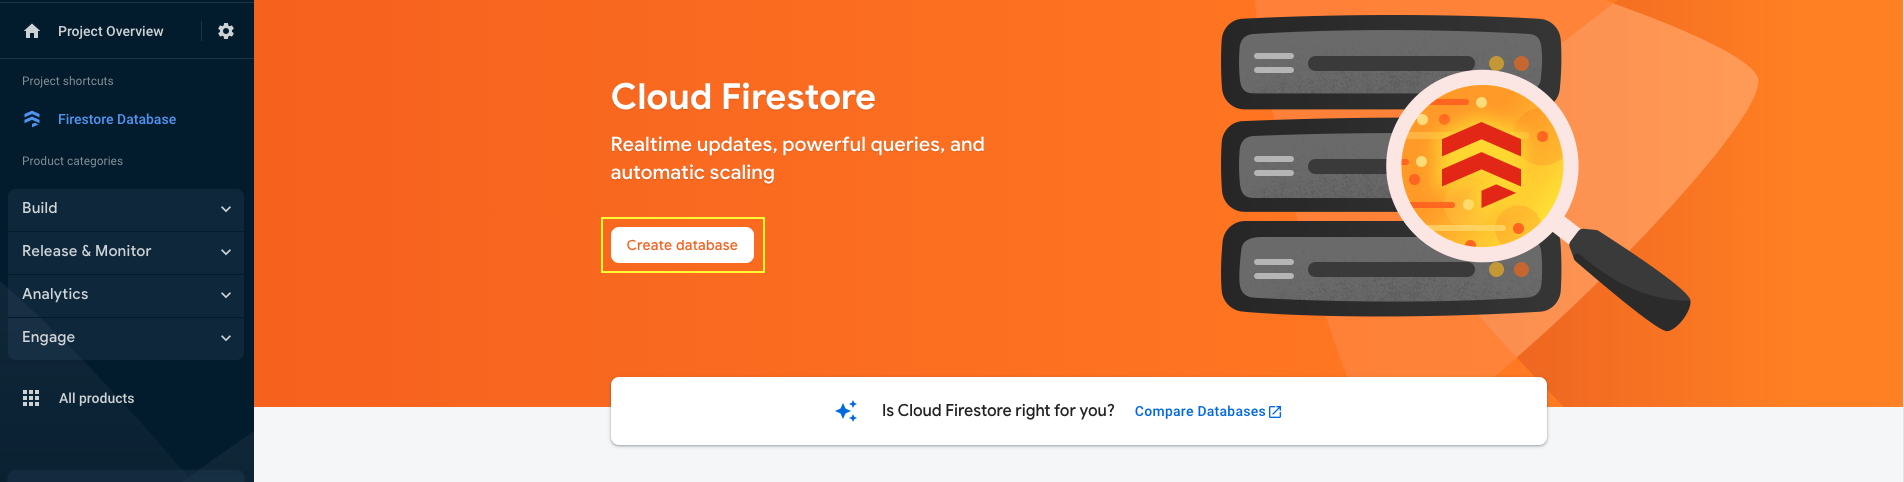
-
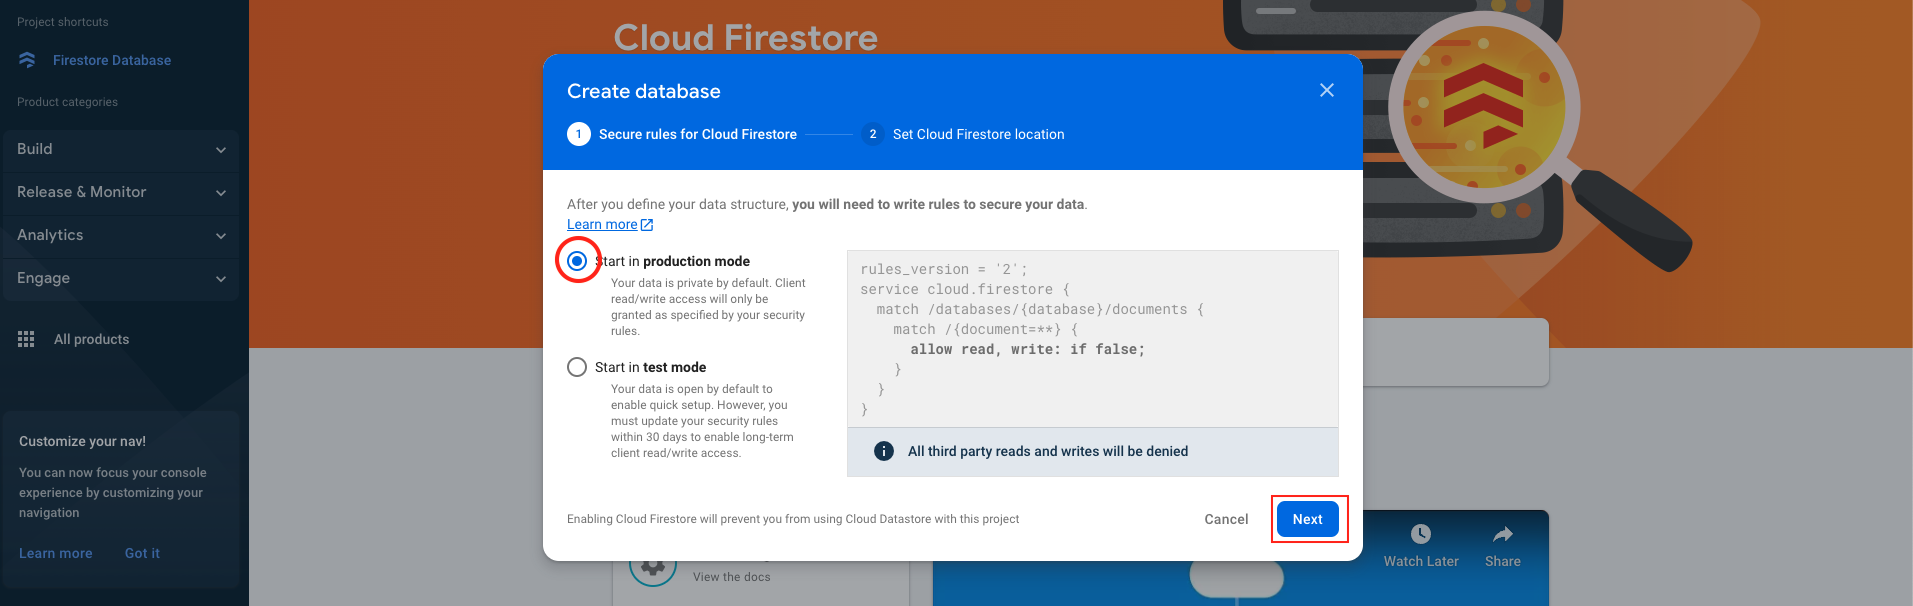
Step 1 : Click on Firestore Database and Create database.
-
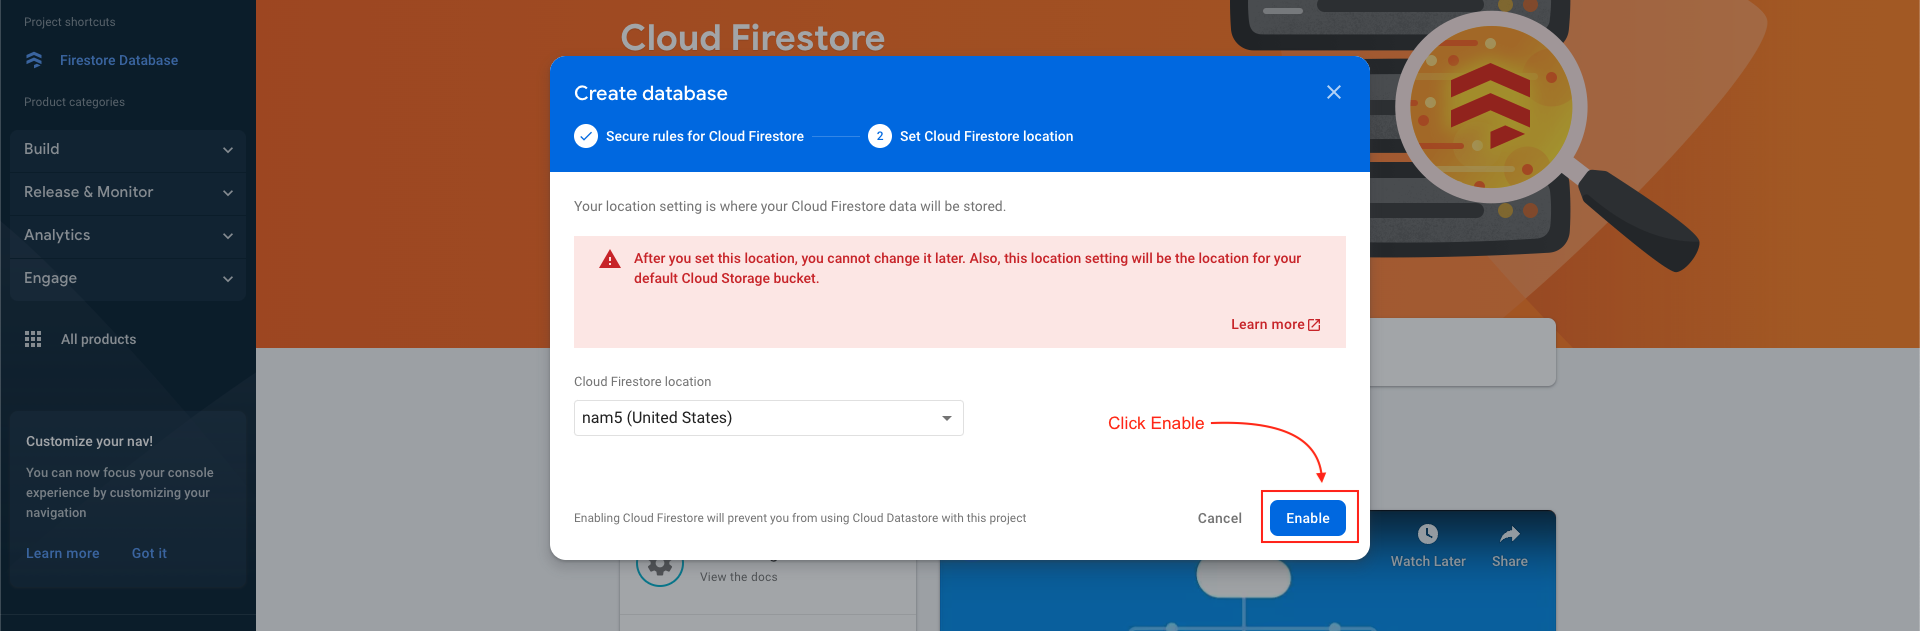
Step 2 : Model will be open click on Next.
-
Step 3 : Then click Enable button
-
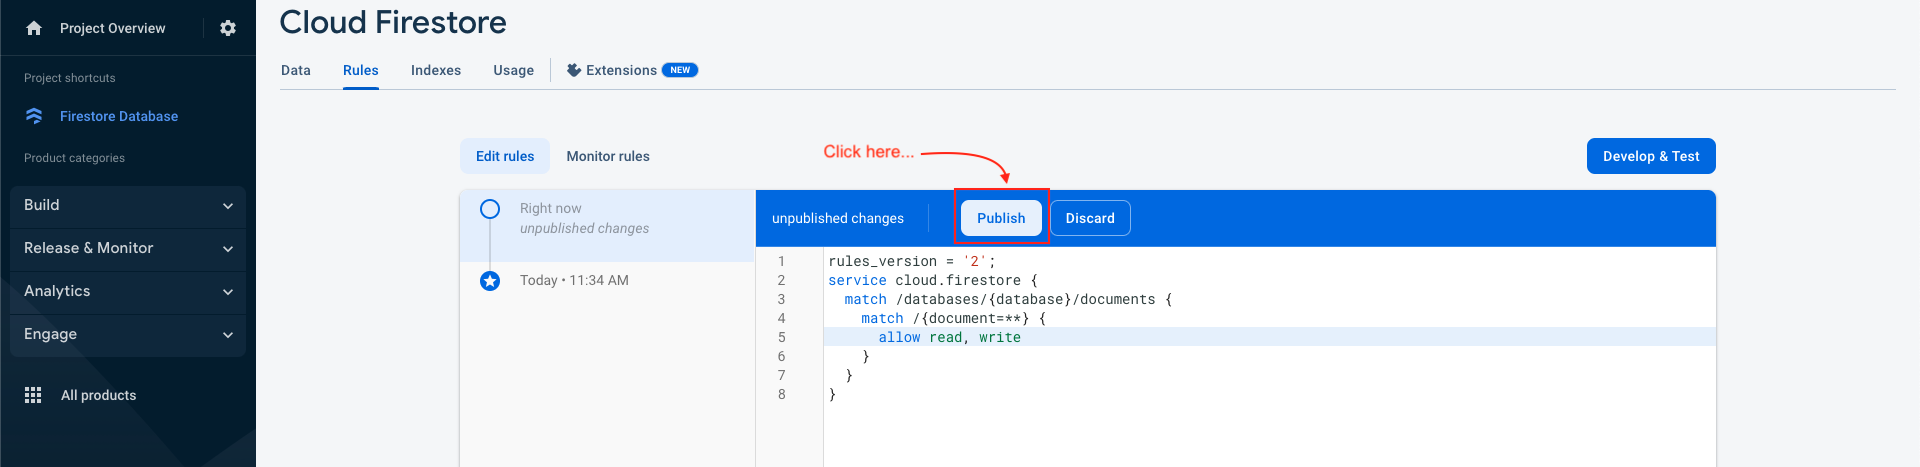
Step 4 : After create Database, You have to change rules of database then click publish button. Follow step, shown below.
-
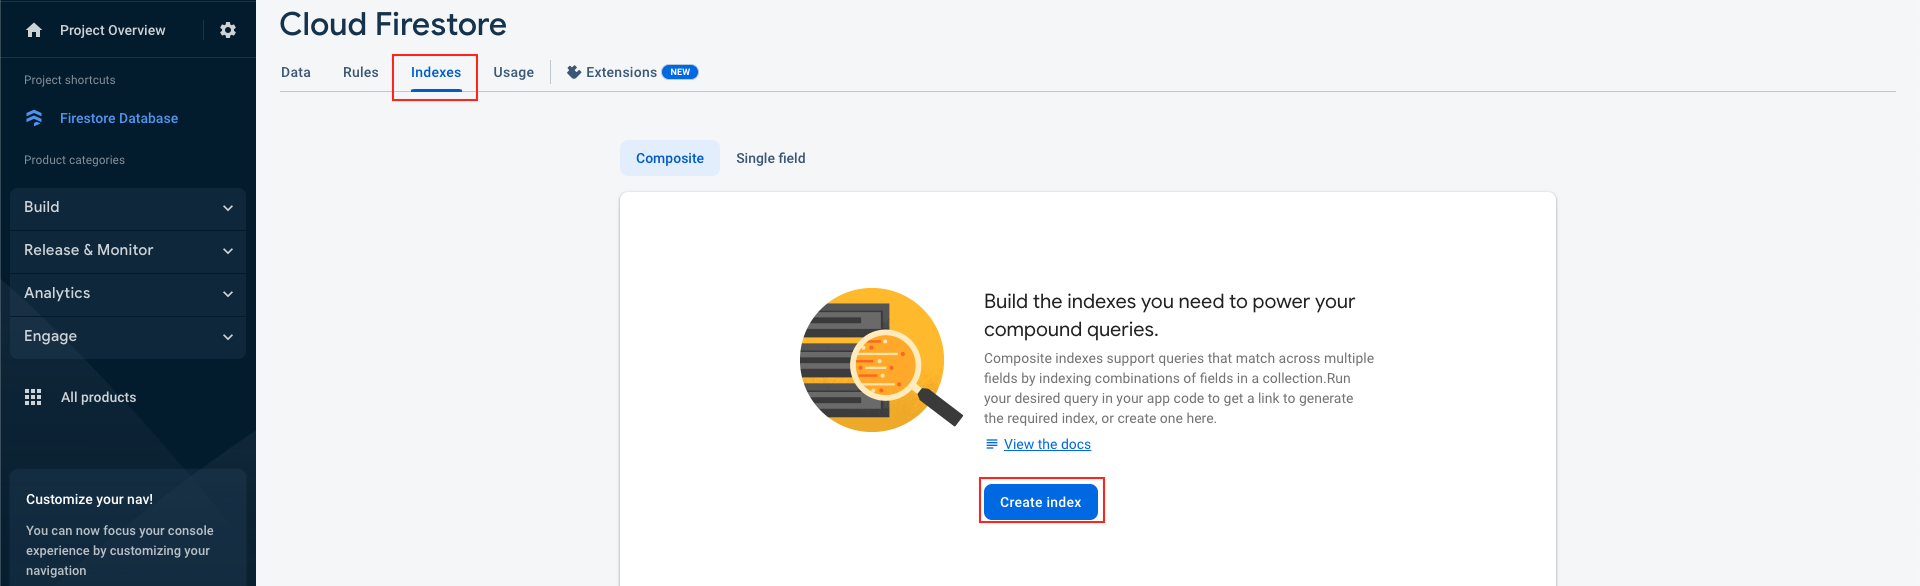
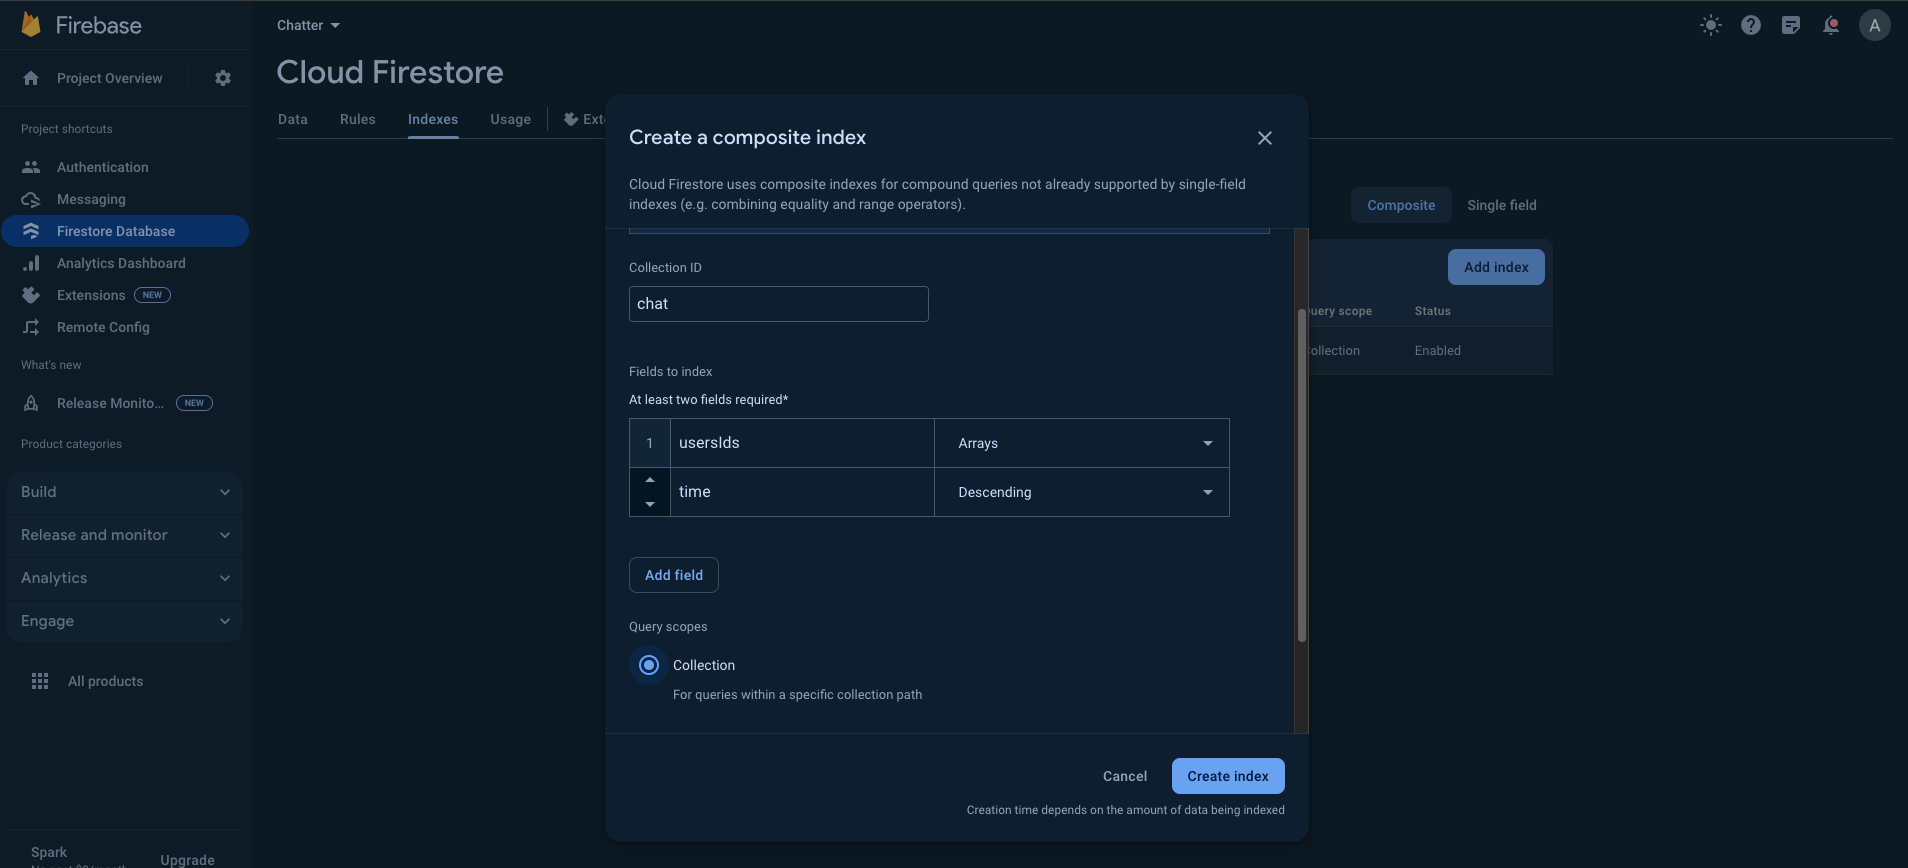
Step 5 : Create index in firestore.
-
Index
-
Collection ID : chats
-
Fields :
-
usersIds = Arrays
-
time = Descending
-
-
Query Scope : Select Collection same as below the image.
-
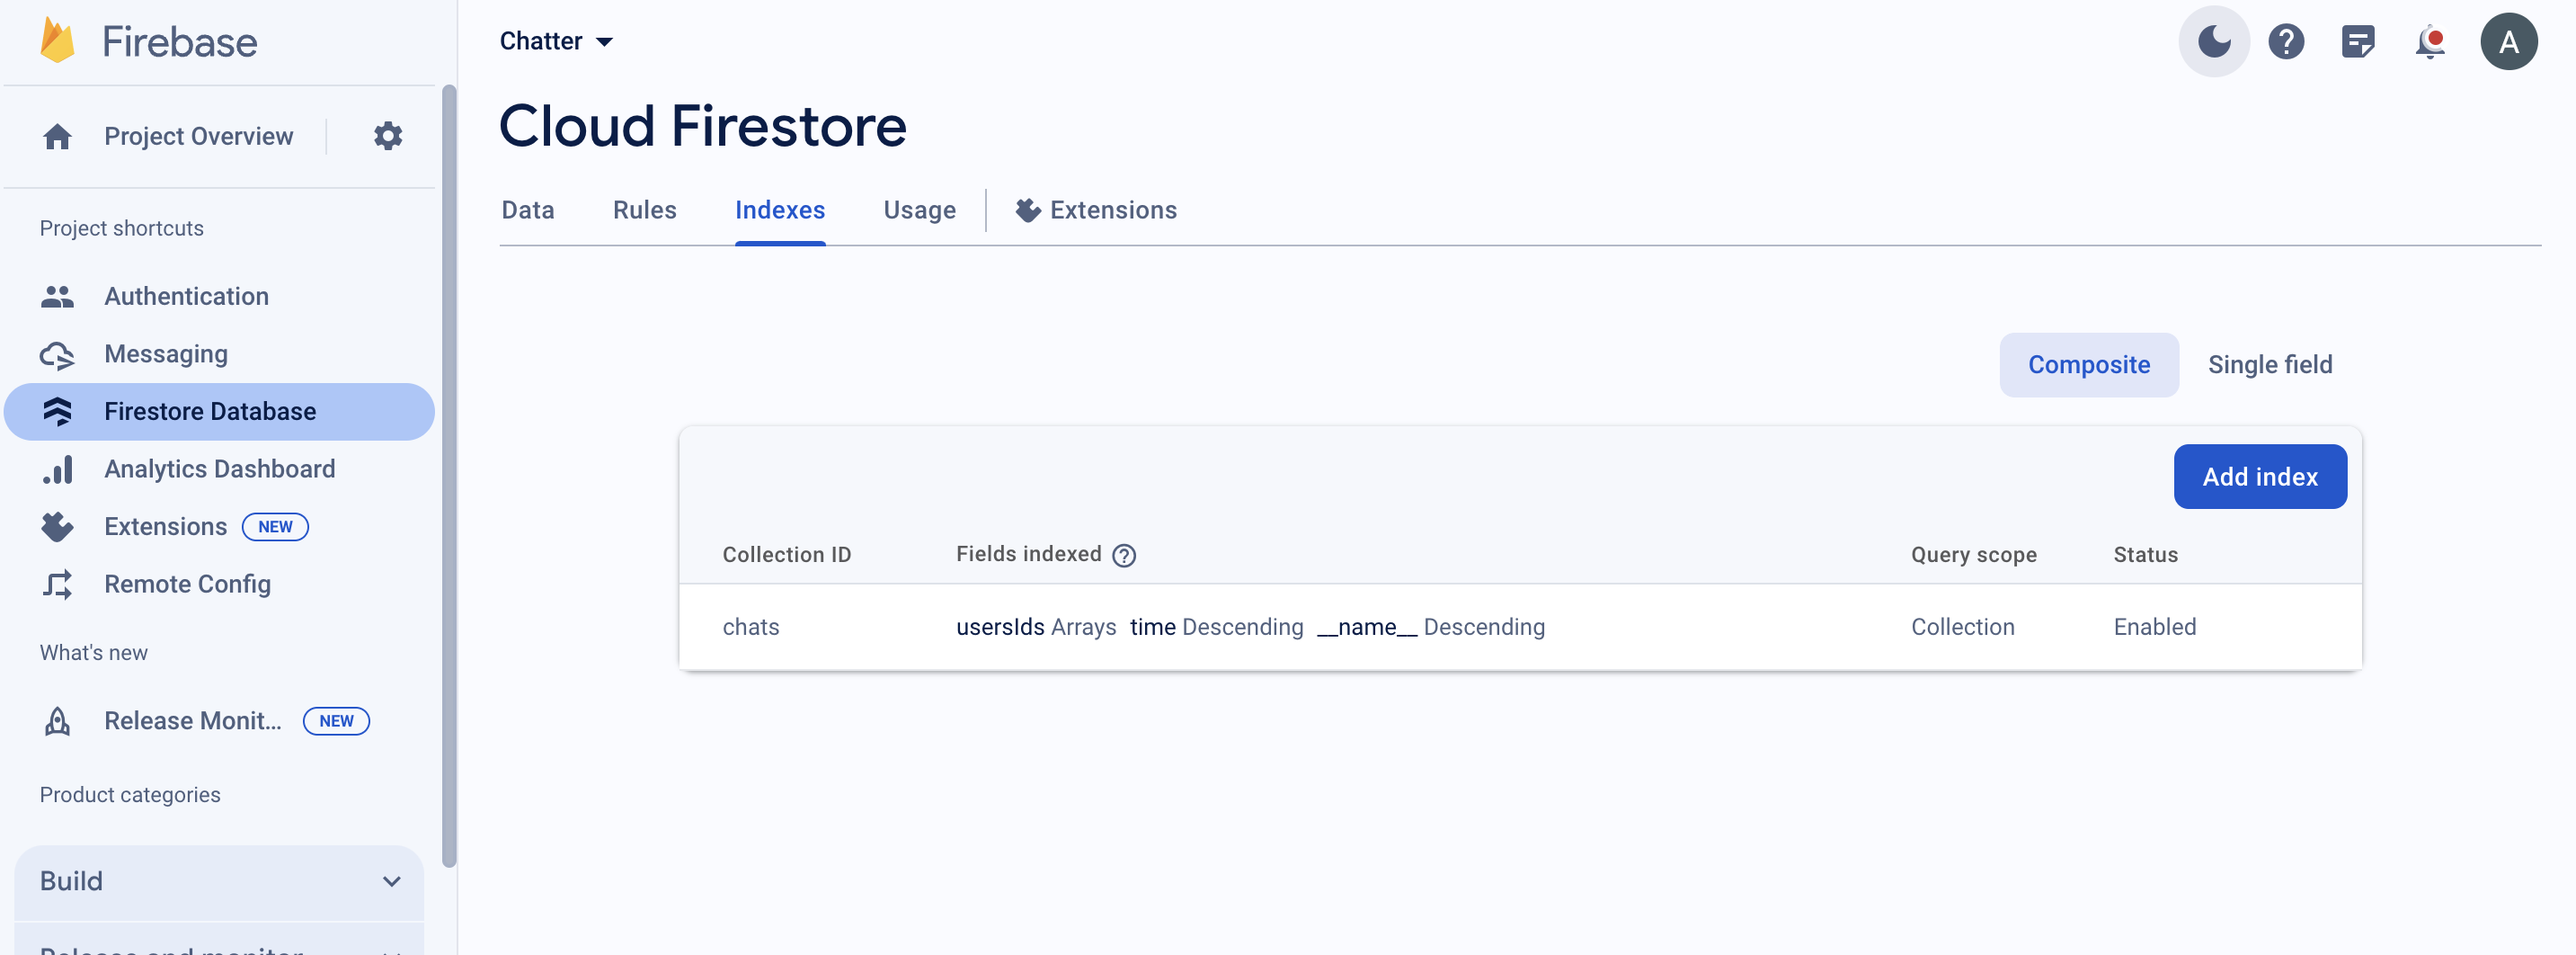
After completing this index, the result will look like the image below.
-
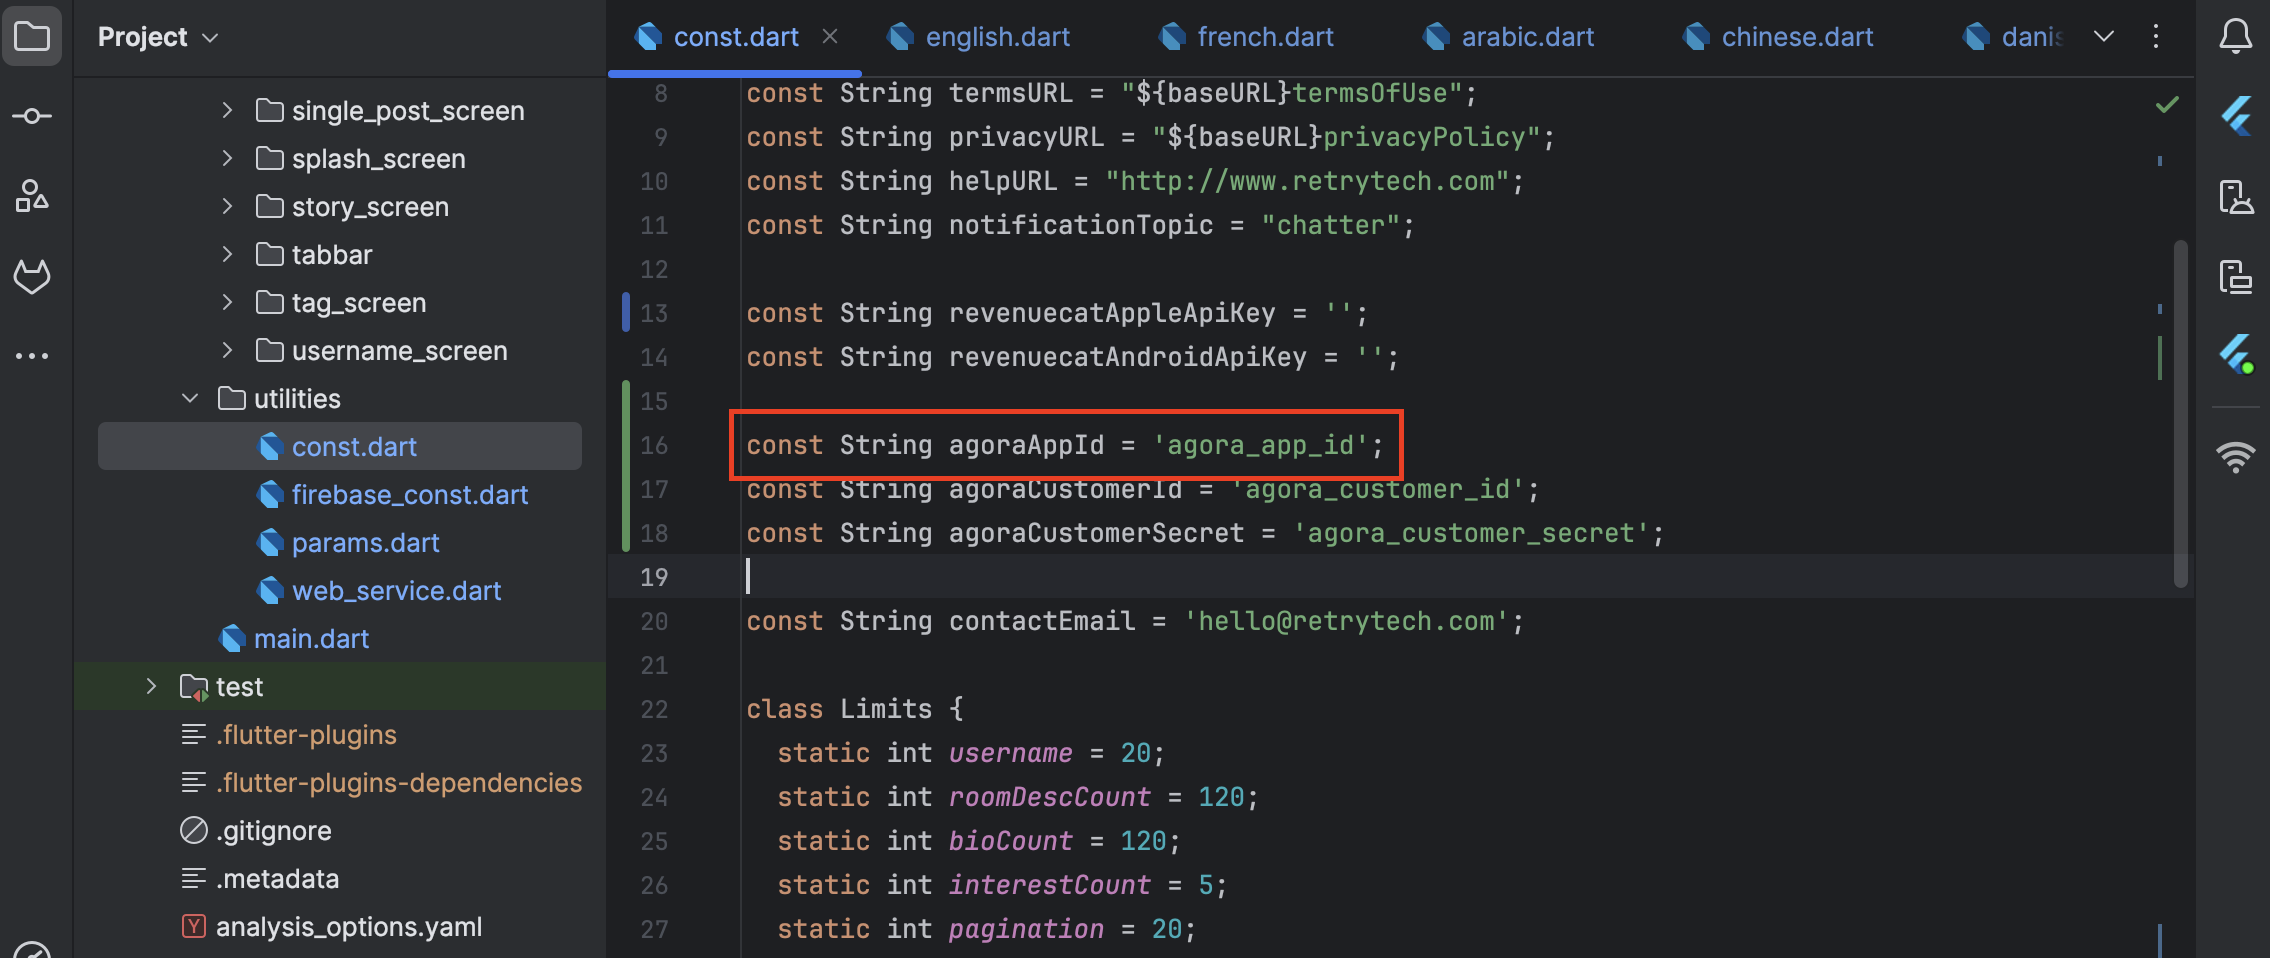
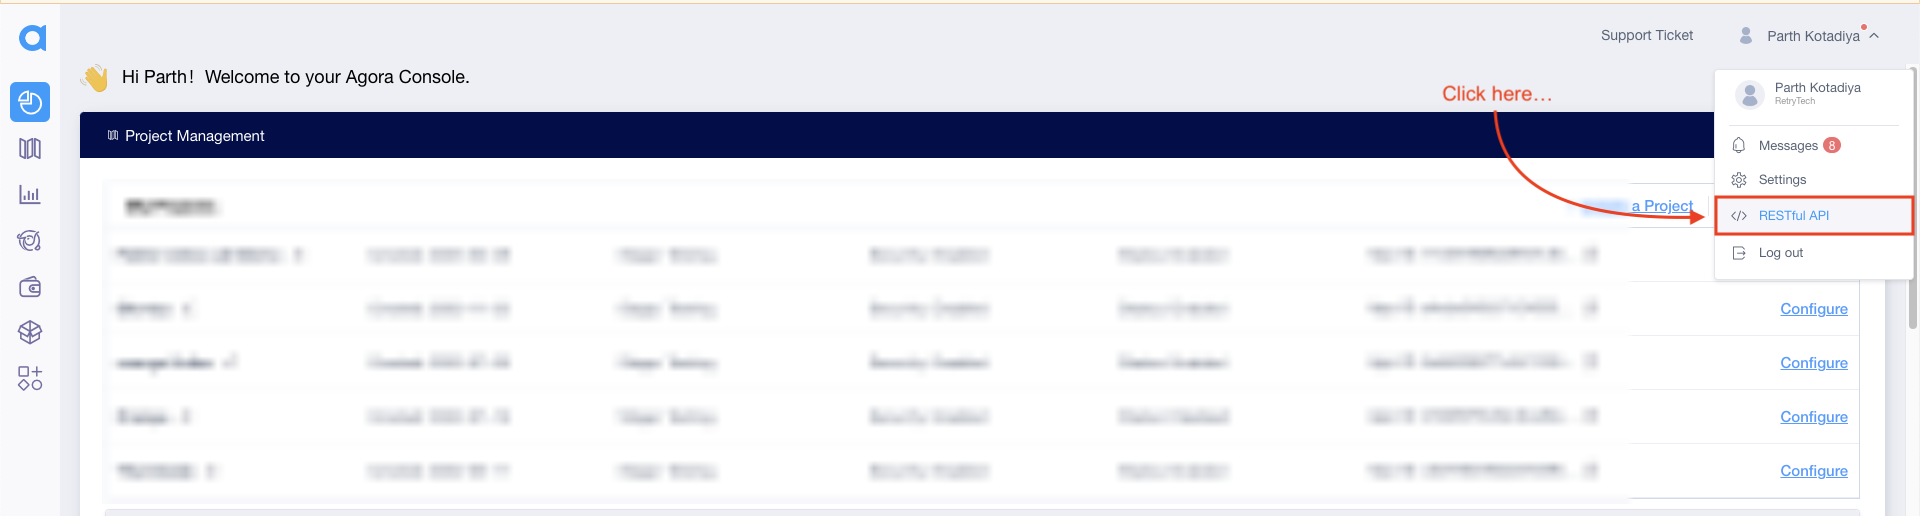
Follow This guide and setup project at agora and collect App id
-
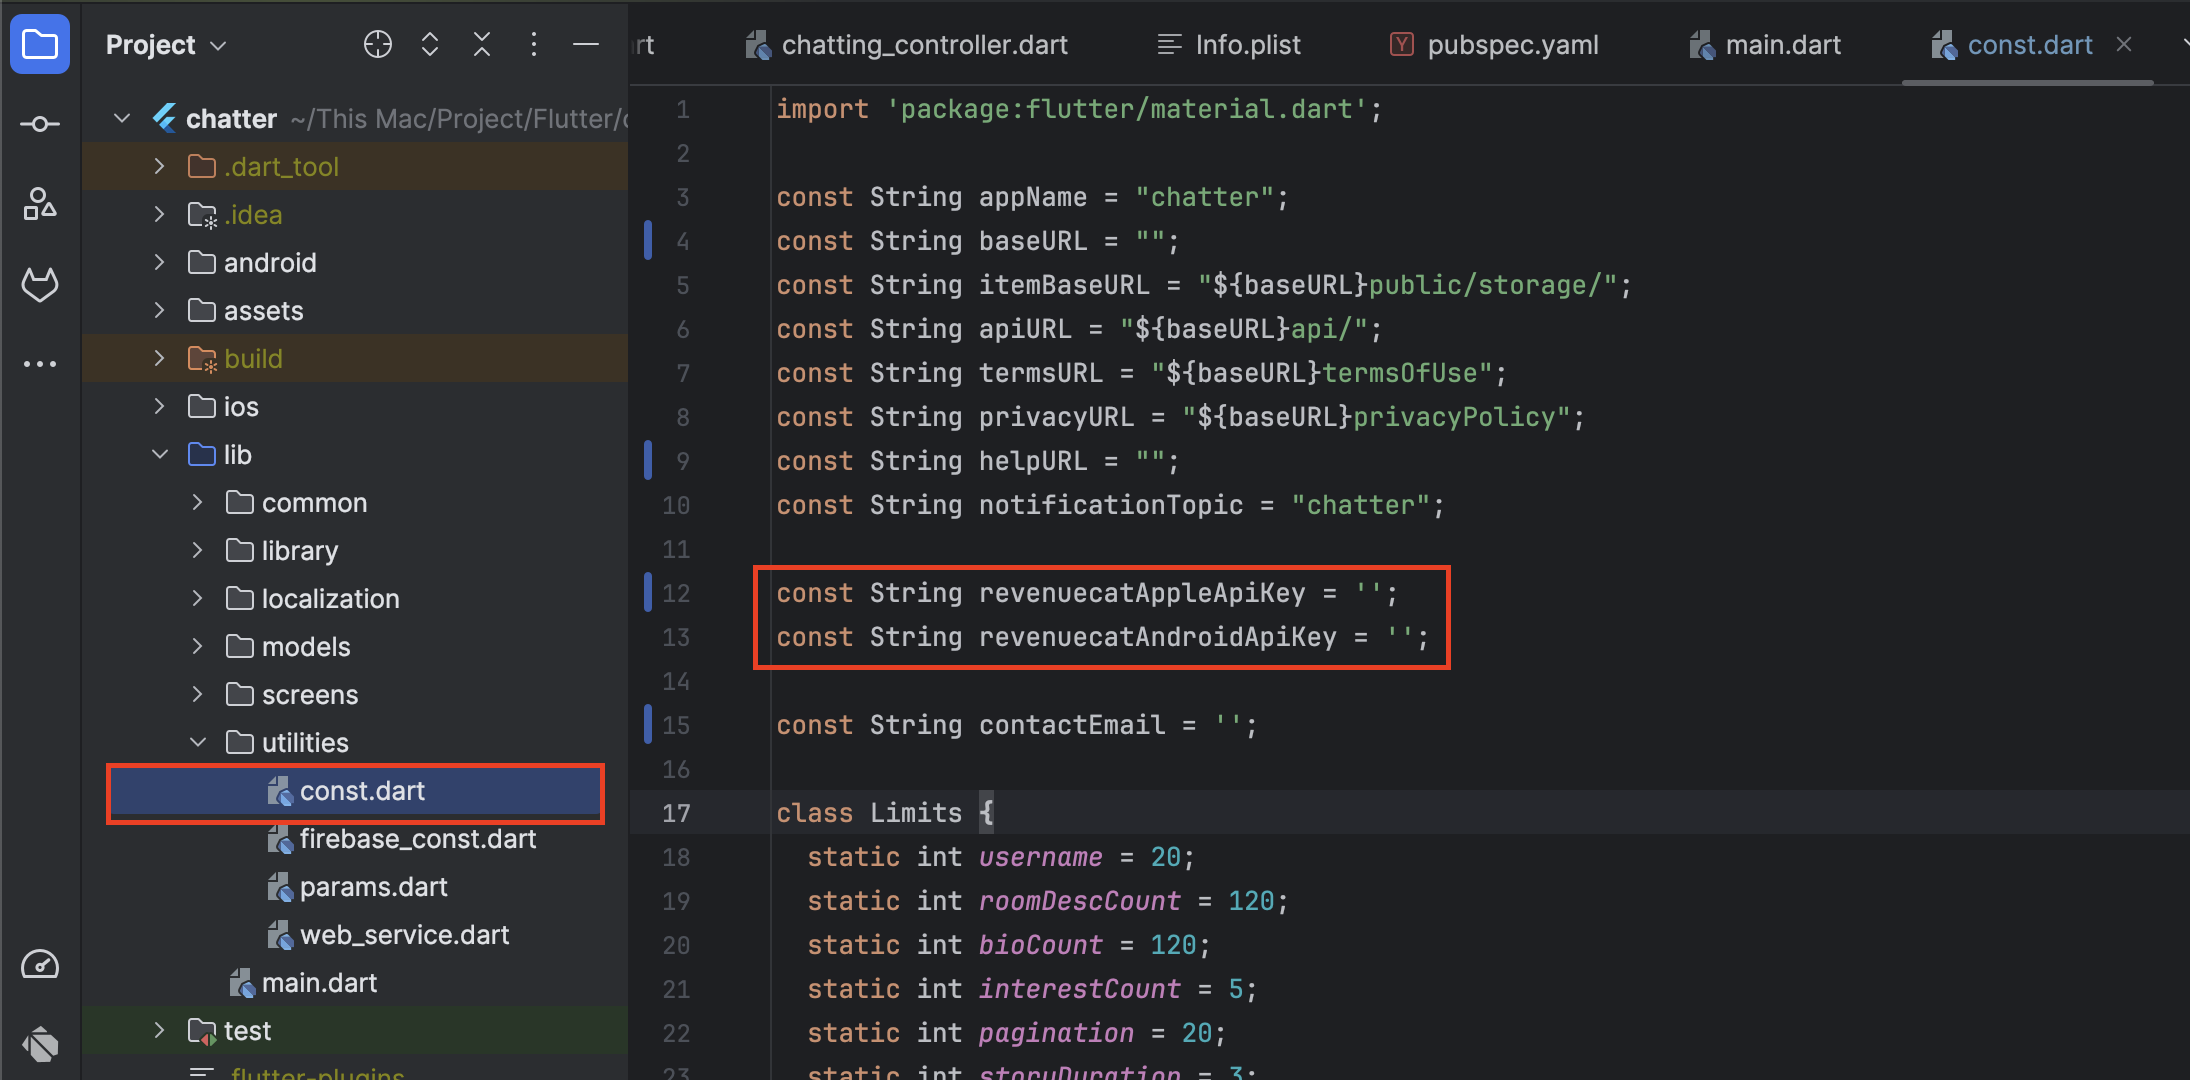
Go to your flutter project and Paste Here : chatter > lib > utilities > const.dart
-
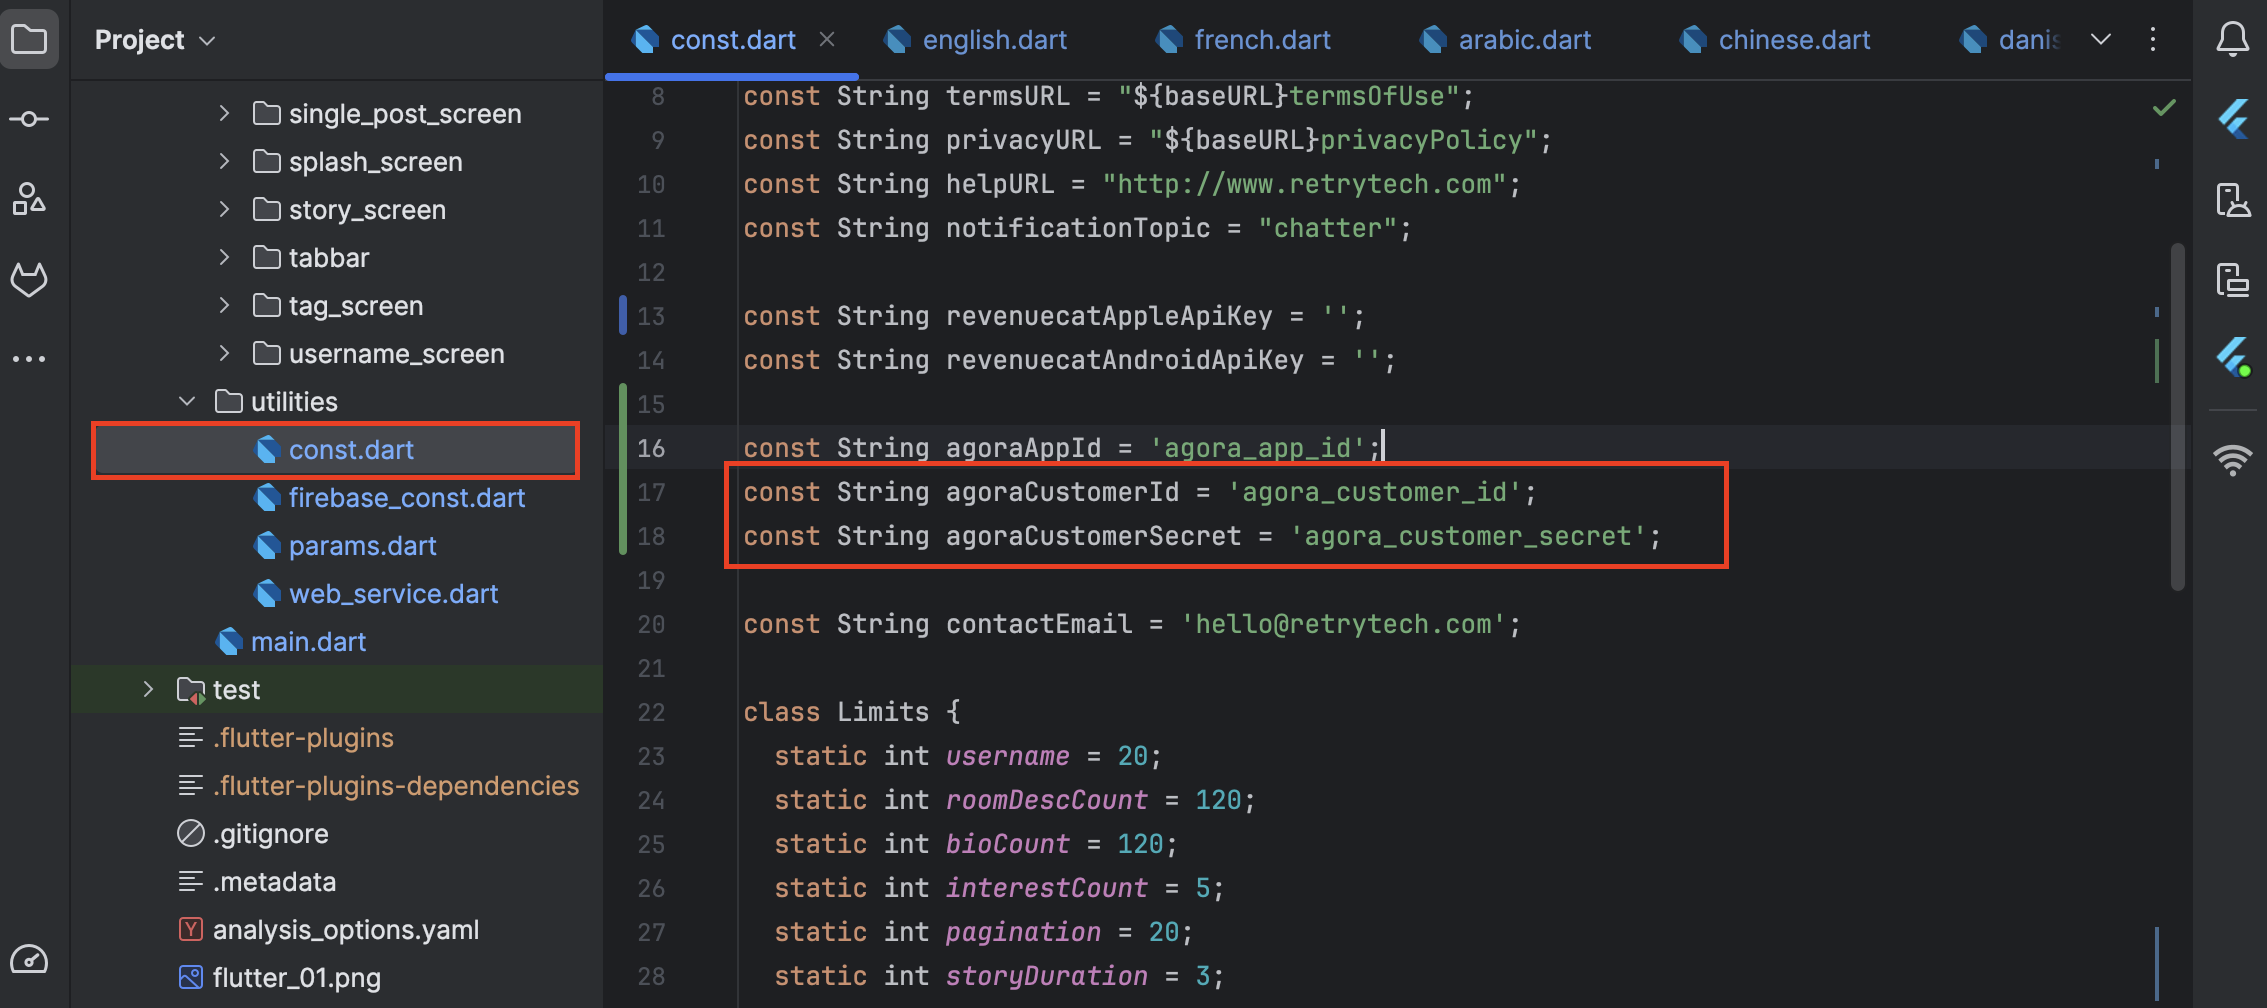
In downloaded file, you will get customerID and customerSecret keys.
-
Please add these to the project file as shown below
-
Paste here : chatter > lib > utilities > const.dart
-
Follow This guide and setup project at DeepLink.
-
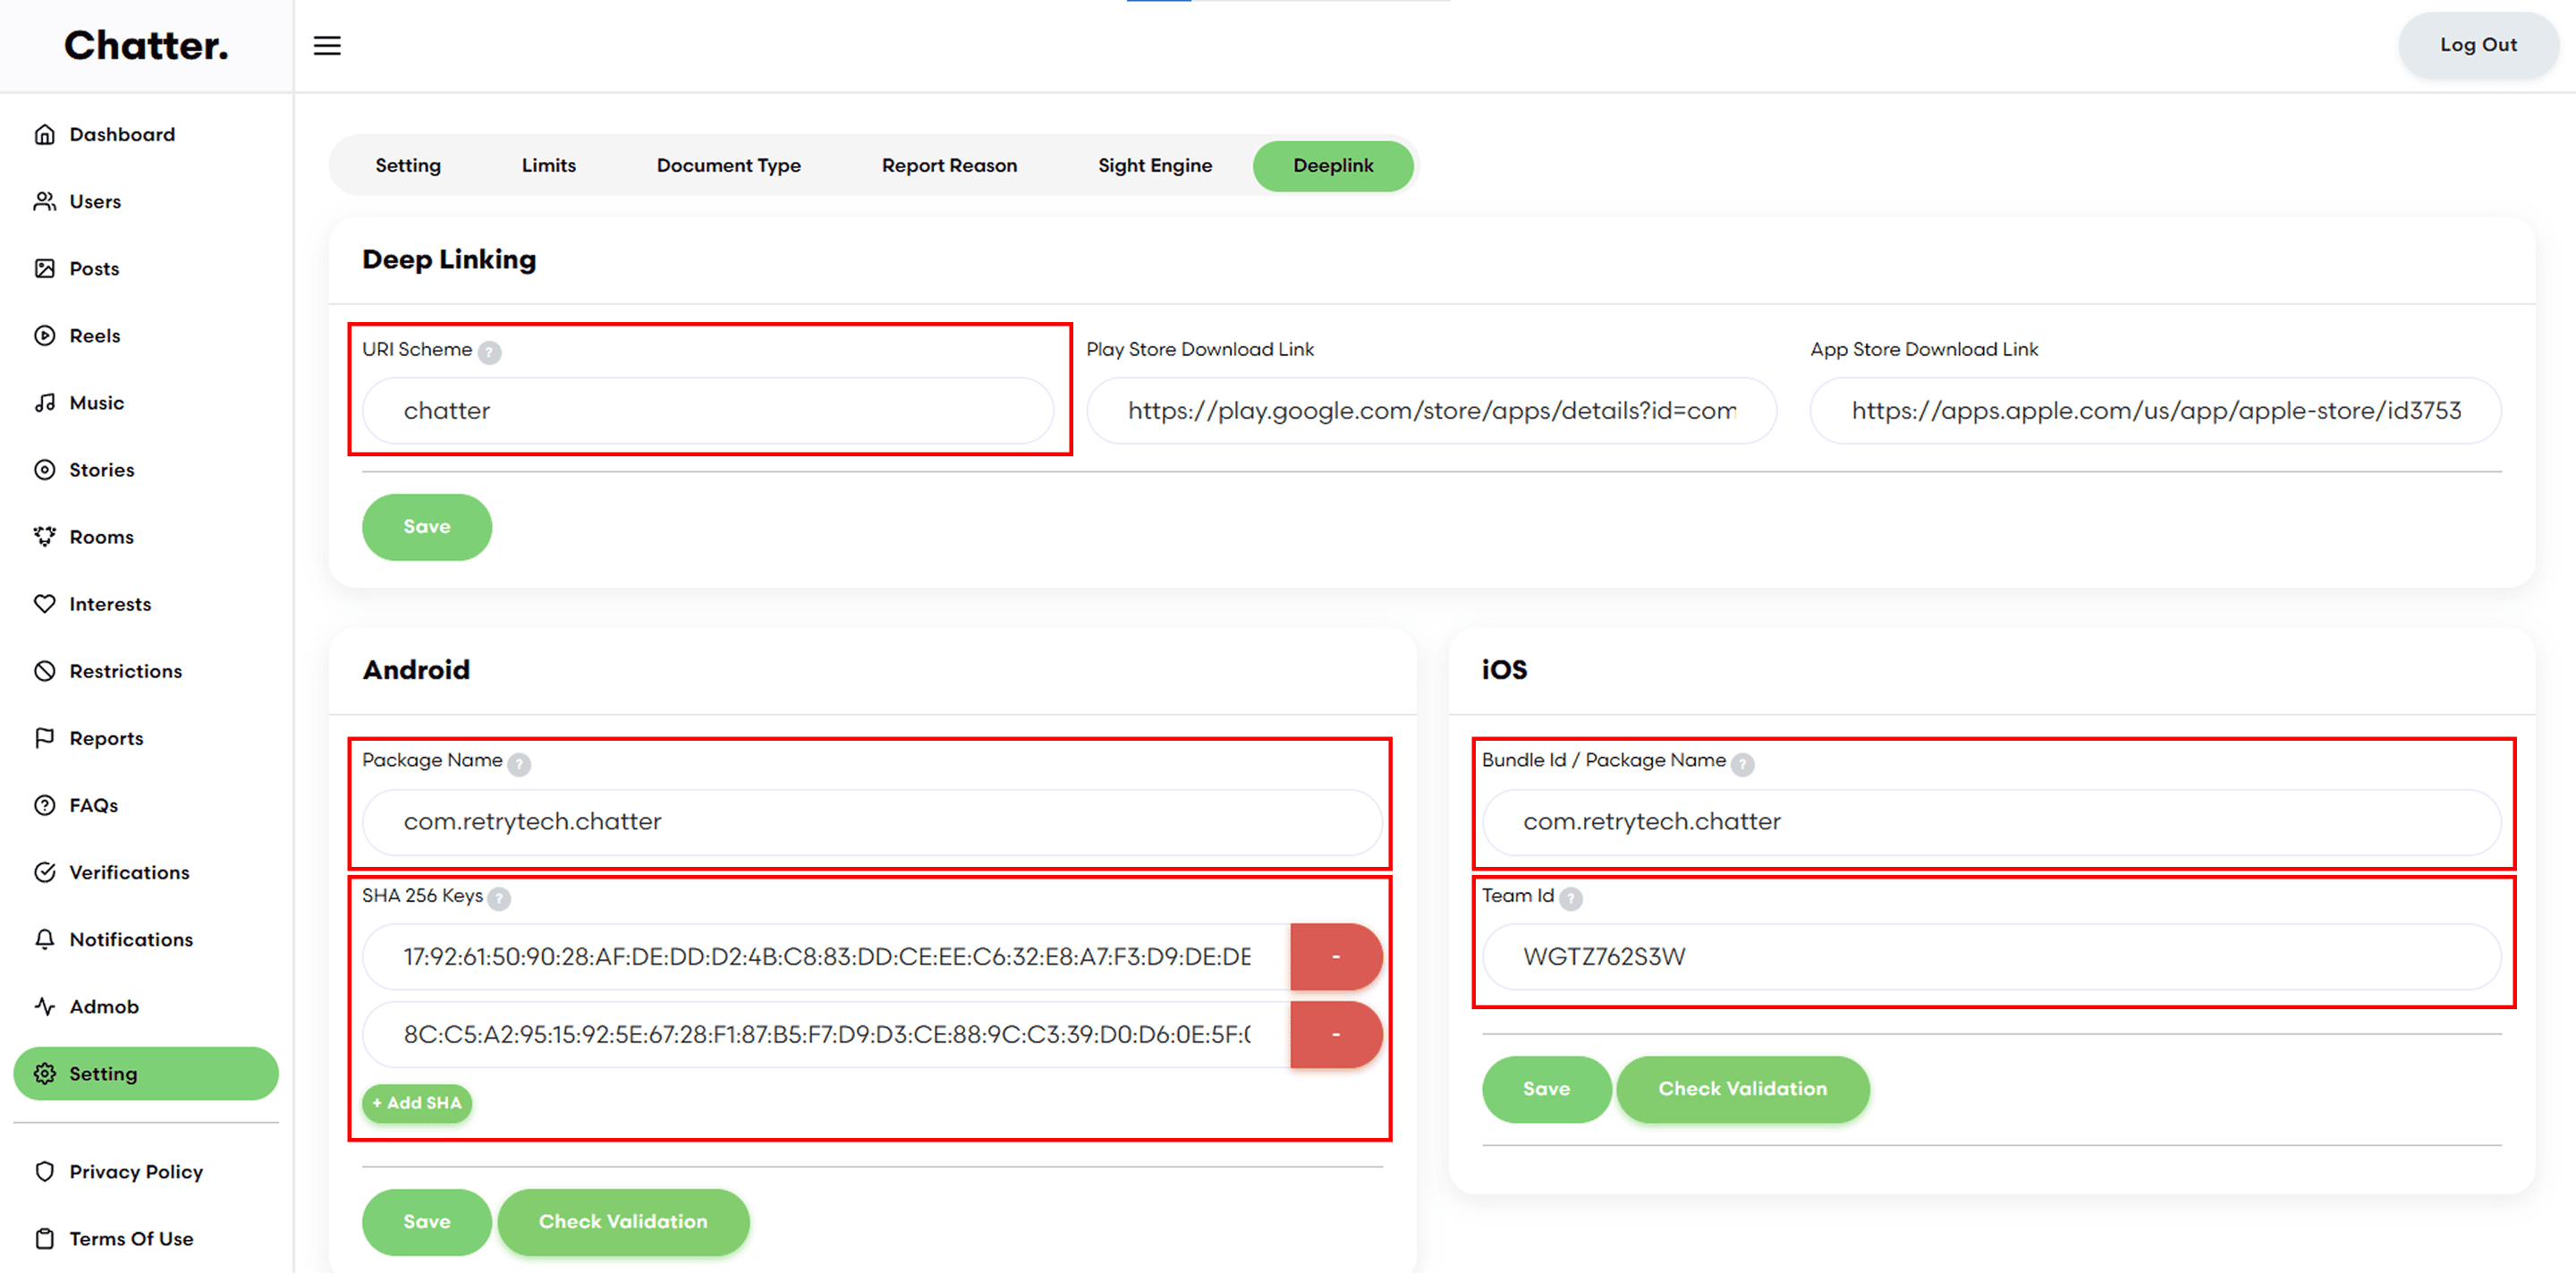
After completing the code integration steps from the above documentation, you now need to configure certain fields in the Admin Panel.
-
Required Fields
-
Scheme - Must be the same for both iOS and Android (already obtained from the above documentation).
-
Play Store Download Link
-
App Store Download Link
-
Android Package Name - (already obtained from the above documentation).
-
Android SHA-256 - Two values are required:
From Android Studio
From Play Store
-
Apple Bundle Identifier - (already obtained from the above documentation).
-
Apple Team ID - (instructions available in the documentation).
-
Once all fields are saved:
-
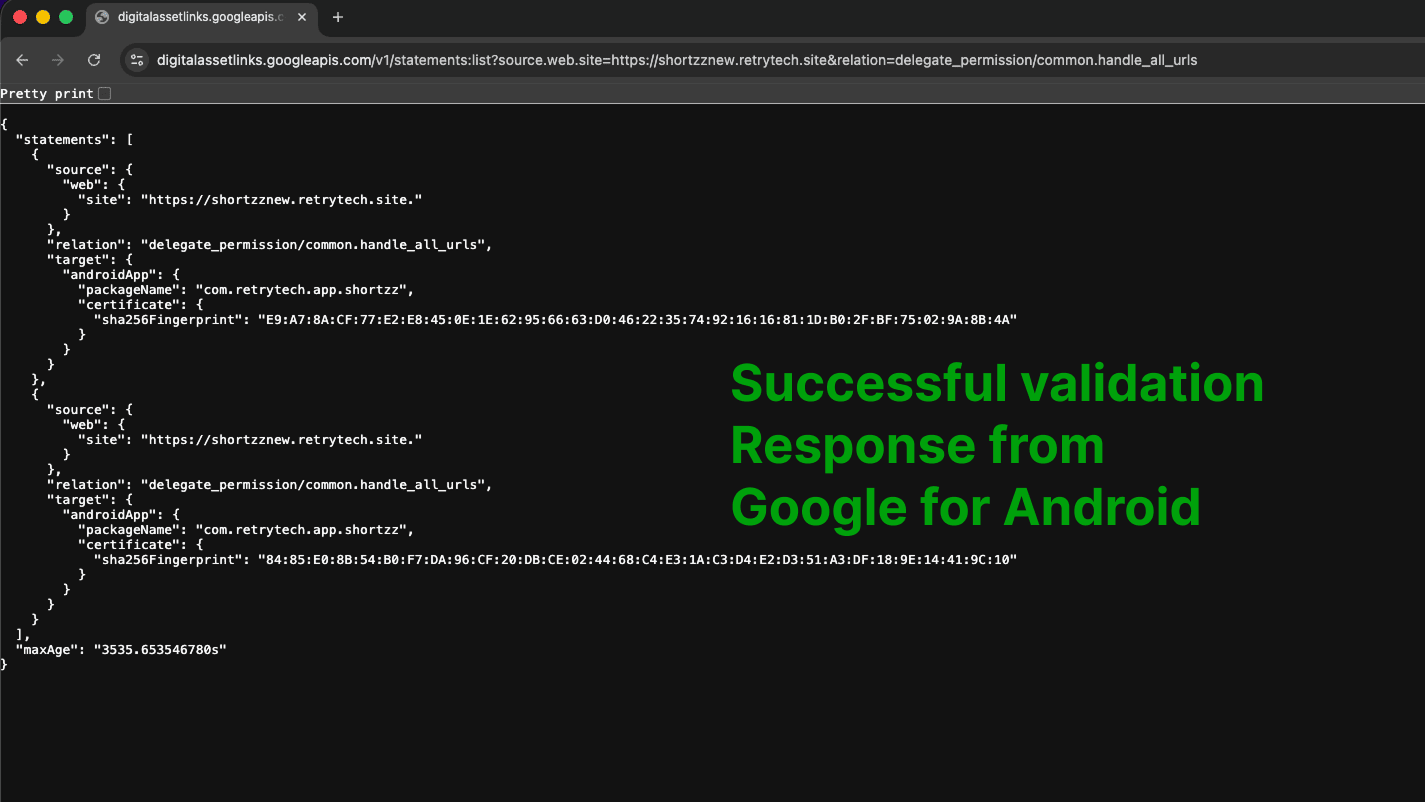
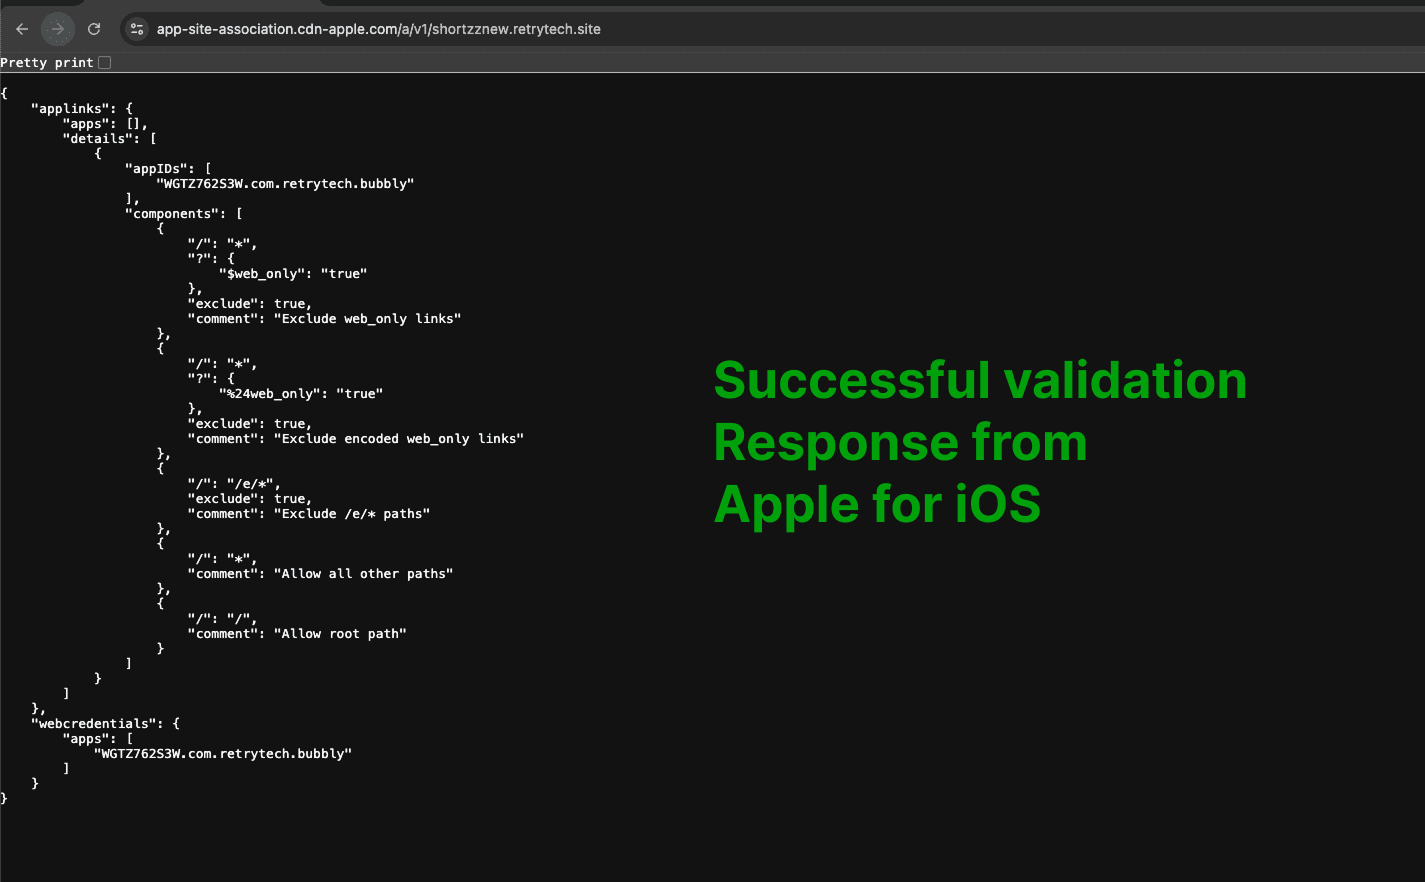
Verify whether the universal link file is available and your domain is validated.
-
A successful validation ensures that the sharing system works correctly.
-
Refer to the screenshots below to see how a validated domain response should look.
-
For check validation, There is a button Check validation beside the Save button. Click on that button.
-
During validation:
-
When clicking the shared link for the first time, you may be redirected to the browser before the app opens.
-
After successful validation, the app will open directly without going through the browser.
-
If the issue persists (i.e., the link still opens in the browser instead of the app):
-
Delete the app from your device.
-
Reinstall the app.
-
Test again on a real device (not just a simulator).
-
Setup subscriptions
-
You need to define subscriptions on Google Play Console (For Android) and Apple App Store Connect (For iOS) before connecting with RevenueCat.
-
Android subscription : Follow this guide
-
iOS subscription : Follow this guide
-
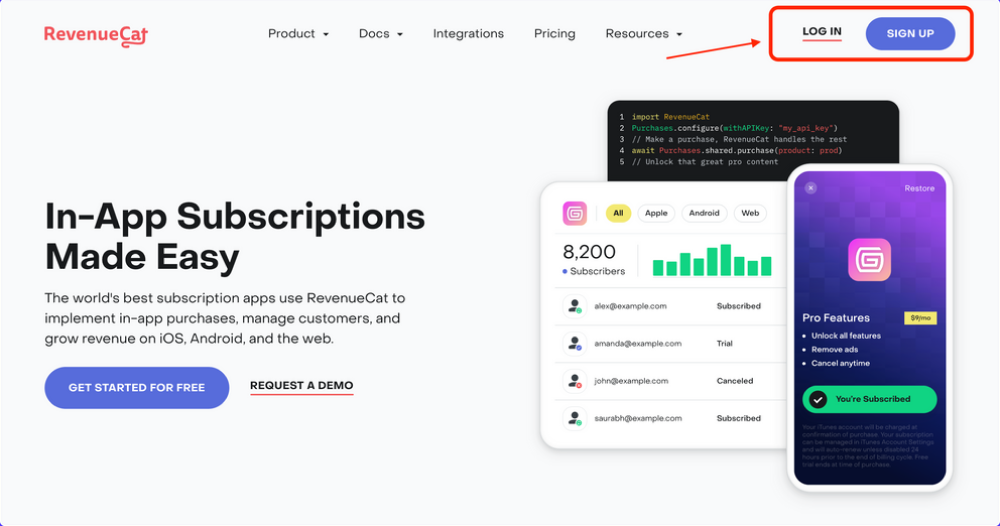
Create an account or log in to RevenueCat from here to get started.
-
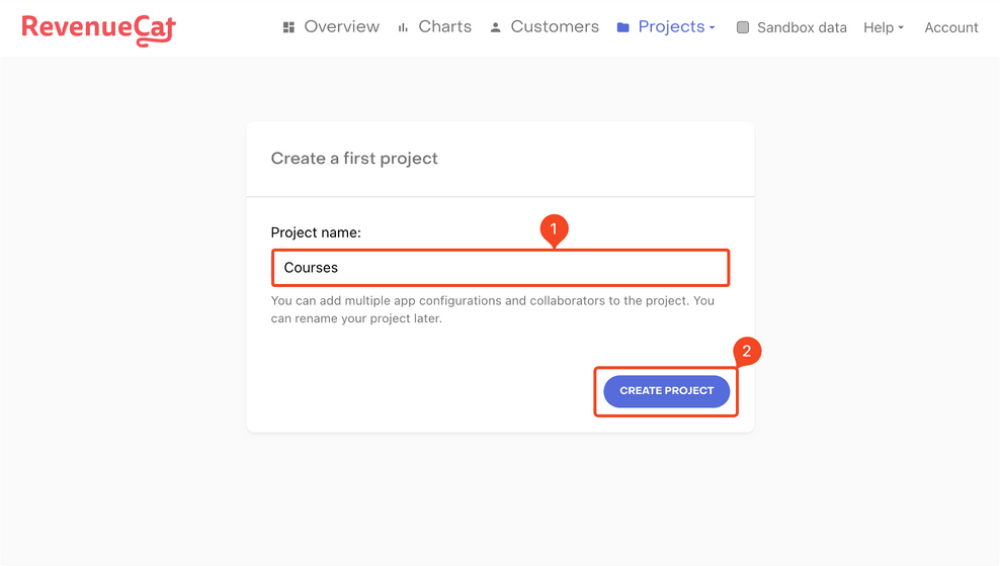
If you have created a new account, you will be automatically prompted to create your first project. Enter a Project name and click "CREATE PROJECT" button.
-
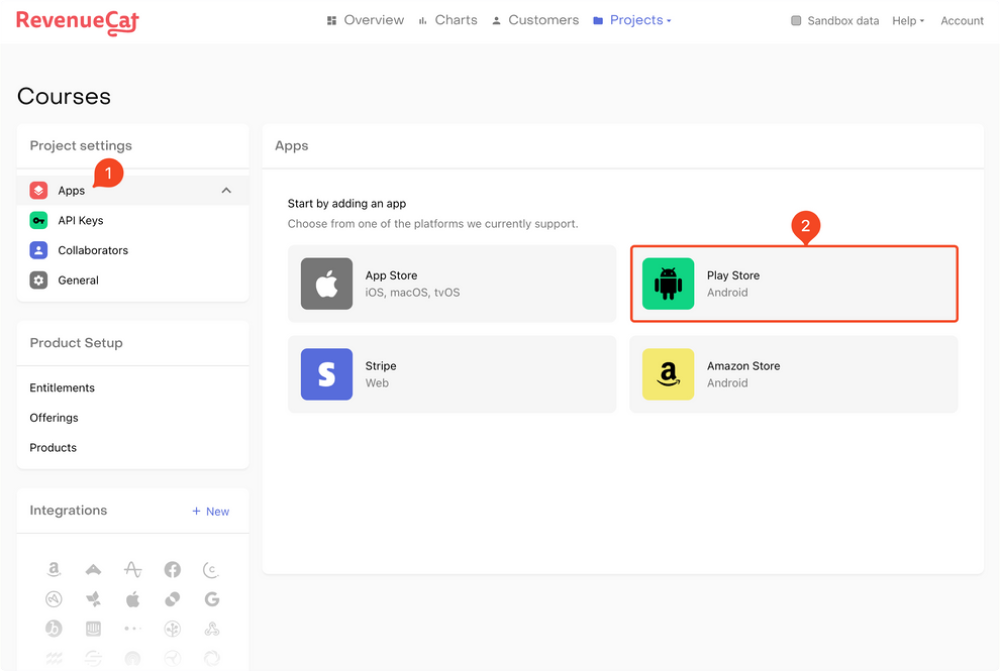
Next, you need to add your Android and iOS apps to RevenueCat in order to use and manage the subscriptions.
-
Let's start by configuring the Android app:
-
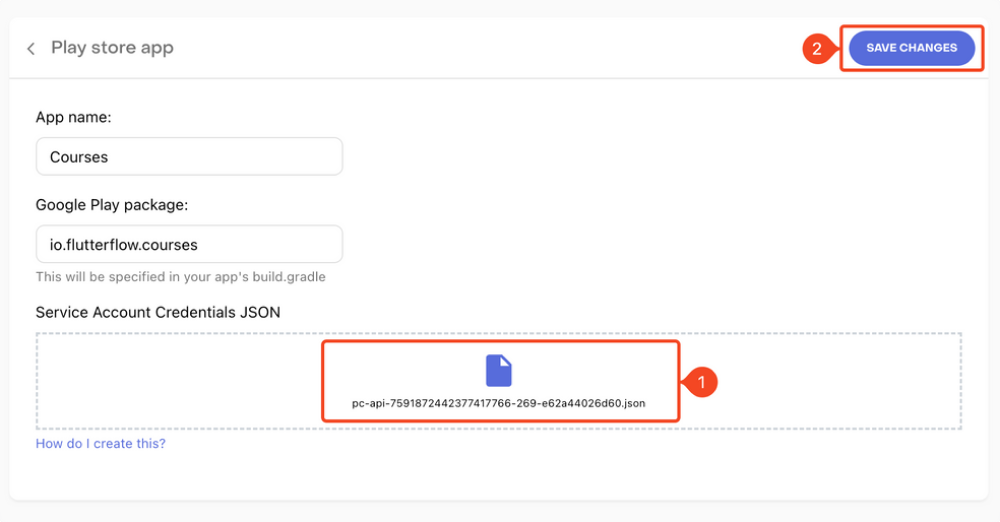
Go to Apps under Project settings (from the left menu). Select Play Store .
-
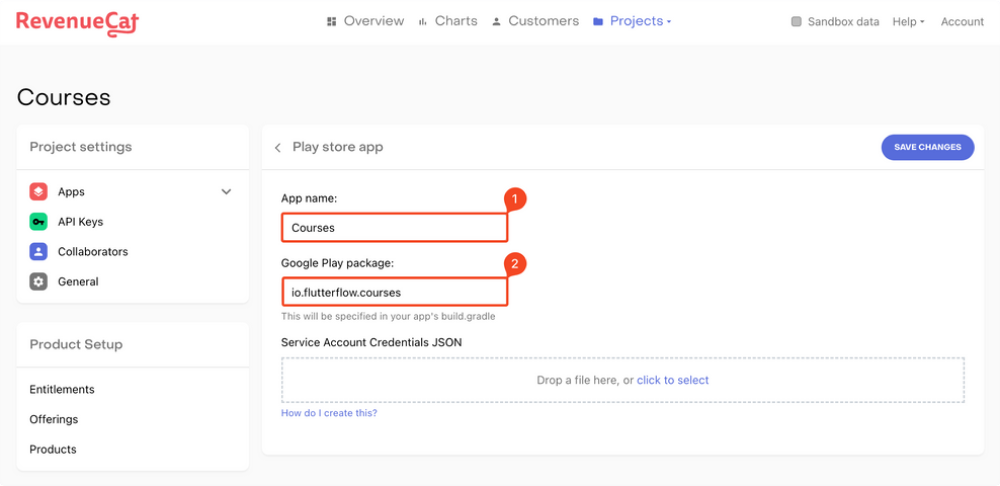
Enter the App name and the package ID.
-
You need to create another Service Account for RevenueCat. Follow This guide to generate the credentials in JSON format. Drag and drop the Credentials JSON file. Click "SAVE CHANGES".
-
This completes the Android app setup on RevenueCat.
-
Follow the steps below to configure the iOS app:
-
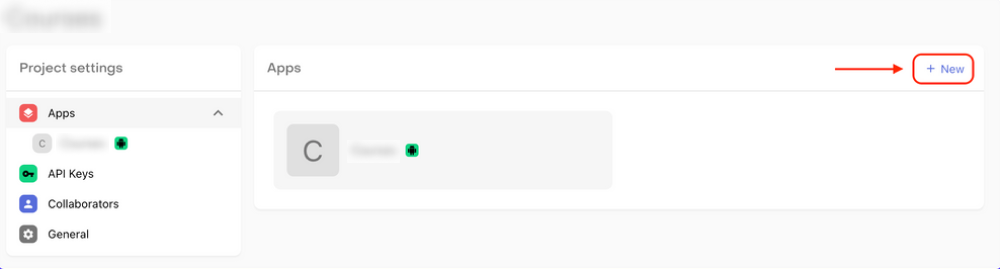
Go back to the Apps page and click on "+ New".
-
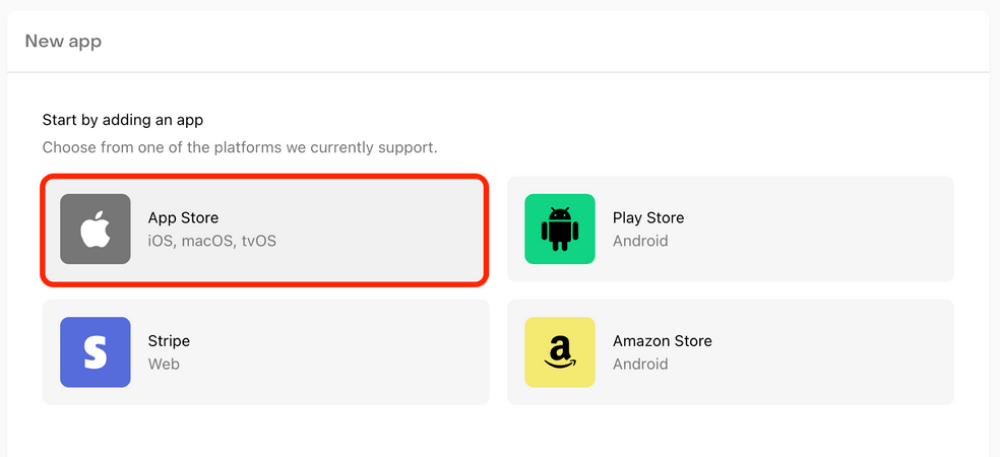
Select App Store.
-
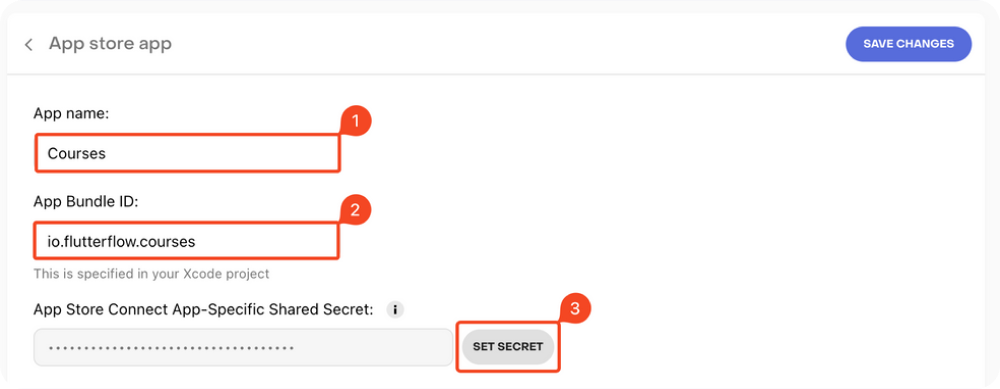
Enter an App name, Bundle ID, and App-Specific Shared Secret. To generate an App-Specific Shared Secret, follow The guide . Once you have the key, click "SET SECRET", enter the value, and click Set. Then click "SAVE CHANGES".
-
This completes the iOS app setup on RevenueCat.
-
You will find these configuration levels on the left menu of the RevenueCat dashboard under the section Product Setup:
-
In this configuration, you need to add all the subscriptions for both your Android and iOS app that the user can purchase. This is like a 1-to-1 mapping of the products in RevenueCat that you have already added to the stores (Google Play Store and Apple App Store).
-
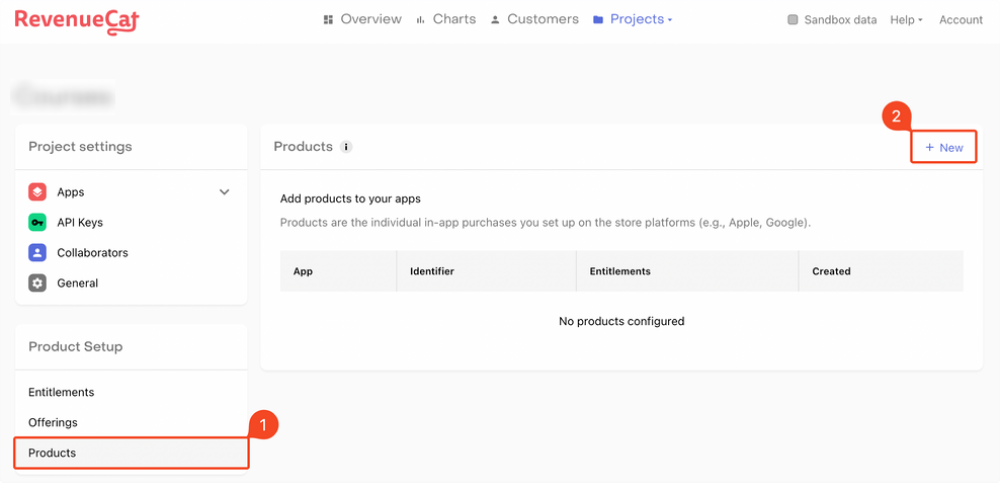
To add products, follow these steps:
-
Select Products under the Product Setup section. Click "+ New".
-
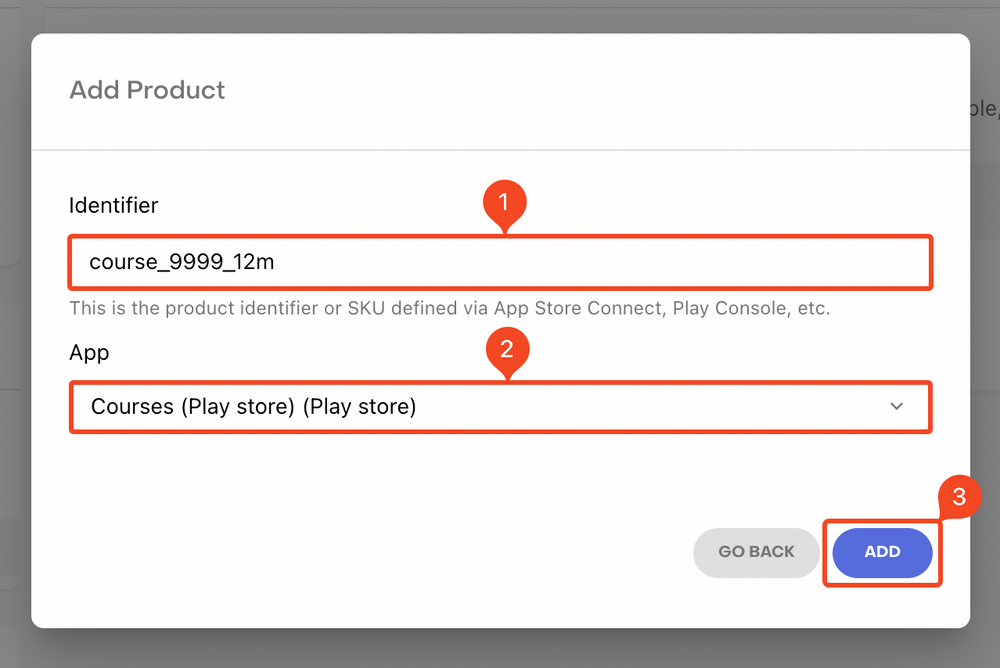
You need to enter the product Identifier and the App . Make sure you use exactly the same product ID you used for the Android/iOS subscription. Click ADD .
-
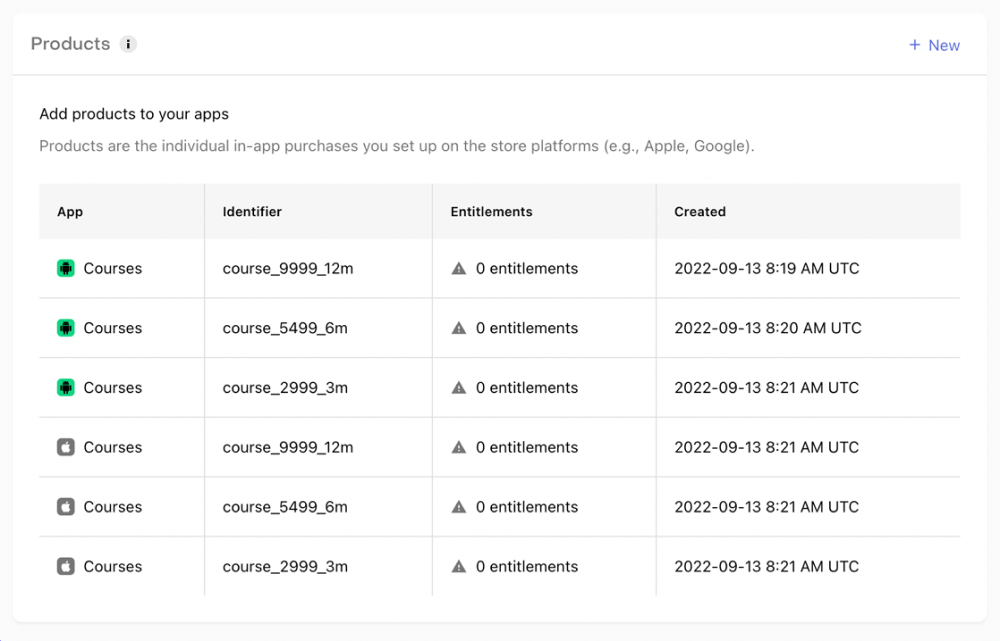
Similarly, add the other subscriptions as well (for both Android and iOS).
-
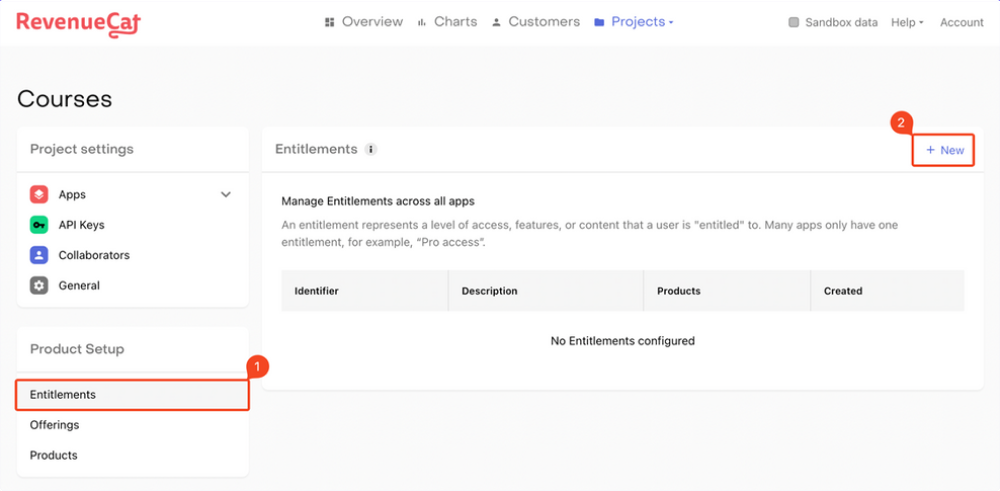
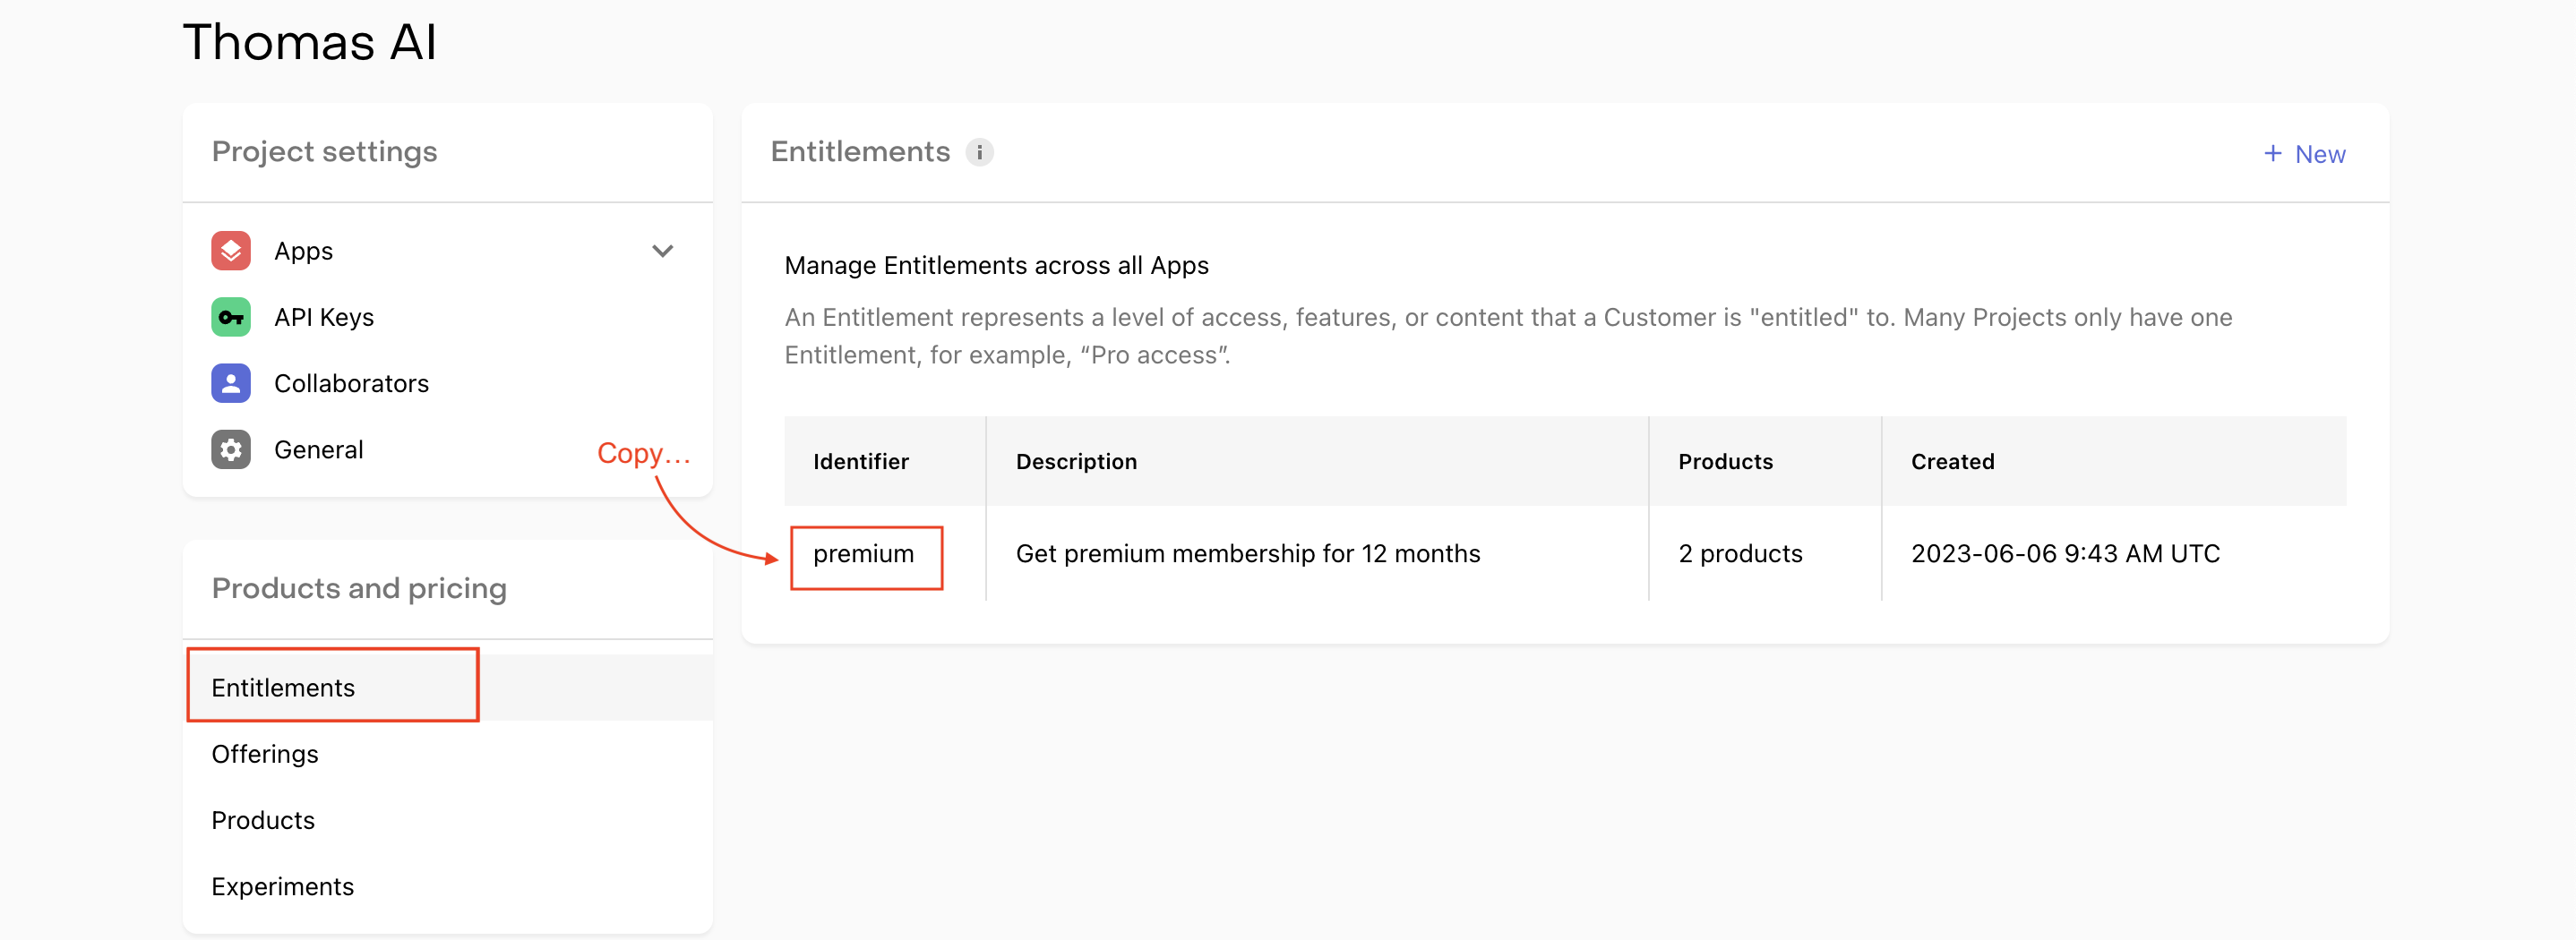
Follow these steps to add an entitlement:
-
Select Entitlements under the Product Setup section. Click "+ New".
-
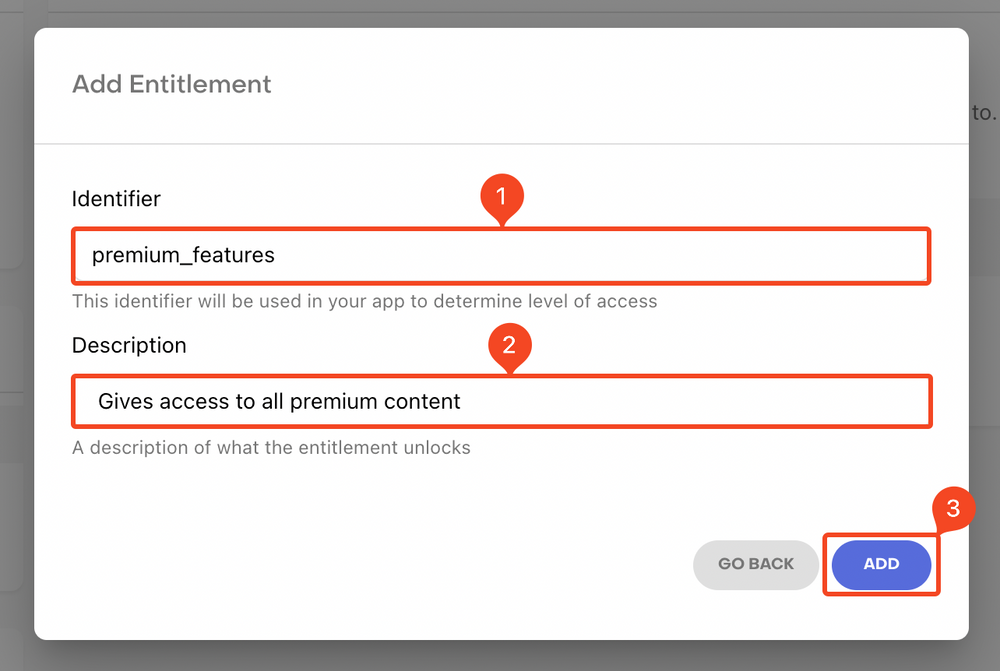
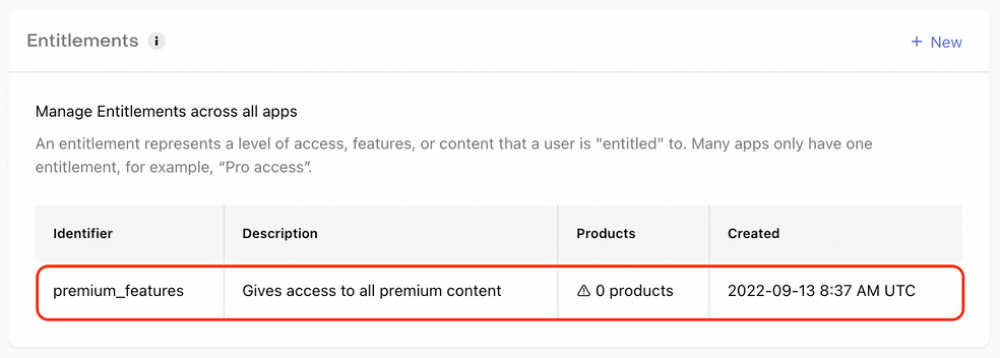
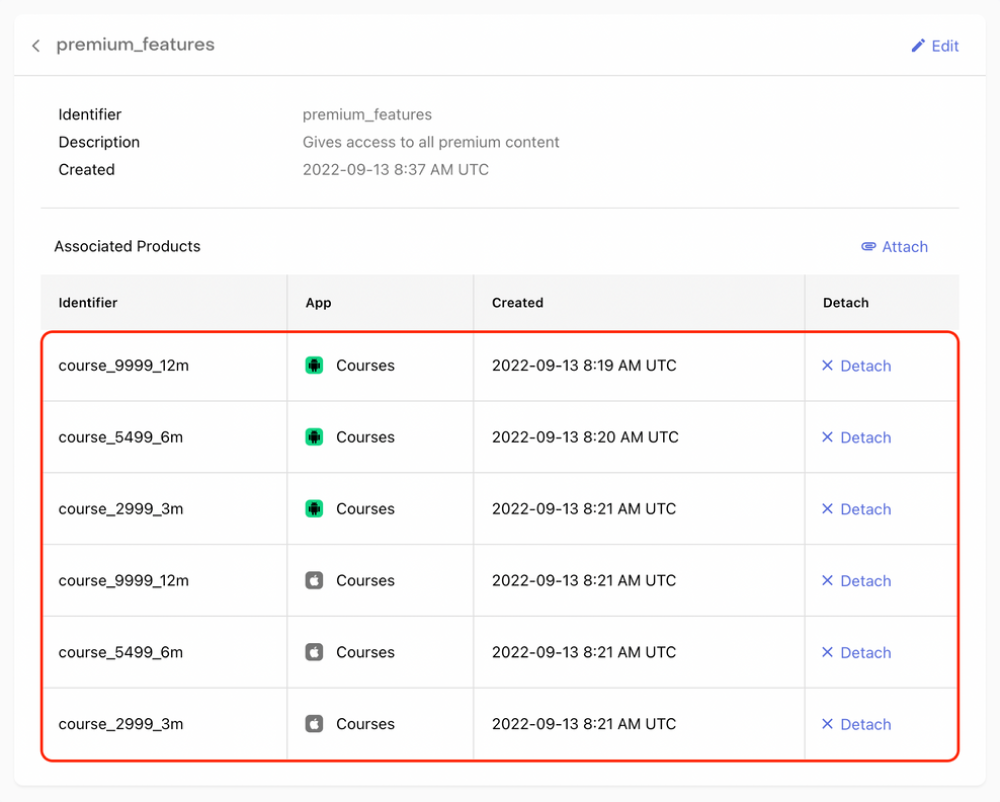
Enter an Identifier and Description for the entitlement. Click ADD.
-
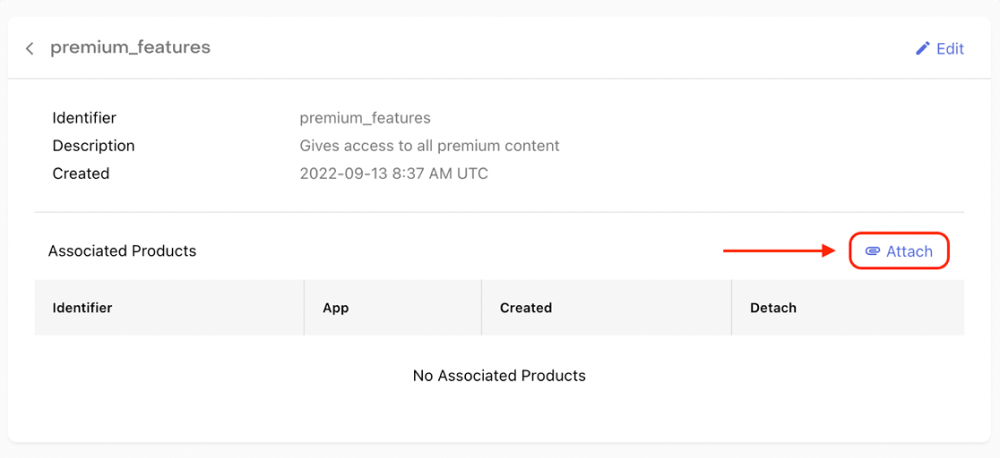
Next, you need to attach the products to this entitlement. Click on the entitlement that you just created.
-
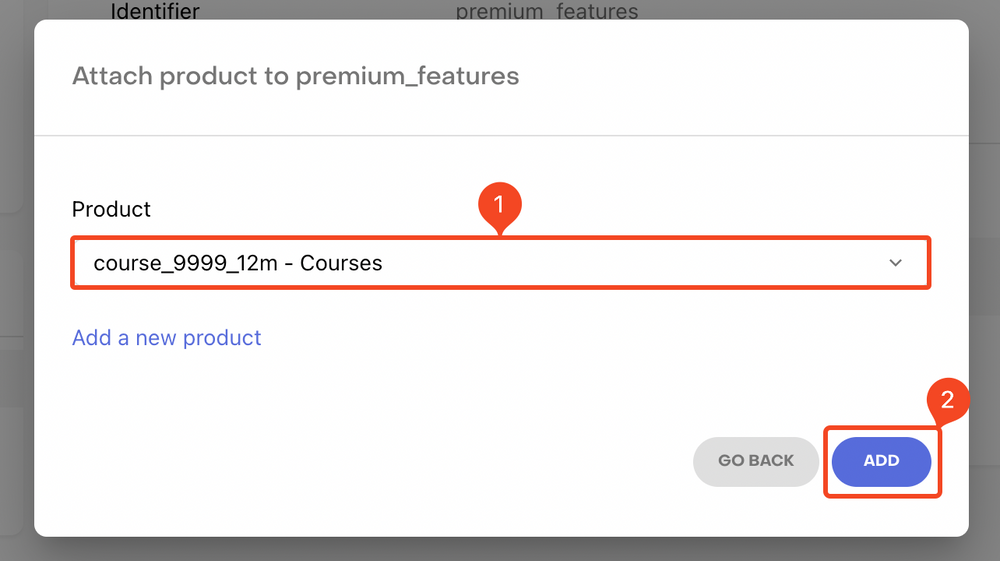
Click on Attach.
-
Select a Product from the dropdown and click ADD .
-
Similarly, attach all the other products to this entitlement.
-
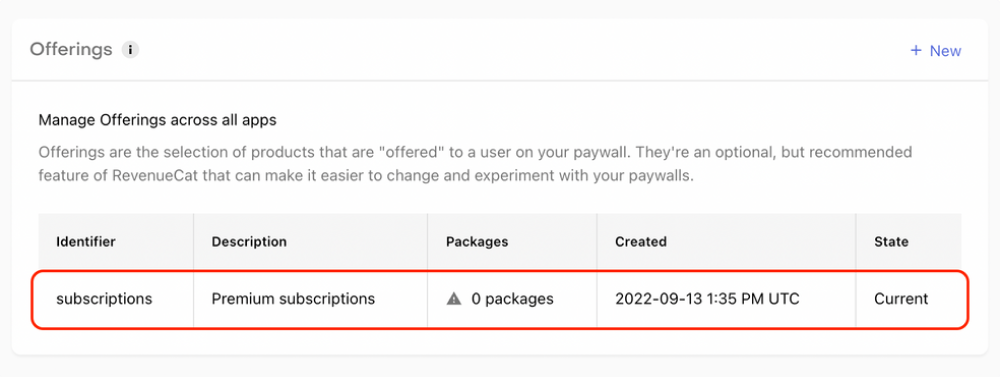
Follow the steps below to add offerings:
-
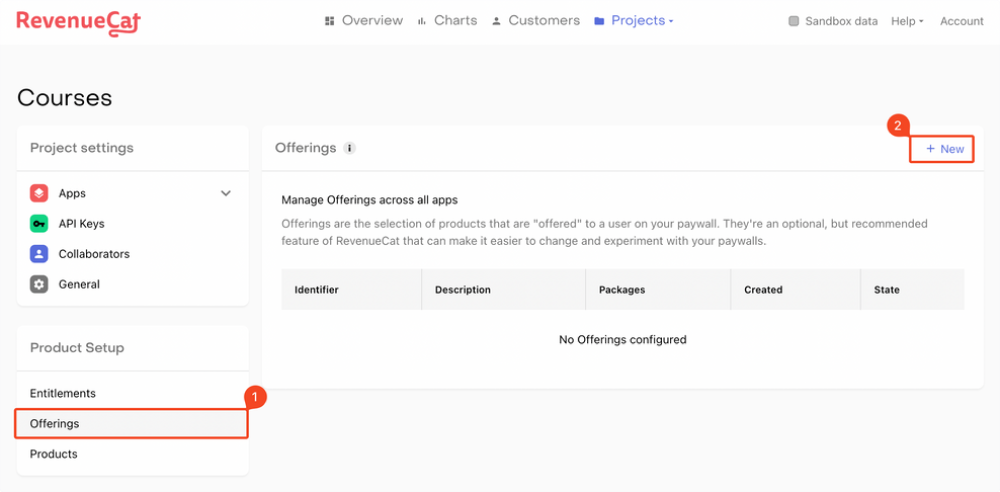
Select Offerings under the Product Setup section. Click "+ New".
-
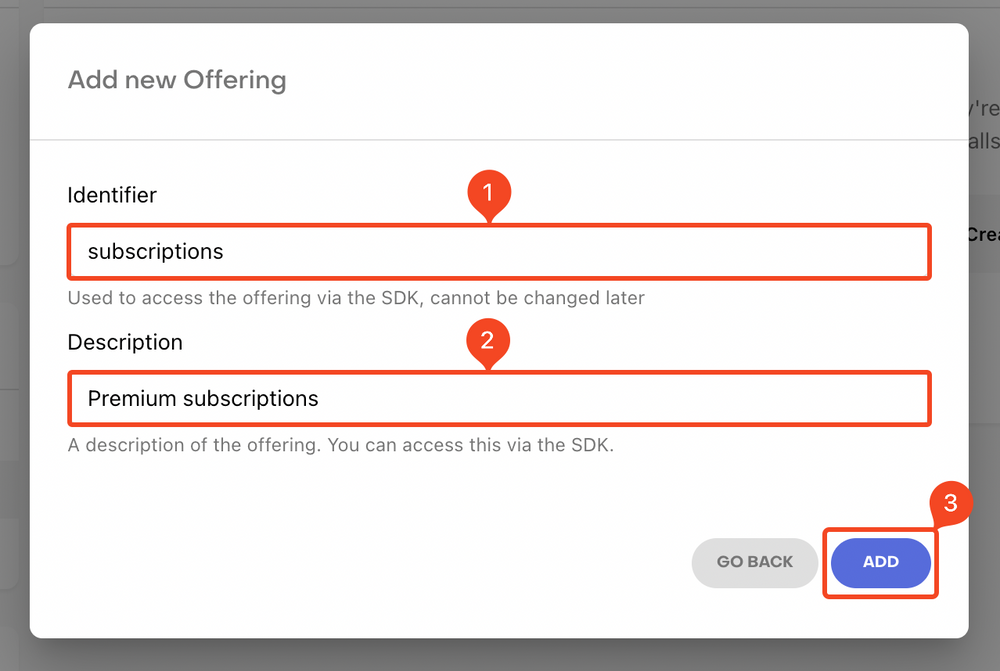
Enter an Identifier and Description for the offering. Click ADD.
-
Click to open the offering that you just created.
-
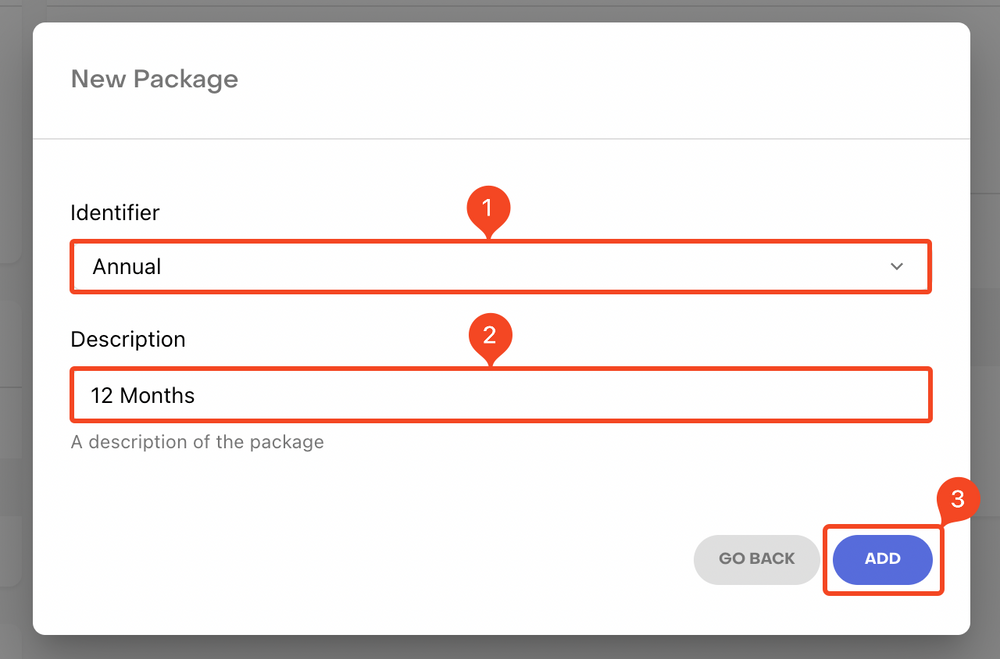
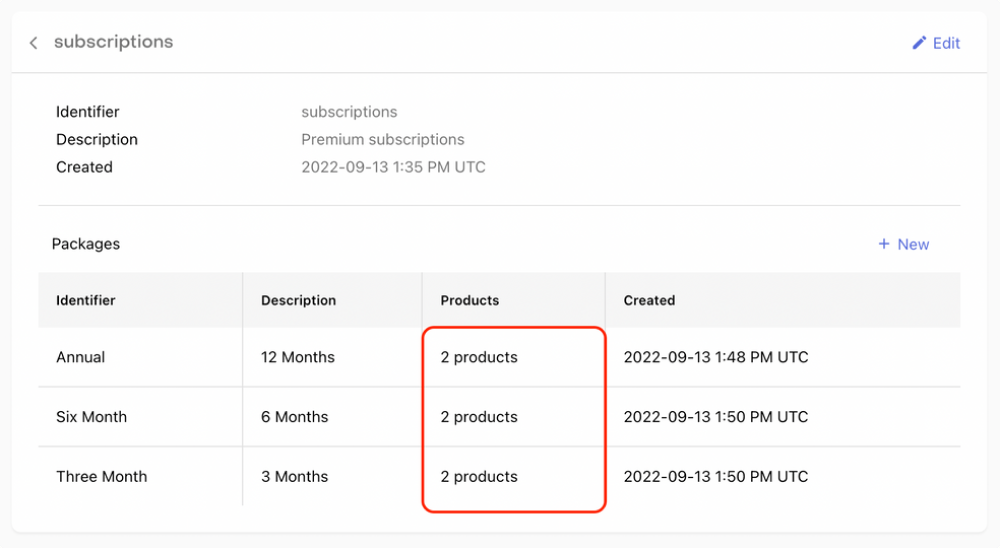
Click on "+ New" beside the Packages.
-
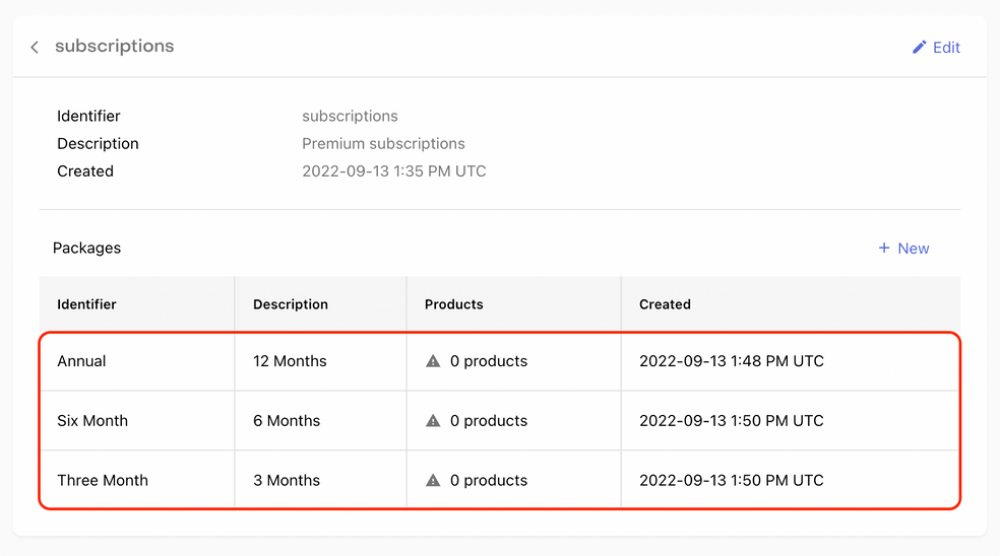
Enter an Identifier for the package from the dropdown and add a Description . Click ADD.
-
Similarly, add the other packages as well.
-
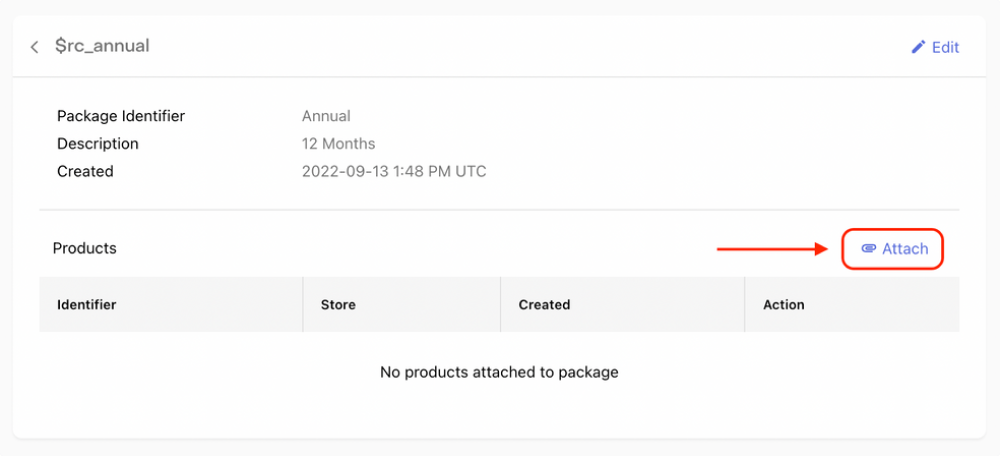
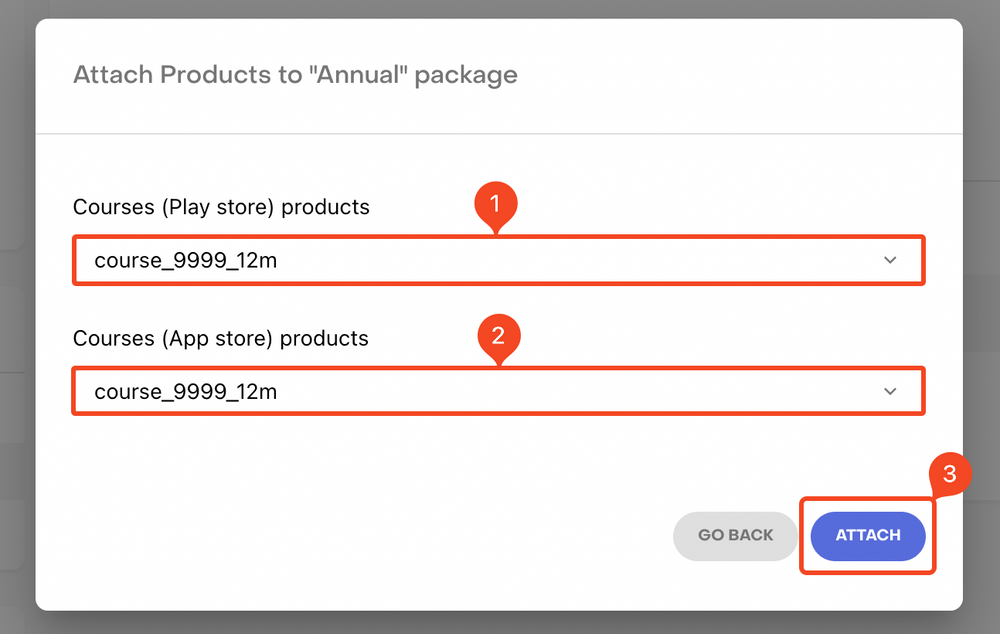
Click to open a package. Then click Attach.
-
Select the respective Play Store and App Store products from the dropdown. Click Attach.
-
Similarly, attach the correct products to the other two packages as well.
-
This completes the three levels of configuration on the RevenueCat.
-
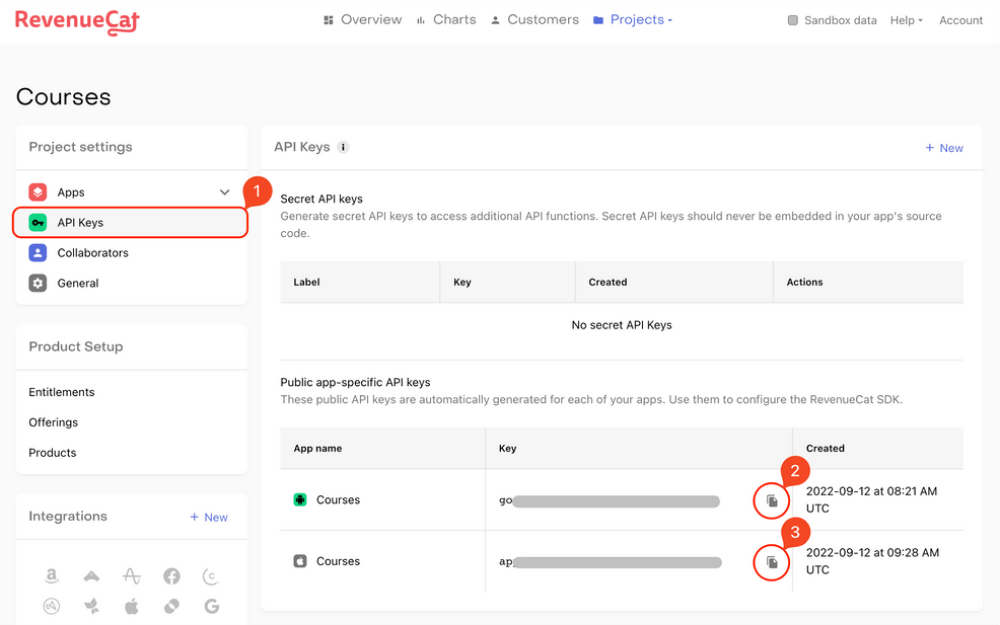
you need to add the App Store Key and Play Store Key to Your project You can get these keys by going to the RevenueCat dashboard > API Keys > Public app-specific API keys. Copy and paste these keys into the respective fields of Project
-
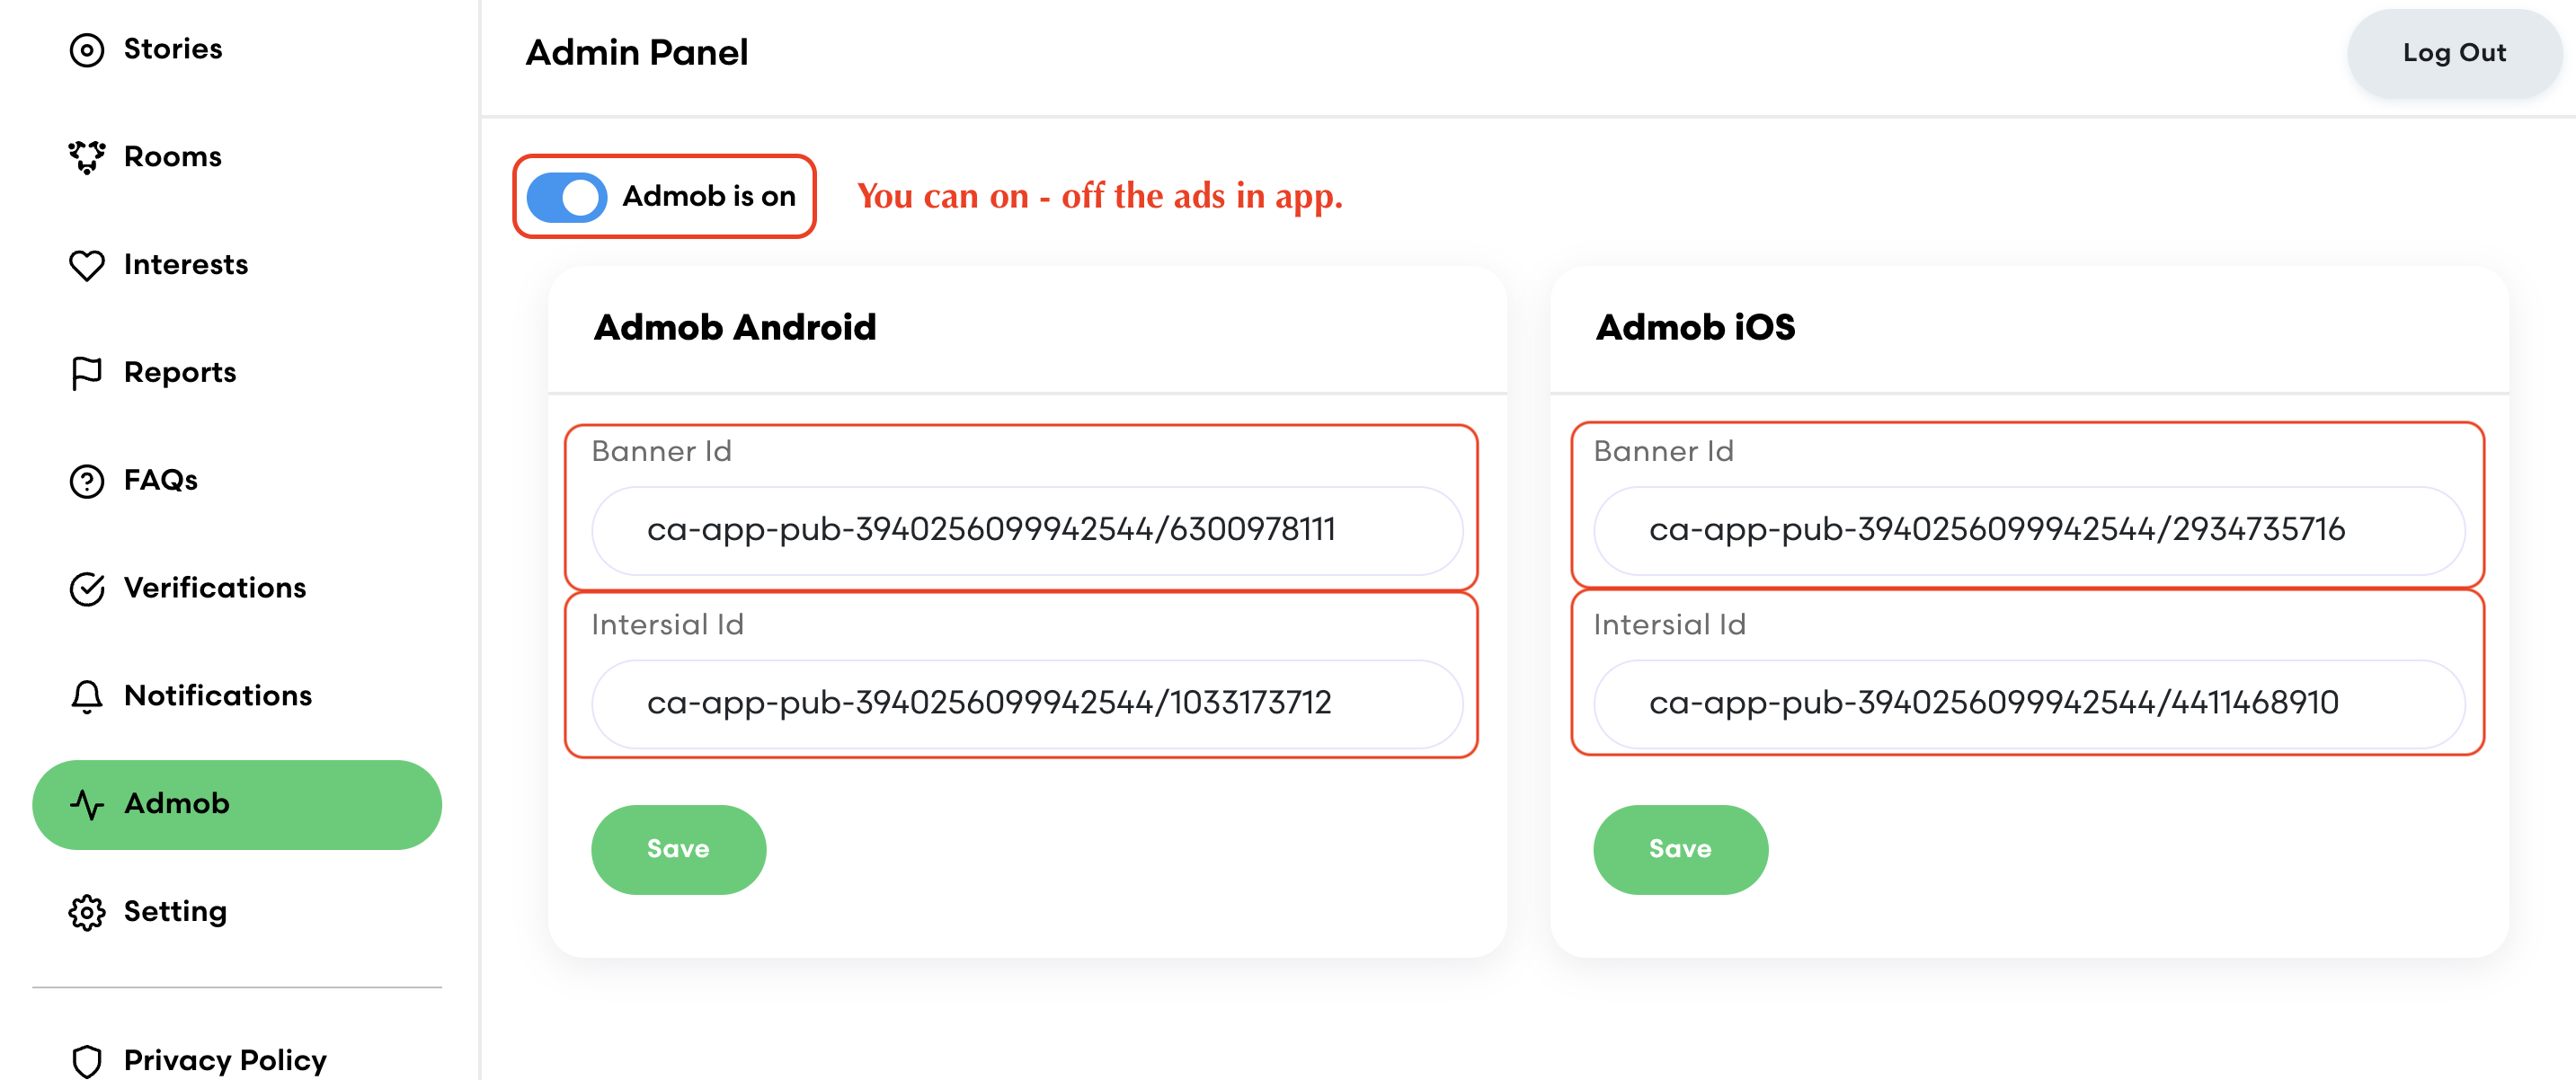
Open https://admob.google.com/home/get-started/ URL and setup account.
-
After configuring Ads in your admob consol, you have to add ad_units accordingly in your admin panel.
-
Follow This guide and you can create build for android.
-
Follow This guide and you can create build for iOS.
-
To update your project (Whenever we update the project at Codecanyon), you have to Add/Update/Remove some files and fields in database (sometimes). Please check README.md file for the update information. (Mostly, can be found at root level directory of the project)
-
Please be careful while making an updates this way, It might result in errors sometimes.
-
If it comes any issues while making an update, you are absolutely responsible for that since updating existing project is not included in the support.
-
01 June 2026
-
- Bug Fixes
-
- OnBoarding issue solved
-
- Dependencies updated
- Telegram (Support Desk) : +91 7990425274
- Email : help.retrytech@gmail.com
- Whatsapp (No Support Here) : +91 7990425274
Email sign in


Enable firestore

Setup Agora

Deep Link
⚠️ Note : Each field has a ? icon beside it. Clicking on it will provide guidance on how to obtain the required value.
Validation Process
Subscription
Connect with RevenueCat
Adding Android app
Adding iOS app
Define subscriptions on RevenueCat
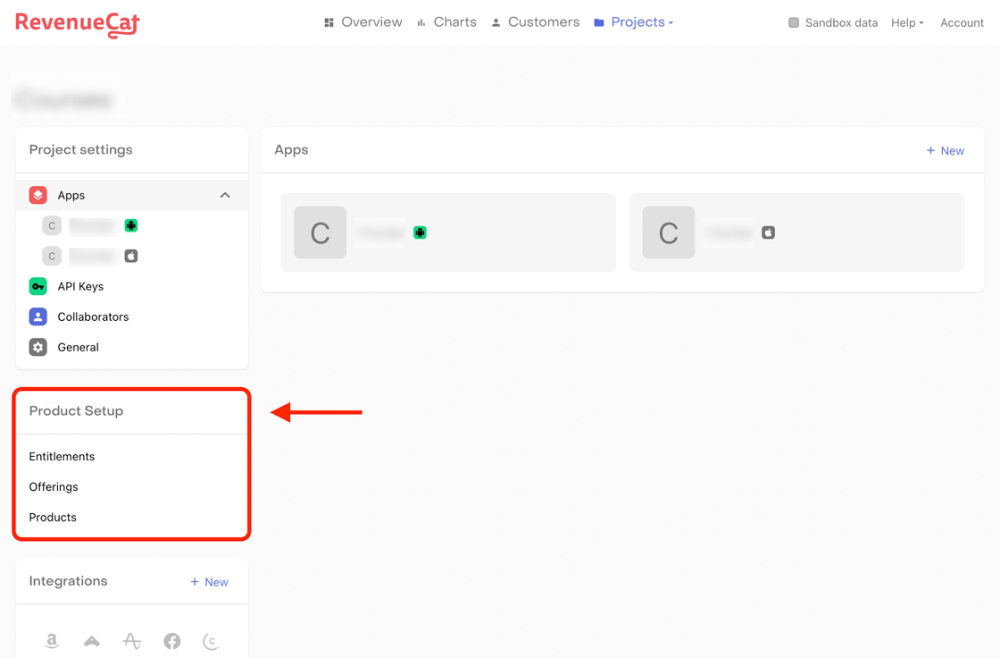
Products
Entitlements
Offerings

RevenueCat Project setup
Google Admob