

Chatter
The Ultimate Flutter Social Media
Chatter app is an ultimate social media script built with flutter and Laravel as backend. It offers many advanced features and functions like Feed (Images, Videos, Text), Stories, Chat, Chat Rooms, Manage Chat Rooms & Members, Random Profiles, Interests, Push Notifications And Lot more... This package contains fully functional Chatter flutter app, Backend, Database file & documentation. Using this script, any individual or company can save 100s of hours and publish twitter like social media app within couple of hours.
Version Details
dart: ">=3.7.0 < 4.0.0"
flutter: ">=3.27.0"
laravel/framework: "^9.0"
Developer Friendly
Specially built for developers to give them freedom while coding.
Clean Code
Less bulky and clean code with Getx flutter state management.
Laravel/Flutter
A great combination of techstacks, trending now in market.
Well Documented
Comes with nice documentation to help you get started fast and ASAP.
Continuous Updates
Comes with continuous updates to keep you safe from exploitable holes
Realtime Chat
Realtime chats between users regarding properties powered by Firestore.
Multiple Languages
The App Comes with multiple languages (More than 20). RTL supported.
Powerful Admin Panel
Admin dashboard to manage the data of the app and control them.
Attractive UI/UX
Amazing UI/UX designed and developed by world class designers.
Active Support
Our support and developer team helps you solve any issues during installation.
Prerequisites
-
VPS with cPanel is recommended
-
PHP 8.0
-
Hosting with cPanel (Strictly Recommended)
-
memory_limit should be 500M
-
upload_max_filesize : 500M
-
post_max_size : 500M
-
max_input_time : 60
-
Firebase Blaze Plan
-
sightengine Account credential for Content Moderation : https://sightengine.com/
Settings up database
-
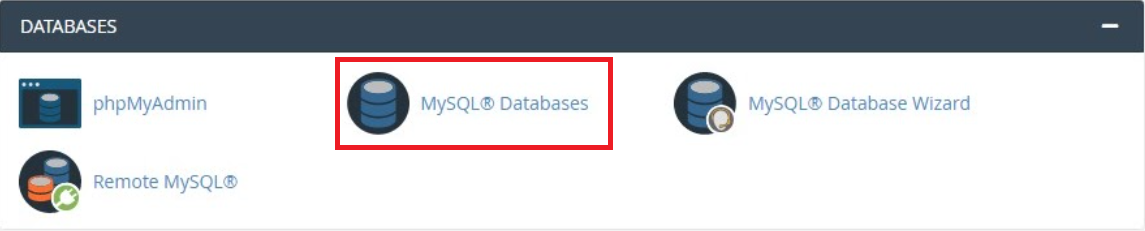
Open your cPanel provided by your web hosting provider.
-
Click the MySQLDatabase option under DATABASES section and create database for your app as shown in the images below.
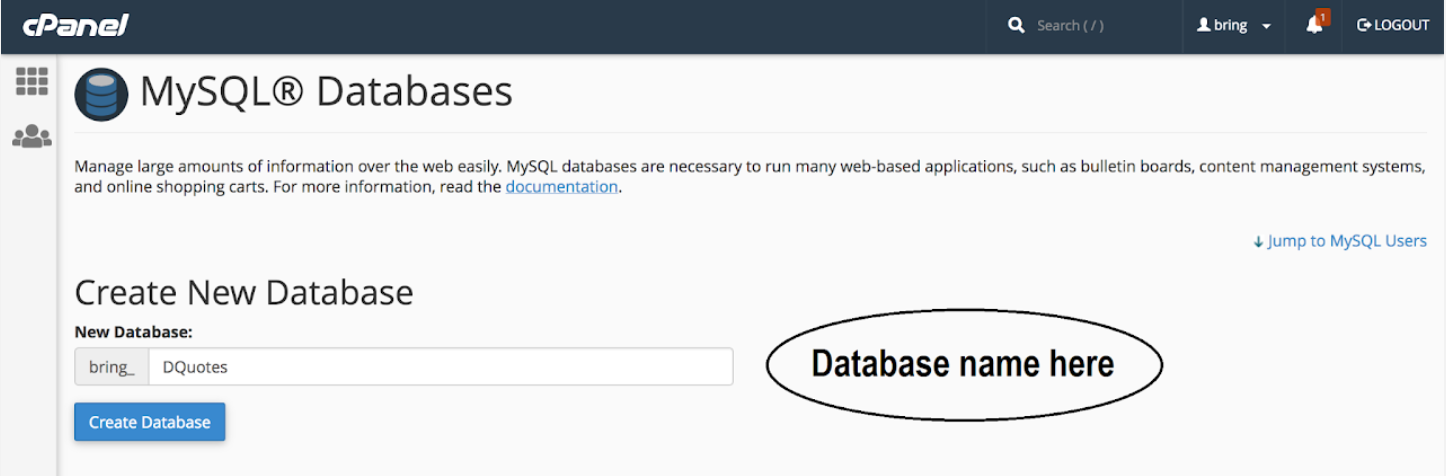
-
Add database name and click on create database.
-
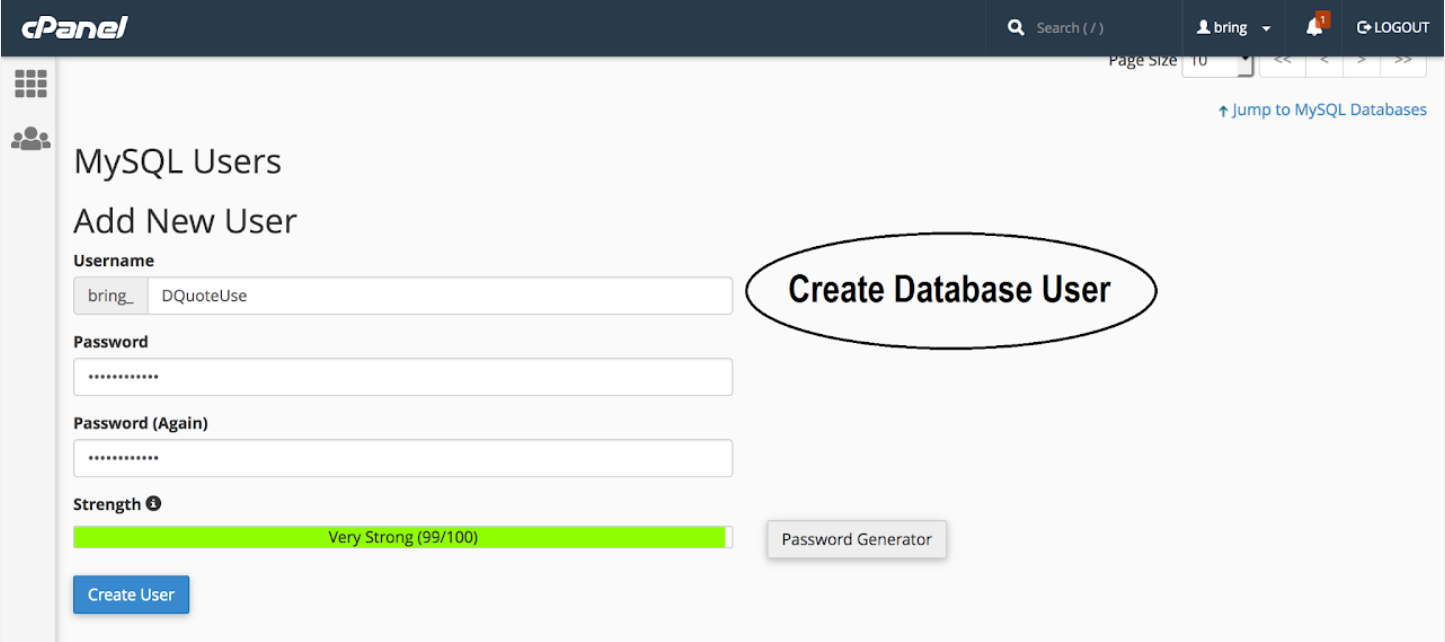
Now we will create a user to access the database
-
Like as shown in the image, enter username and password (save it to use later)
-
Click on create user and user will be created
-
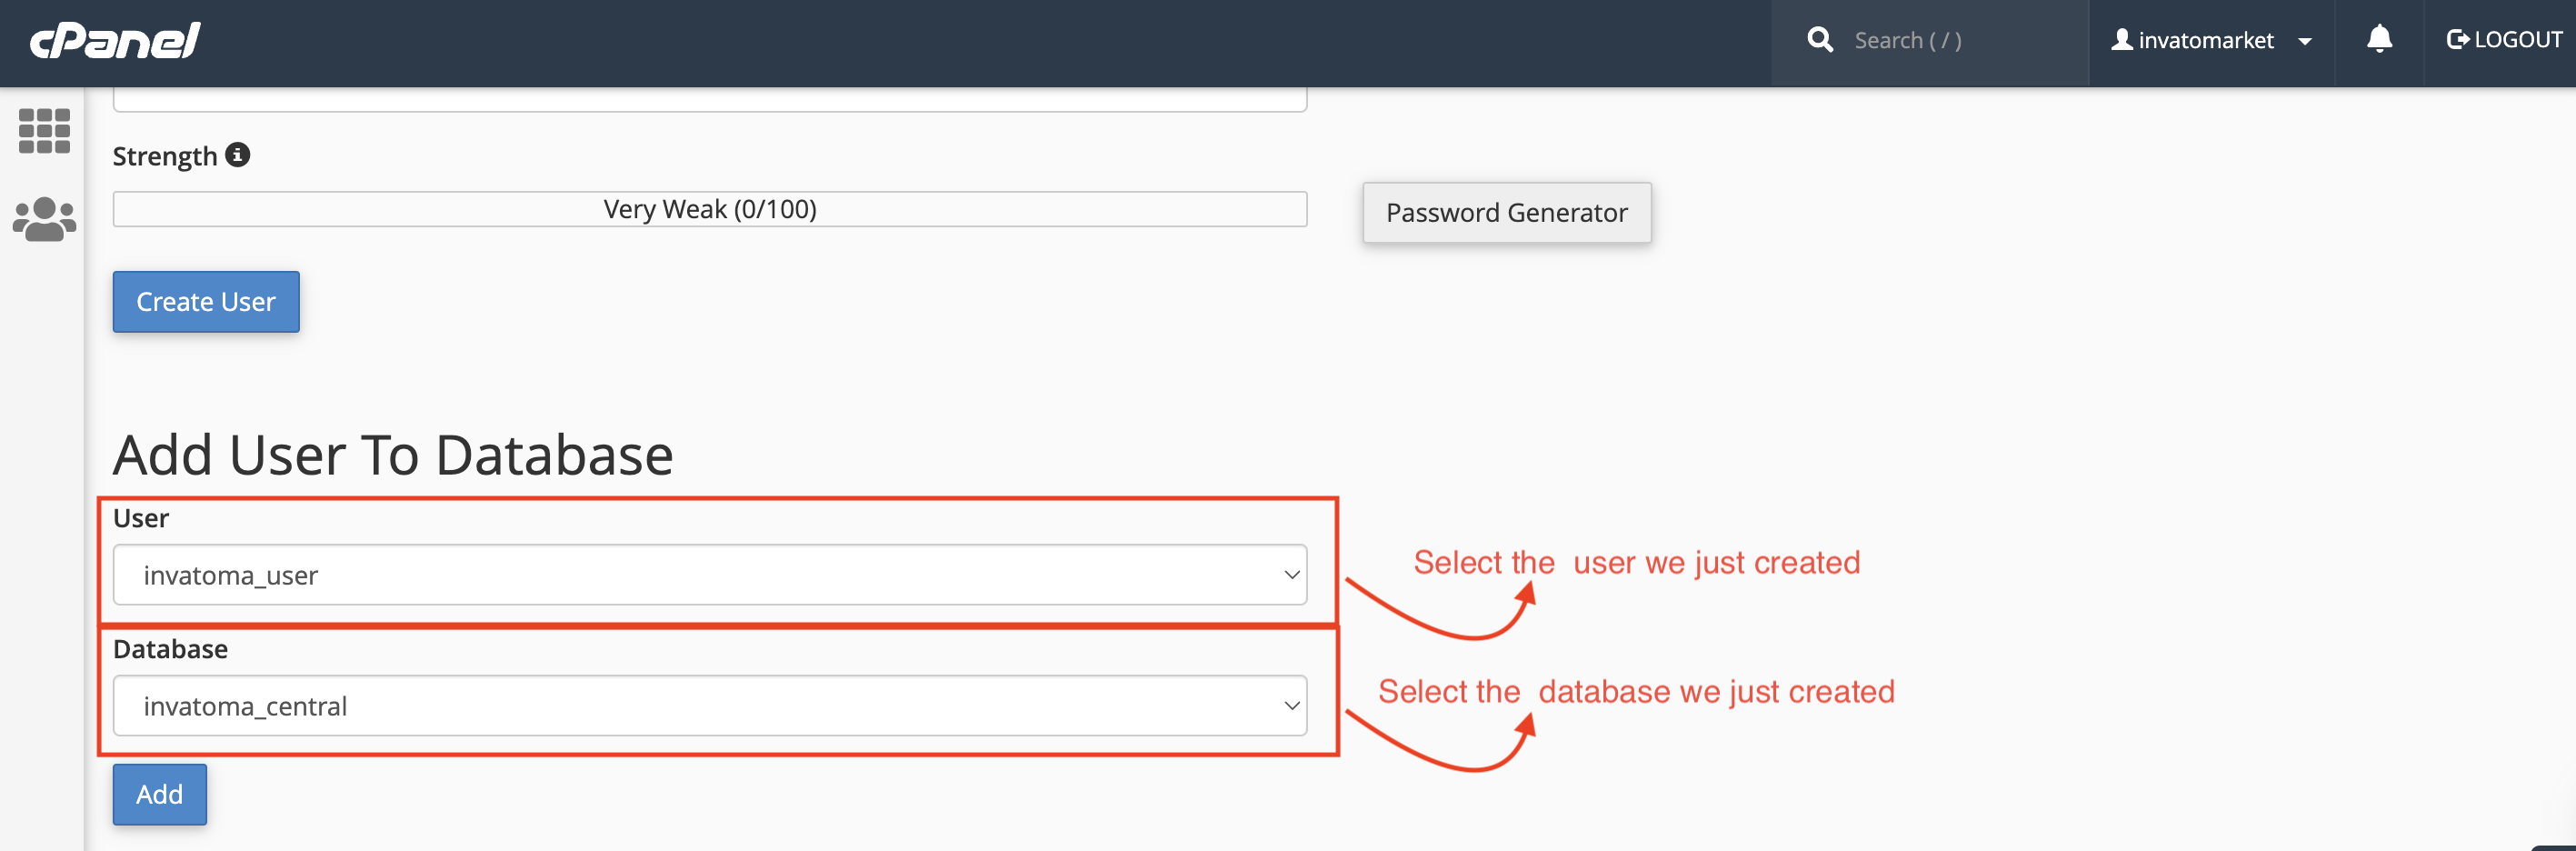
Now we have to add that created user to database. so scroll down and you can see like image below
-
Select the user from the list and select the database, and click on add button below
-
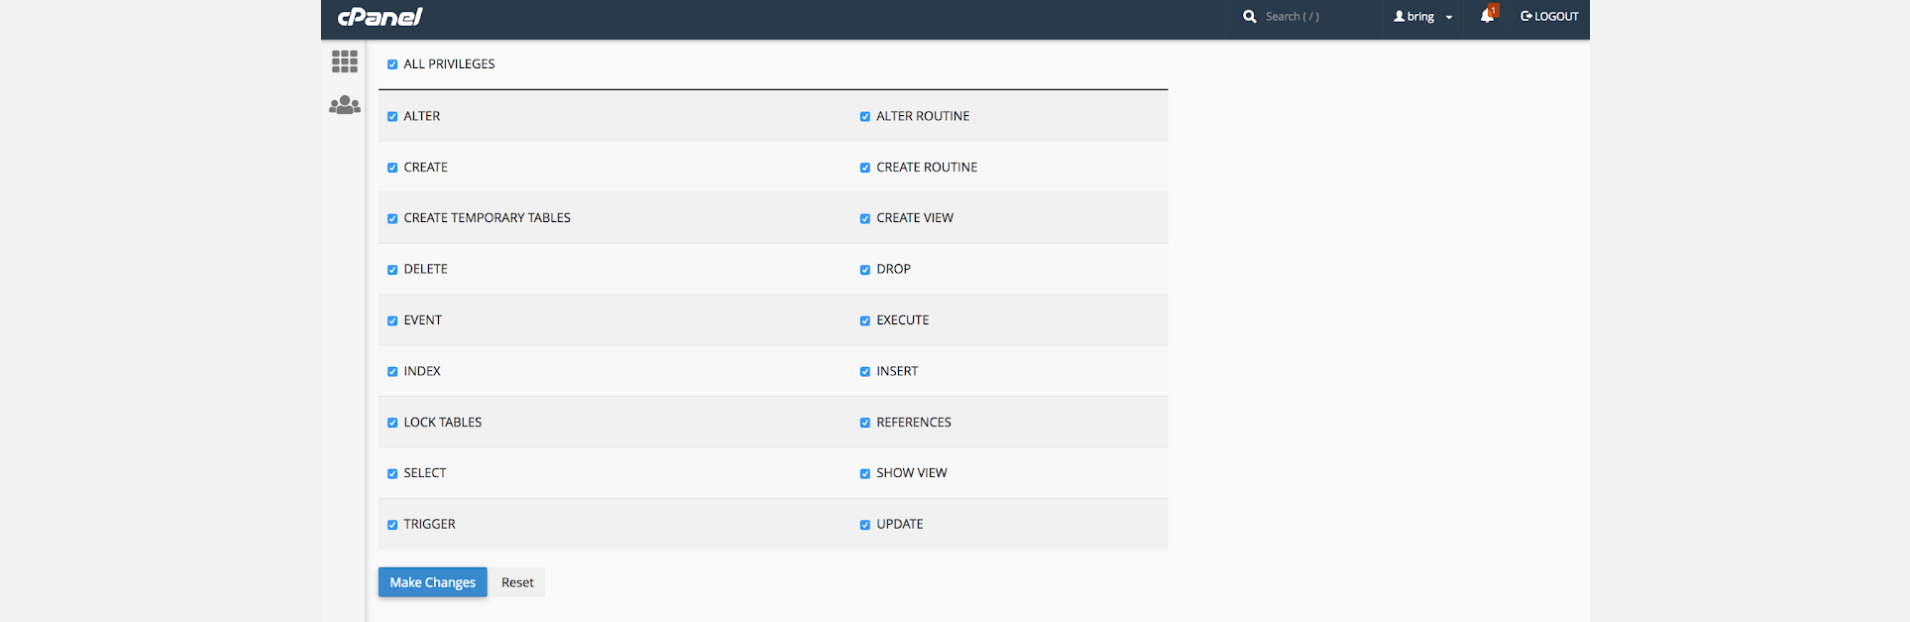
After clicking on add button you will see like below.
-
There you can see ALL PRIVILEGES option, check the box before that
-
This will tick all the boxes shown below (Check the image below). Click on make changes and you are done.
-
Now we have database name - database username - database password - copy all of them for future use.
Setting Up Database credentials to the backend project
-
Upload the folder to your domain-targeted directory on your cPanel provided by your hosting provider. and extract the zip file.
-
In that folder, find the .env.example file and copy it to create a .env file. Then open it with any text editor and make the changes as shown below.
-
There in the APP_URL Replace the https://yourdomain.com/ to Your Domain
-
Make sure that your APP_URL ends with " / " as above.
-
Change Database Configuration, as shown in the example below (With the credentials you just created at cPanel)
-
APP_NAME should be without space.
-
And save the file.
-
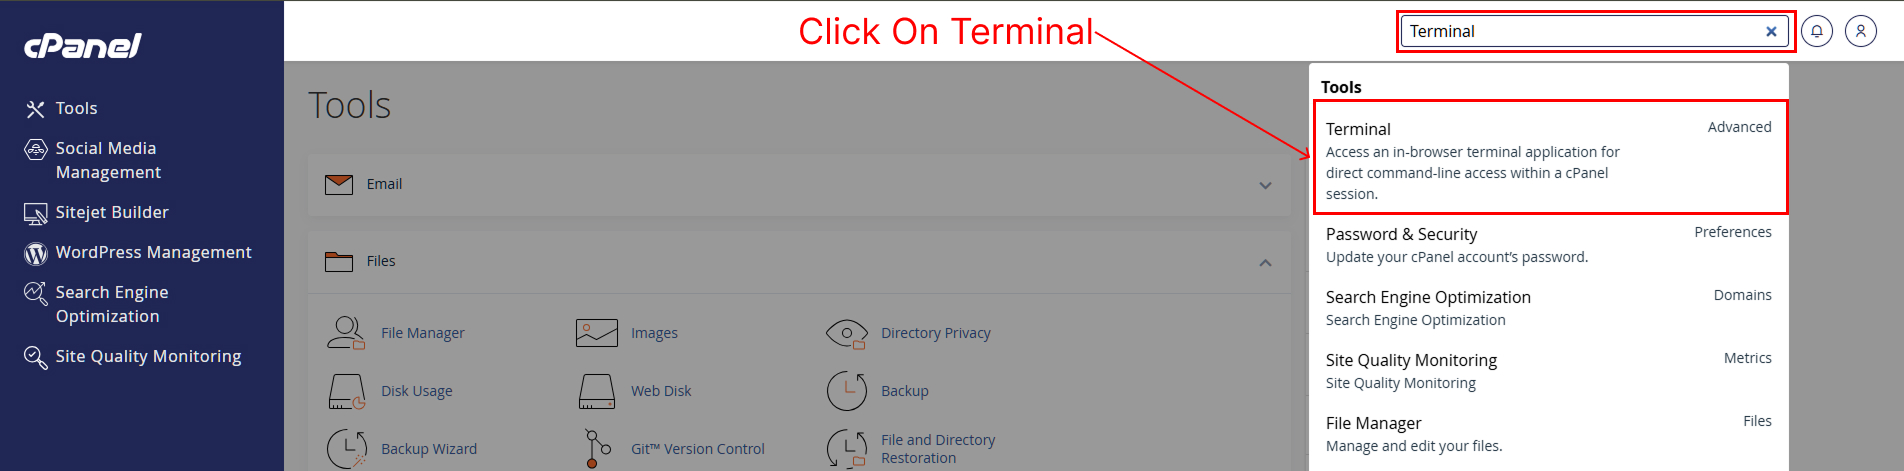
Log in to your server using SSH or open the Terminal provided by your hosting control panel.
-
Search for Terminal in your cPanel and open it.
-
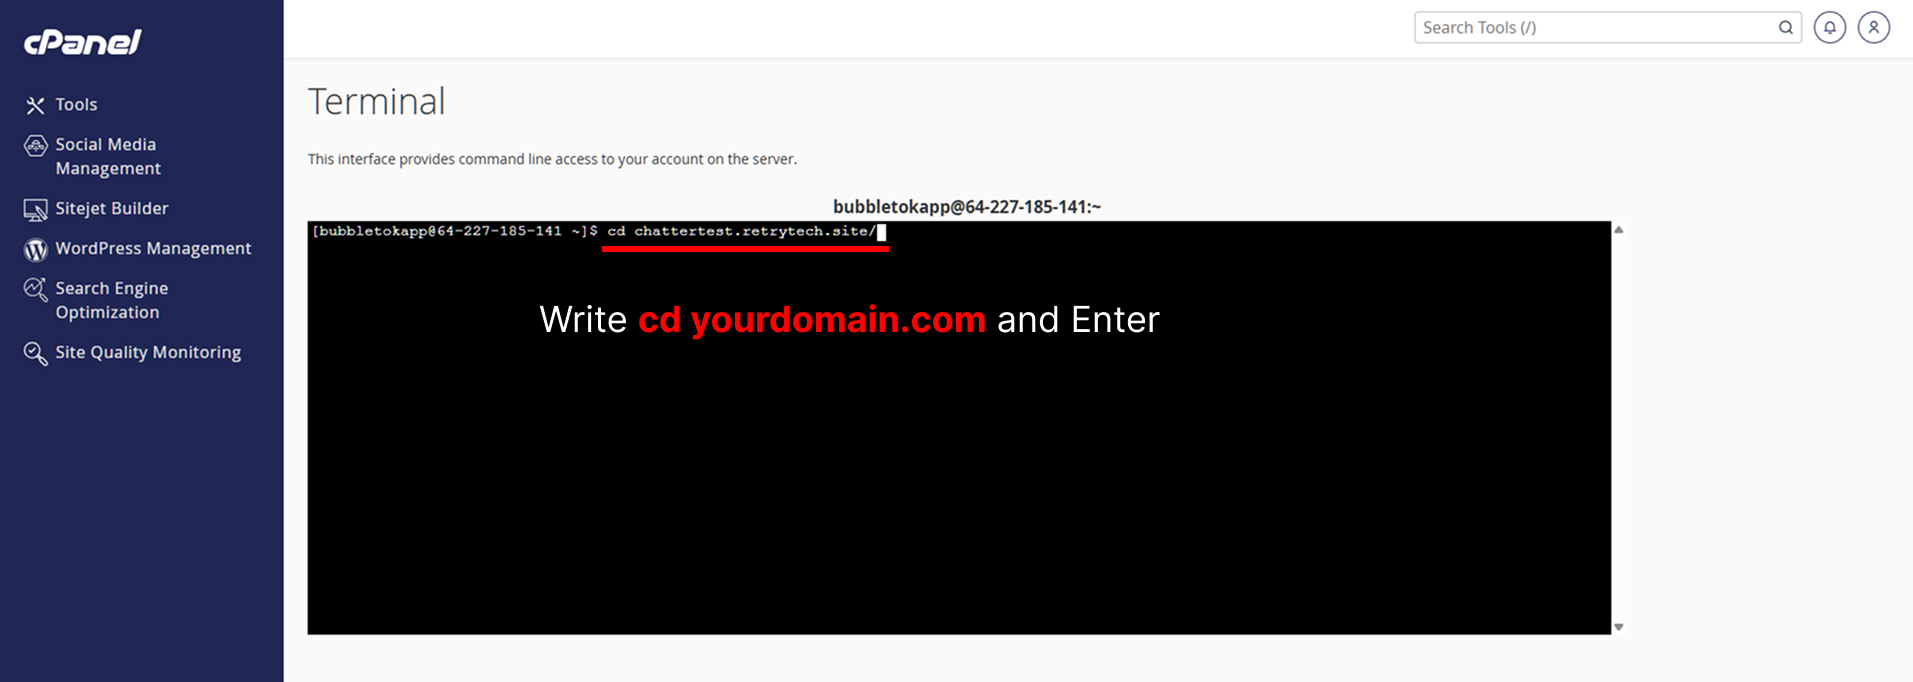
Navigate to your project directory. If your project is installed directly inside public_html, run the following command:
-
If your project is installed inside a domain folder, navigate to that folder as well.
-
Make sure the terminal displays the path where the your application files are located.
-
Like below (You can check the files in the current directory) - this examples shows that the terminal is in the correct path where the application files are located. (not in the public_html folder but in the domain folder)
-
Once you are inside your project directory, run the migration command to create all required database tables.
-
After the migration is completed successfully, run the database seeder command to populate the default application data.
-
After running both commands successfully, your database will be initialized and all required default data, including administrator information and application settings, will be populated automatically.
-
Your application is now ready to use.

DB_DATABASE = database_name
DB_USERNAME = database_username
DB_PASSWORD = "database_password"
cd public_html
cd yourdomain.com
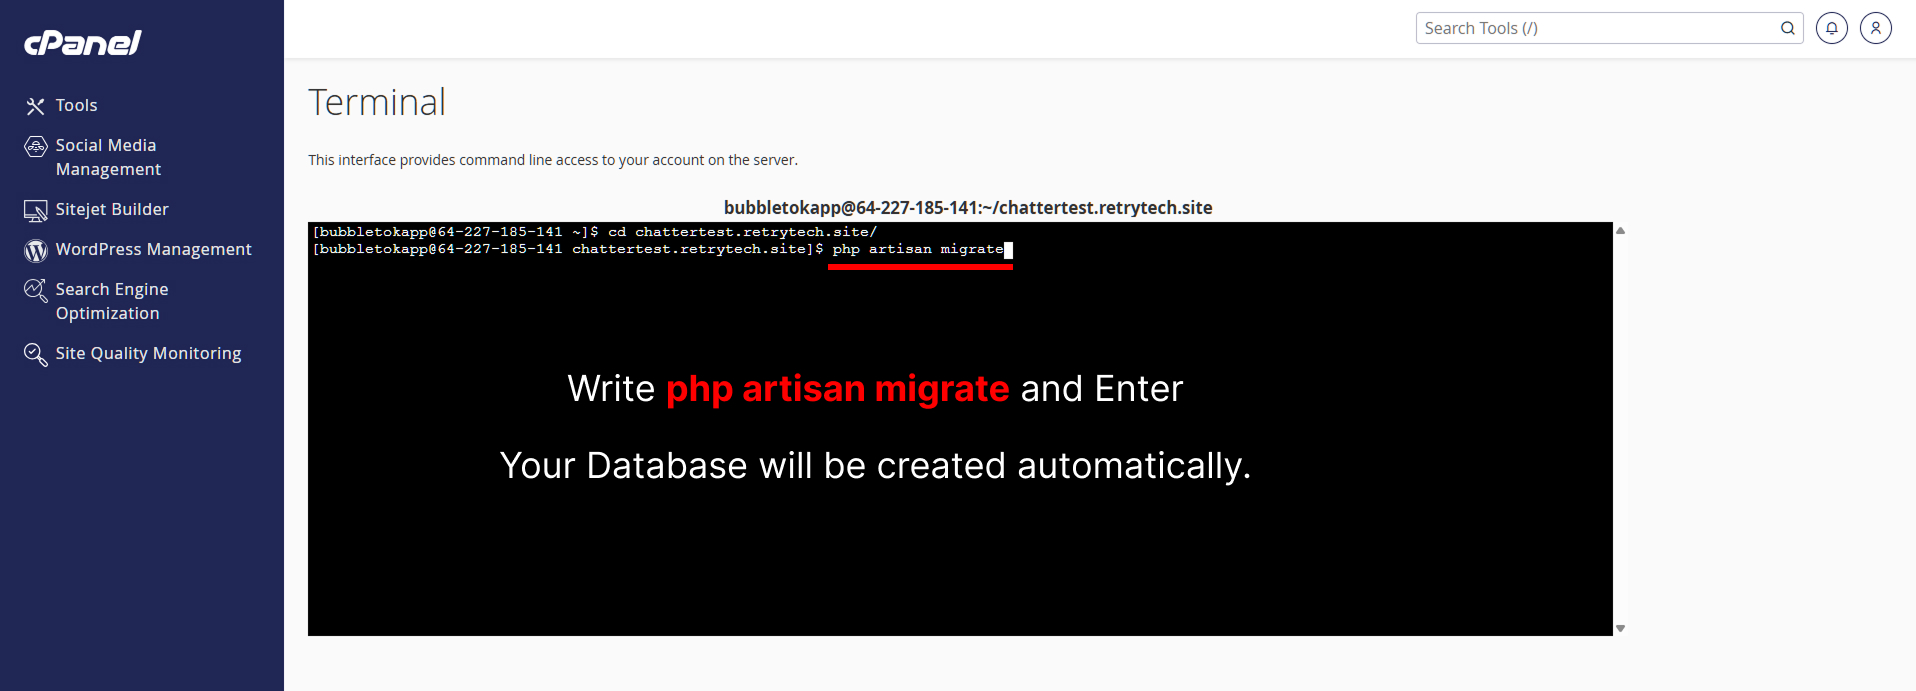
php artisan migrate

php artisan db:seed
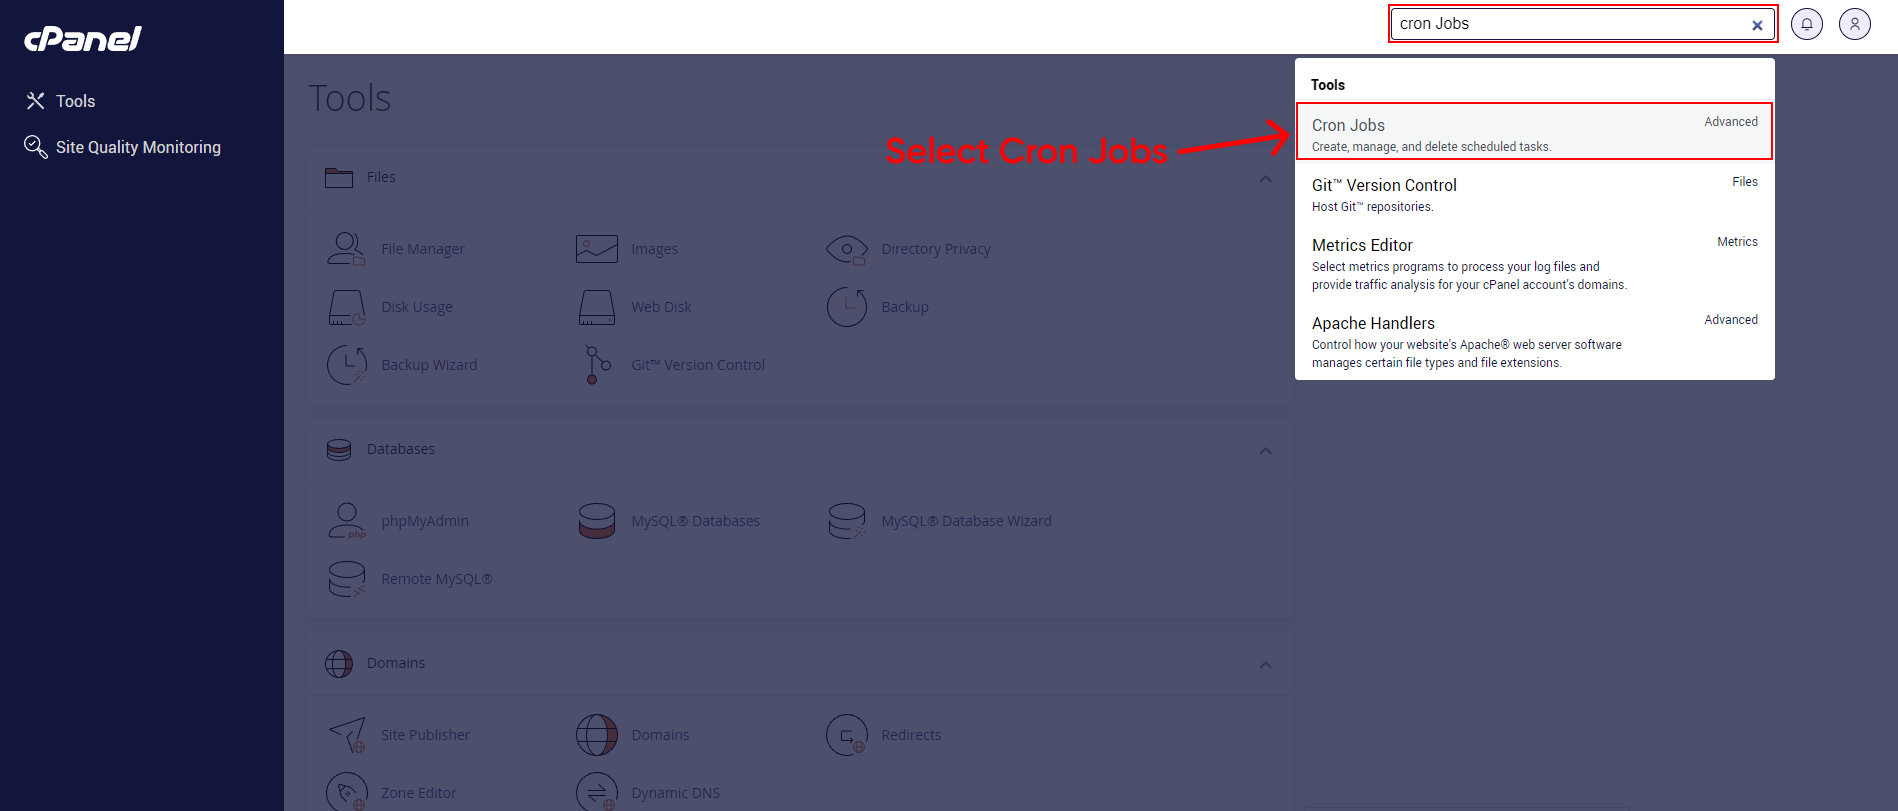
Cron Jobs
-
Search the Cron jobs in your cPanel Tools search.
-
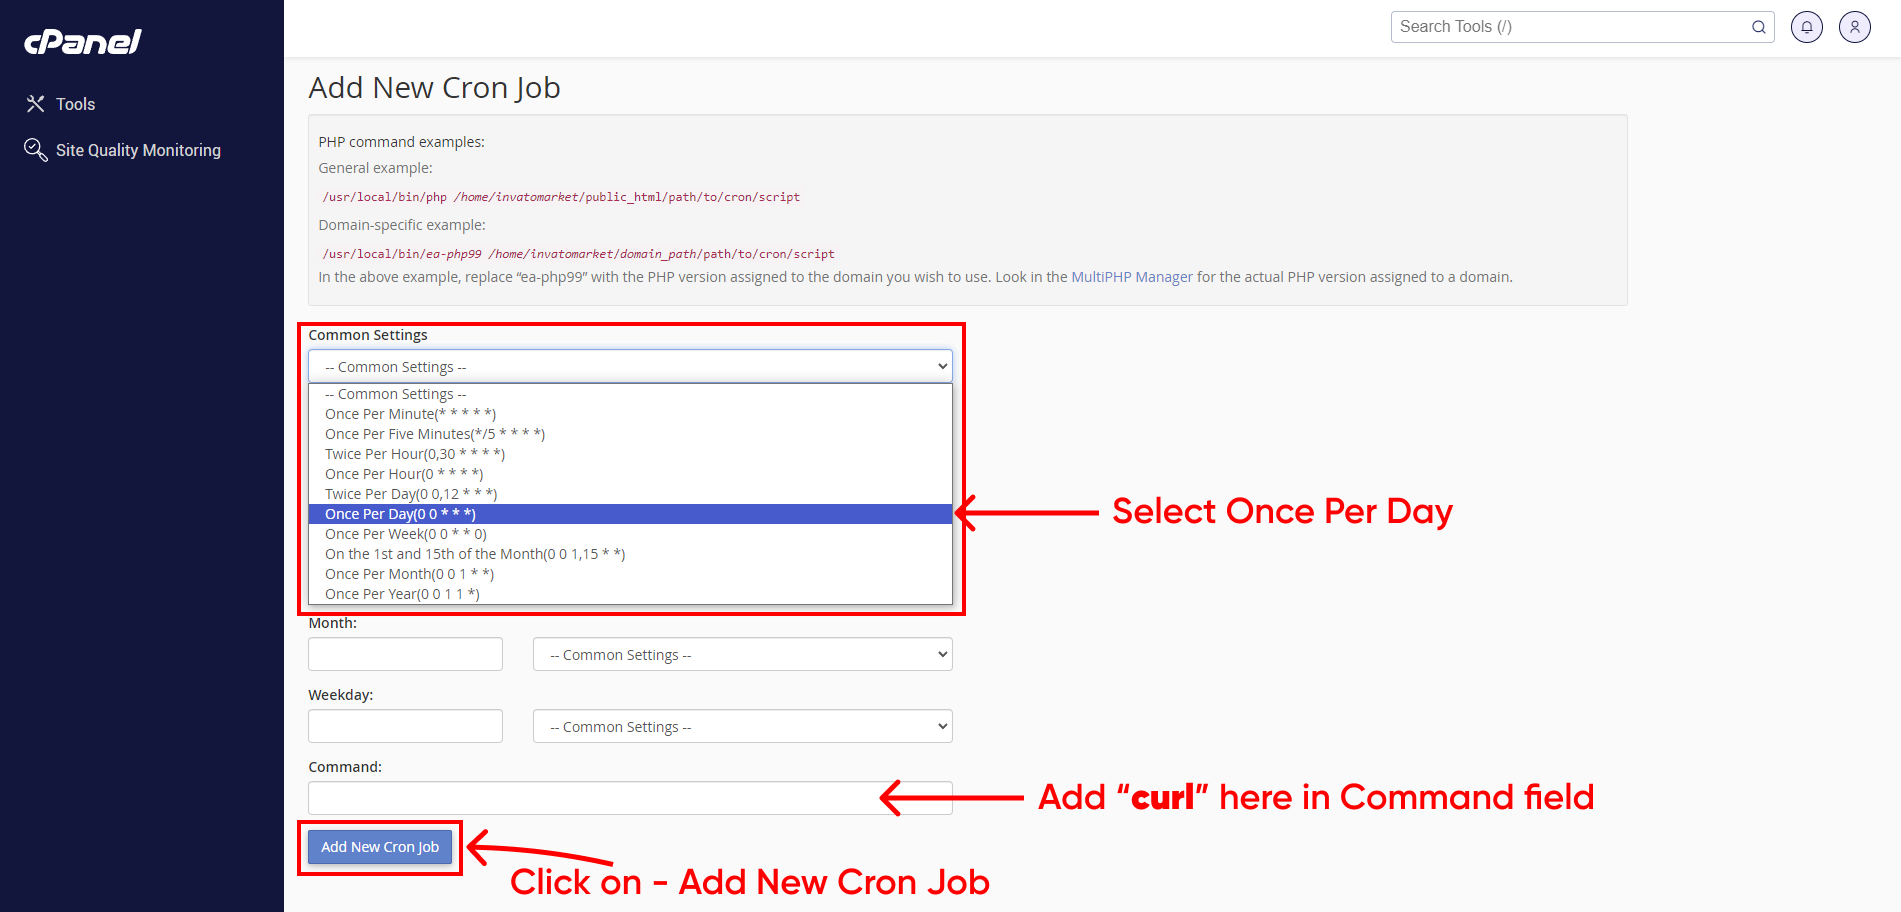
Now Add your curl --request GET 'https://yourdomain.com/deleteStoryFromWeb' in Command field like as above image.
-
And then Click on "Add New Cron Job" Button.
-
Your Cron Job is ready to work.

Setting up agora
-
Follow This guide and setup project at agora and collect App id and App Certificate
-
Add that App id and App Certificate to the .env file as show below.
-
Save the file by pressing Ctrl + s

Setup Notification (FCM)
-
Follow This guide and setup project at firebase and collect .json
-
Open .json file in your text editor.
-
Copy content of .json file from your text editor.
-
Create a new file named googleCredentials.json in your backend folder and paste the content in that file.
Setup Firebase Config
-
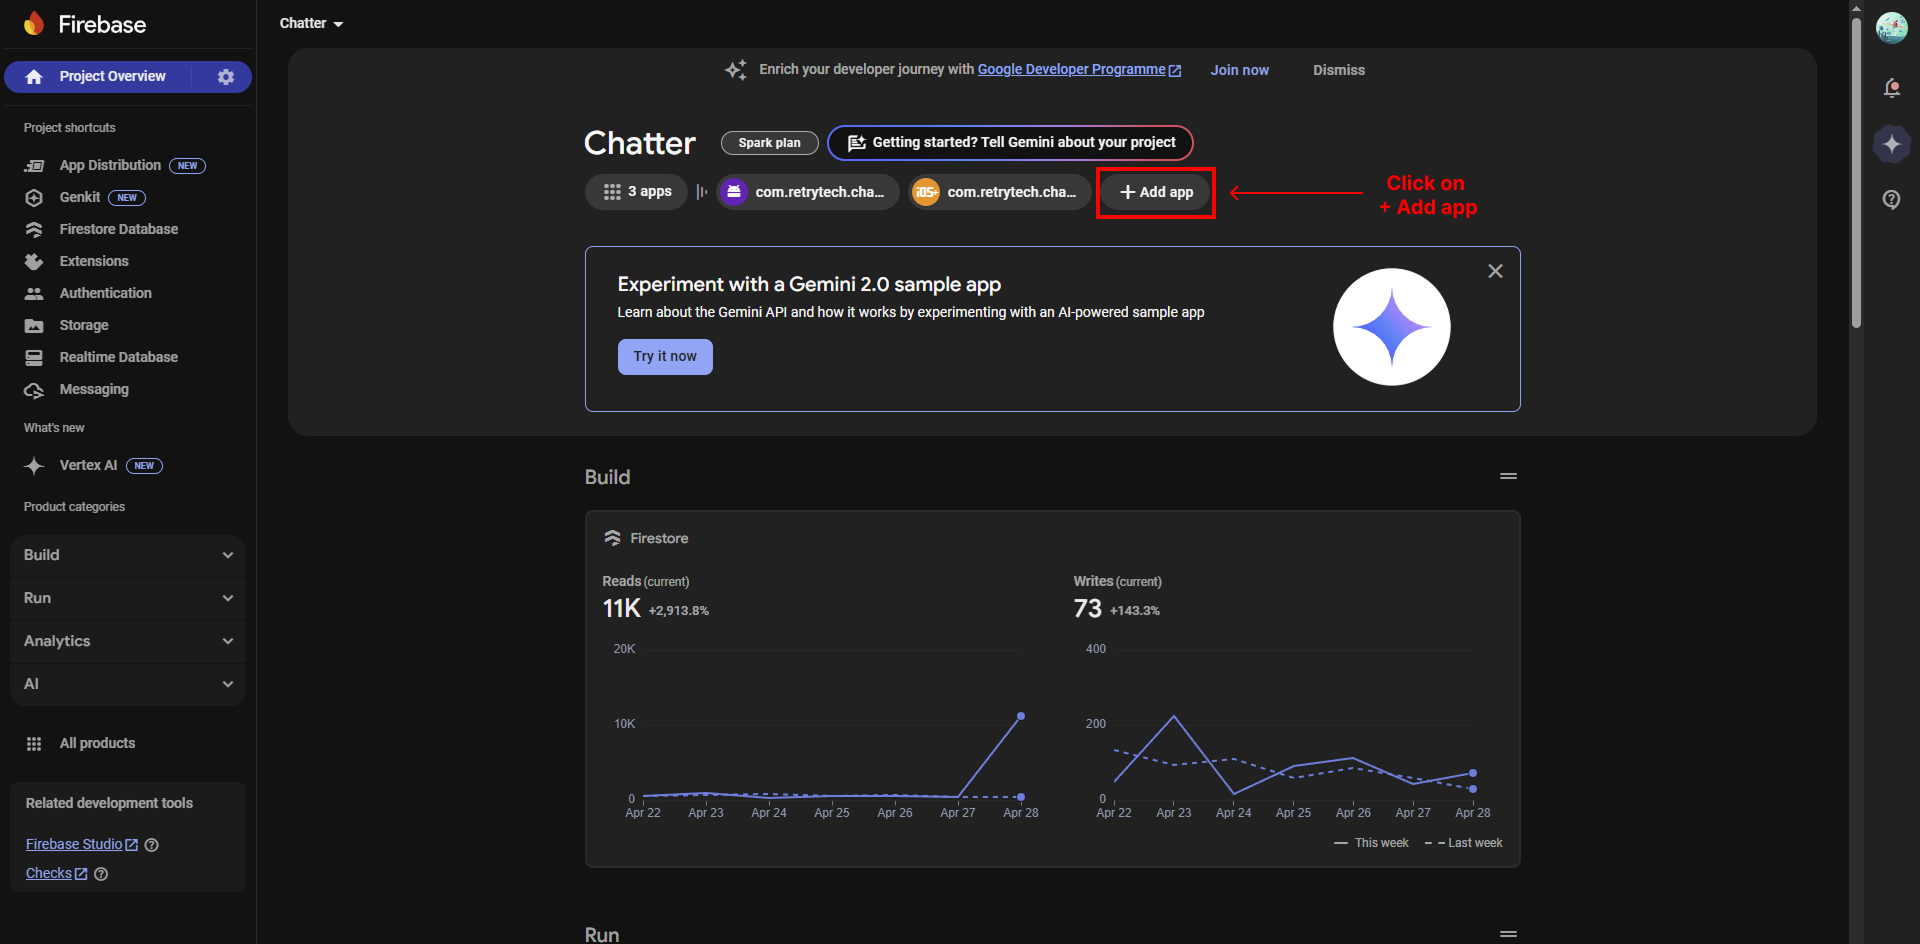
Now go back to the Project Overview page in Firebase and follow the steps below carefully.
-
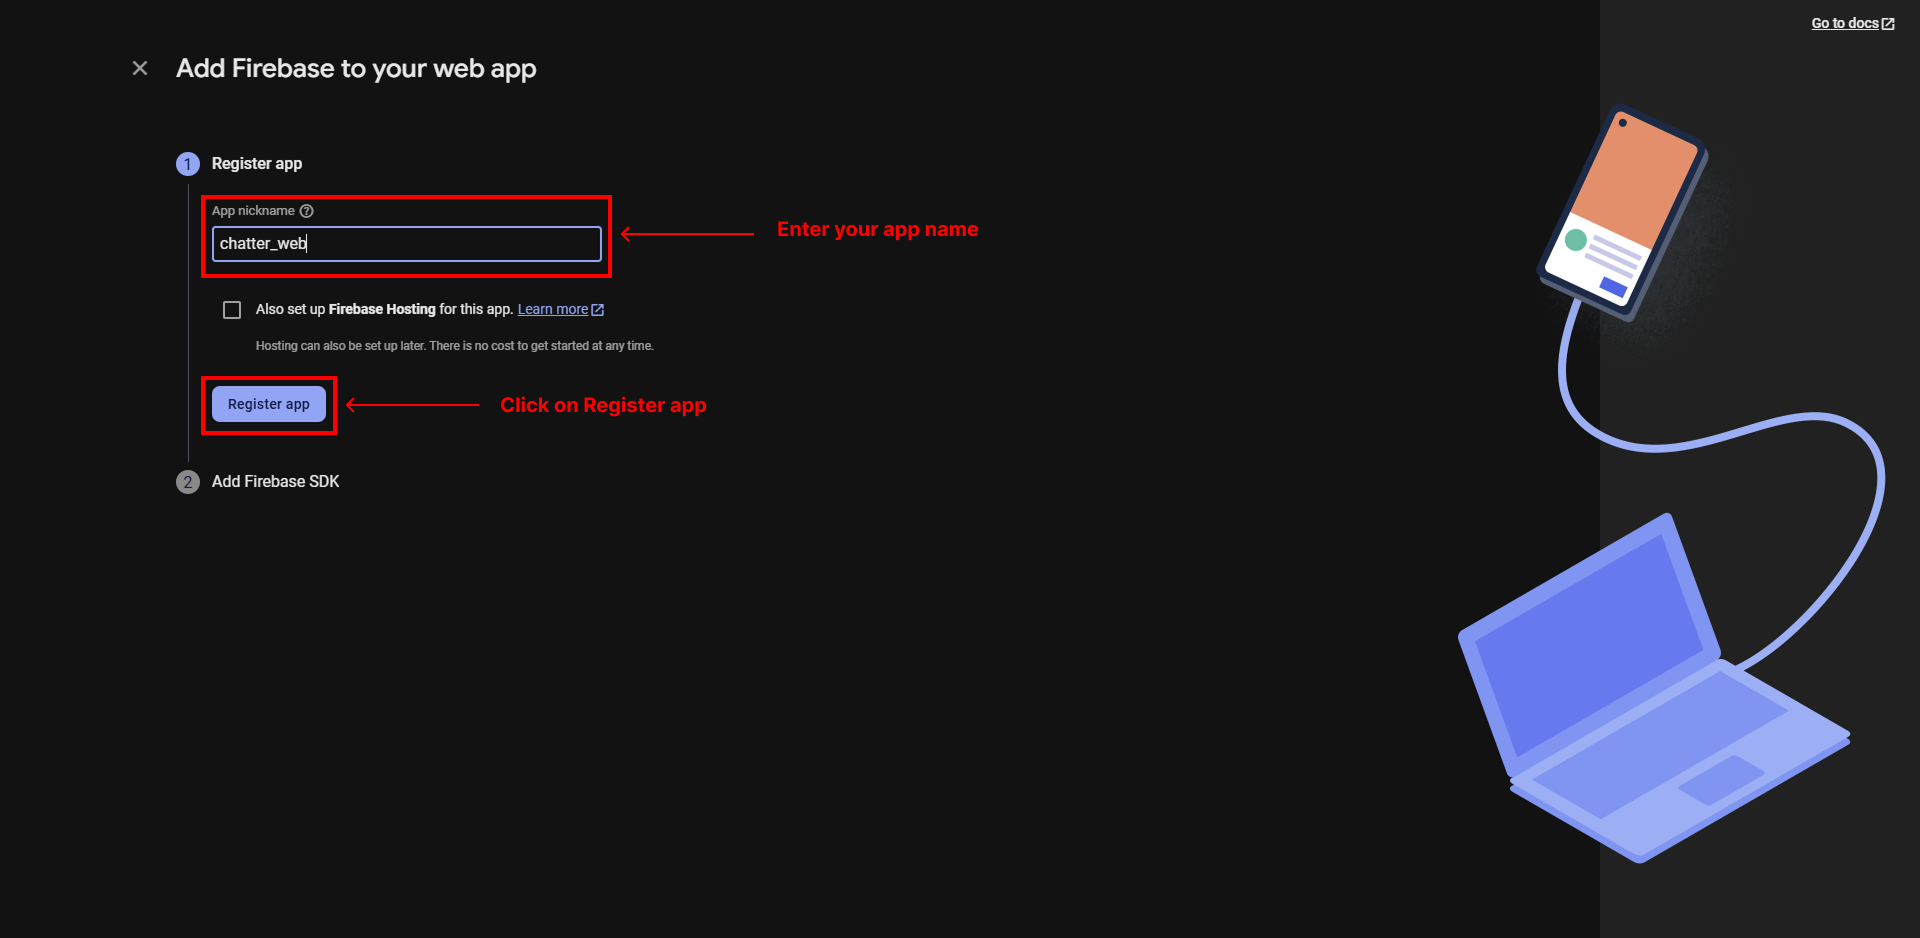
Click on + Add app
-
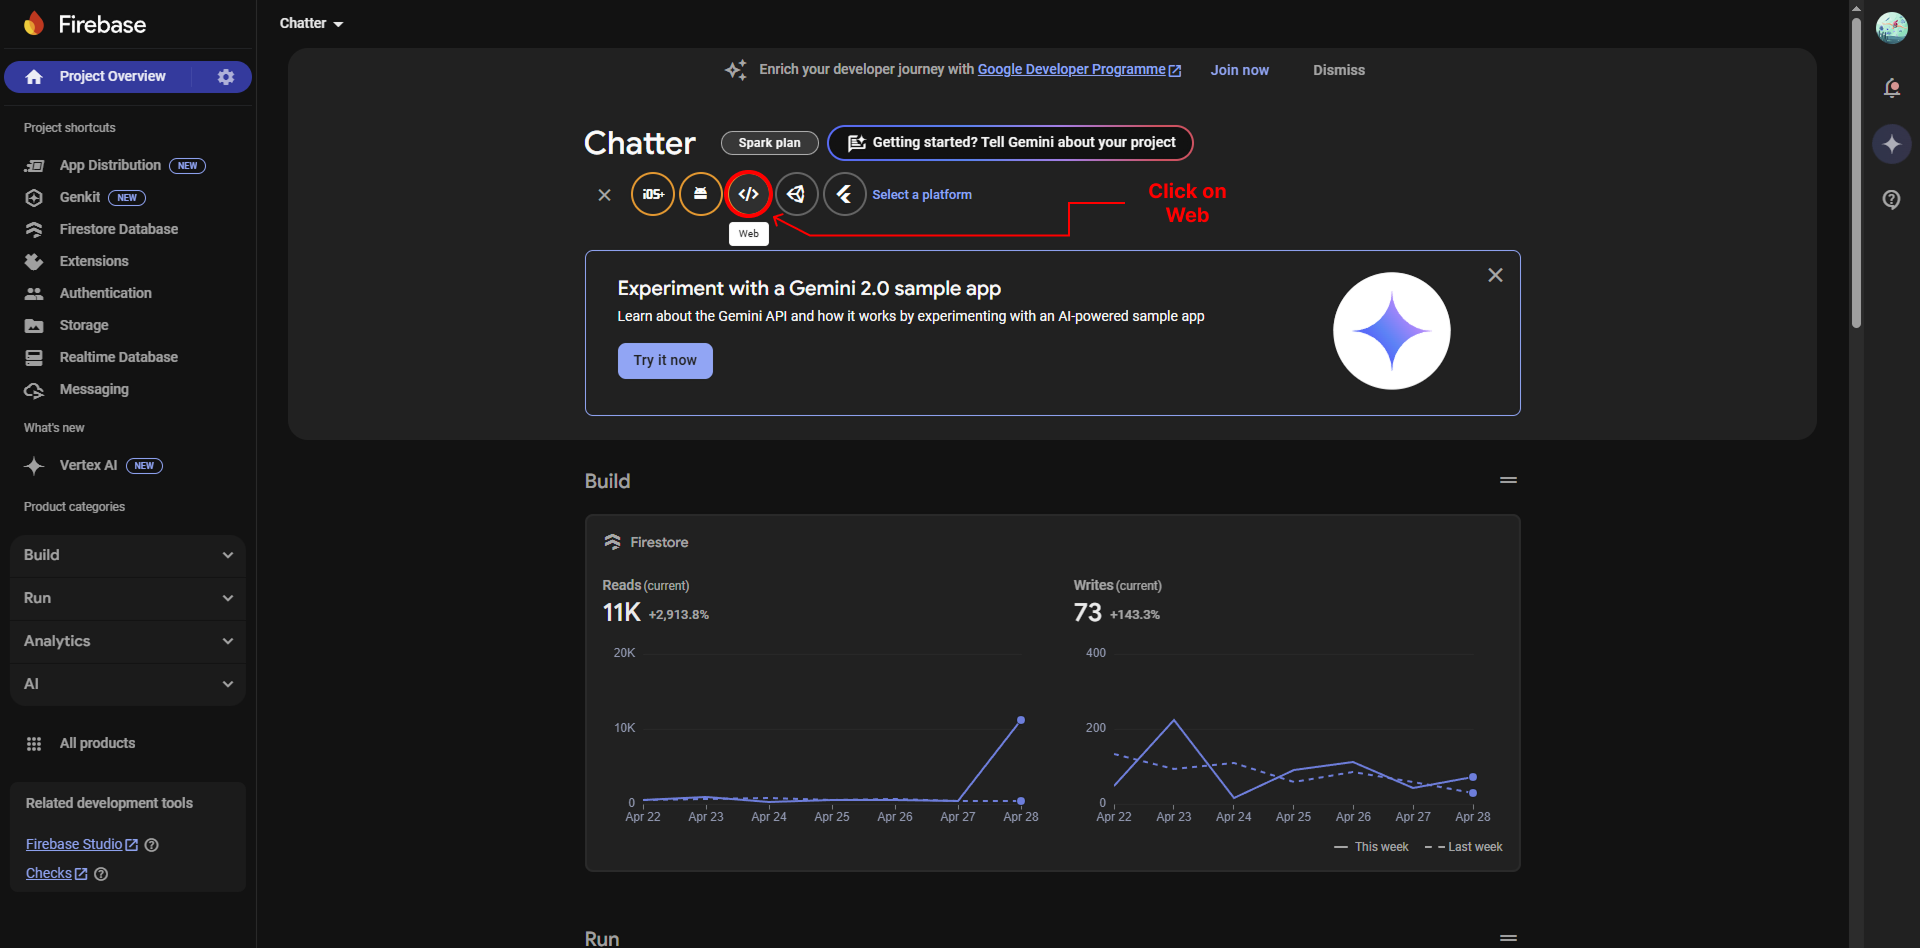
Click on Web
-
Enter your app name
-
Click on Register app
-
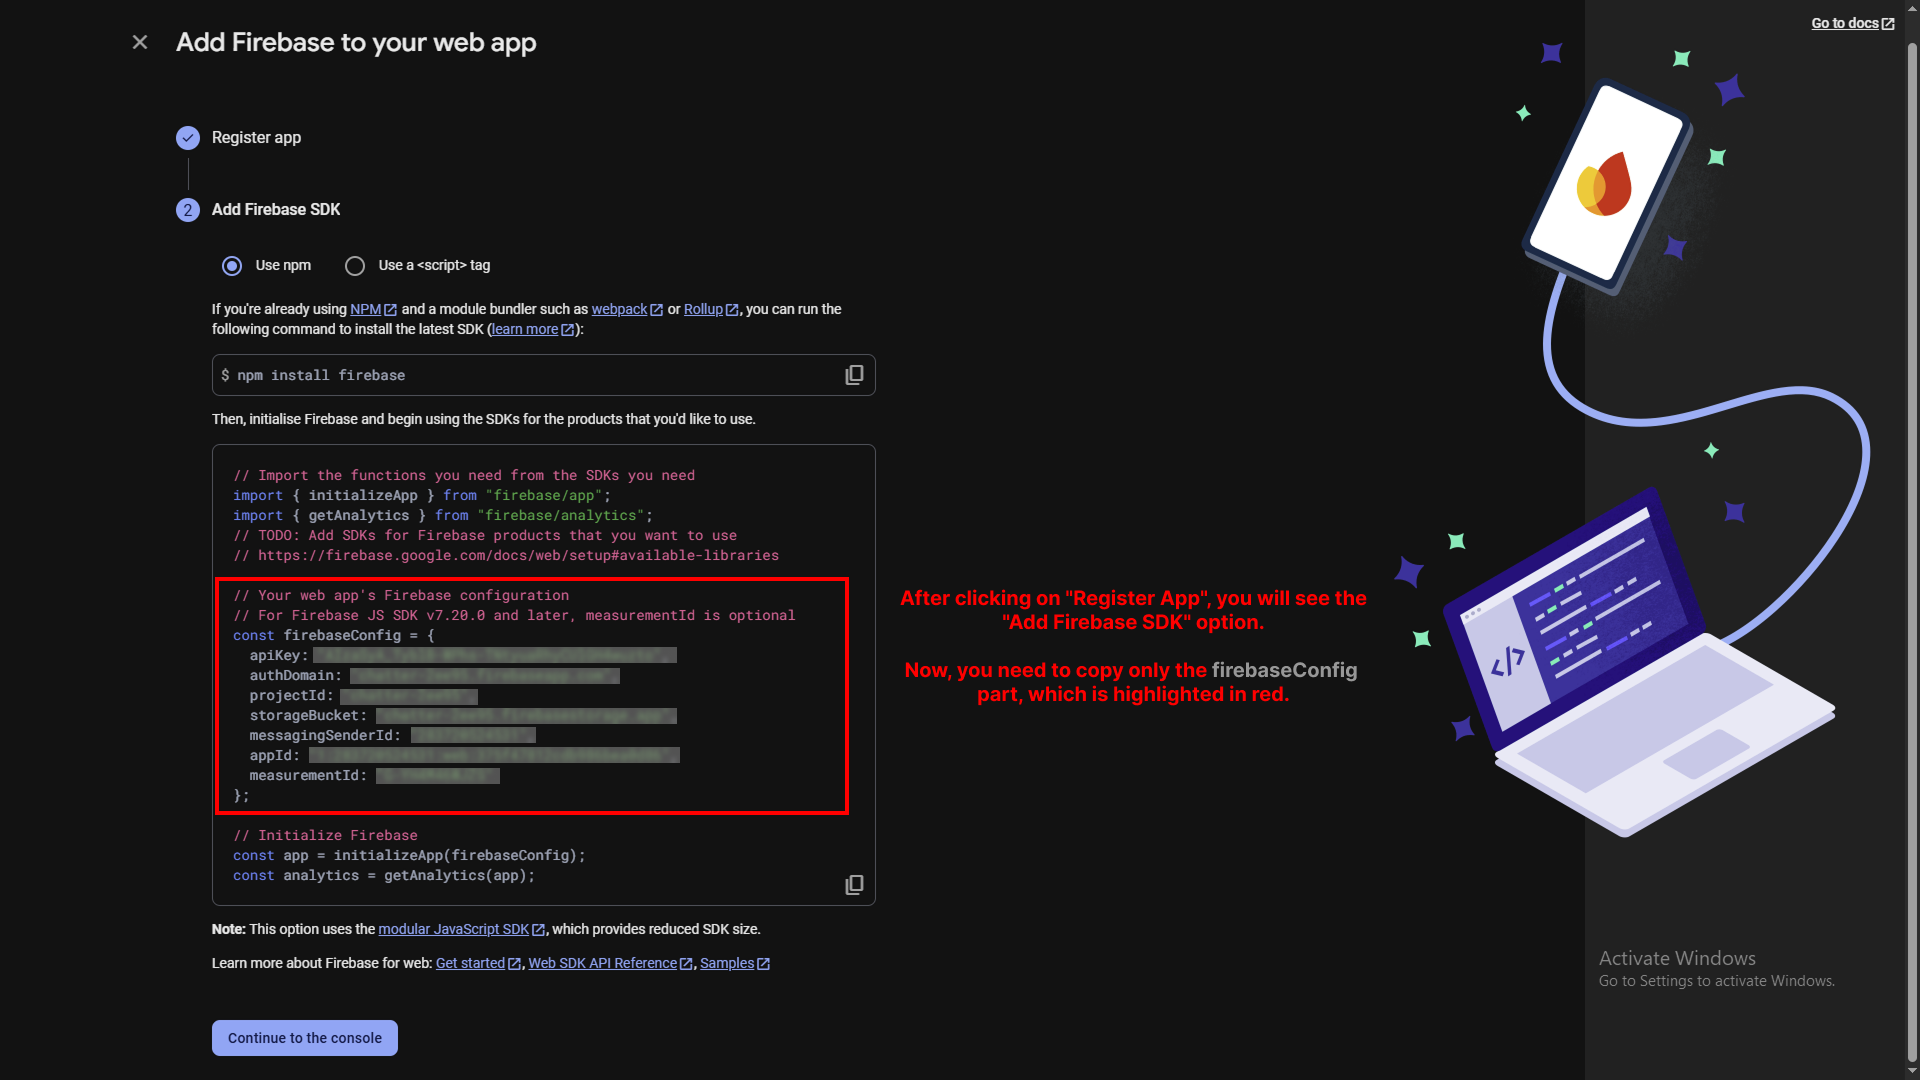
After clicking on Register App , you will see the Add Firebase SDK option.
-
Now, you need to copy only the firebaseConfig part , which is highlighted in red.
-
Please handle the copied part carefully.
-
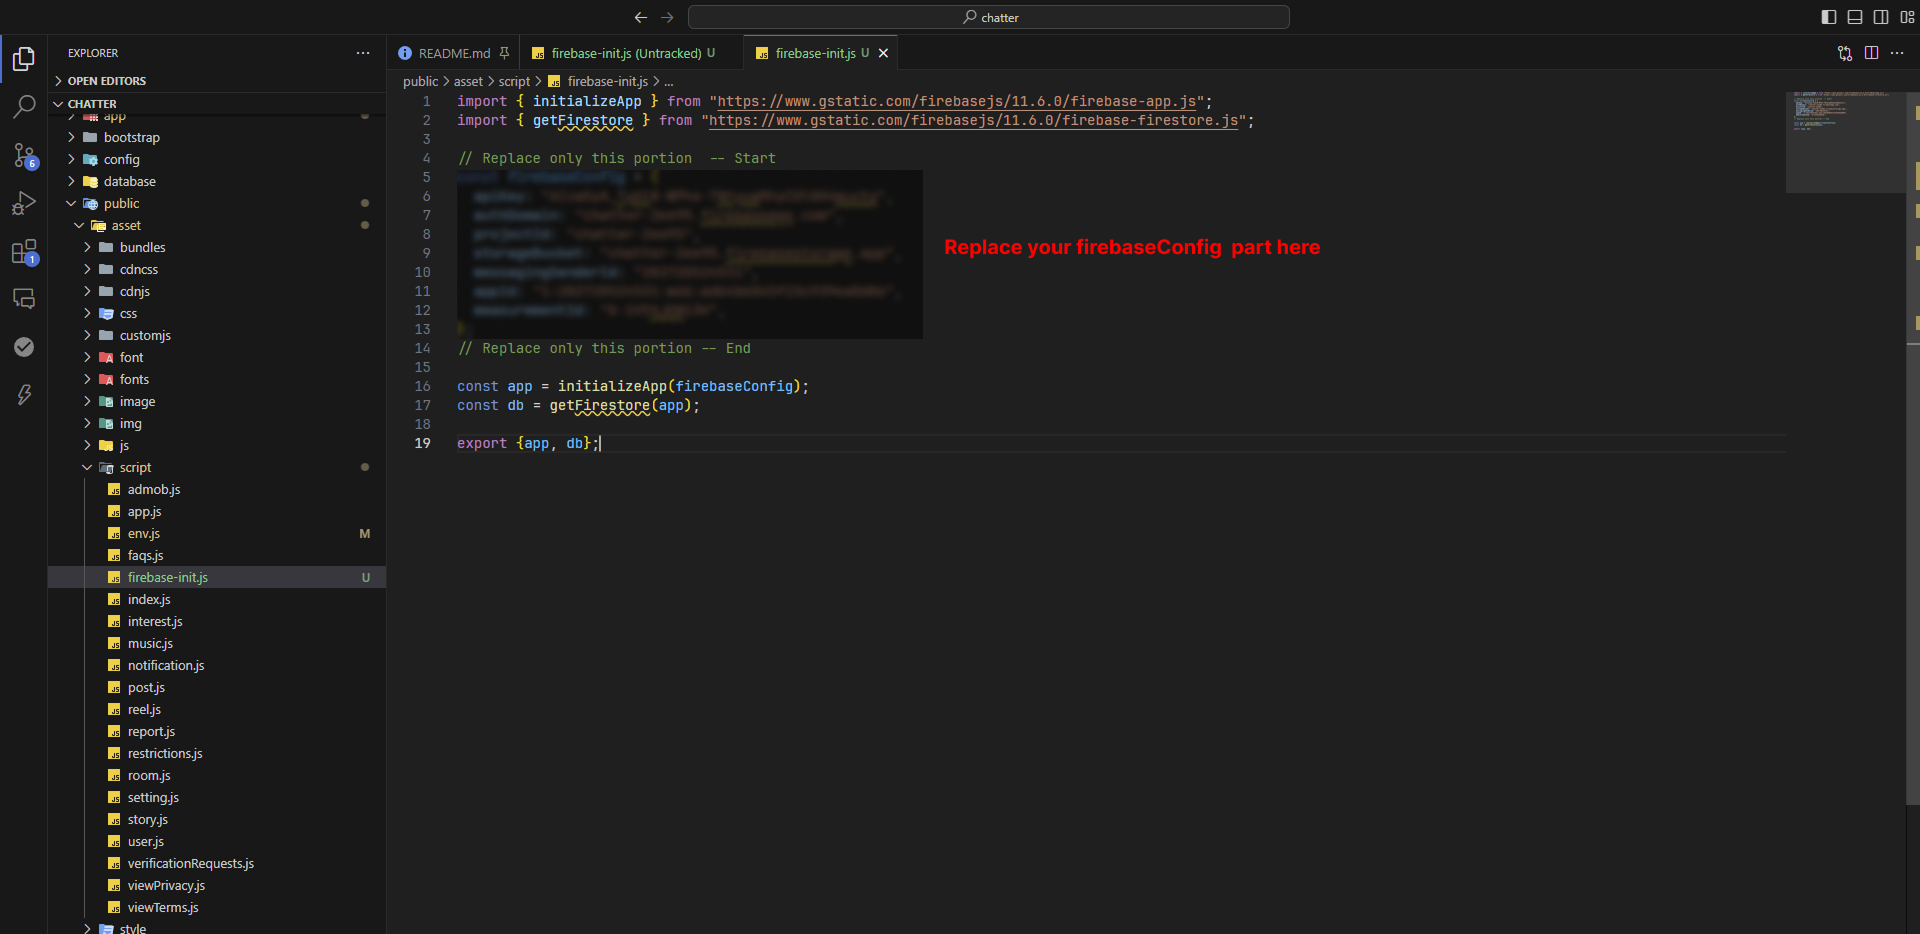
Now, open your backend project and locate the file firebase-init.js .
-
which is placed at: public\asset\script\firebase-init.js
-
Replace only the copied firebaseConfig part in that file with the new one.
-
For more details, please refer to the image shown below.
-
And CTRL + S save the file.
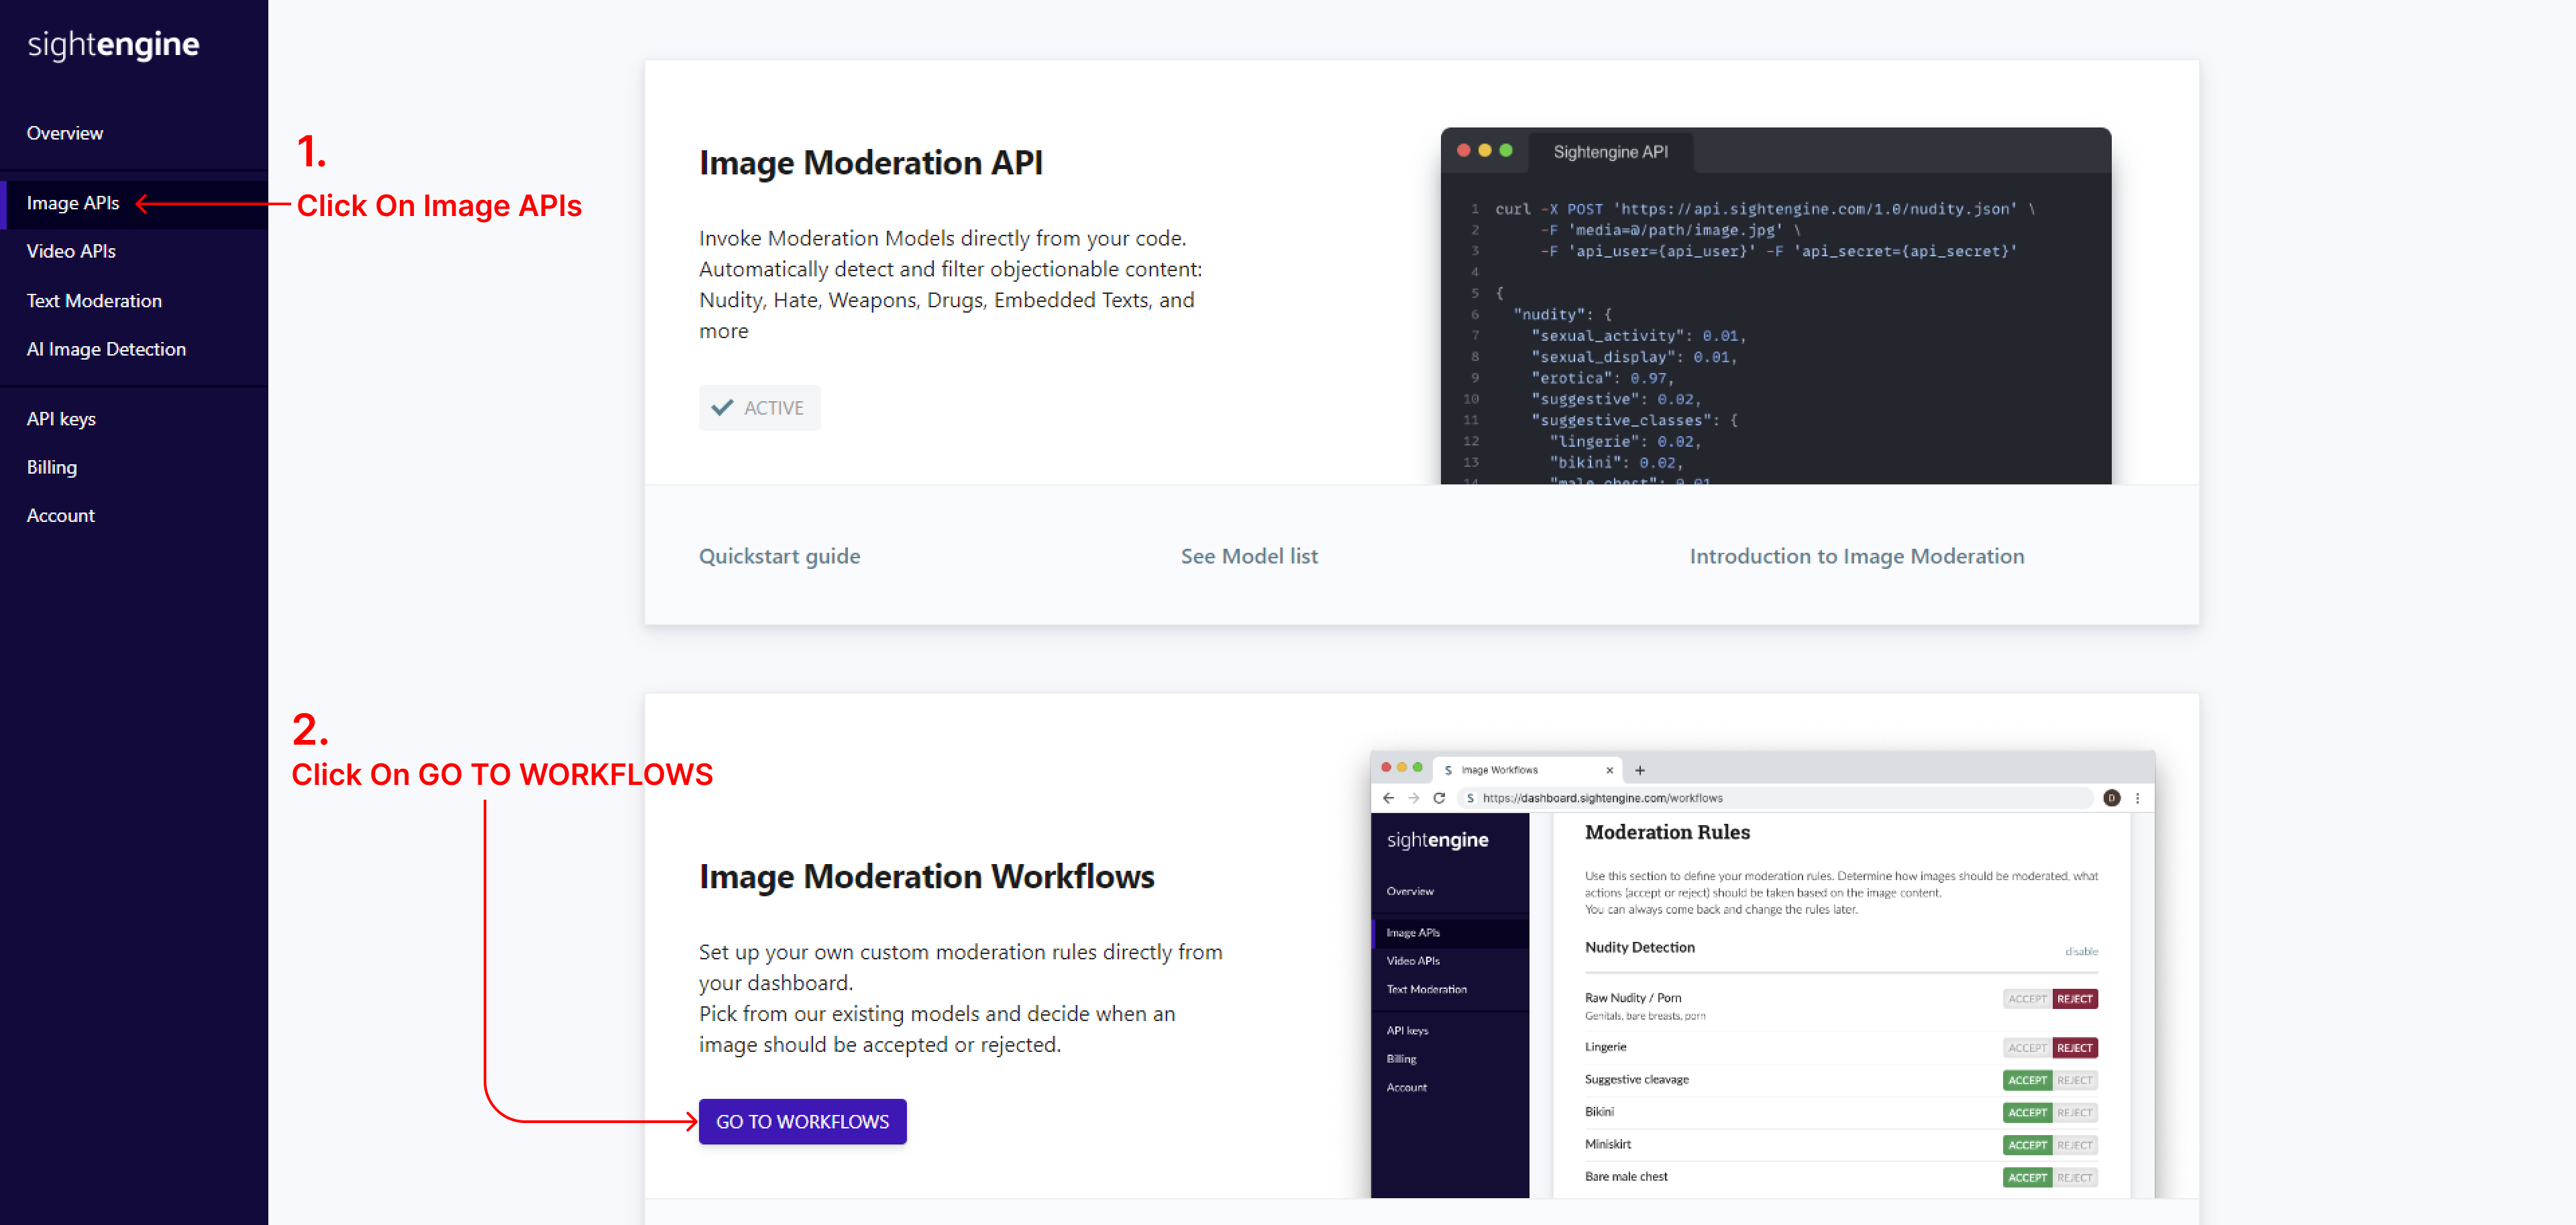
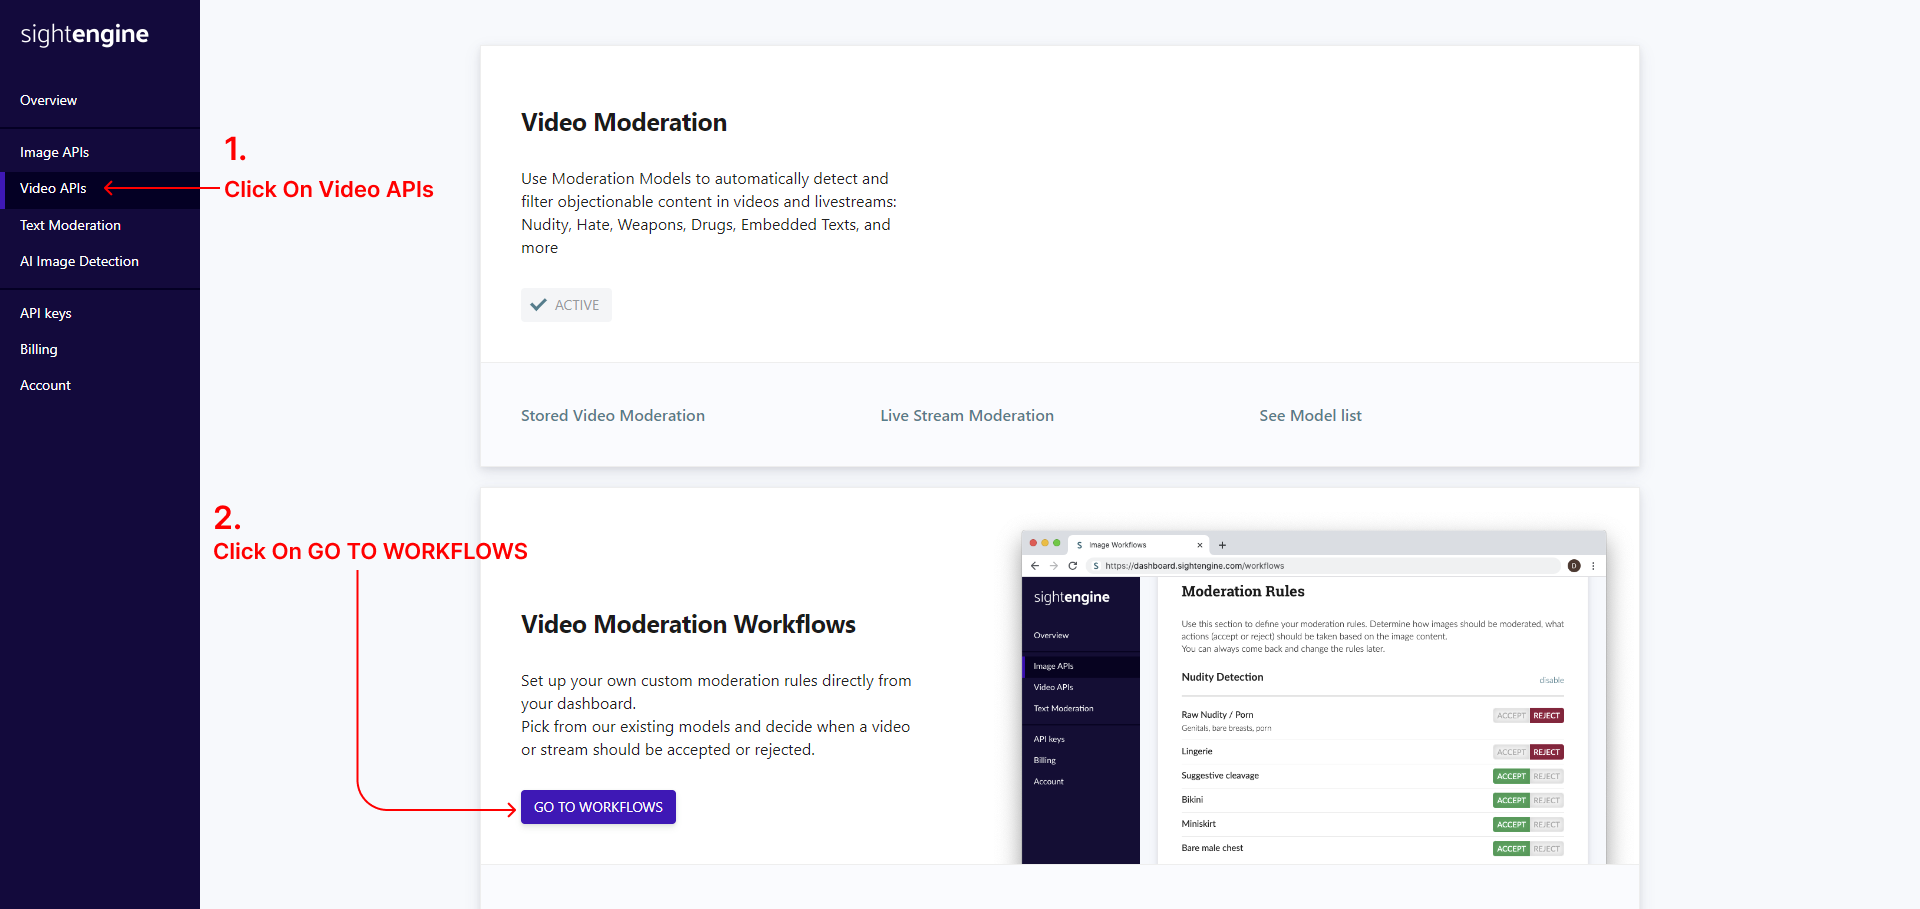
sightengine (Optional)
-
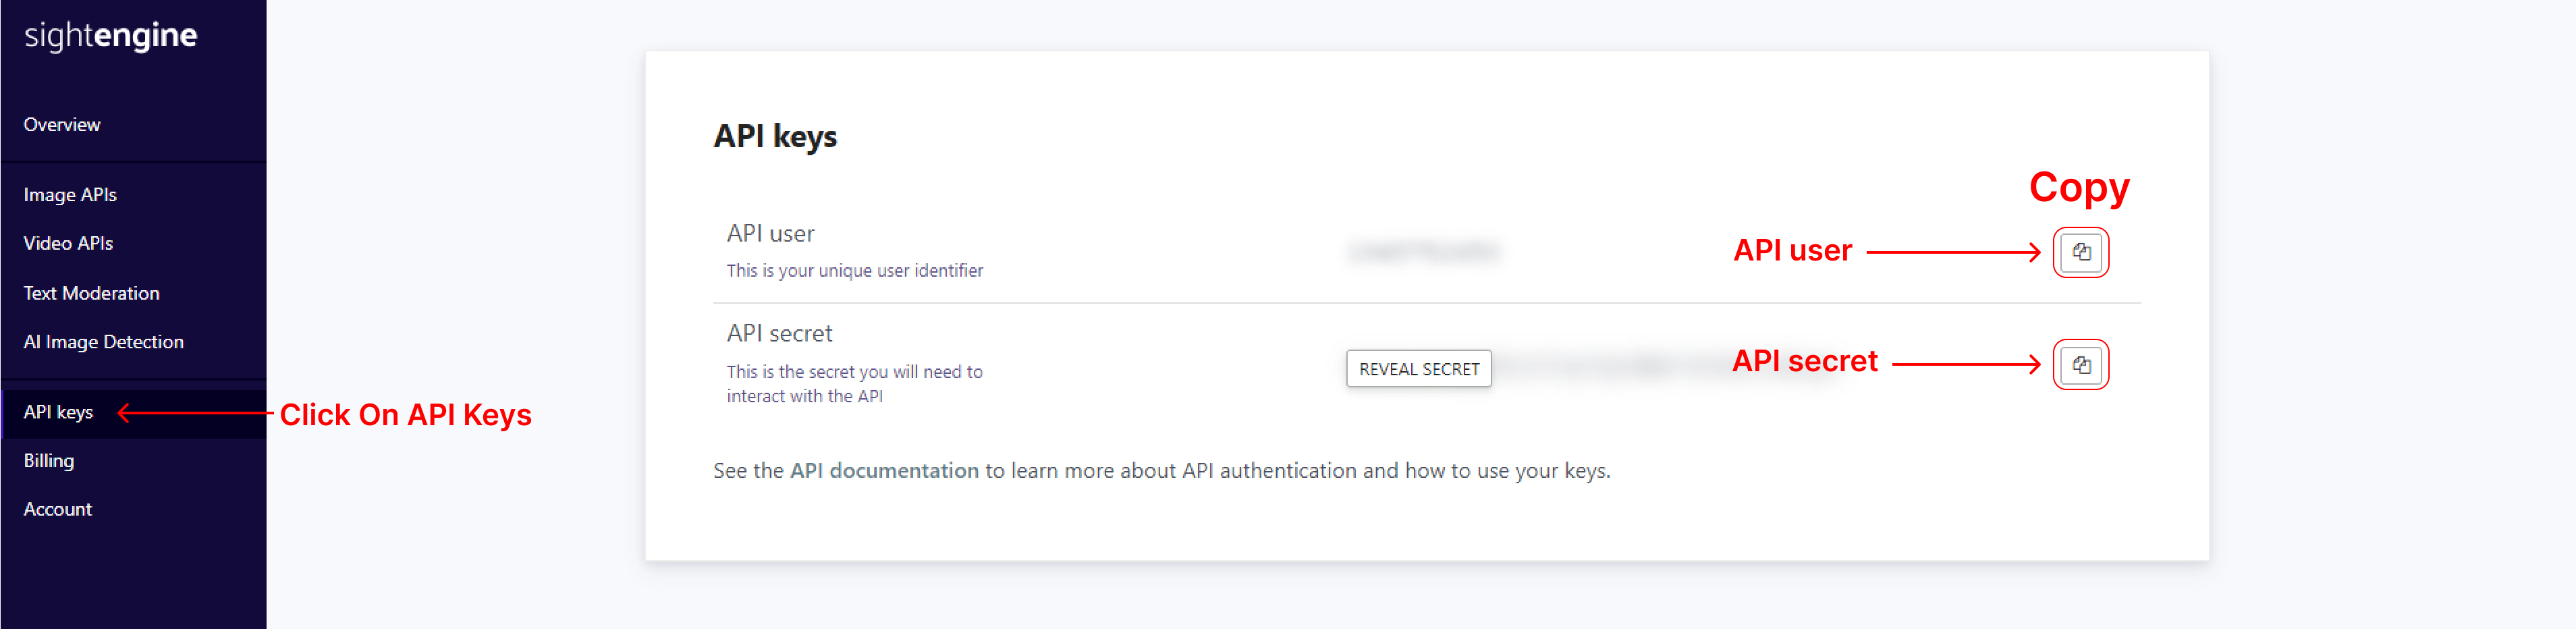
Sign up at sightengine
-
See Below image for getting API Keys (API User & API secret)
-
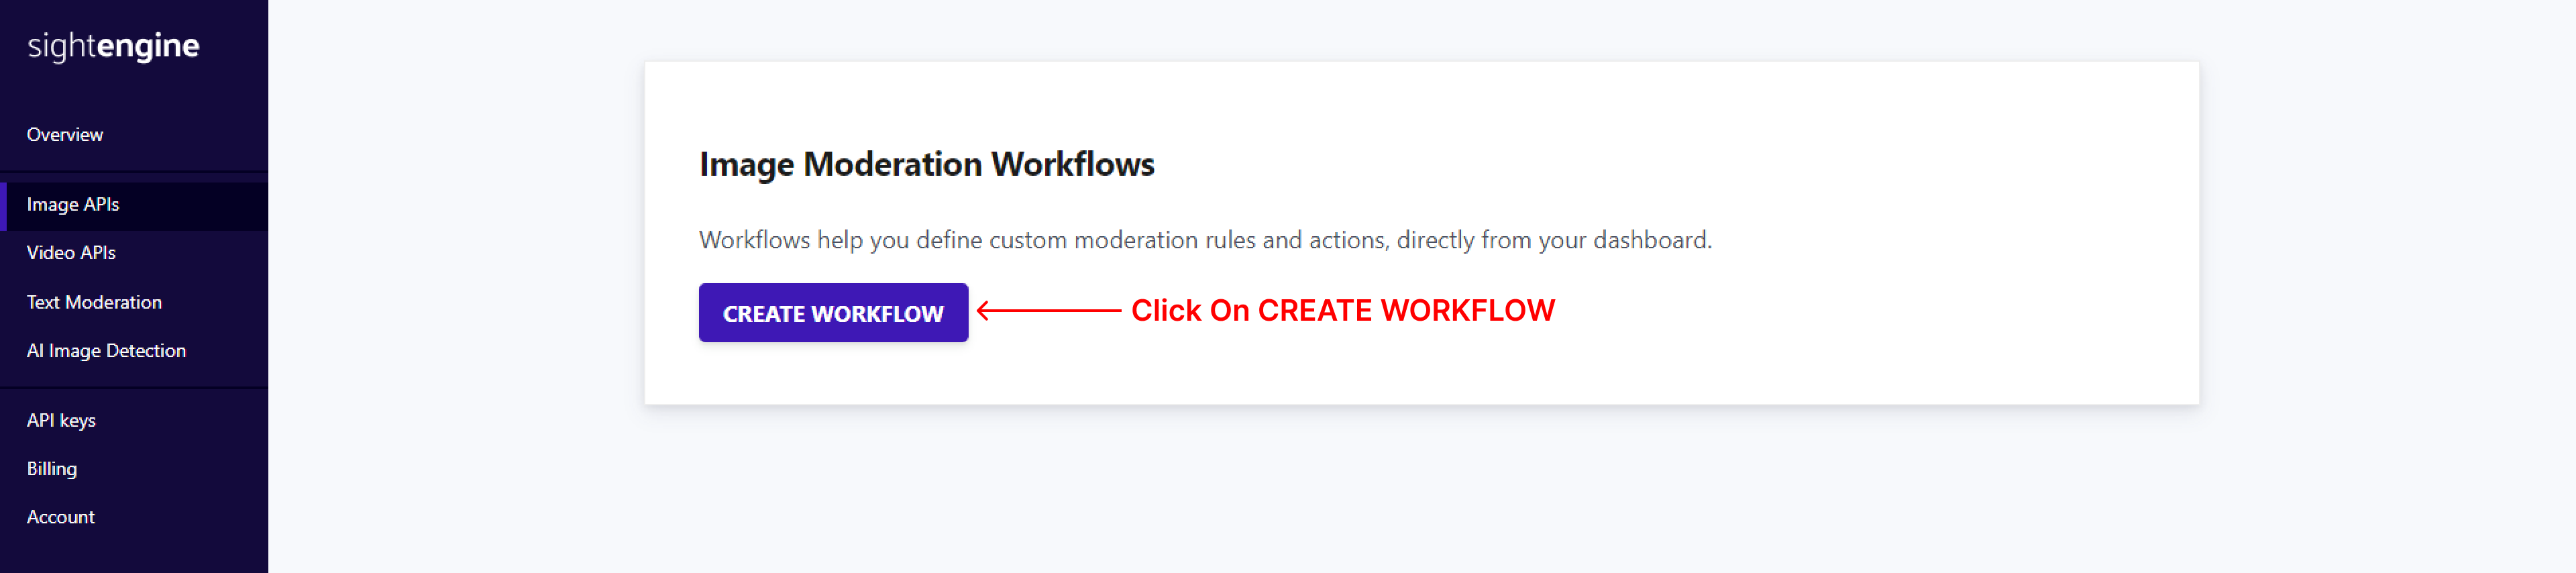
Image

-
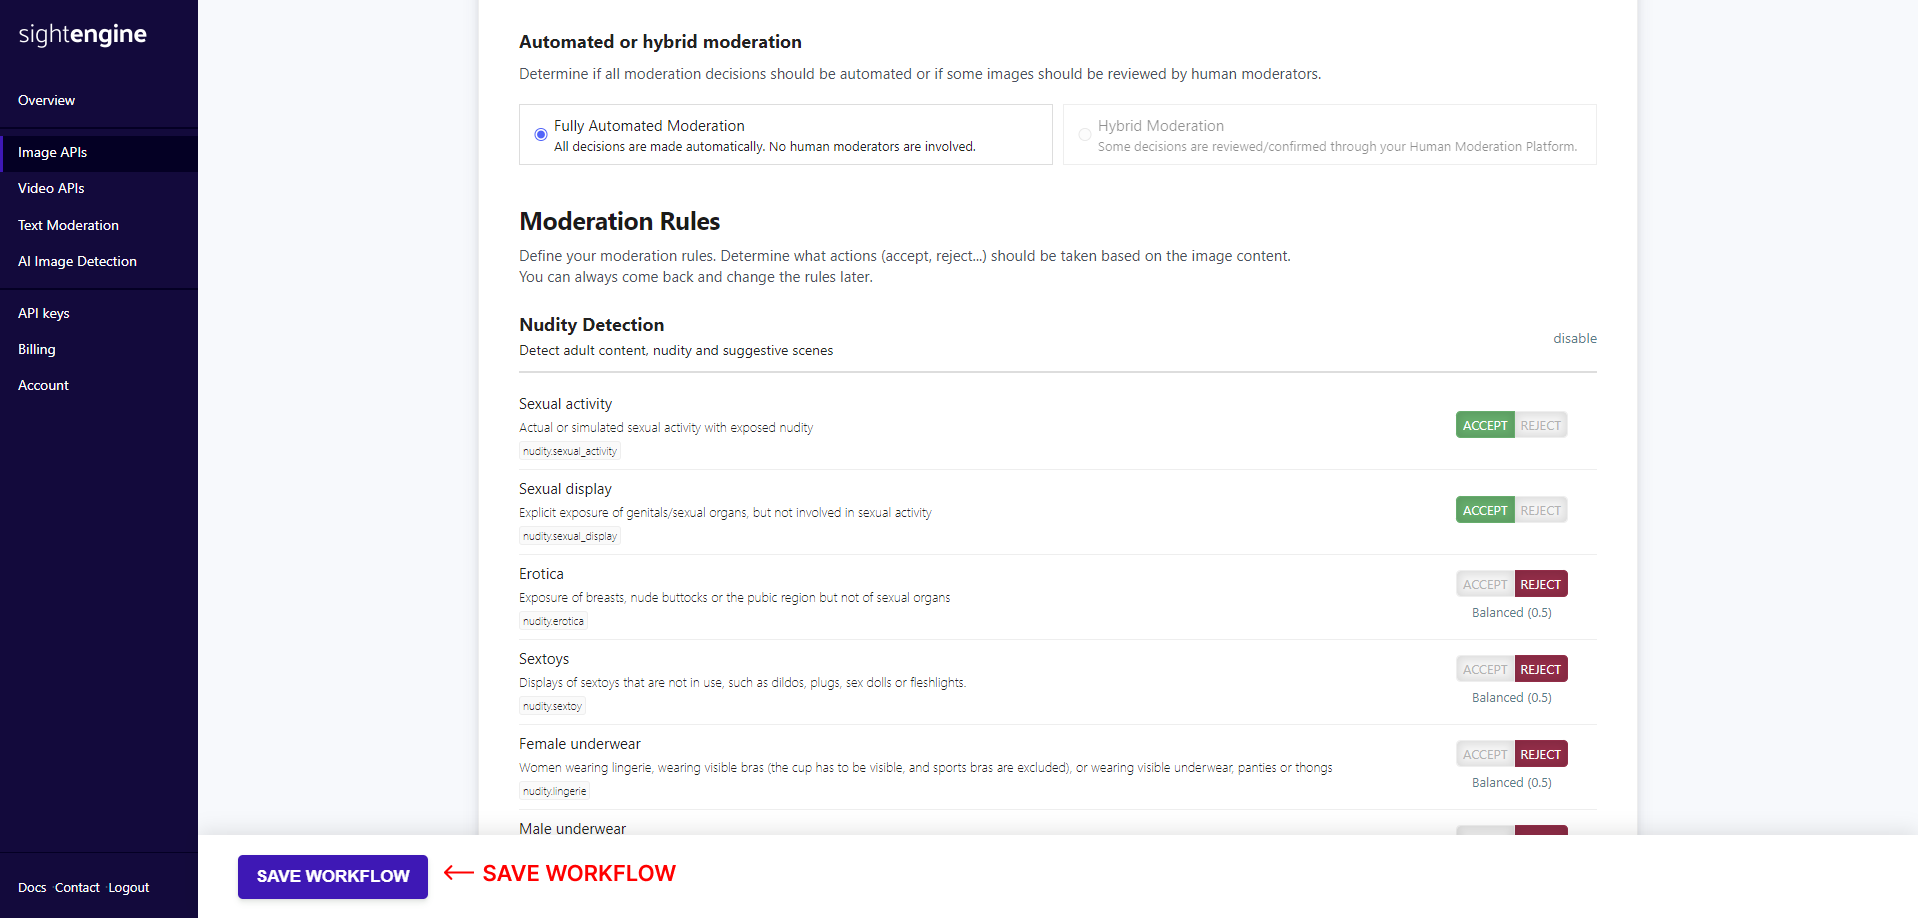
You will be able to select the rules that should be applied, and what actions should be taken based on those rules: ACCEPT or REJECT.
-
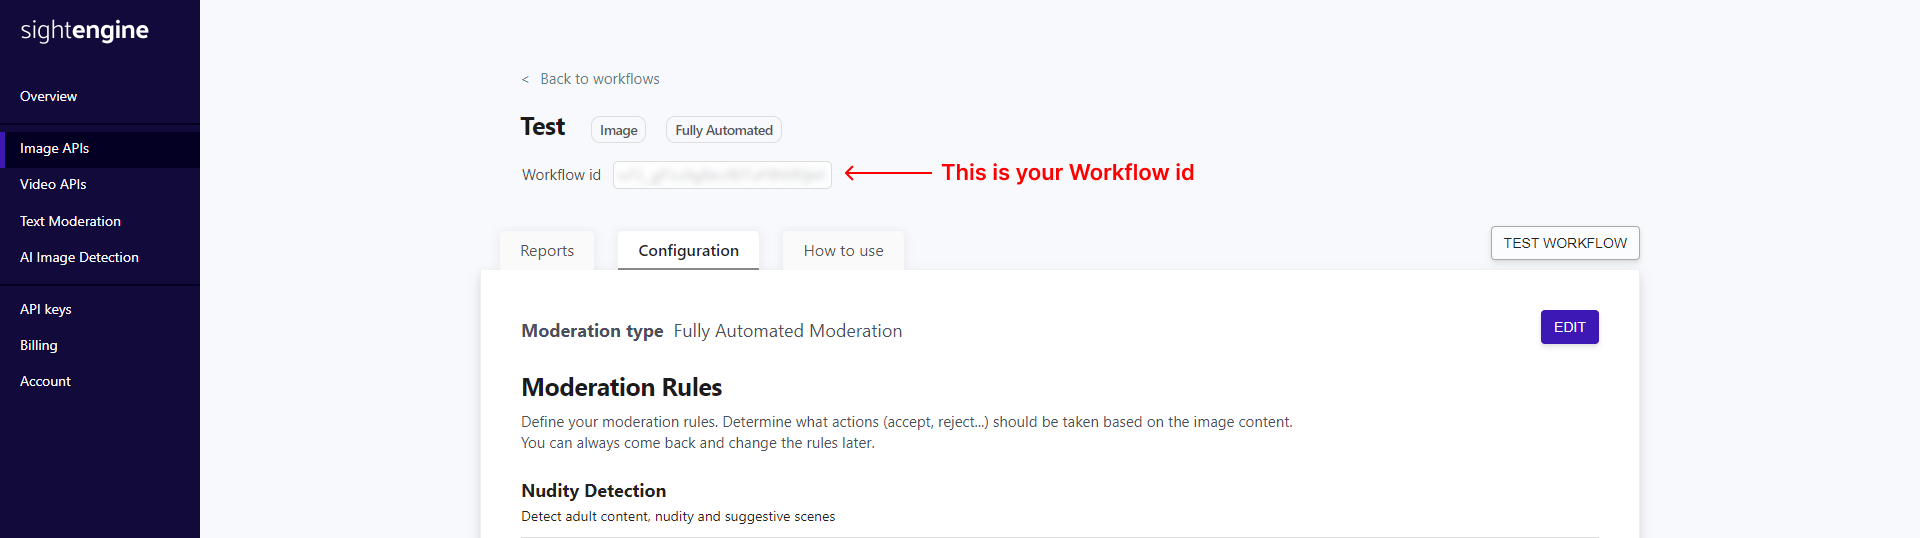
When you click on SAVE WORKFLOW , Then you will get your Workflow id for image
-
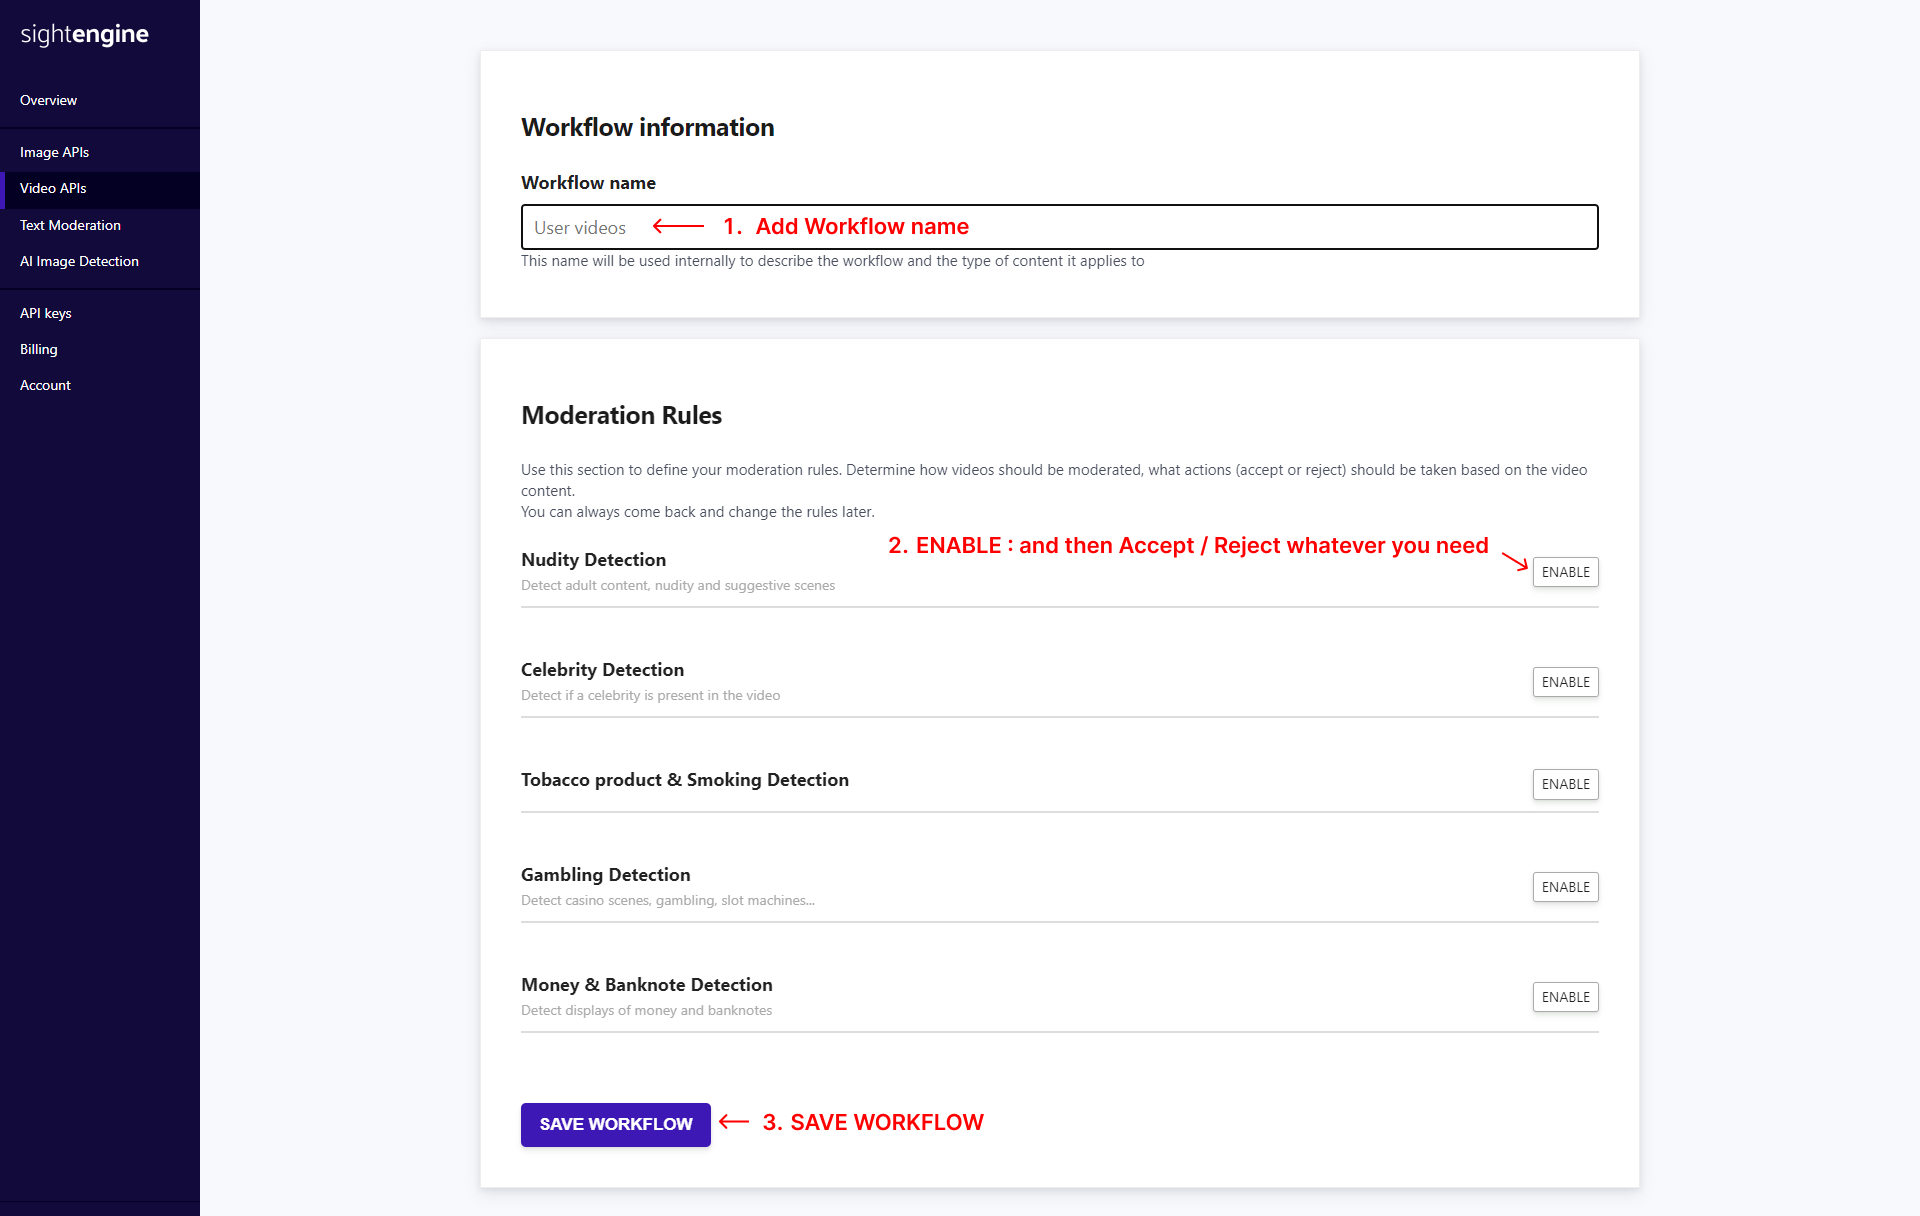
Video

-
You will be able to select the rules that should be applied, and what actions should be taken based on those rules: ACCEPT or REJECT.
-
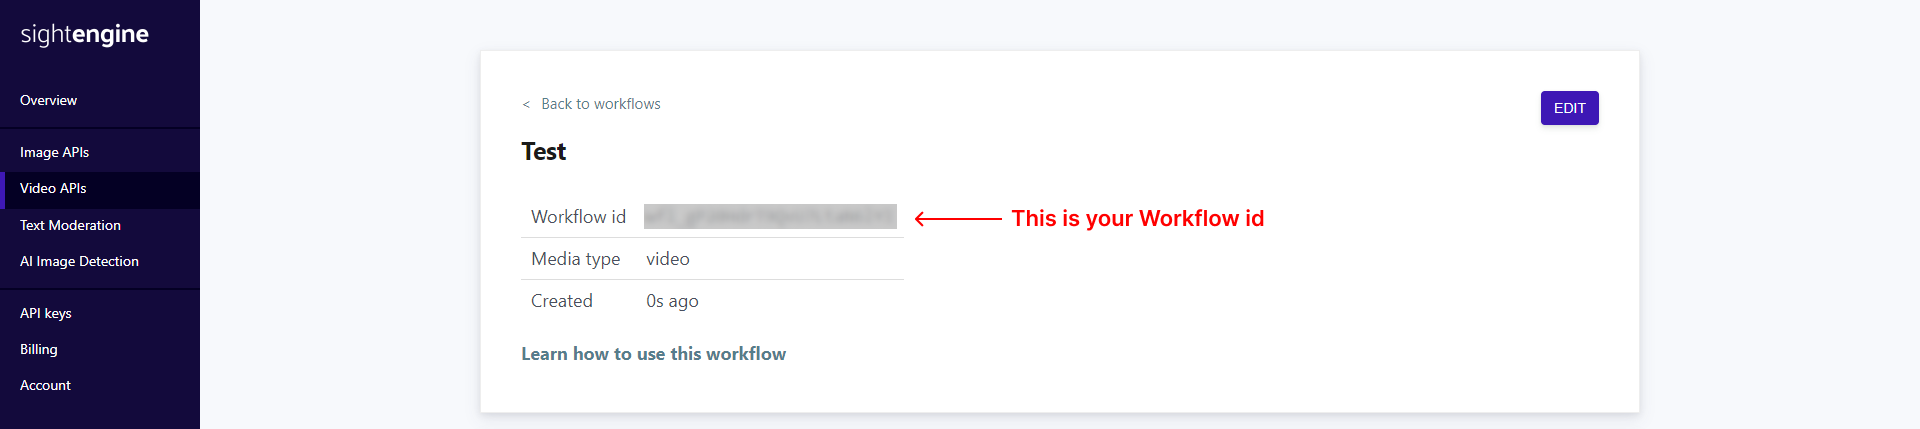
When you click on SAVE WORKFLOW , Then you will get your Workflow id for video, Like below image
-
Copy all 4 things, API Key, API Secret, Image Workflow id, Video Workflow id
-
Now Go to Admin panel and open setting page.
-
Now you will find sightengine section in setting page.
-
Keep switch on and paste them all like below image and save them

-
Sightengine is now working in your app.
Storage setting (Optional)
-
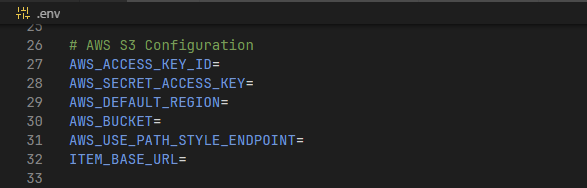
AWS S3
-
Follow This guide and create AWS S3 Bucket and get API Keys and other credentials.
-
Once you collected all credentials, open .env file and paste those credentials. you will find something like below.
-
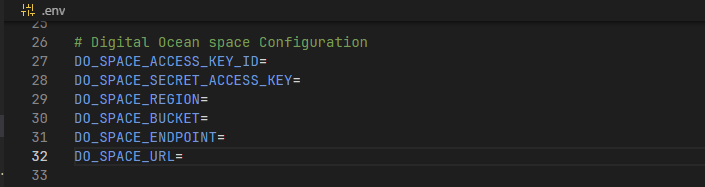
DigitalOcean
-
Follow This guide and create Digital Ocean Space Bucket and get API Keys and other credentials.
-
Once you collected all credentials, open .env file and paste those credentials. you will find something like below.
-
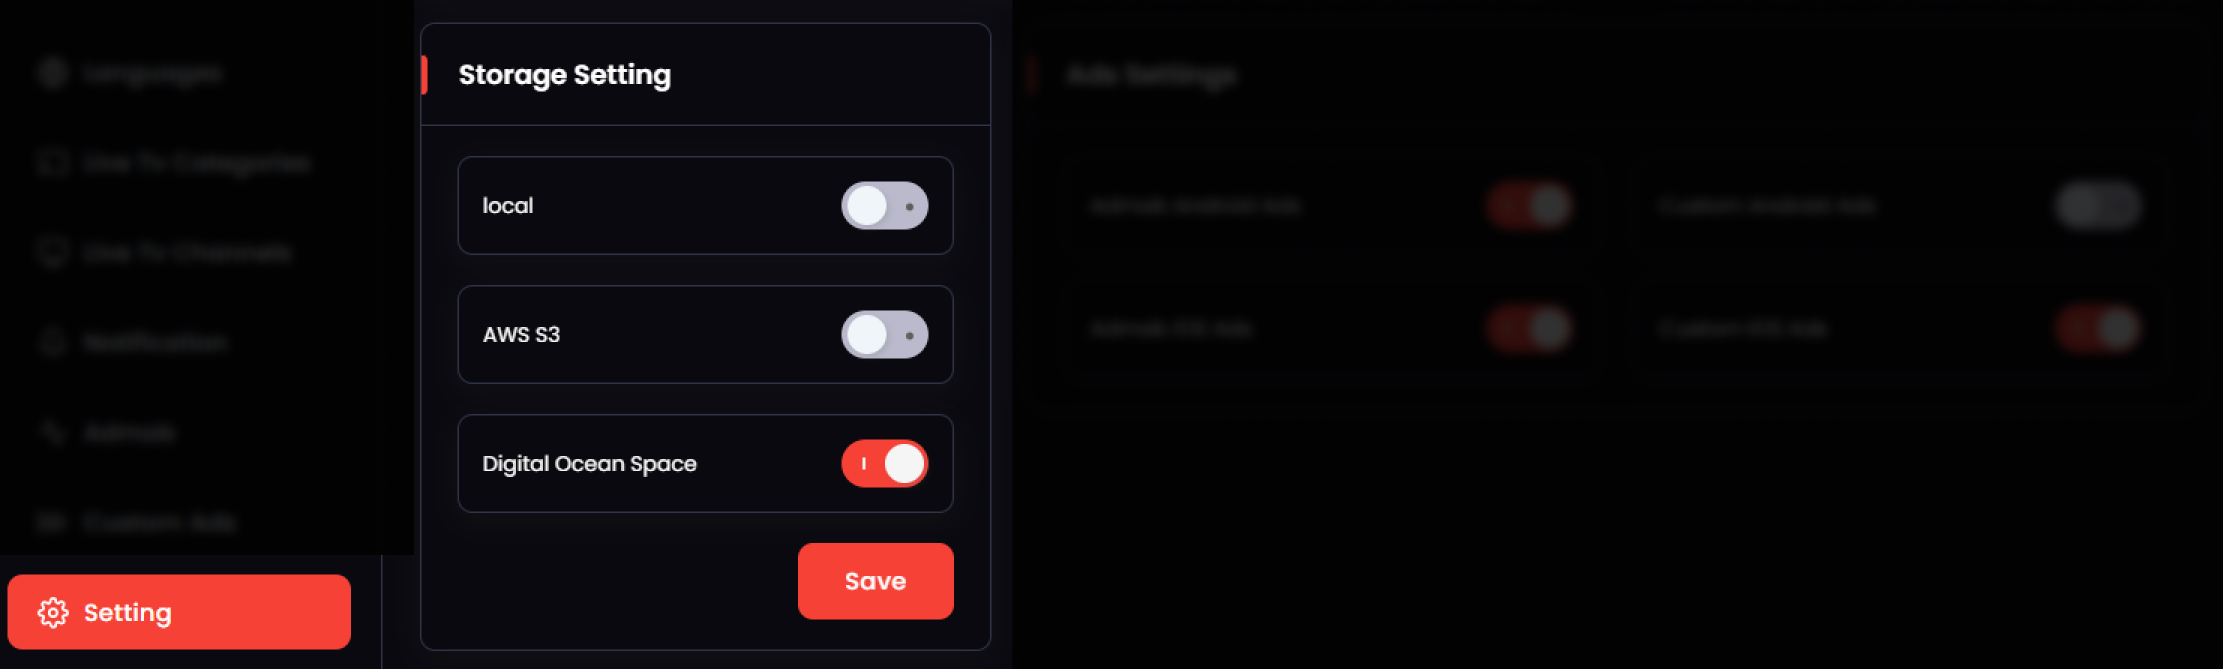
Once you have set the credentials for required storage providers, You can set the required one here on the settings page. Only one at a time works. (So yes, You have to set the credentials only for that which you want to use.)
-
Local storage doesn't require any credentials.
-
Storage will work fine only if you have set the credentials correctly and made required configurations on their dashboards.
Getting the credential
Now web setup is completed and let's collect some credentials for the app setup
-
Admin Panel URL : http://yourdomain.com/
-
Admin Panel User Name : admin
-
Admin Panel Password : admin123
-
Baseurl : http://yourdomain.com/api/
-
apiKey : 123
Now save these credentials somewhere and start following the documentation to setup application.
Update info
-
To update your project (Whenever we update the project at Codecanyon), you have to Add/Update/Remove some files and fields in database (sometimes). Please check README.md file for the update information. (Mostly, can be found at root level directory of the project)
-
Please be careful while making an updates this way, It might result in errors sometimes.
-
If it comes any issues while making an update, you are absolutely responsible for that since updating existing project is not included in the support.
Change logs
-
01 June 2026
-
- Bug Fixes
-
- OnBoarding issue solved
-
- Dependencies updated
Want to talk with us?
- Telegram (Support Desk) : +91 7990425274
- Email : help.retrytech@gmail.com
- Whatsapp (No Support Here) : +91 7990425274