
Introduction
Hey there, We are happy to see you as our valued customer of the Life-Sound Meditation app. Here is the easy documentation to set up the app and ready to launch. Please follow all the instructions carefully and don’t skip any step. Feel free to contact us if you face any problems while set-up.
Change App Bundle
-
Extract the folder you downloaded from the codecanyon.
-
Open iOS project (.xcodeproj) in Xcode.
-
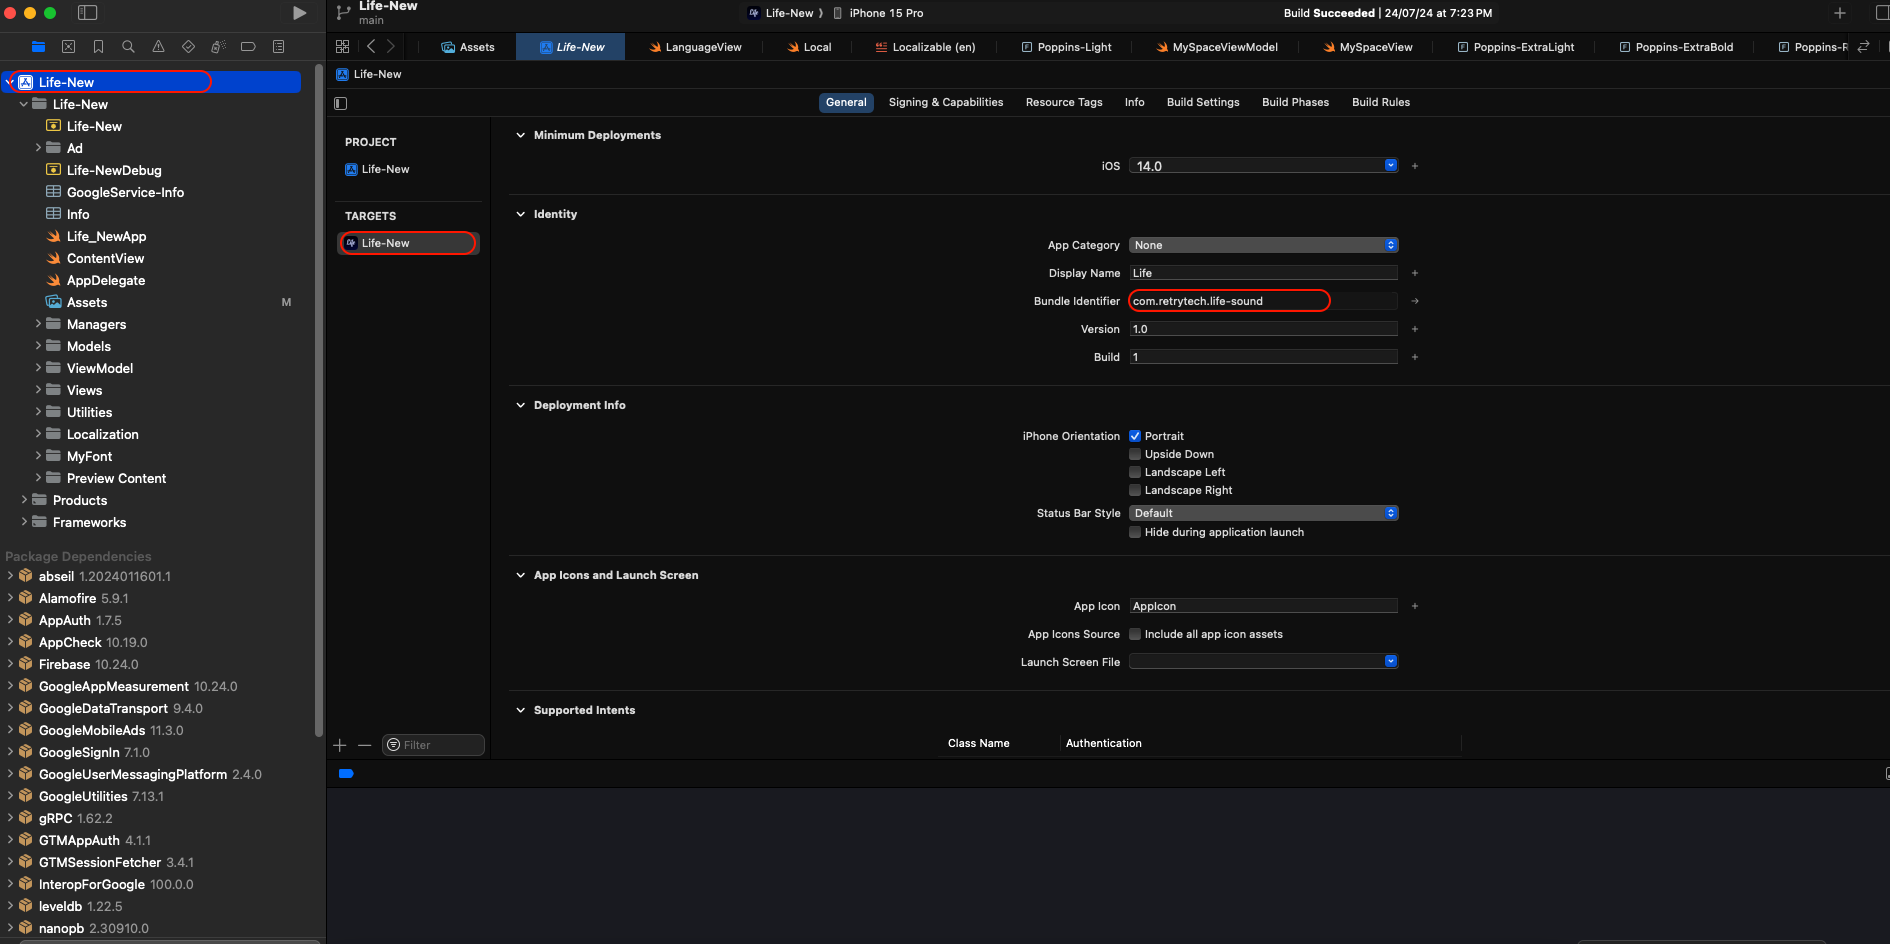
Find bundle identifier and change with your bundle identifier
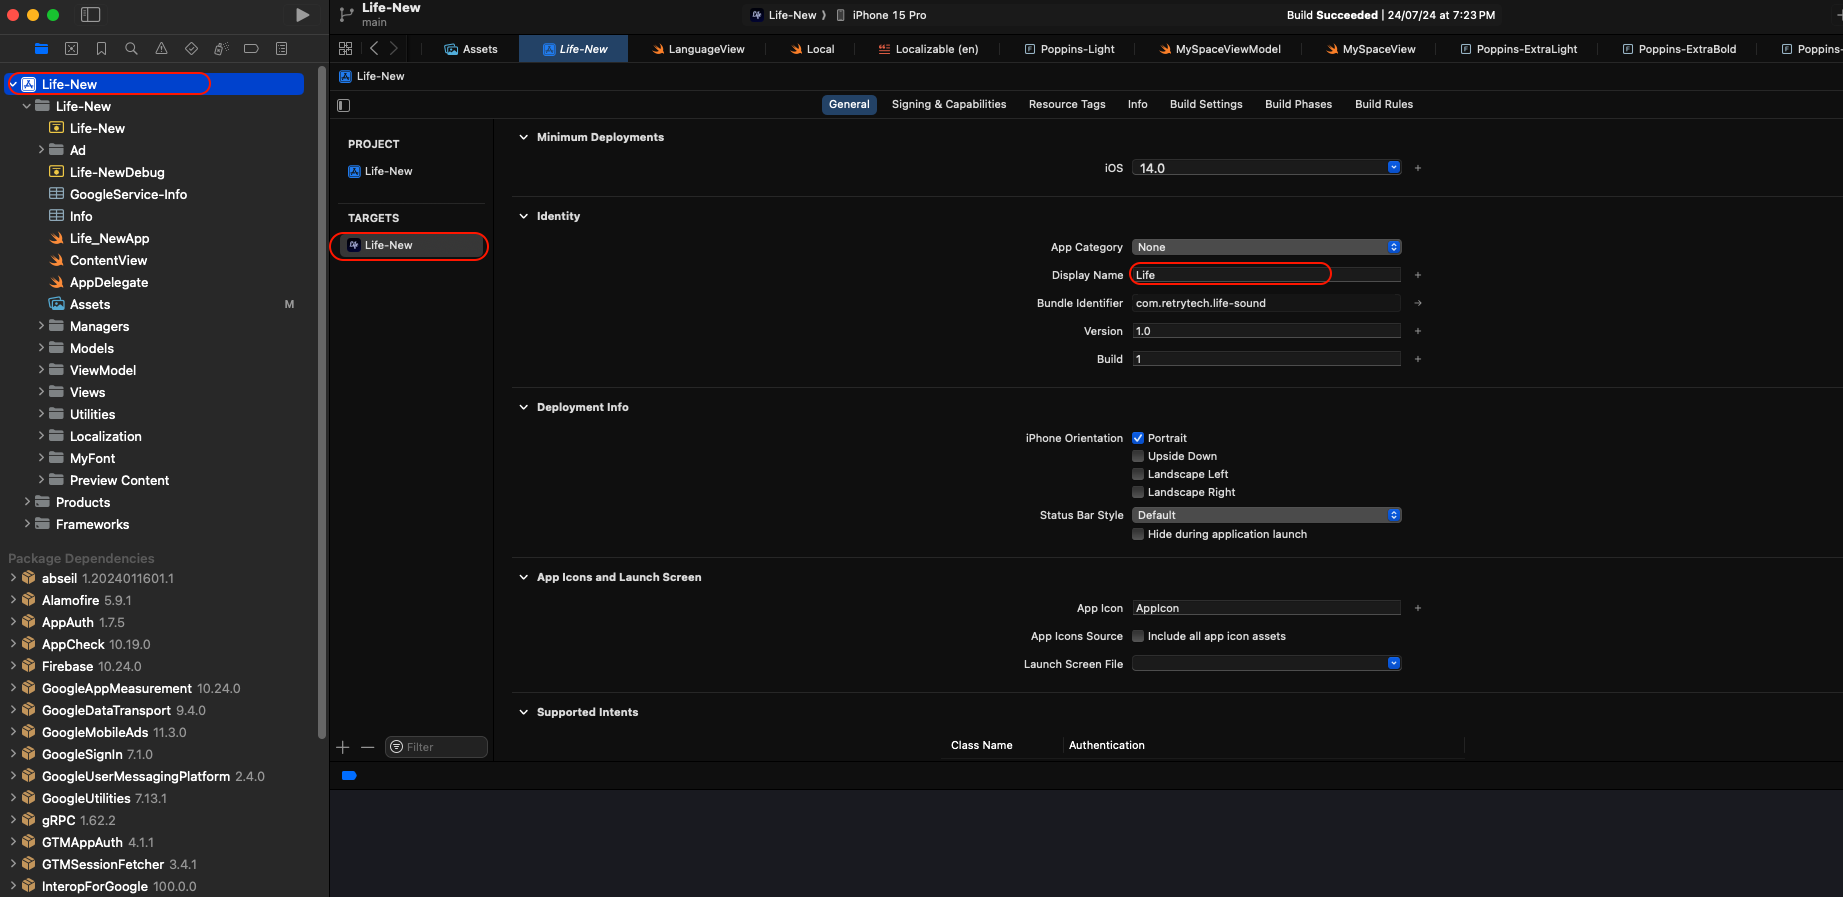
Change app name
Change app color

Change app icon
-
Create your app logo with size 1024 * 1024
-
Drag and drop to existing app icon in Xcode.
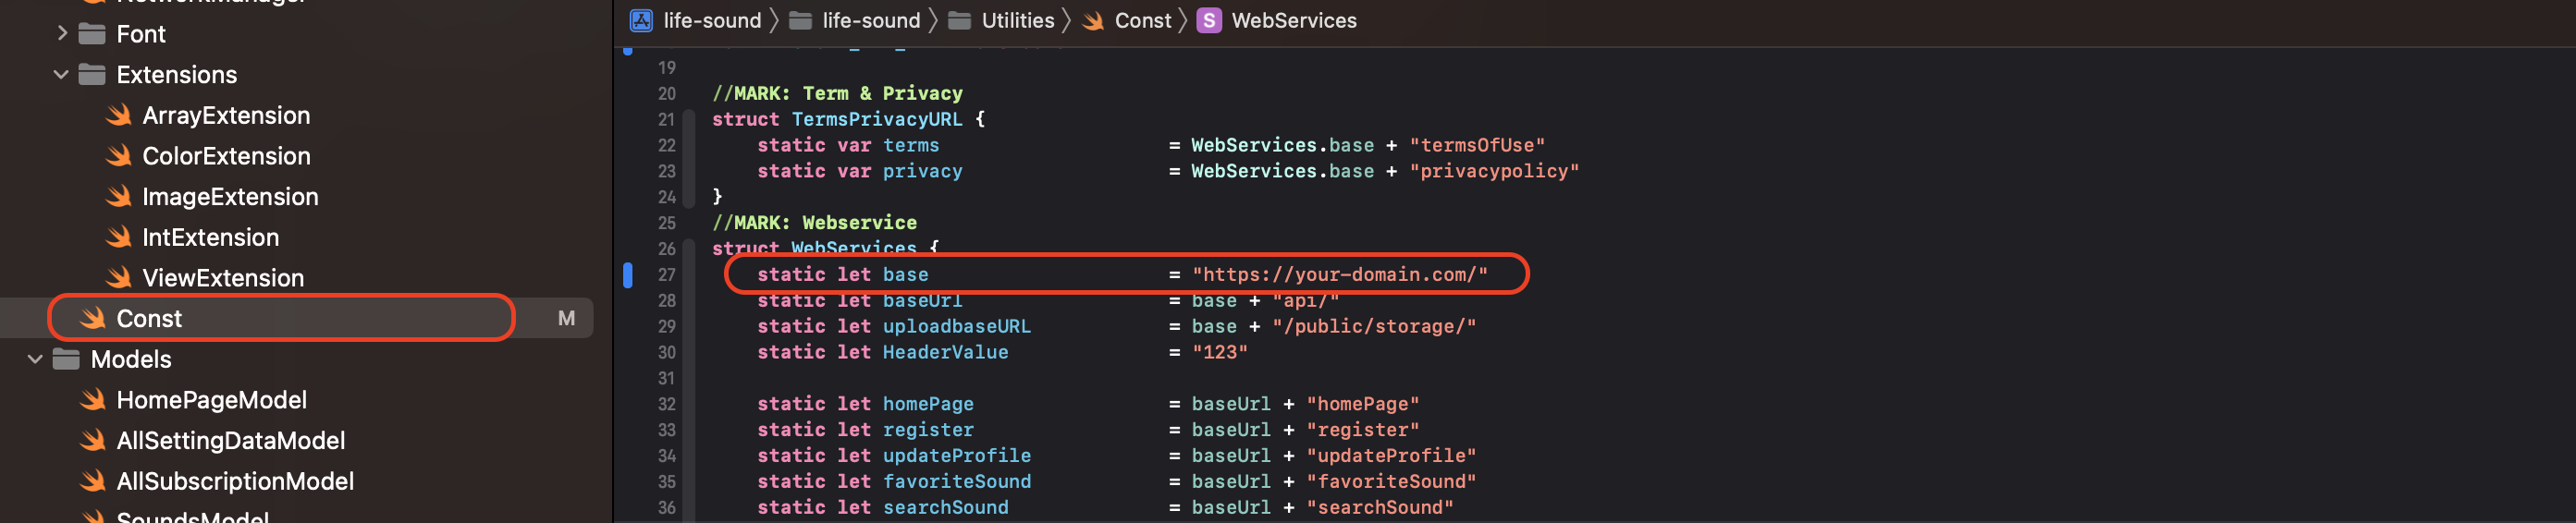
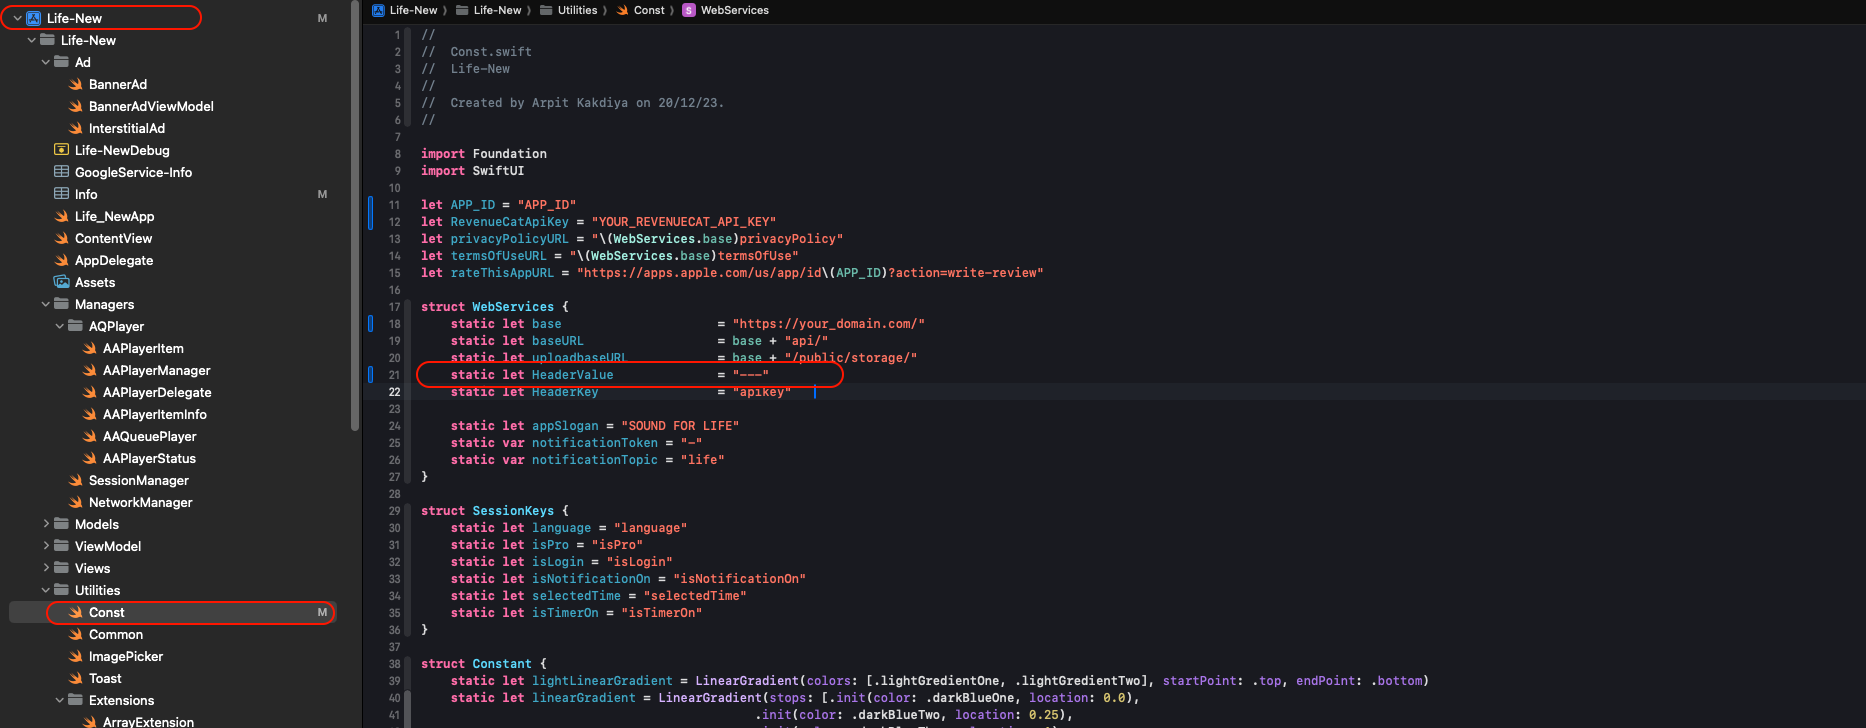
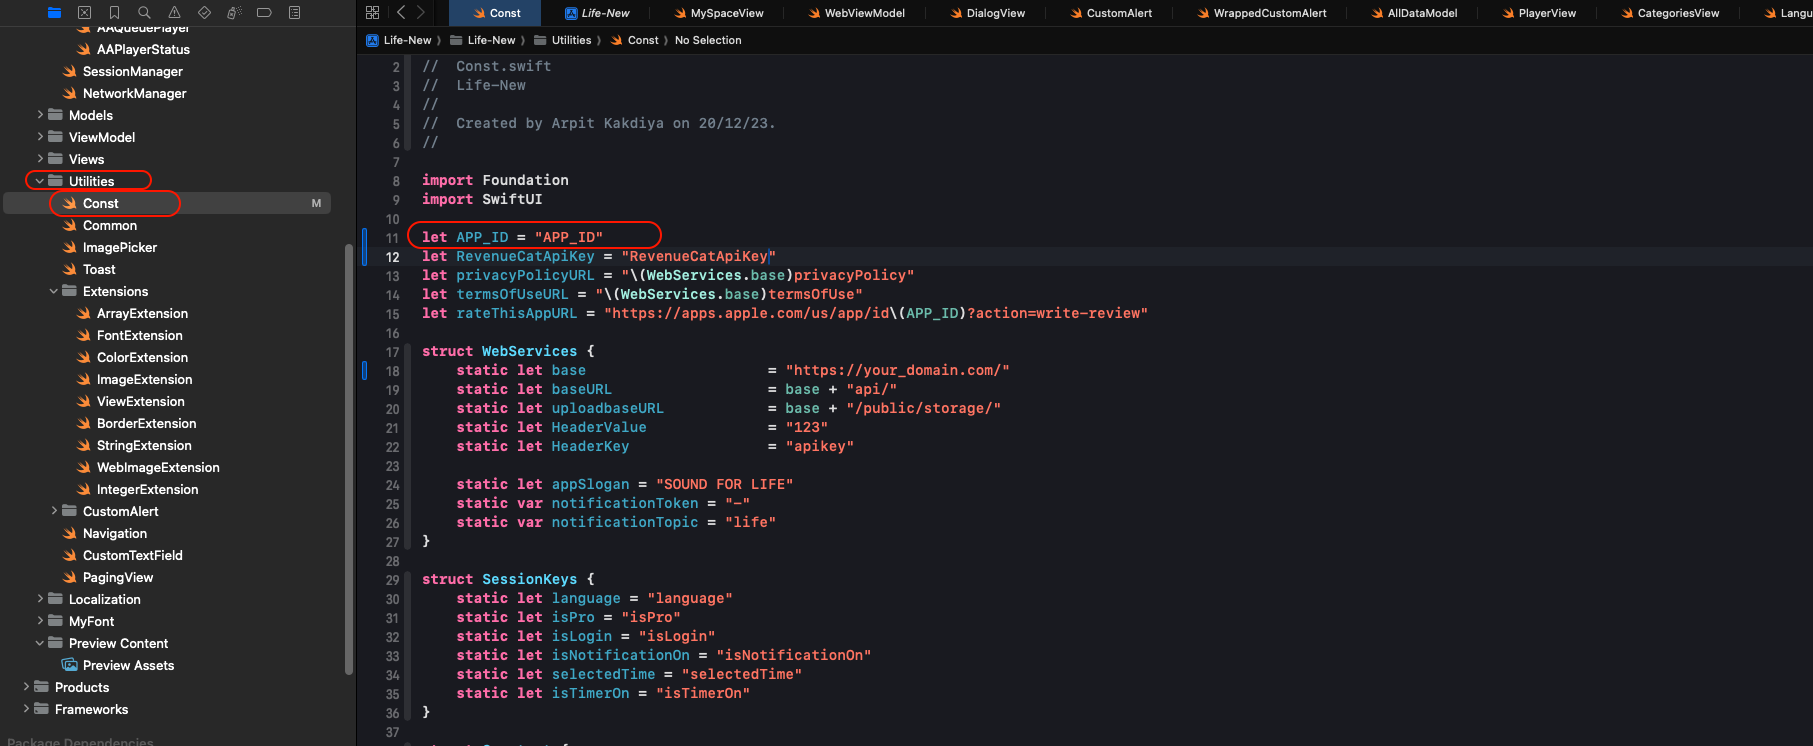
Setup your Credentials
-
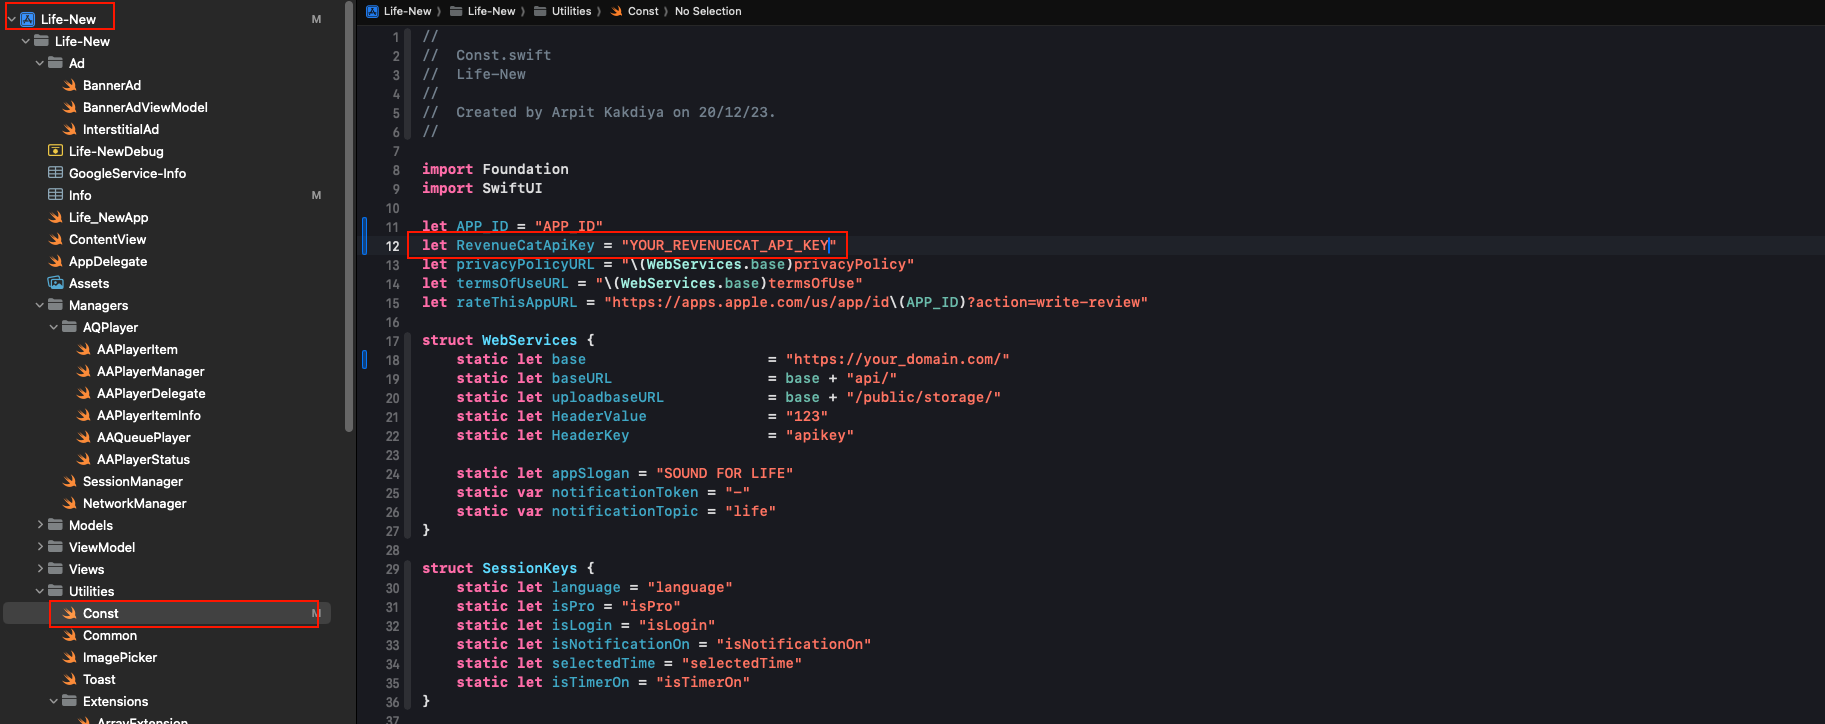
Open Const.swift file
-
Replace https://your-domain.com/ with your baseURL (which you got, when you was setting up backend).
-
Replace ---- with your apikey (which you got, when you was setting up backend).
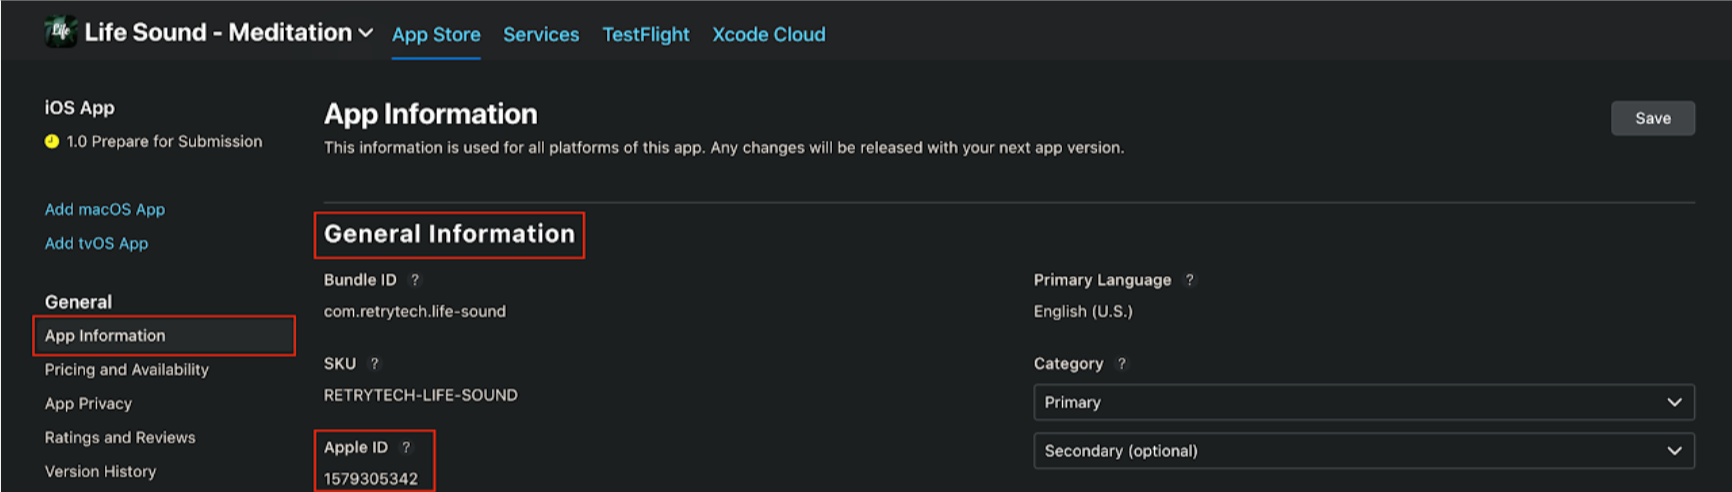
Add your APPSTORE_APP_ID
-
Go to your app console sdf App Store Connect
-
Click on your app
-
Go to YOUR_APP > App Information > General Information > Apple ID
-
Copy AppID and paste to Const.swift File in your project
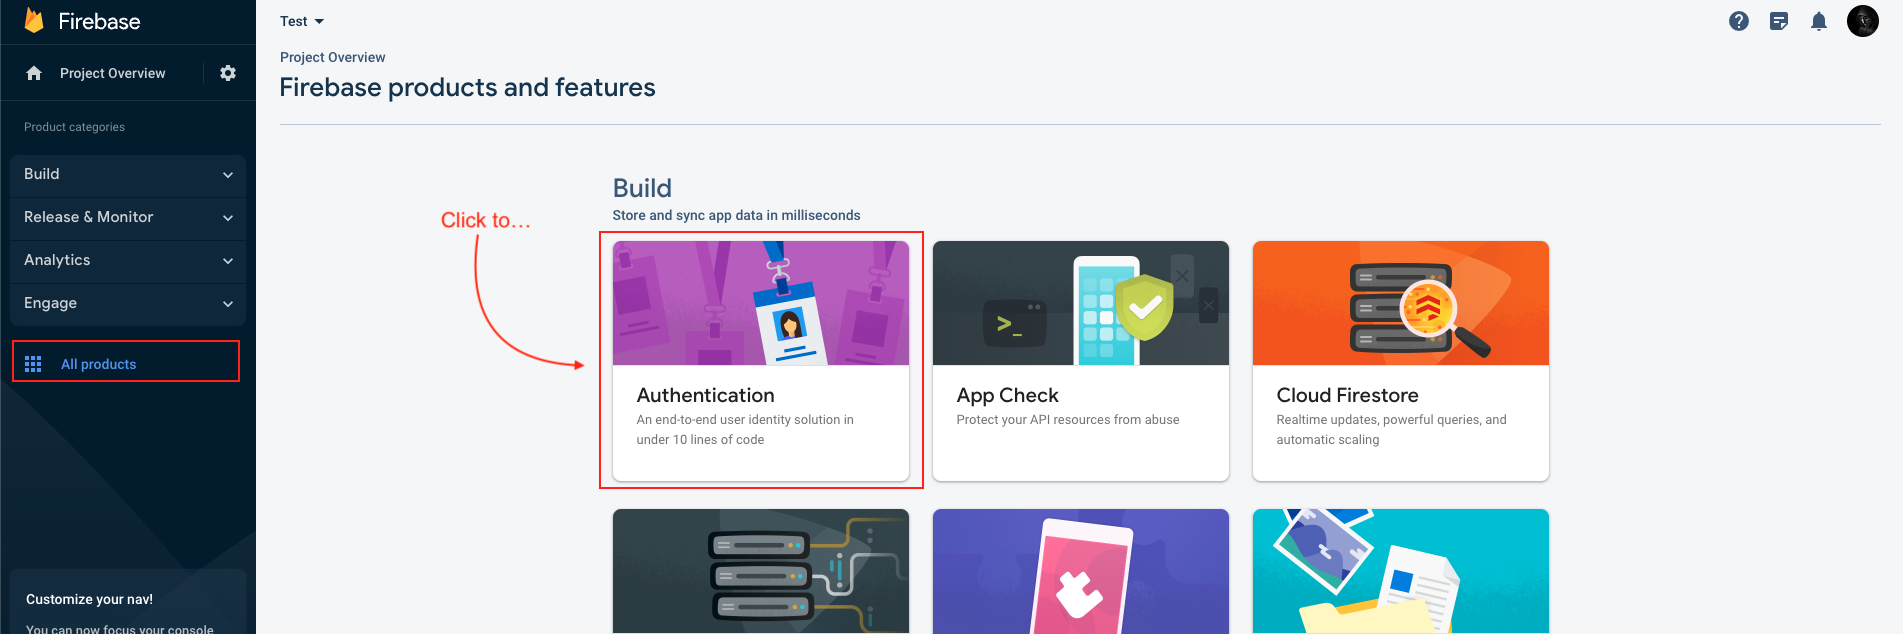
Configure Firebase
-
Go to the firebase project you might created while following backend documentation.
-
If you don't have, follow the steps below and create one project.
-
At first, follow this link https://firebase.google.com/
-
Now, we first have to create a Firebase project. Firebase project will go through and describe what it is. This allows us to add an app to that project. It can have many projects inside of Firebase.
-
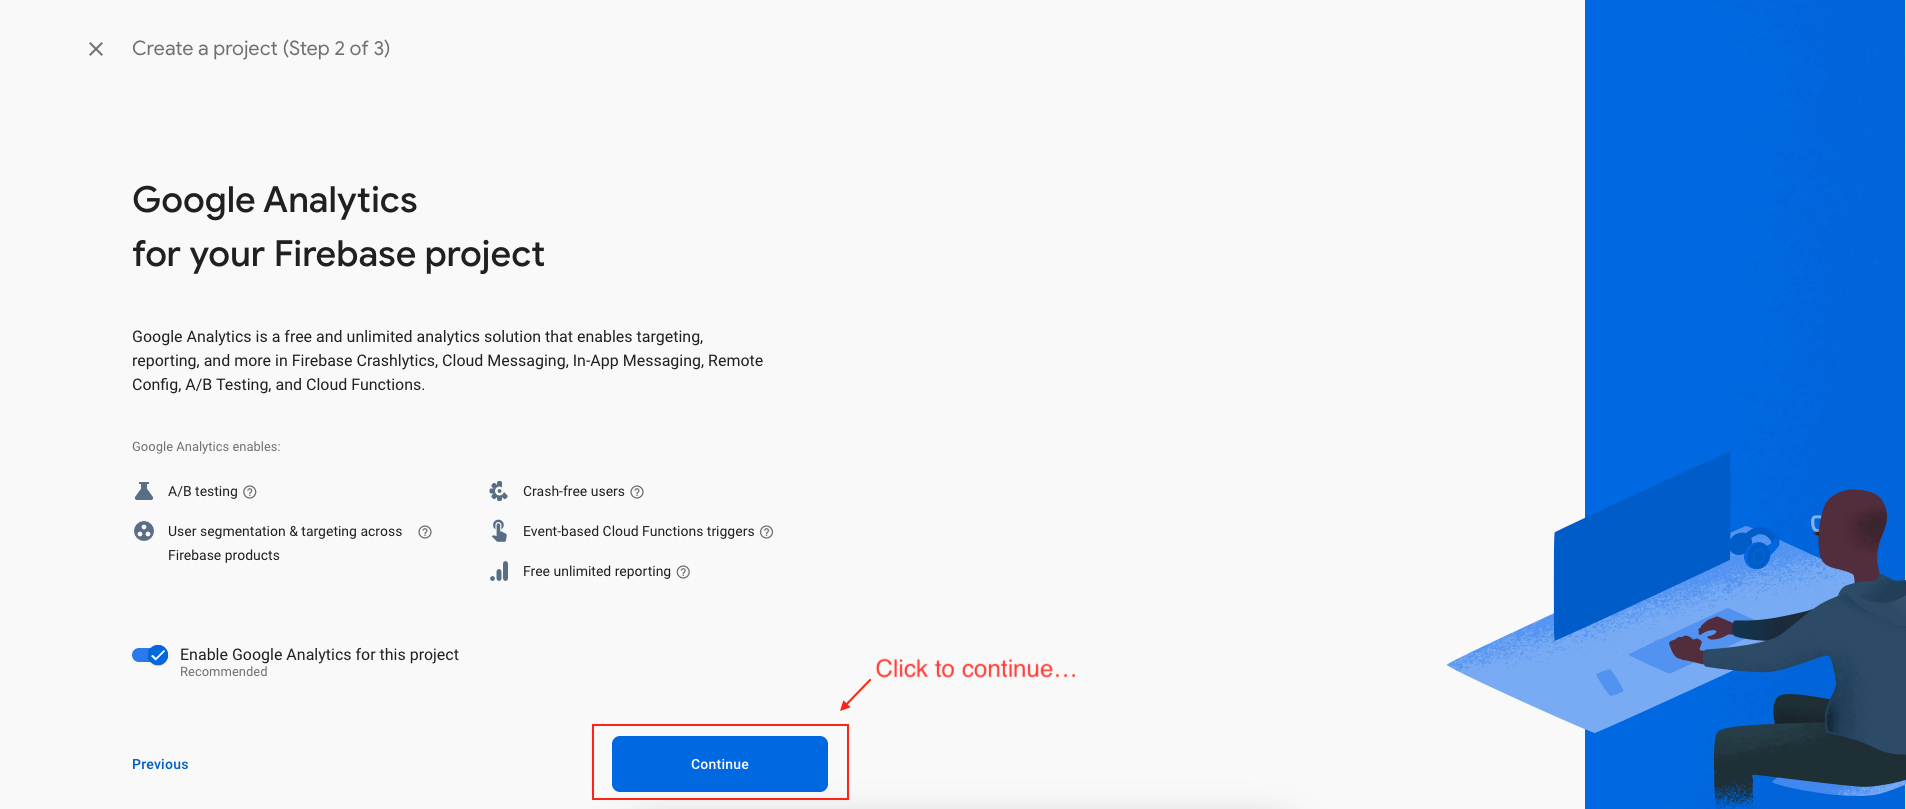
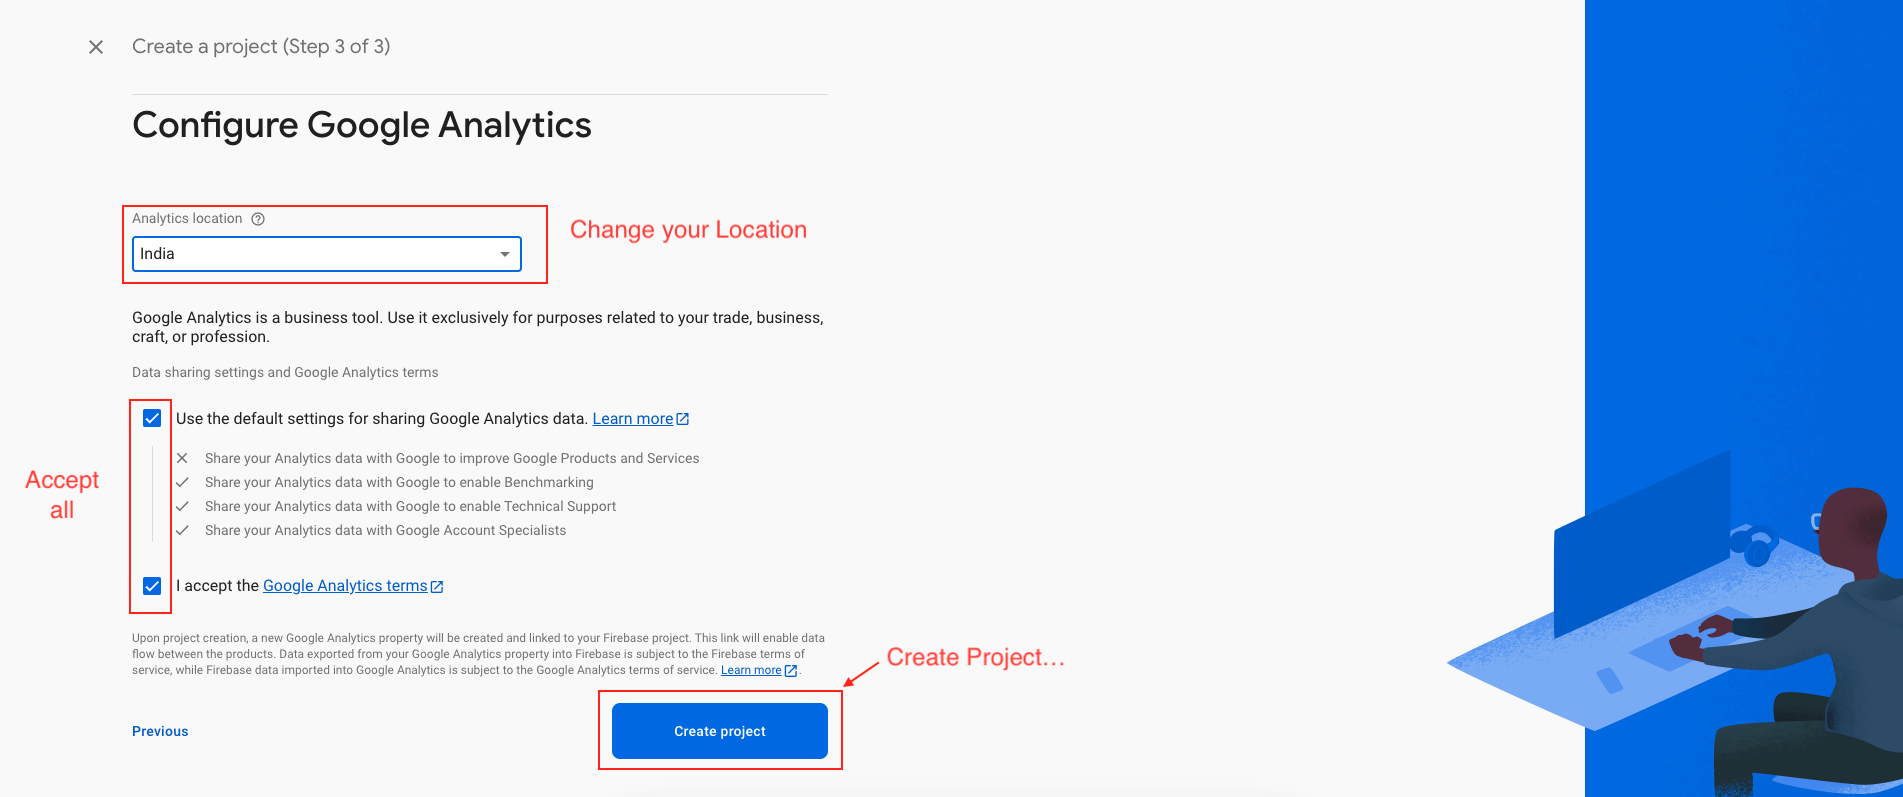
Now, we have to give a name and id to the project, enable Google Analytics for the project, set an analytics location, and accept all the terms and conditions. Firebase console automatically creates a unique id for the project.
-
Step 1 : Giving a name to the project
-
Step 2 : Enable Google analytics for the project
-
Step 3 : First Choose default Firebase account and then create project

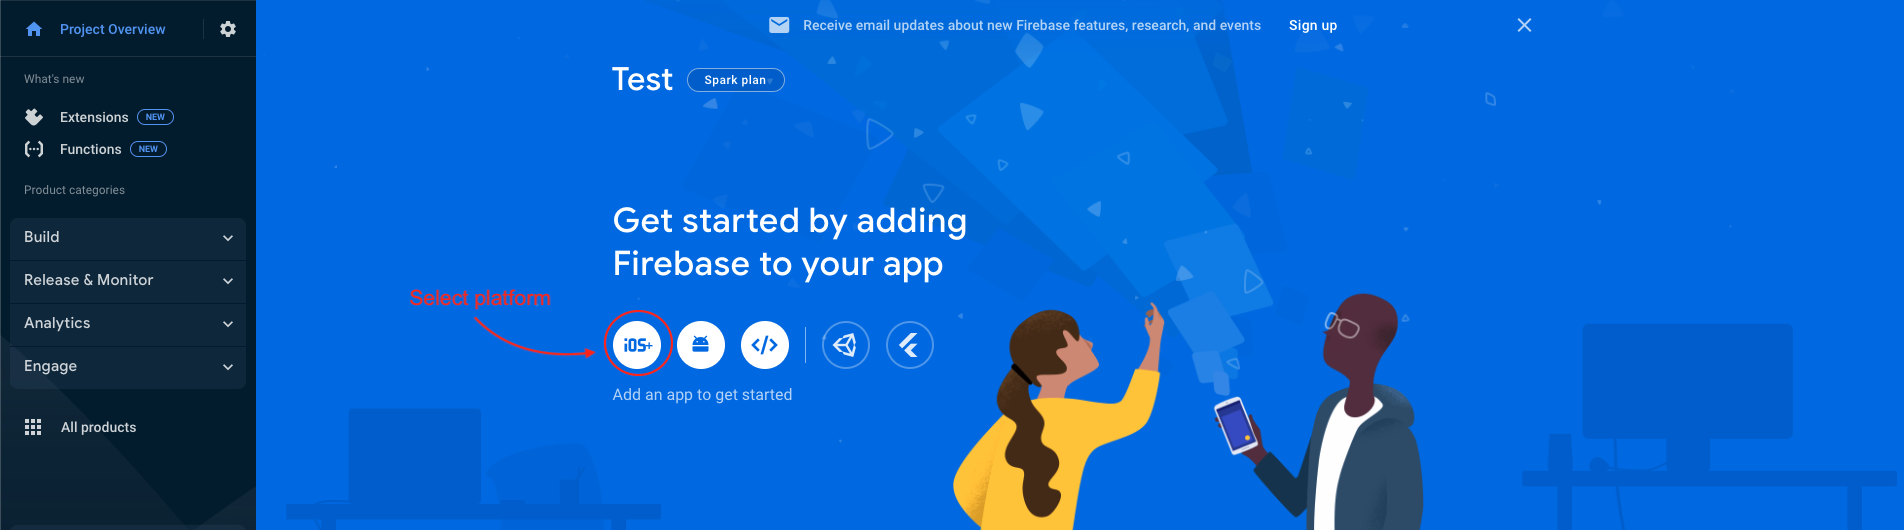
Add iOS app in Firebase
-
We have to choose the platform to add Firebase to our application. Click on iOS.
-
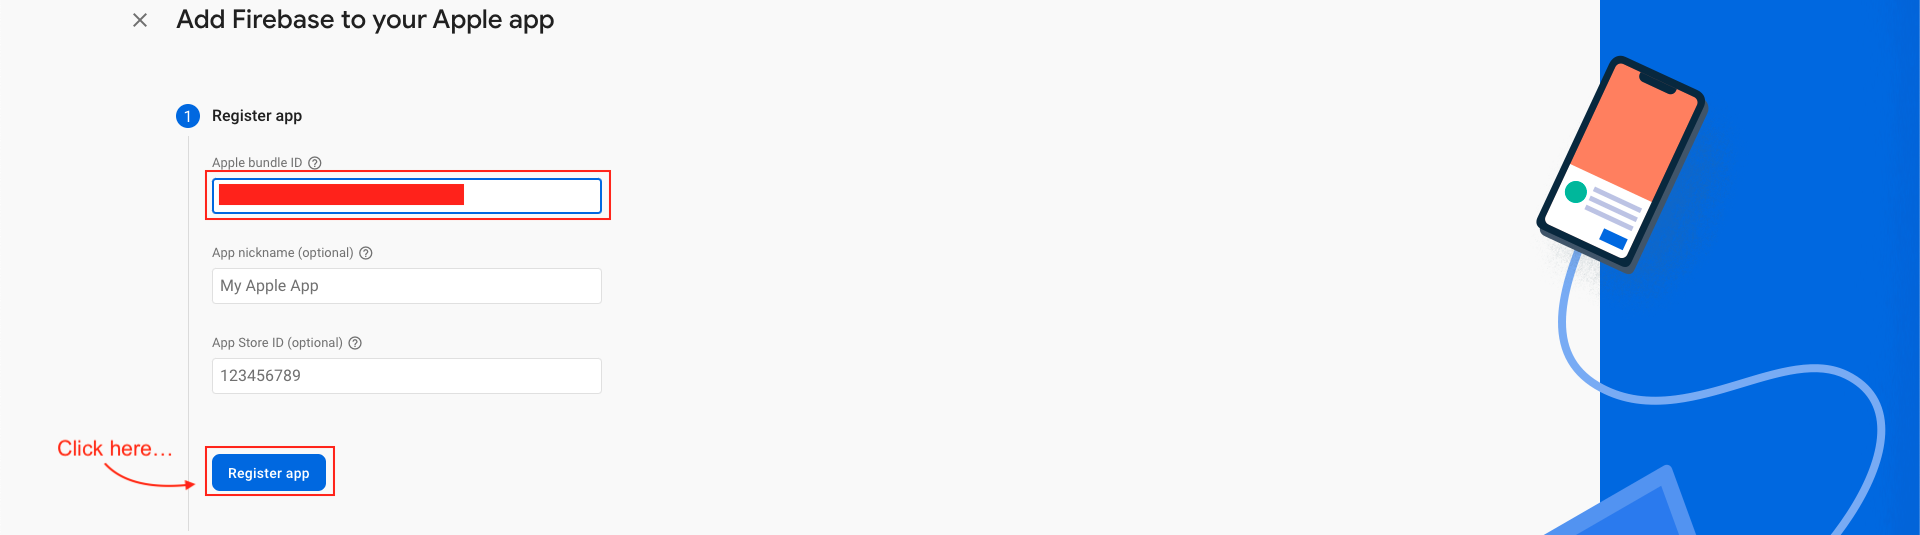
On the next screen, enter your iOS bundle ID & App nickname and click on Register App. You can find your bundle ID in the General tab for your app's primary target in Xcode. If specified, the app nickname will be used throughout the Firebase console to represent this app. Nicknames aren't visible to users.
-
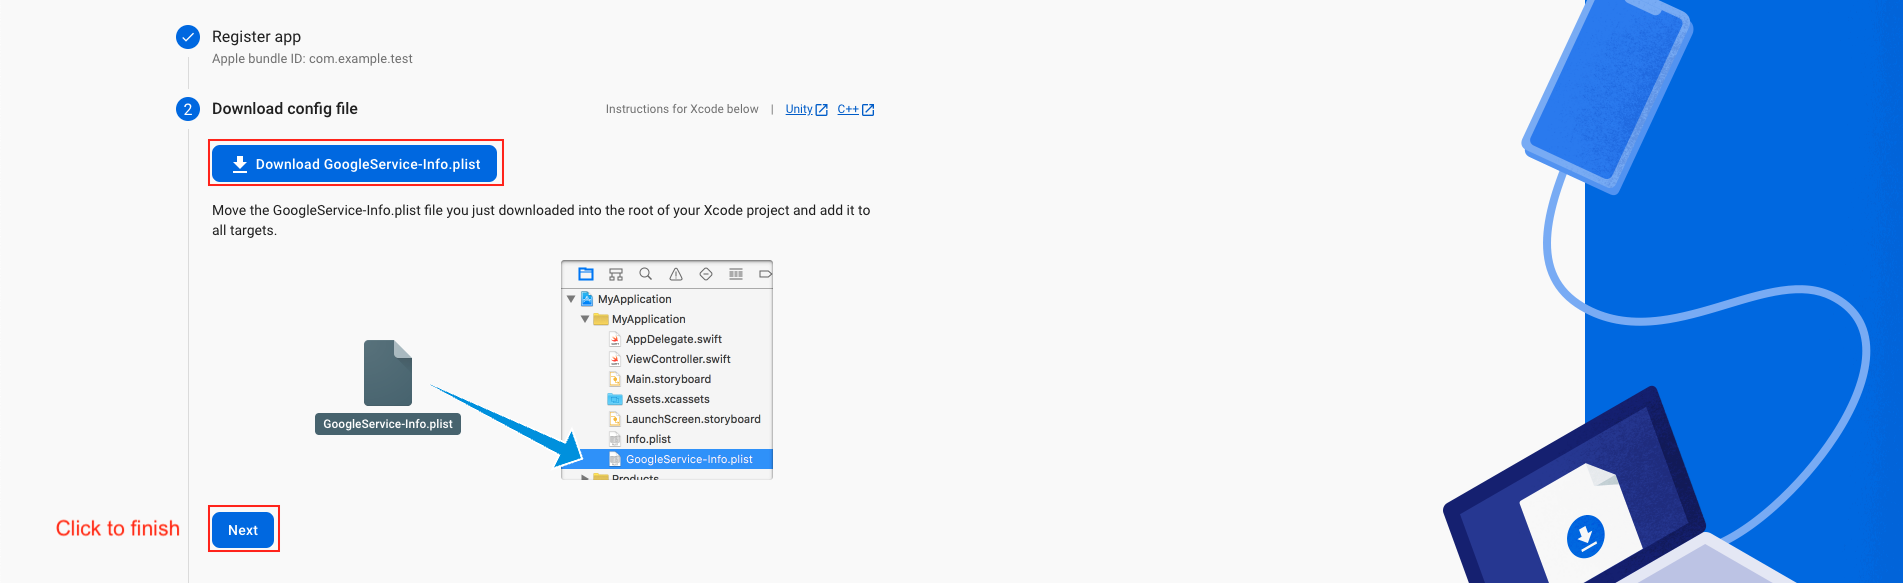
Download the GoogleService-Info.plist file & move the GoogleService-Info.plist file you just downloaded into the root of your Xcode project and add it to all targets. Make sure the config file is not appended with additional characters, like (2).
-
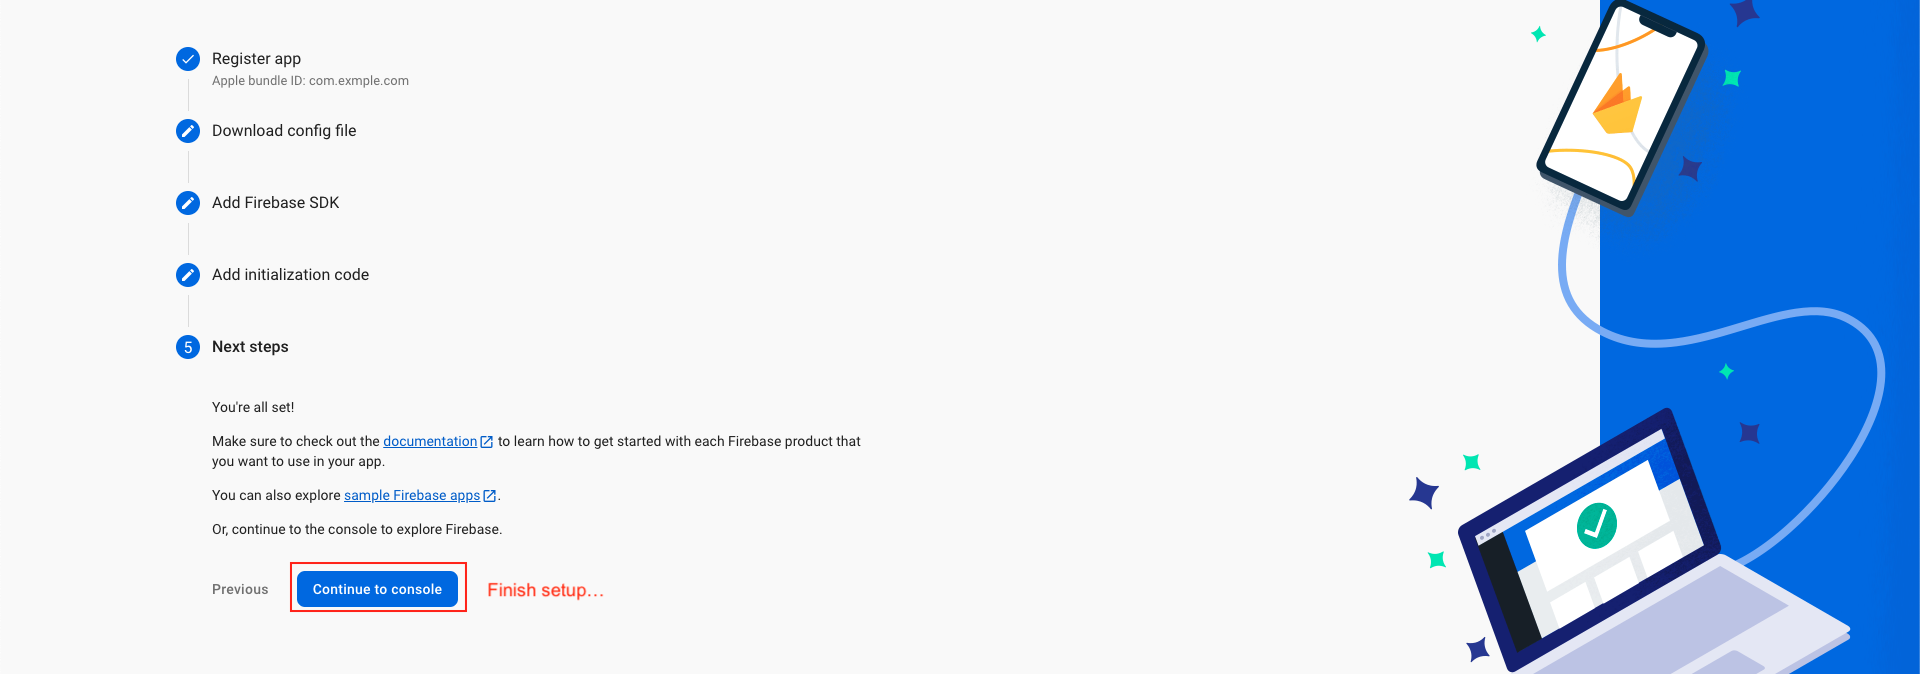
Back in the Firebase console-setup workflow, click Next to skip the remaining steps and the finish.
-
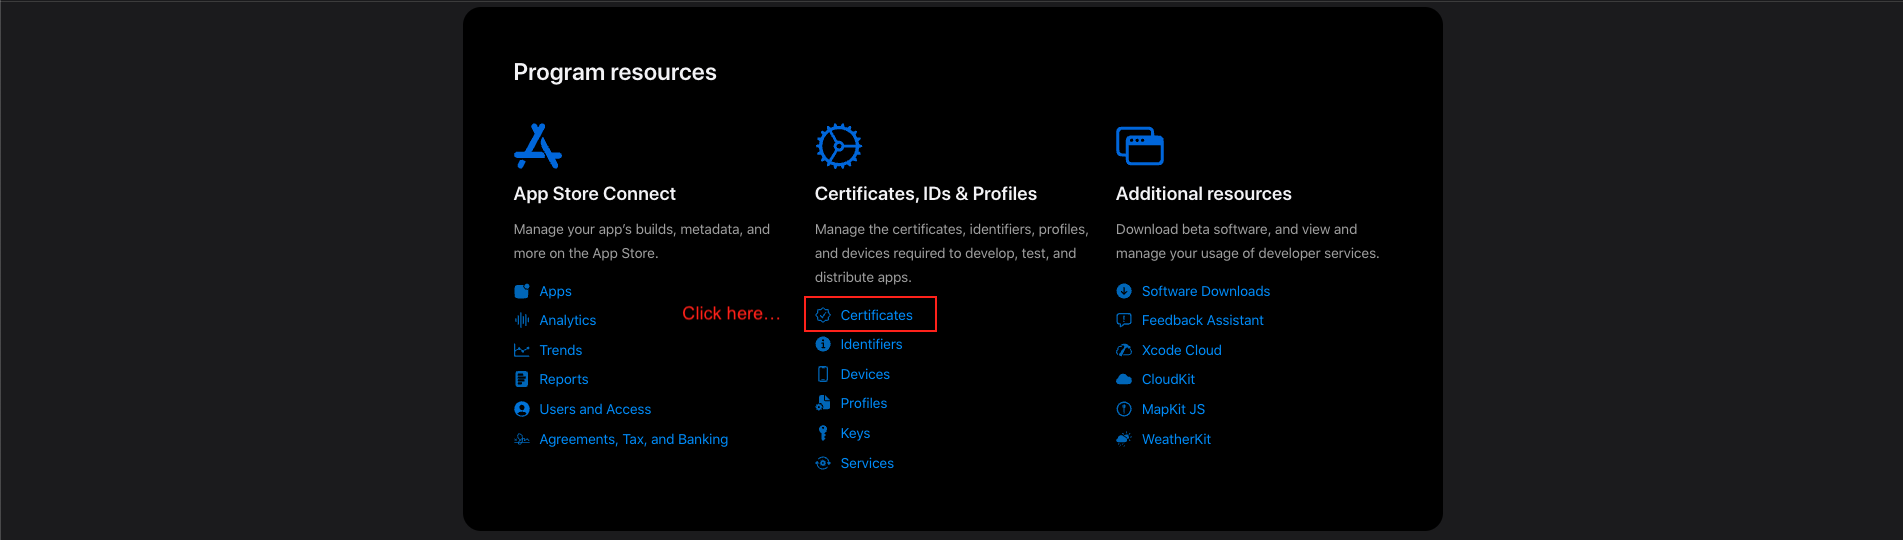
Login to Apple Developer Account
-
- Go to Apple Developer Account
-
- Log in with your Apple Developer credentials.
-
-
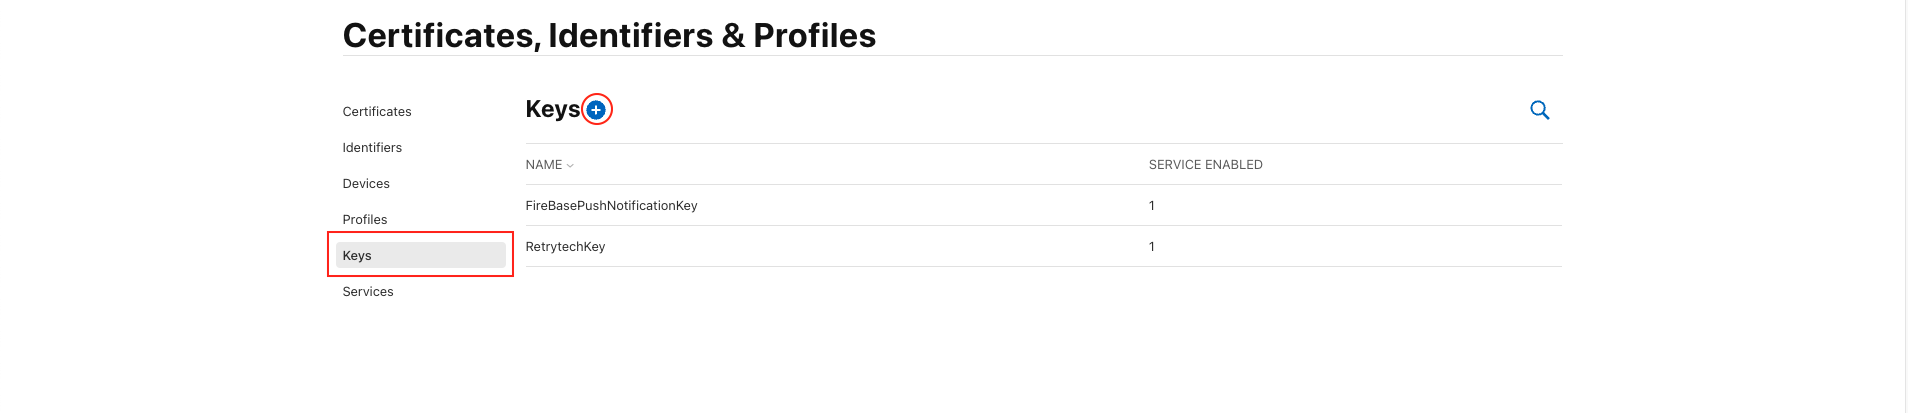
Navigate to Keys Section
-
- Click Certificates, Identifiers & Profiles.
-
- In the left sidebar, click Keys.
-
-
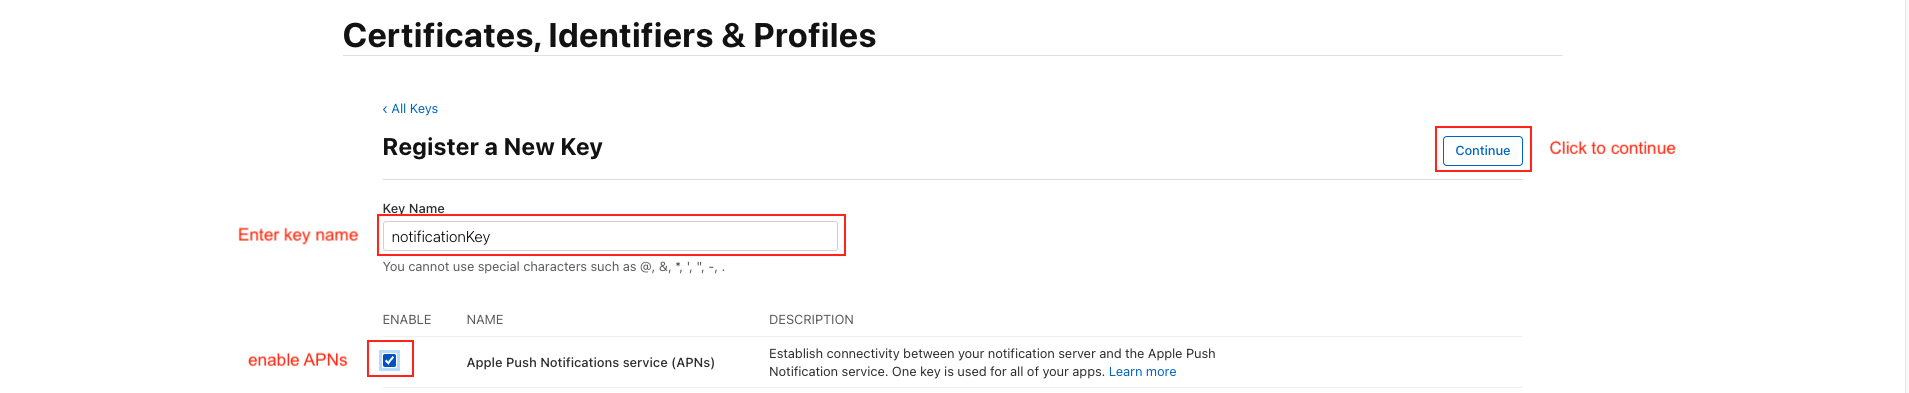
Enter a name (e.g., NotificationKey ).
-
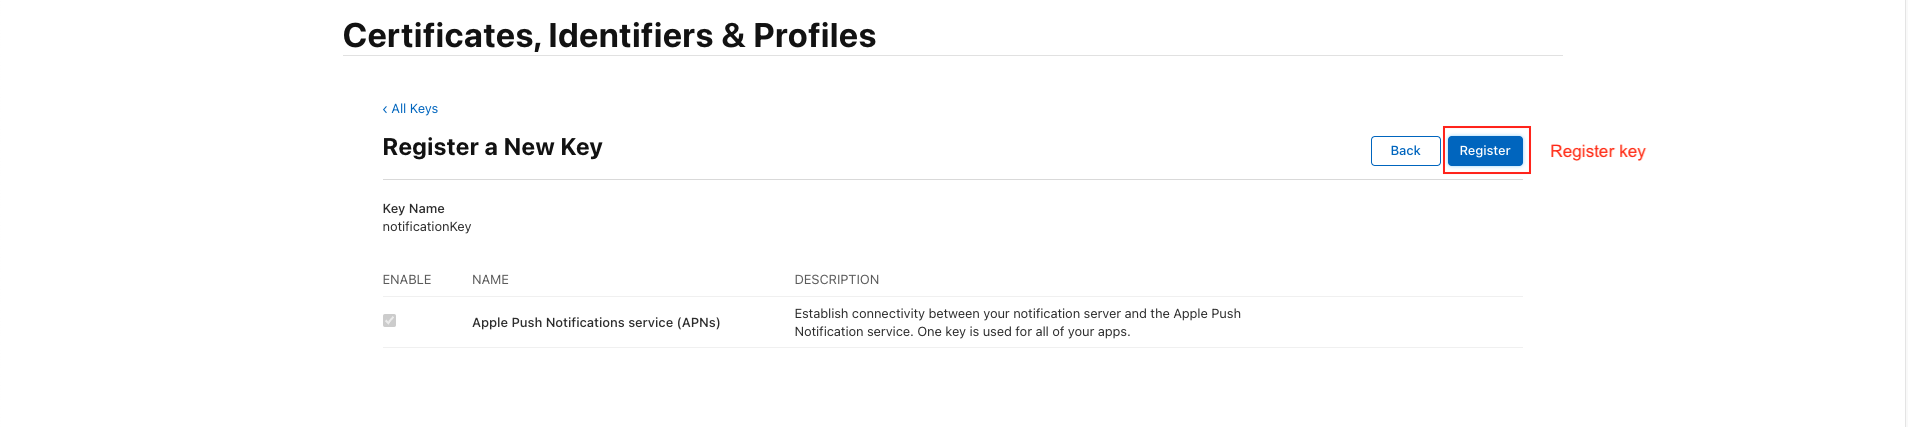
Check the box for Apple Push Notifications service (APNs). then Configure button press
-
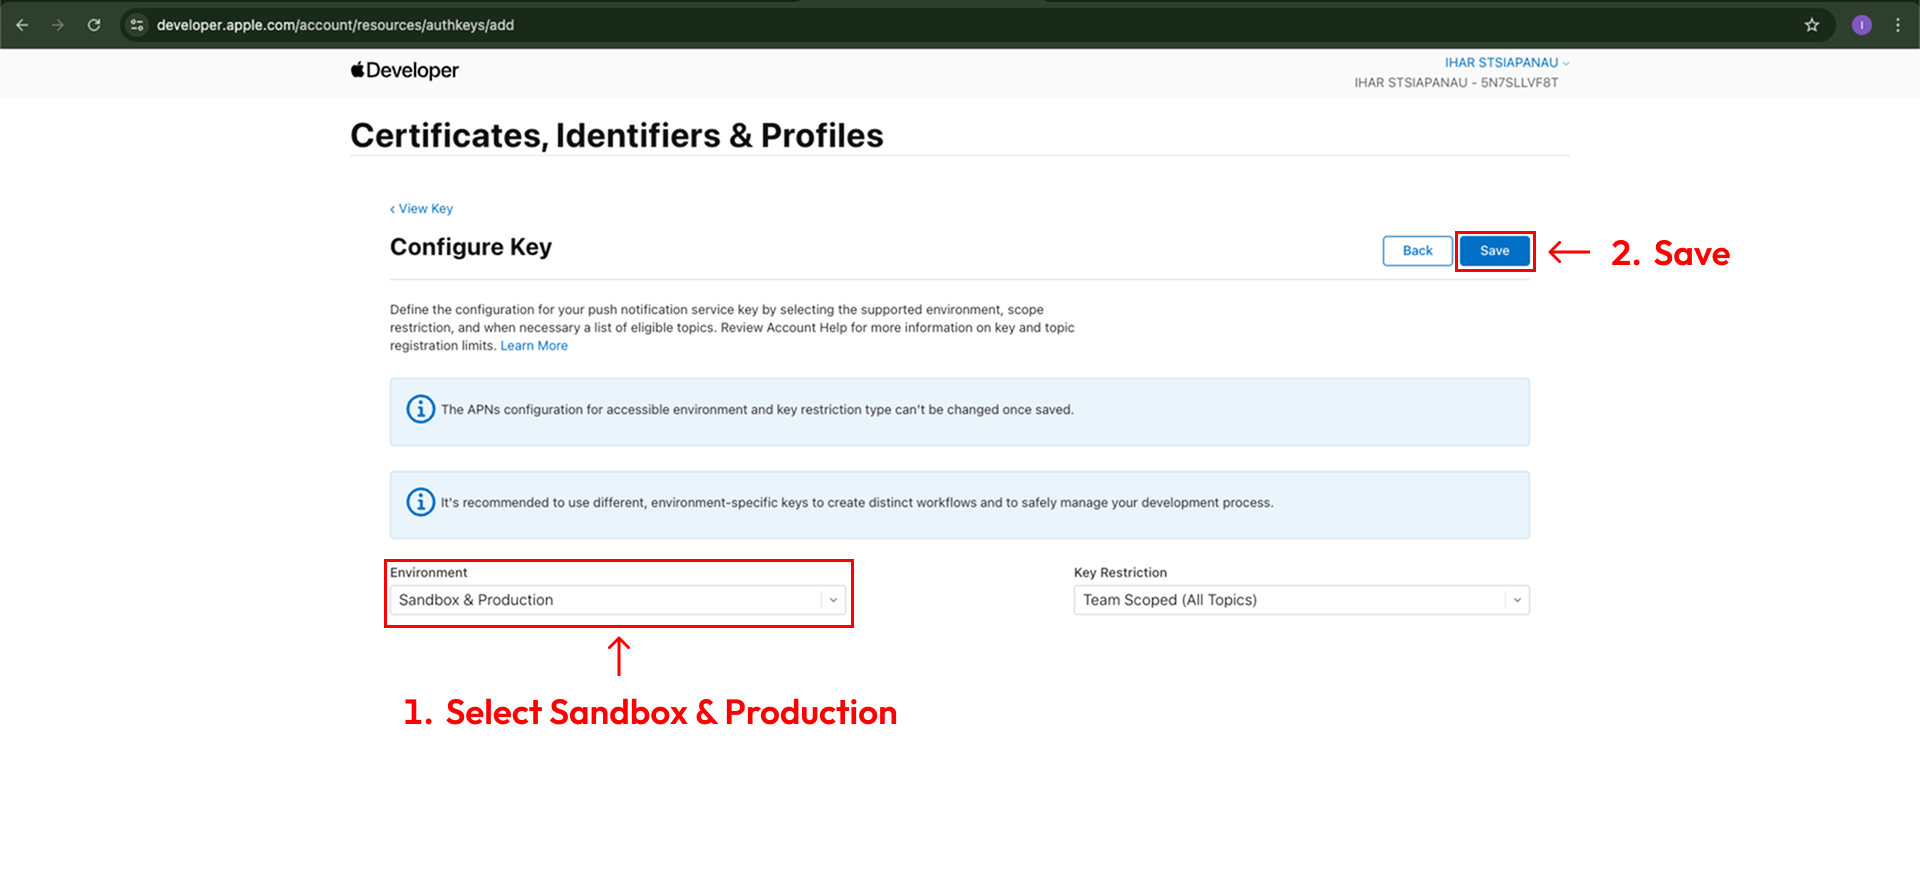
Select Environment section Select "Sandbox & Production" and Key Restriction section select "Team Scoped (All Topics)"
-
Click "Continue" & then "Save". Once saved, you will be presented with a screen displaying the private "Key ID" & the ability to download the key. Copy the ID, and download the file to your local machine:
-
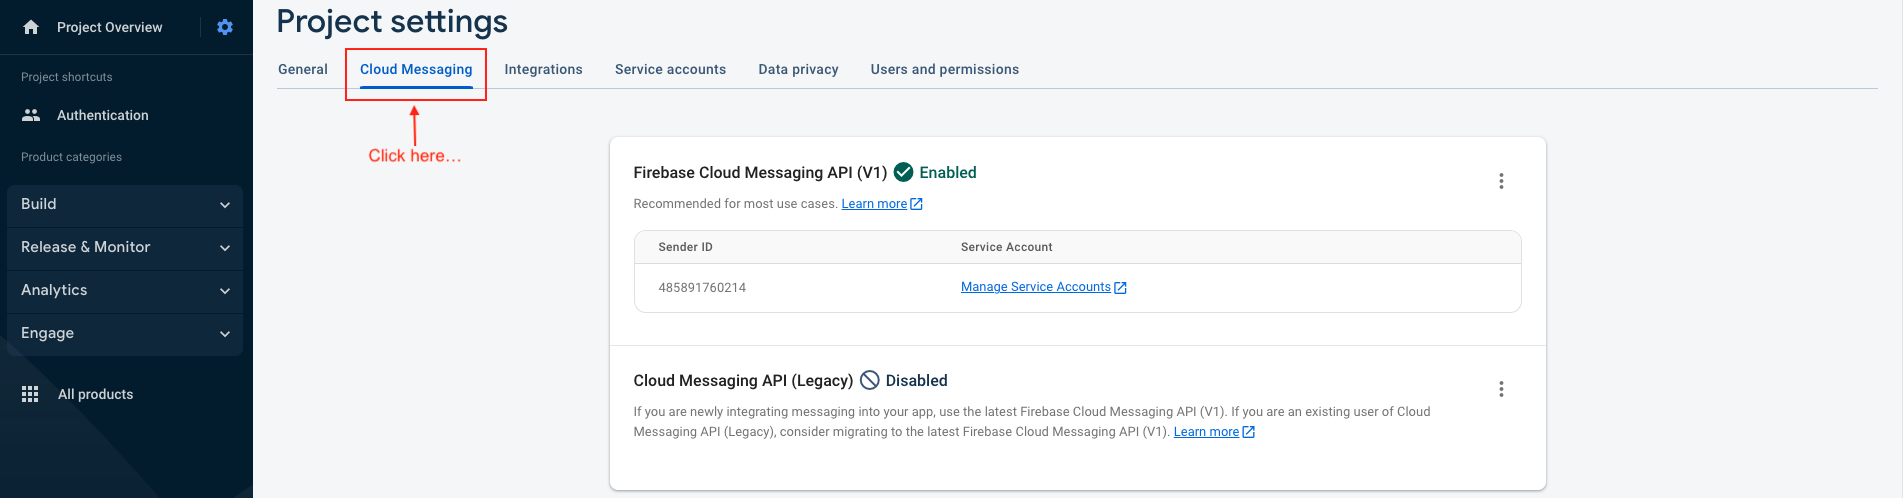
The file & Key ID can now be added to your Firebase Project. On the Firebase Console, navigate to the "Project settings" and select the "Cloud Messaging" tab. Select your iOS application under the "iOS app configuration" heading.s
-
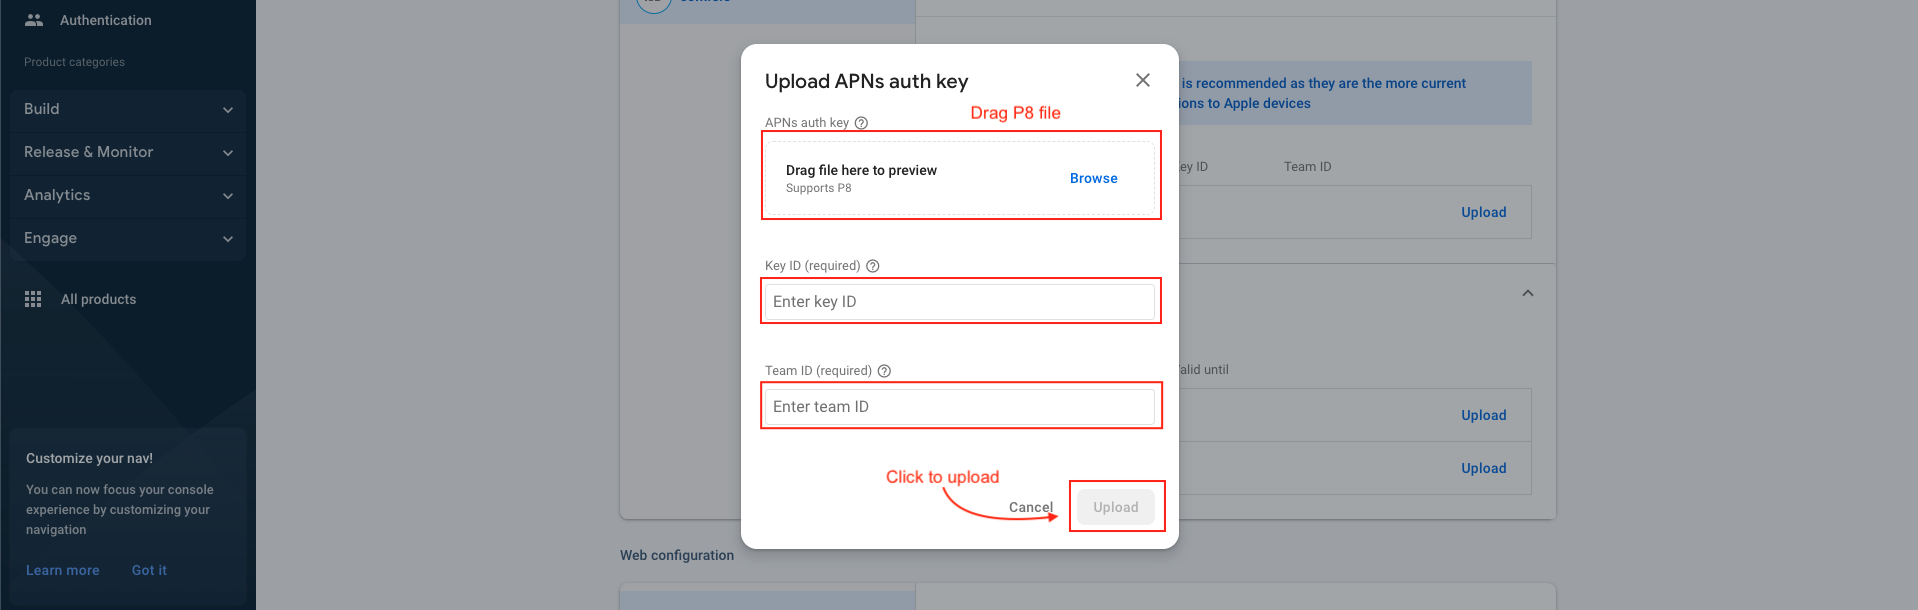
Upload the downloaded file and enter the Key & Team IDs;
-
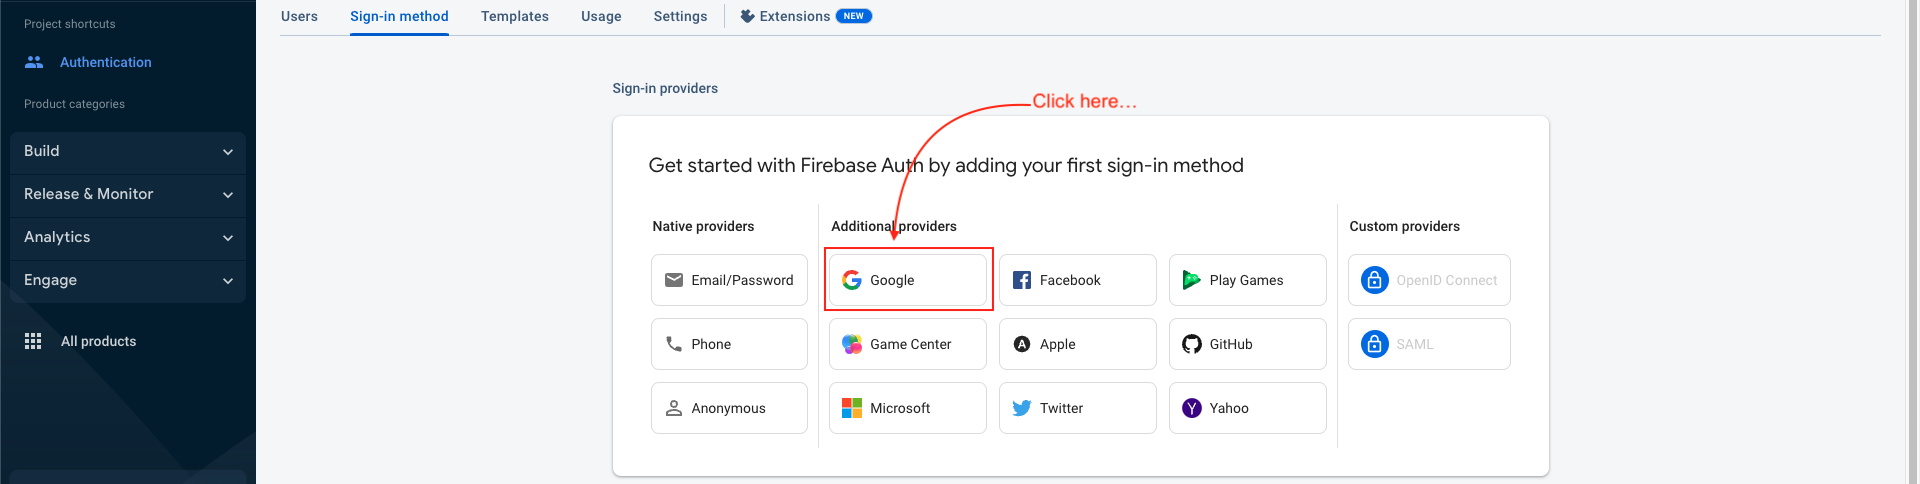
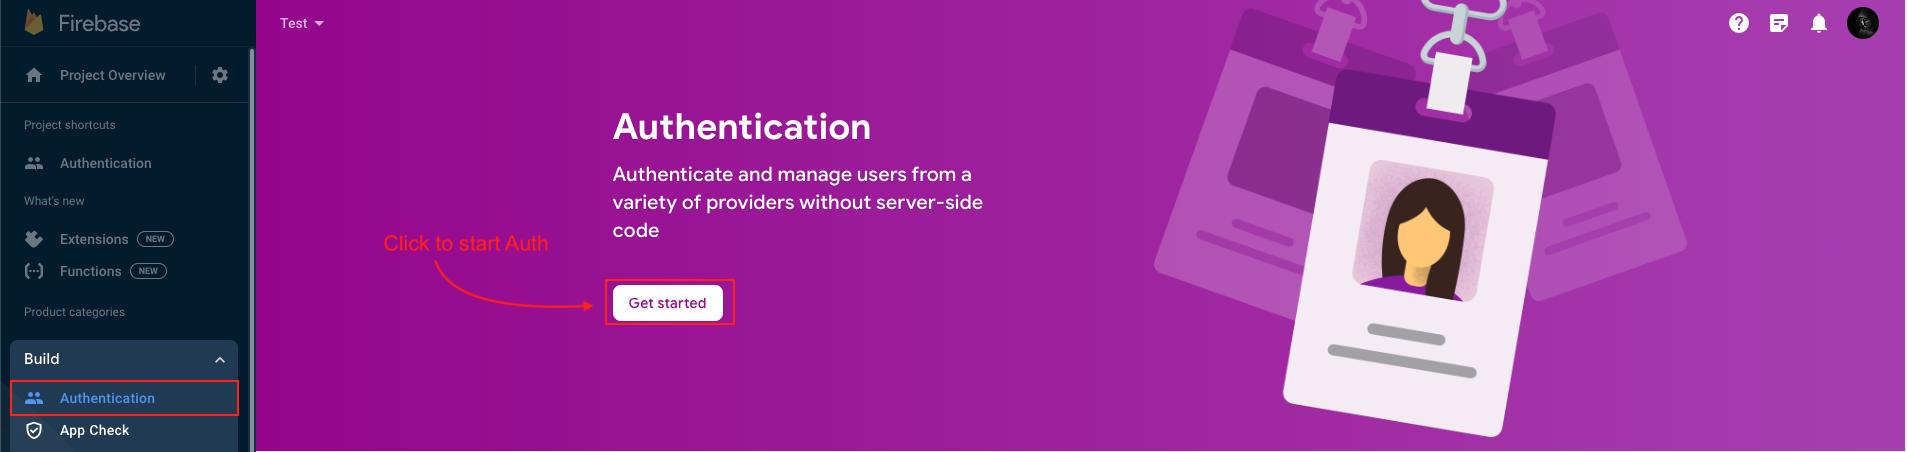
Click to Authentication and sign in mathod tab
-
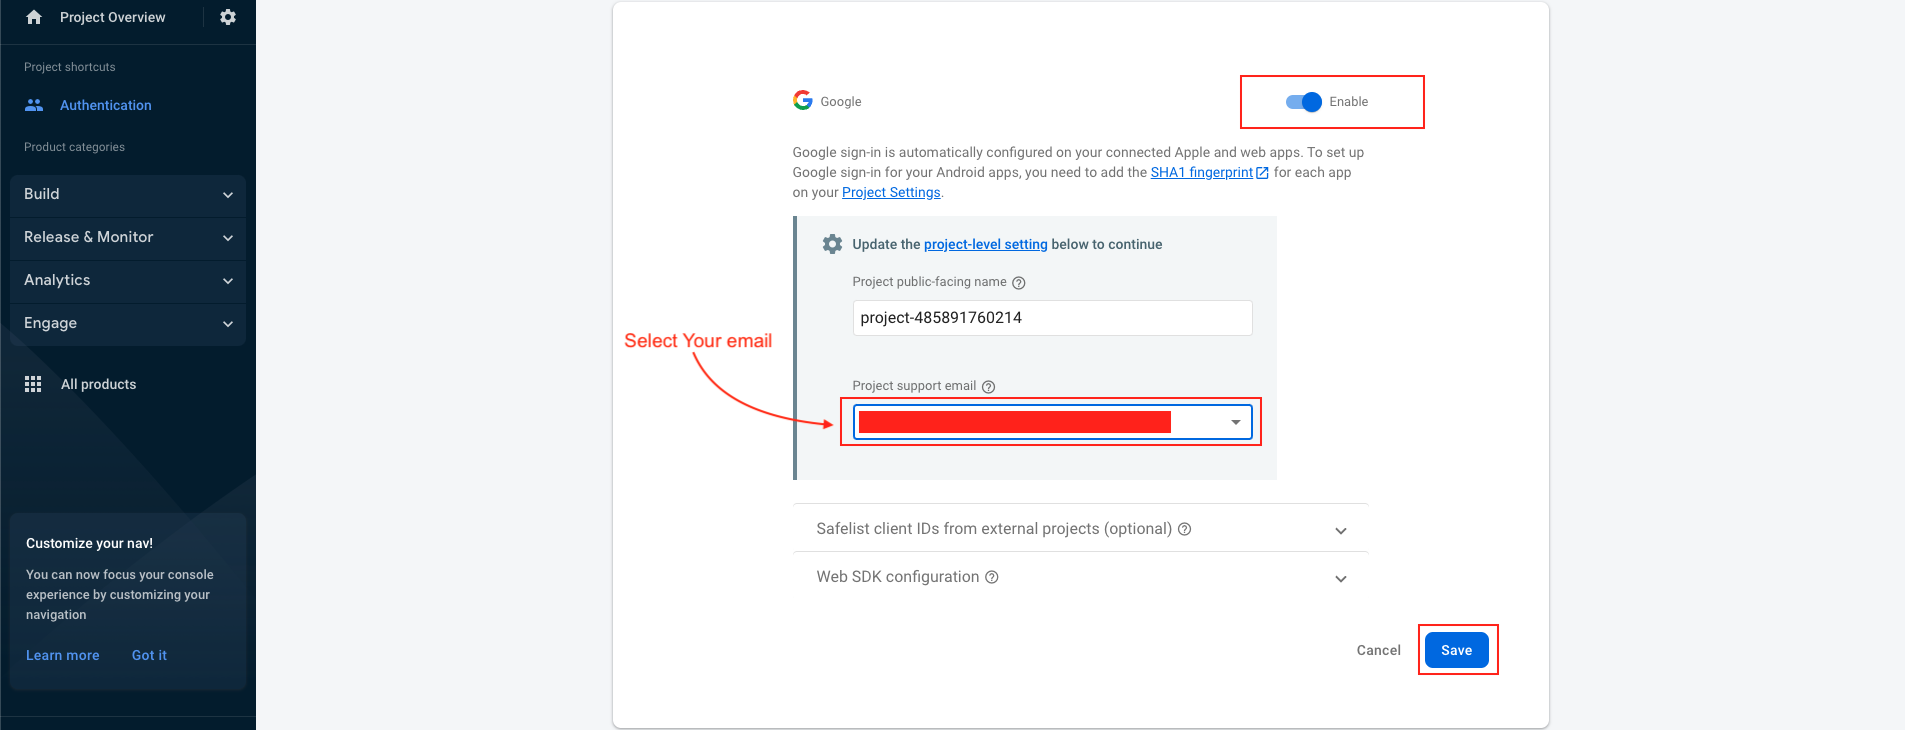
Click to Enable
-
Select your support email and save
-
Successfully Enable google sign in method
-
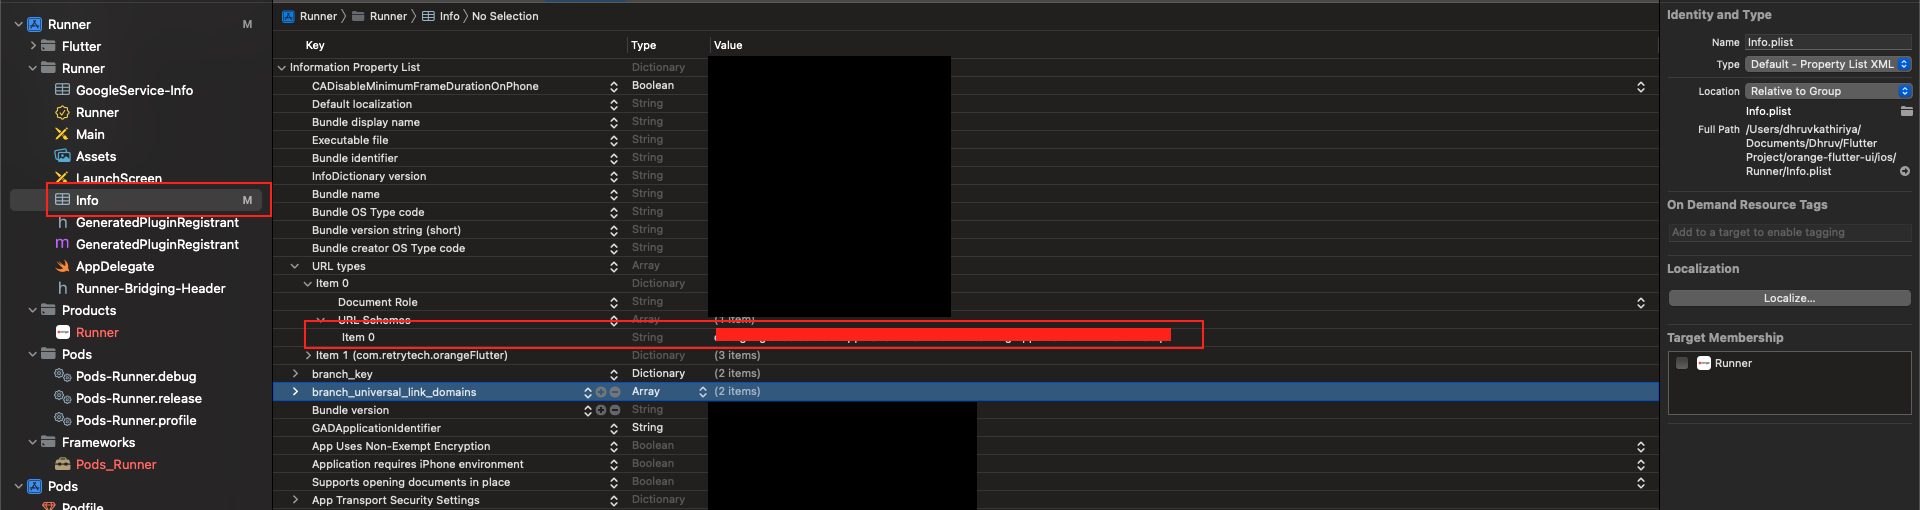
Set Google ‘REVERSED_CLIENT_ID’
-
Open GoogleService-Info.plist file and find ‘REVERSED_CLIENT_ID’ and Copy it.
-
And paste it in project > target > info > URL Types
-
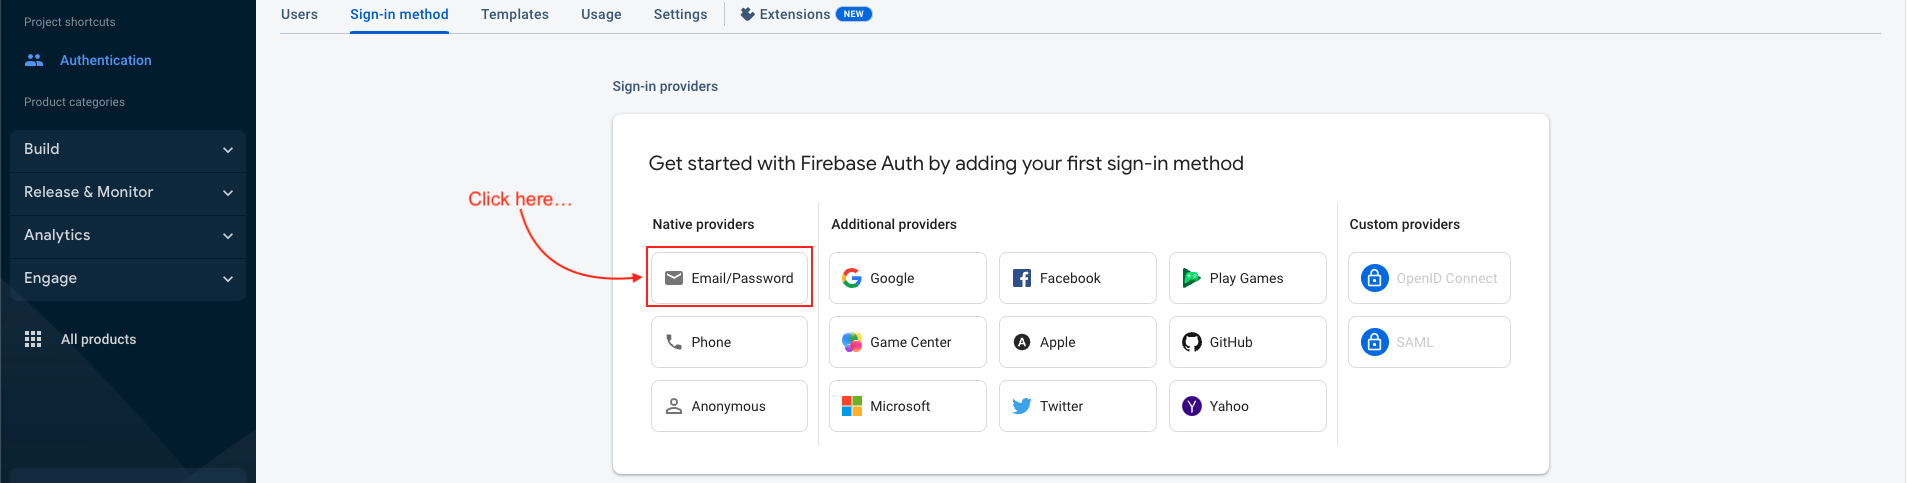
Click to Authentication and sign in mathod tab
-
Then click on email/password provider
-
Then both button switch to enable and save
-
Your email and password successfully Enable
-
Setup subscriptions
-
You need to define subscriptions on Google Play Console (For Android) and Apple App Store Connect (For iOS) before connecting with RevenueCat.
-
iOS subscription : Follow this guide
-
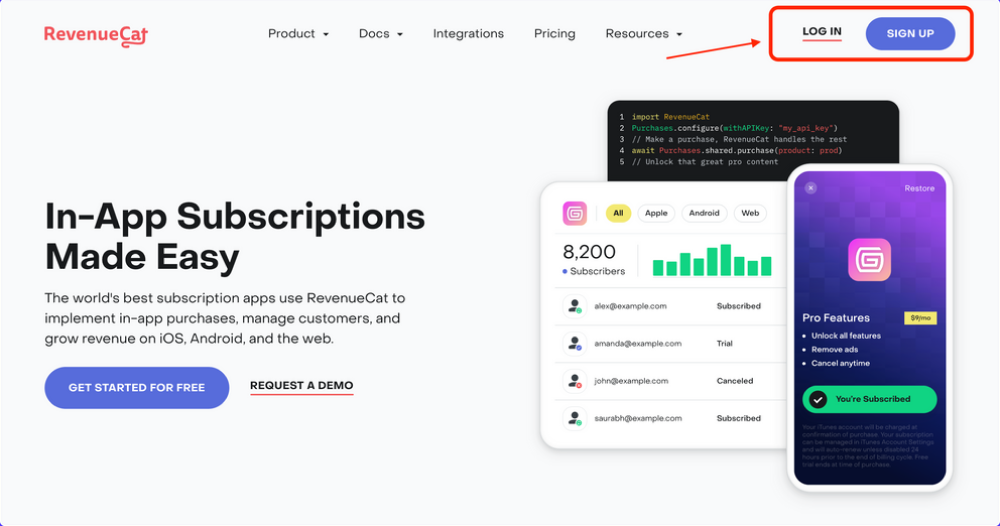
Create an account or log in to RevenueCat from here to get started.
-
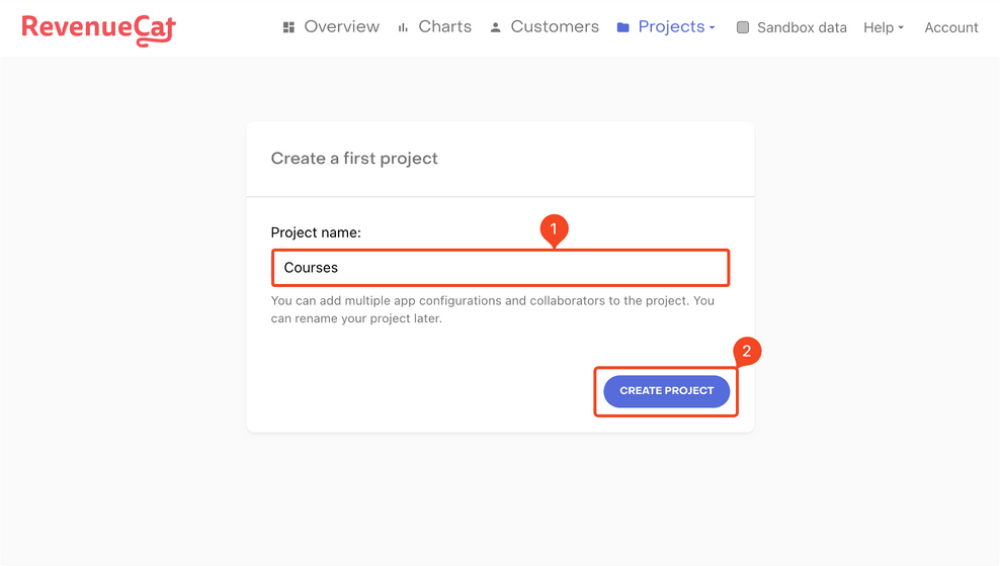
If you have created a new account, you will be automatically prompted to create your first project. Enter a Project name and click "CREATE PROJECT" button.
-
Next, you need to add your Android and iOS apps to RevenueCat in order to use and manage the subscriptions.
-
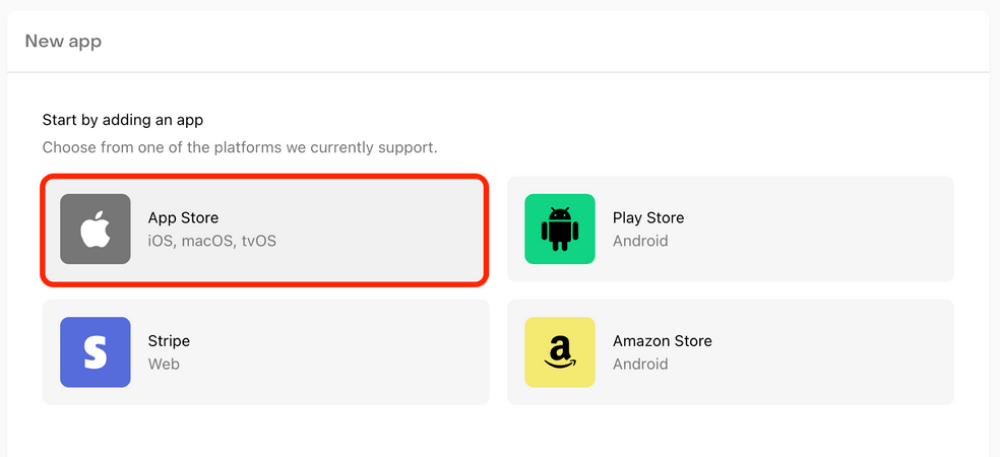
Follow the steps below to configure the iOS app:
-
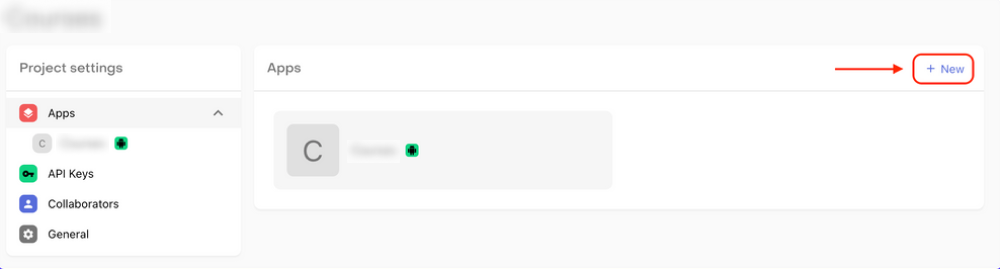
Go back to the Apps page and click on "+ New".
-
Select App Store.
-
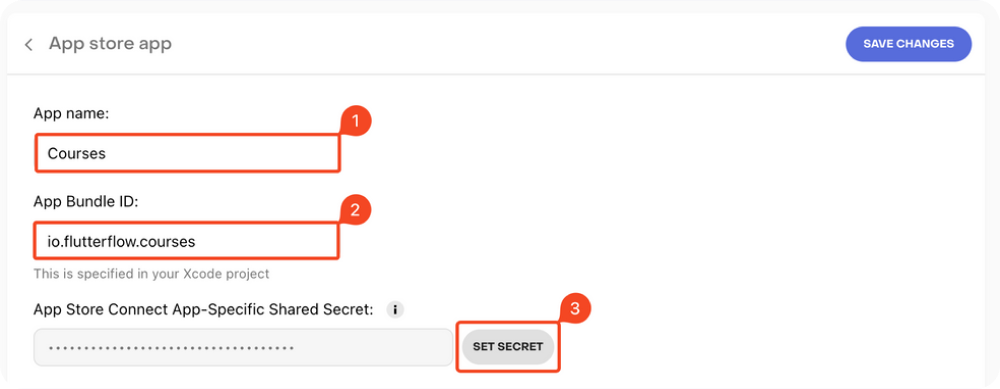
Enter an App name, Bundle ID, and App-Specific Shared Secret. To generate an App-Specific Shared Secret, follow The guide . Once you have the key, click "SET SECRET", enter the value, and click Set. Then click "SAVE CHANGES".
-
This completes the iOS app setup on RevenueCat.
-
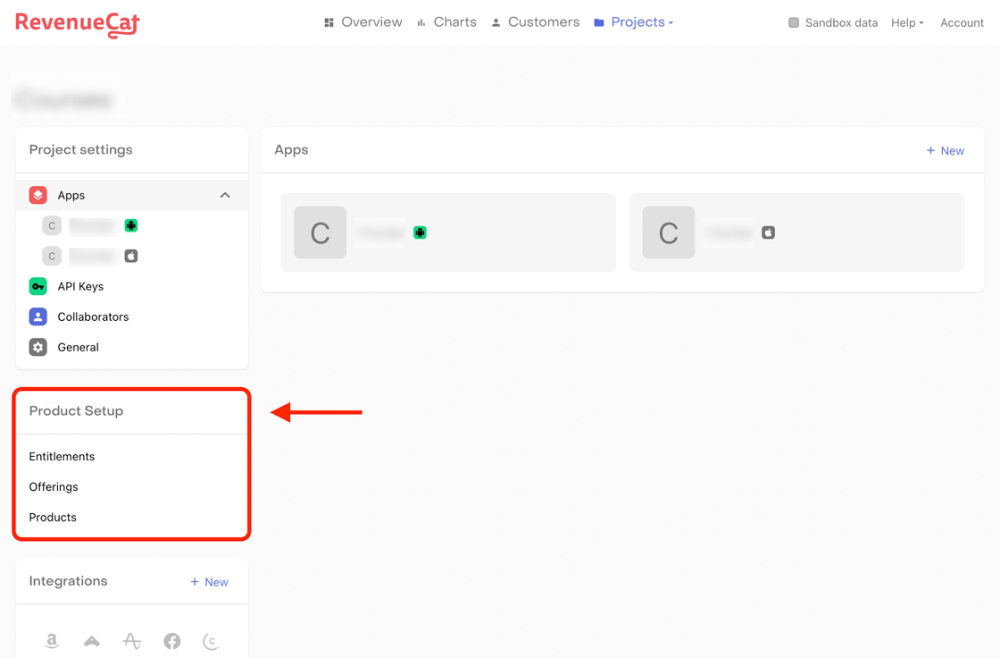
You will find these configuration levels on the left menu of the RevenueCat dashboard under the section Product Setup:
-
In this configuration, you need to add all the subscriptions for both your Android and iOS app that the user can purchase. This is like a 1-to-1 mapping of the products in RevenueCat that you have already added to the stores (Google Play Store and Apple App Store).
-
To add products, follow these steps:
-
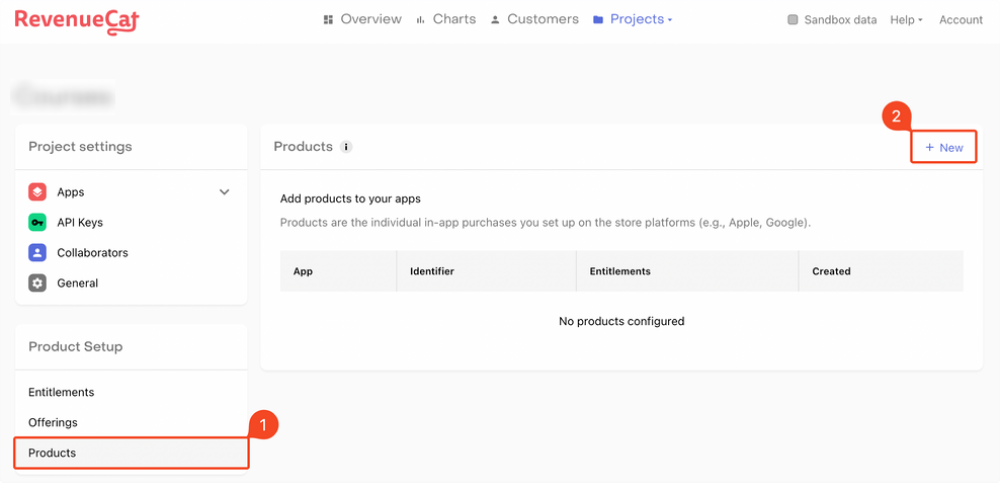
Select Products under the Product Setup section. Click "+ New".
-
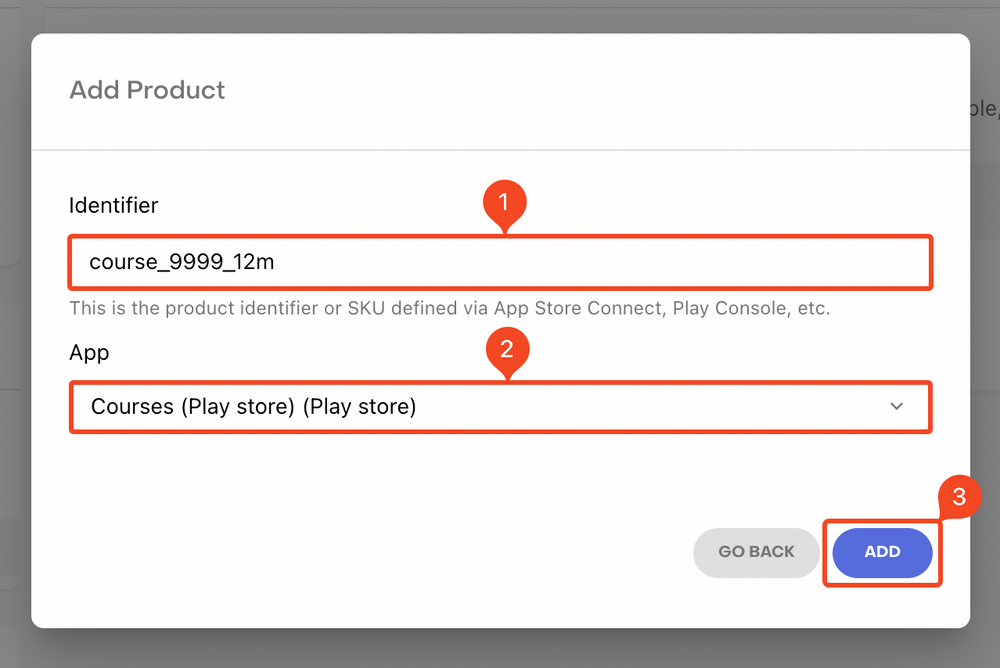
You need to enter the product Identifier and the App . Make sure you use exactly the same product ID you used for the Android/iOS subscription. Click ADD .
-
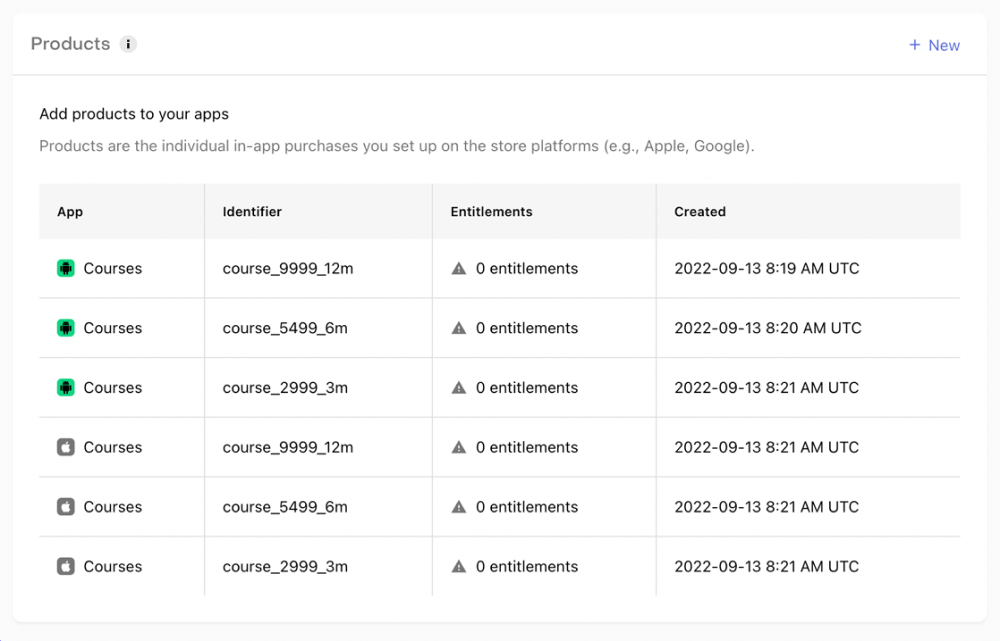
Similarly, add the other subscriptions as well (for both Android and iOS).
-
Follow these steps to add an entitlement:
-
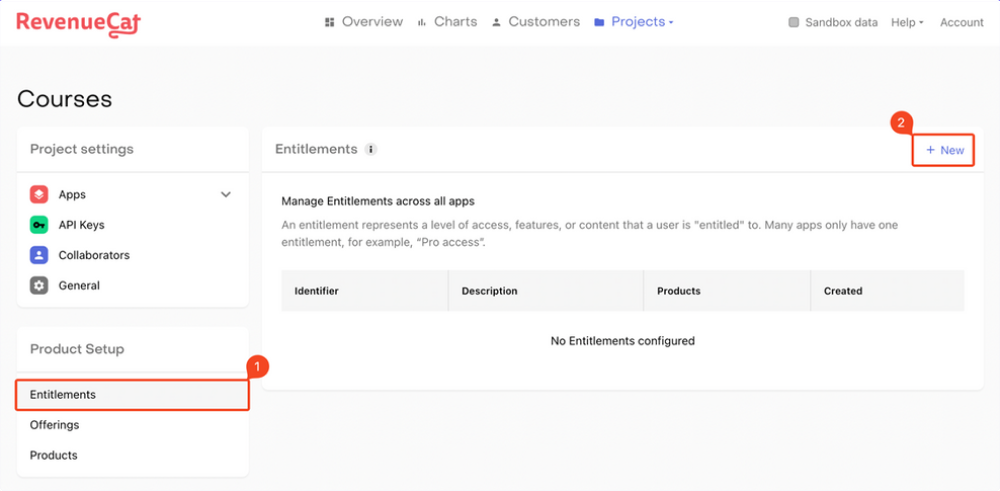
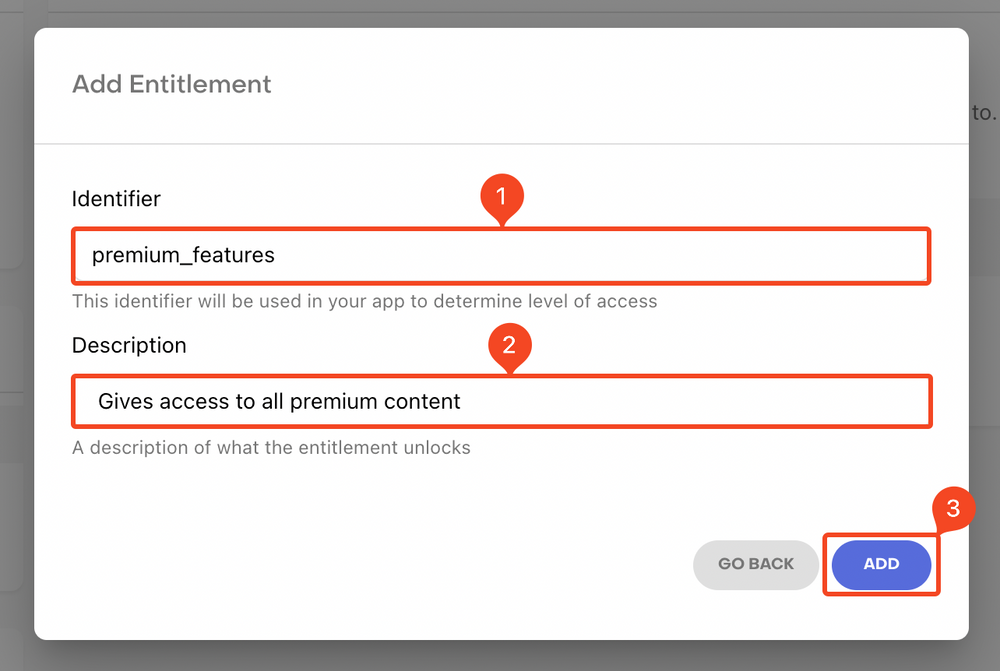
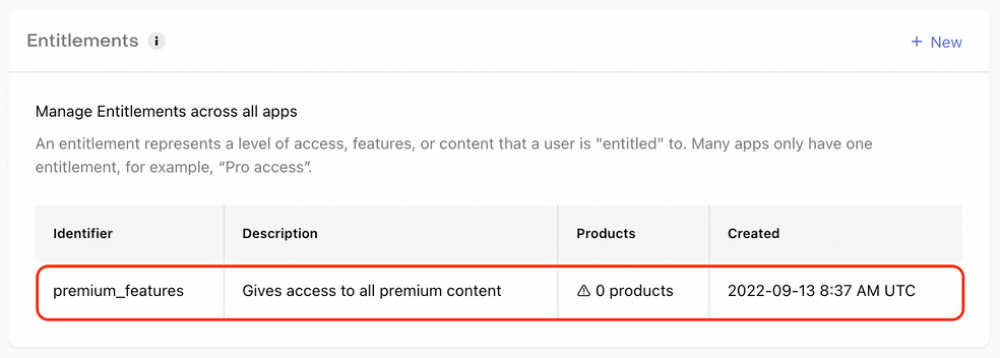
Select Entitlements under the Product Setup section. Click "+ New".
-
Enter an Identifier and Description for the entitlement. Click ADD.
-
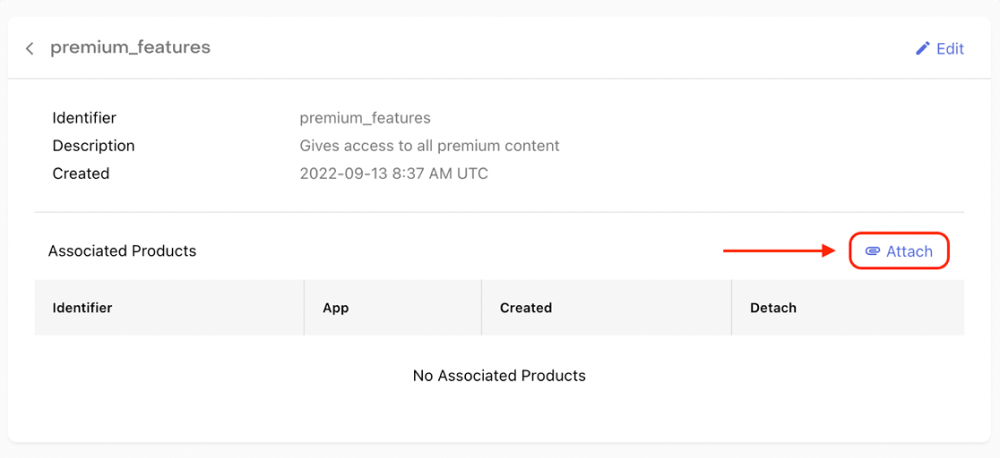
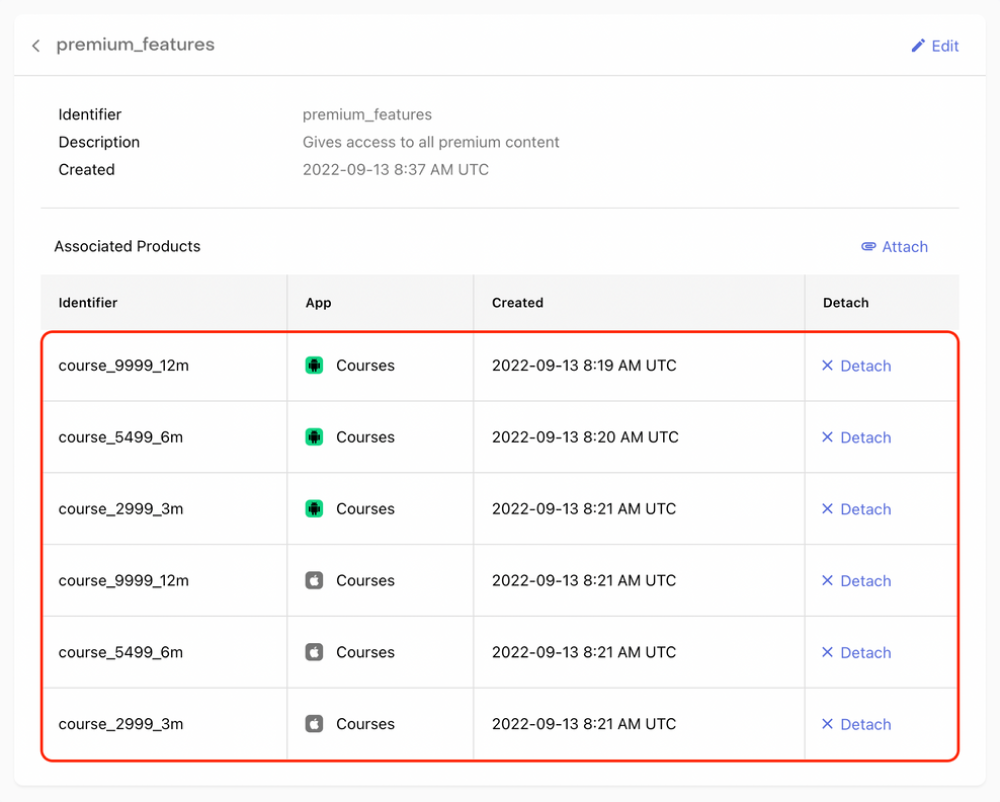
Next, you need to attach the products to this entitlement. Click on the entitlement that you just created.
-
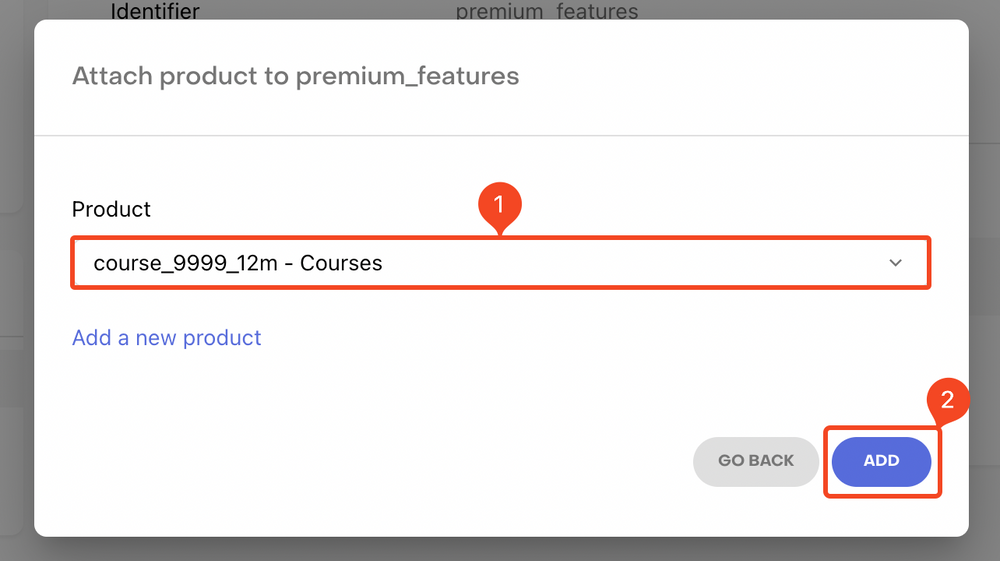
Click on Attach.
-
Select a Product from the dropdown and click ADD .
-
Similarly, attach all the other products to this entitlement.
-
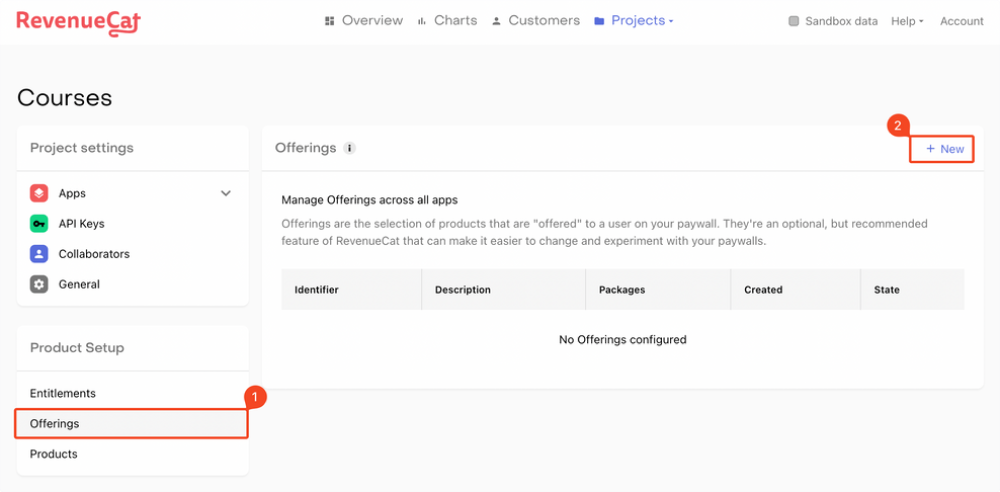
Follow the steps below to add offerings:
-
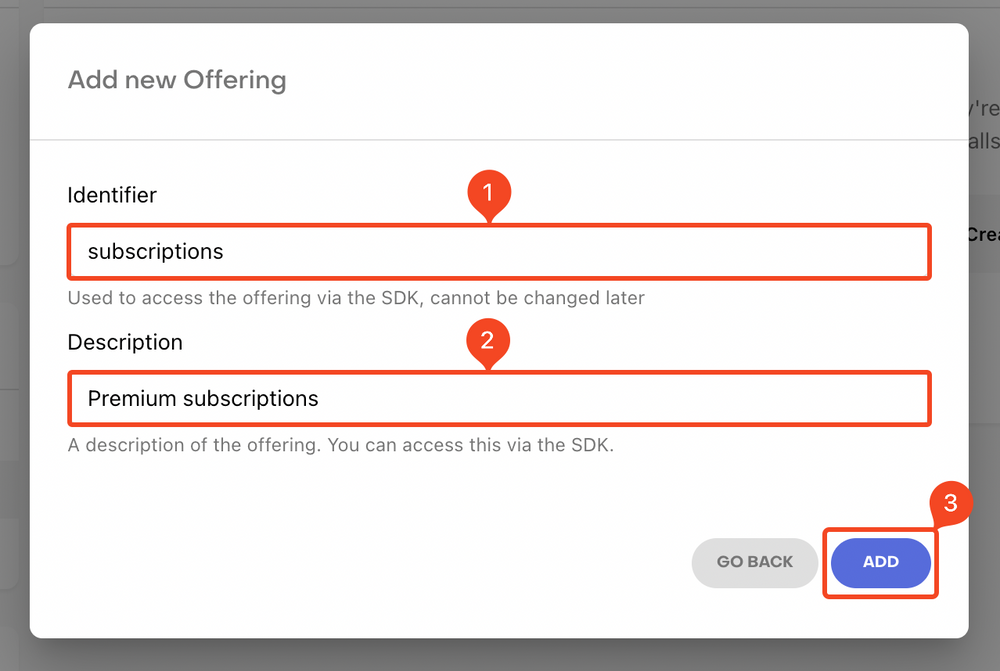
Select Offerings under the Product Setup section. Click "+ New".
-
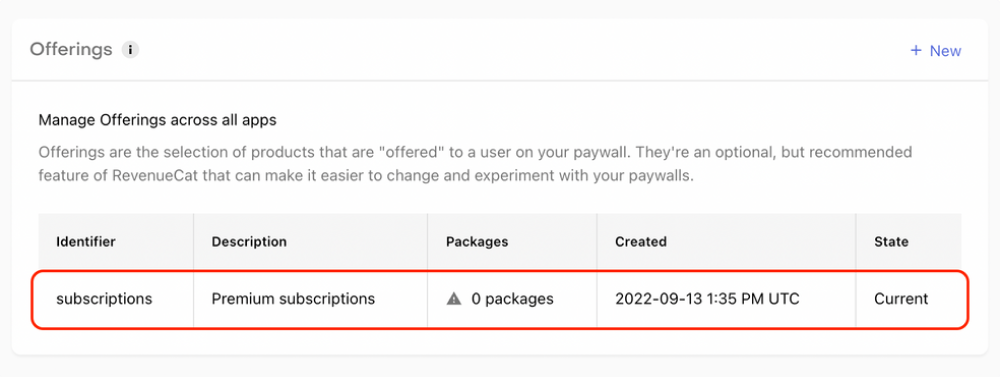
Enter an Identifier and Description for the offering. Click ADD.
-
Click to open the offering that you just created.
-
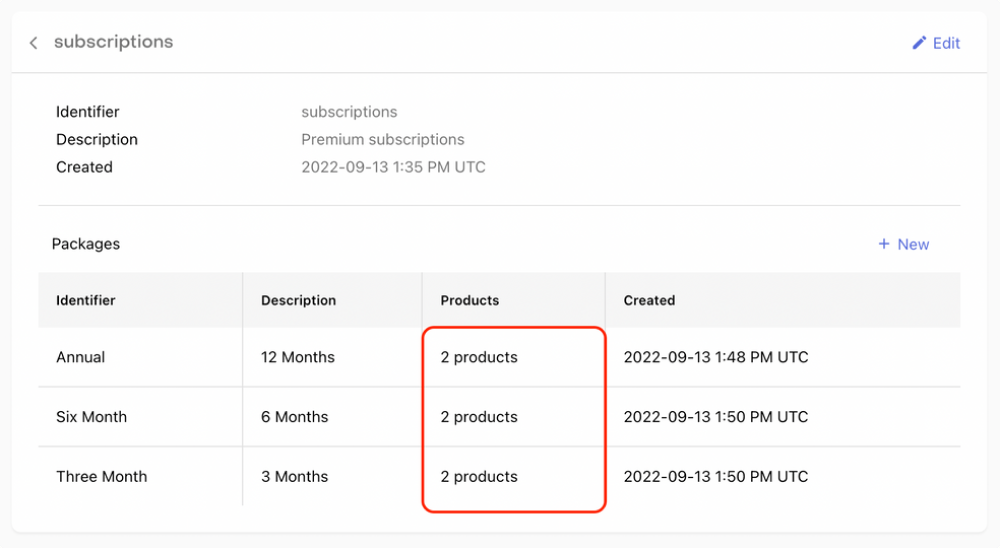
Click on "+ New" beside the Packages.
-
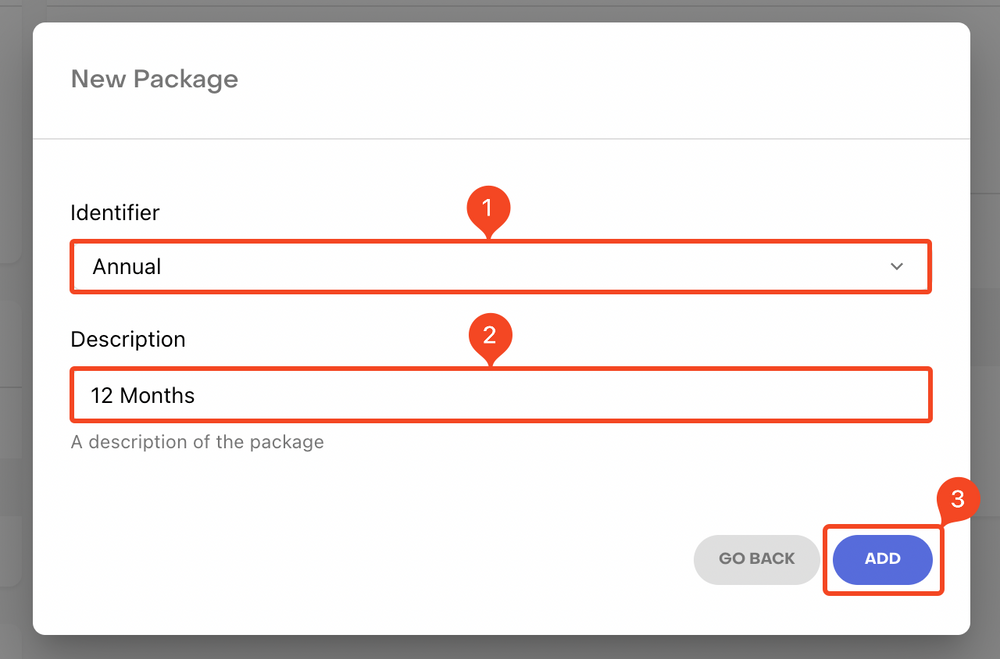
Enter an Identifier for the package from the dropdown and add a Description . Click ADD.
-
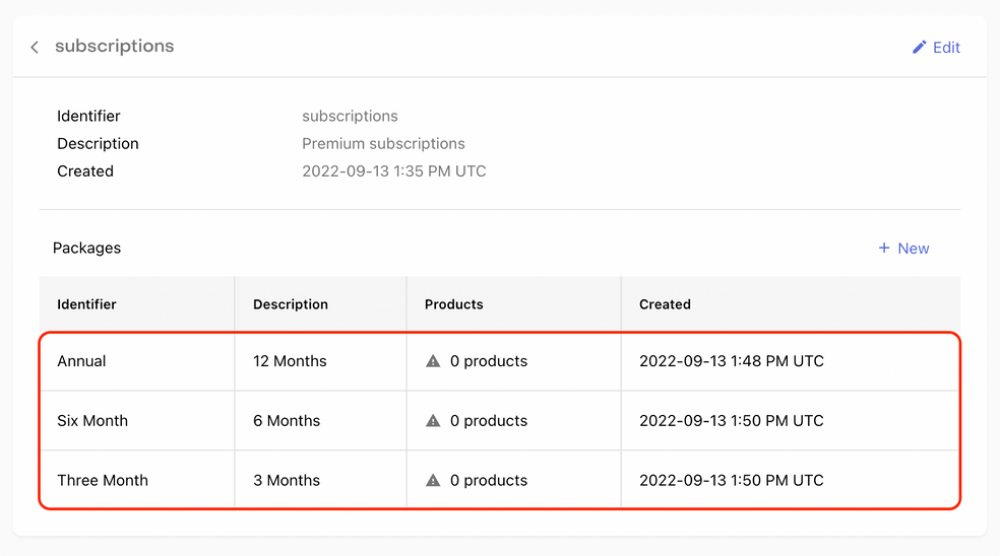
Similarly, add the other packages as well.
-
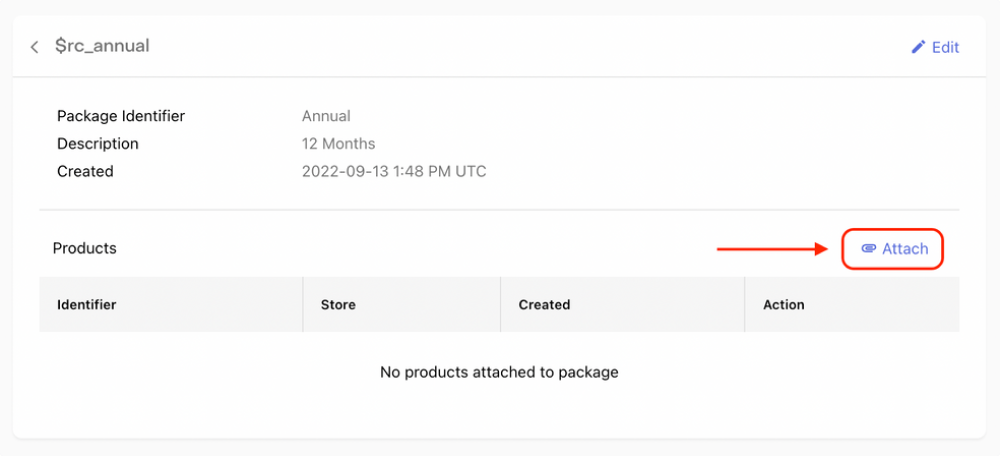
Click to open a package. Then click Attach.
-
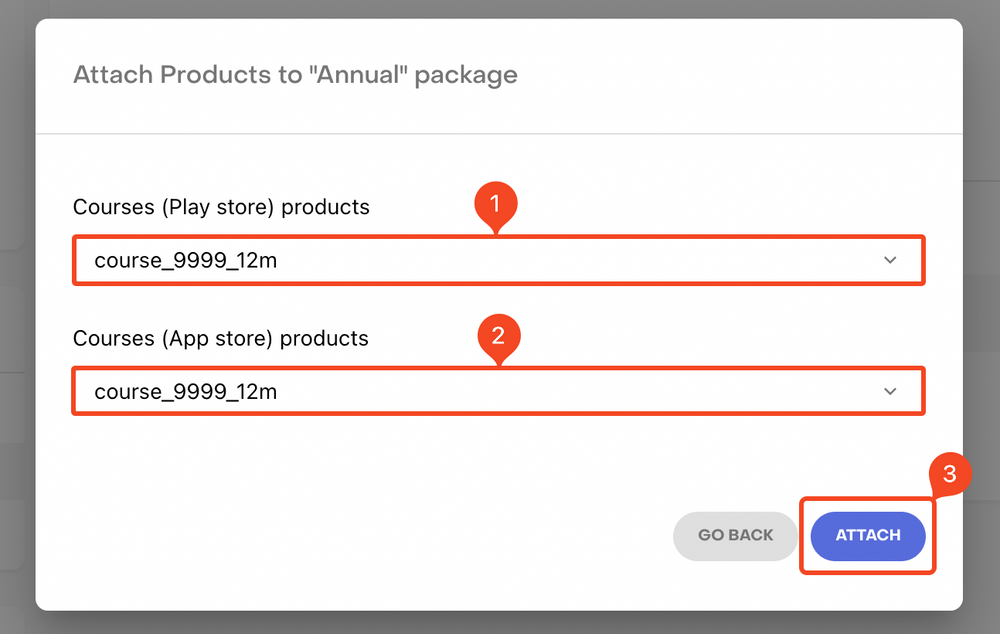
Select the respective Play Store and App Store products from the dropdown. Click Attach.
-
Similarly, attach the correct products to the other two packages as well.
-
This completes the three levels of configuration on the RevenueCat.
-
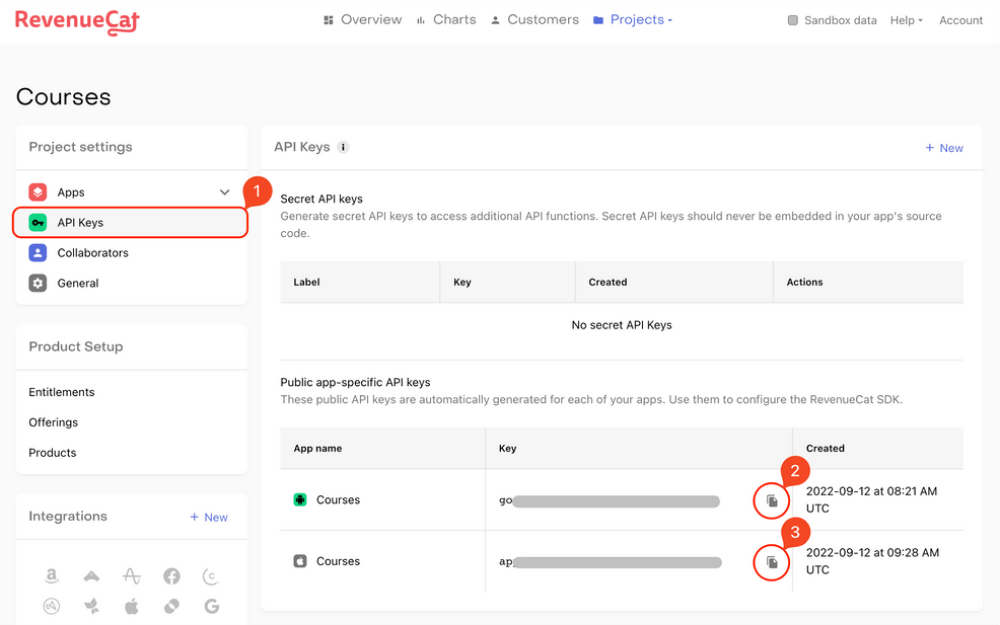
you need to add the App Store Key and Play Store Key to Your project You can get these keys by going to the RevenueCat dashboard > API Keys > Public app-specific API keys. Copy and paste these keys into the respective fields of Project
-
Open https://developers.google.com/admob/ios/quick-start URL and setup account.
-
You have to set Keys in admin panel.
- Telegram (Support Desk) : +91 7990425274
- Email : help.retrytech@gmail.com
- Whatsapp (No Support Here) : +91 7990425274
Create APNs Auth key for push notification

Copy Key ID & Download File

Google sign in

Email sign in


Subscription
Connect with RevenueCat
Adding iOS app
Define subscriptions on RevenueCat
Products
Entitlements
Offerings

RevenueCat Project setup