

Introduction
Here is the quick documentation to set up the web part of the project created in PHP Laravel. Please follow all the steps correctly and carefully set up the project.
Prerequisites
-
Server with cPanel is recommended
-
PHP 8.0 or upper
-
Hosting with cPanel (Strictly Recommended)
-
memory_limit should be 500M
-
upload_max_filesize : 500M
-
post_max_size : 500M
-
max_input_time : 60
-
Firebase Blaze Plan
-
Agora project and credentials to setup video metting part.
Extracting the project and settings up database
-
Extract the folder you have downloaded from codecanyon and open the folder
-
Open it and find the database.sql file
-
Then open your cPanel provided by your web hosting provider.
-
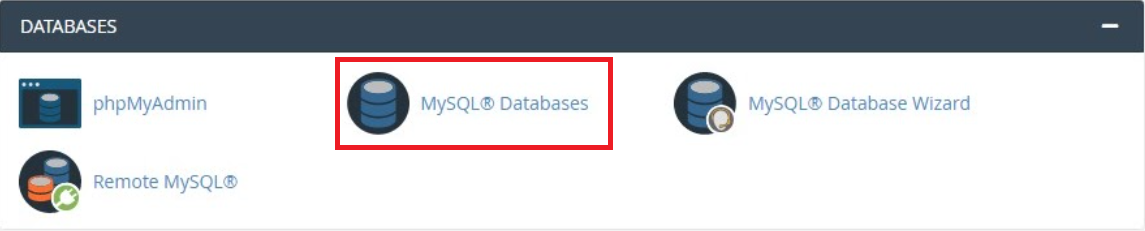
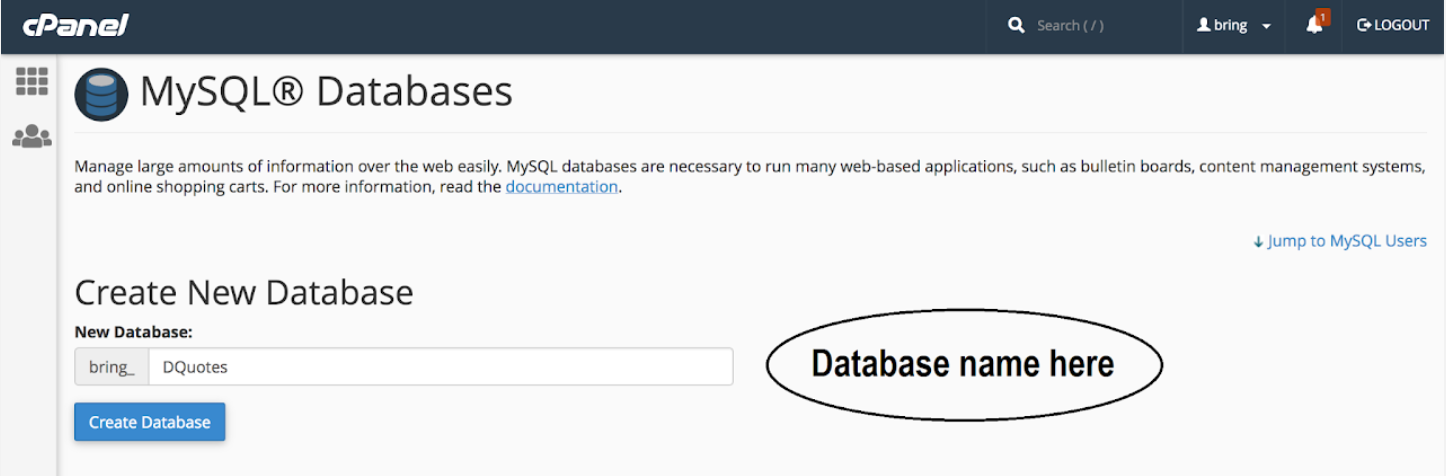
Click the MySQLDatabase option under DATABASES section and create database for your app as shown in the images below.
-
Add database name and click on create database.
-
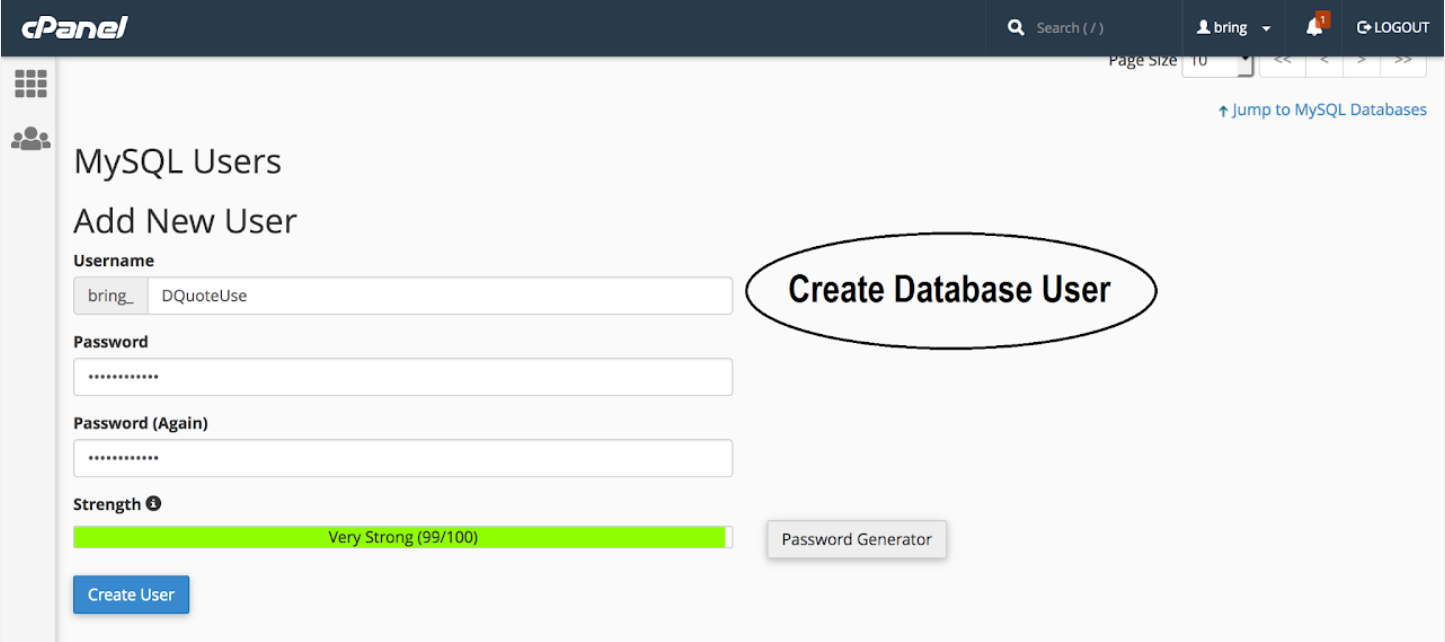
Now we will create a user to access the database
-
Like as shown in the image, enter username and password (save it to use later)
-
Click on create user and user will be created
-
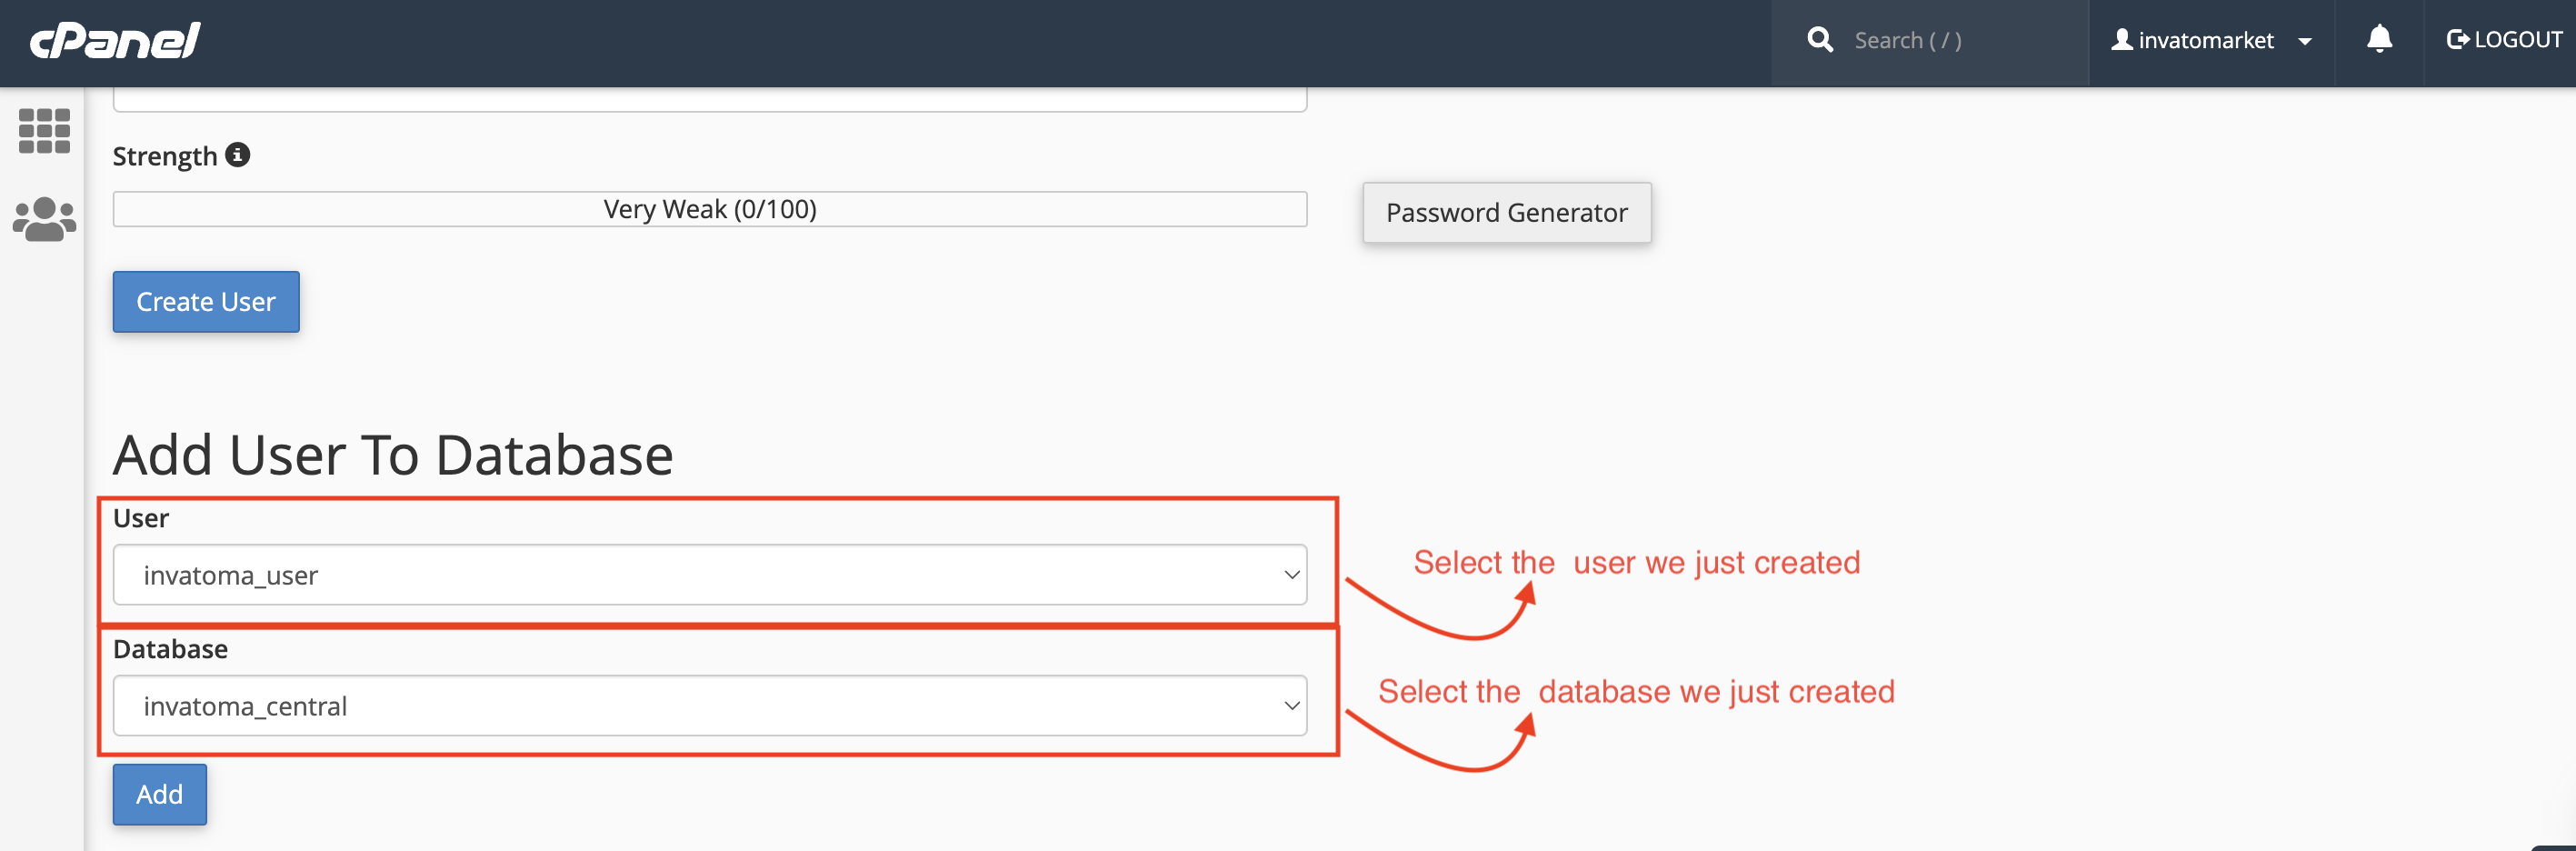
Now we have to add that created user to database. so scroll down and you can see like image below
-
Select the user from the list and select the database, and click on add button below
-
After clicking on add button you will see like below.
-
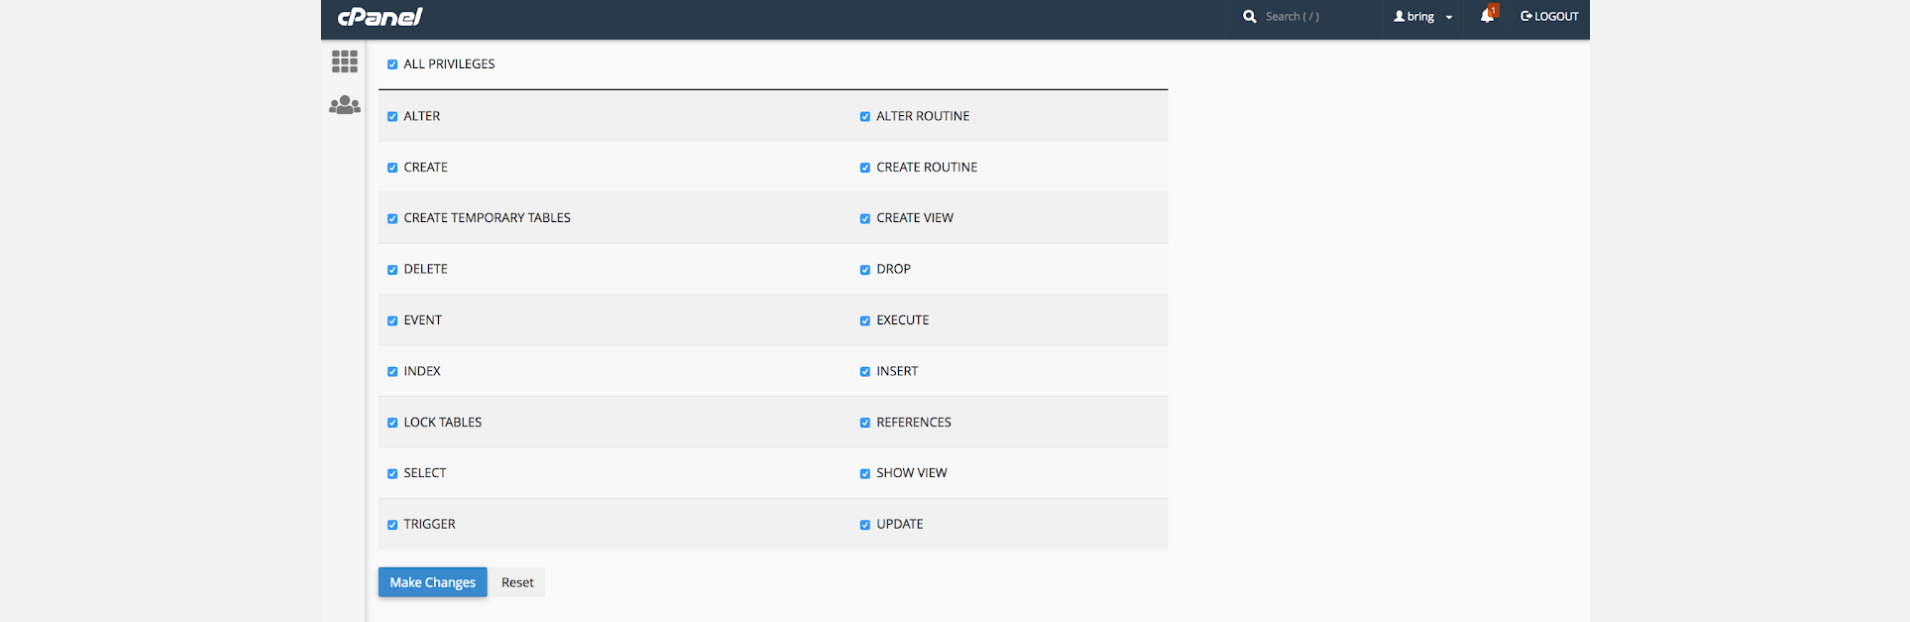
There you can see ALL PRIVILEGES option, check the box before that
-
This will tick all the boxes shown below (Check the image below). Click on make changes and you are done.
-
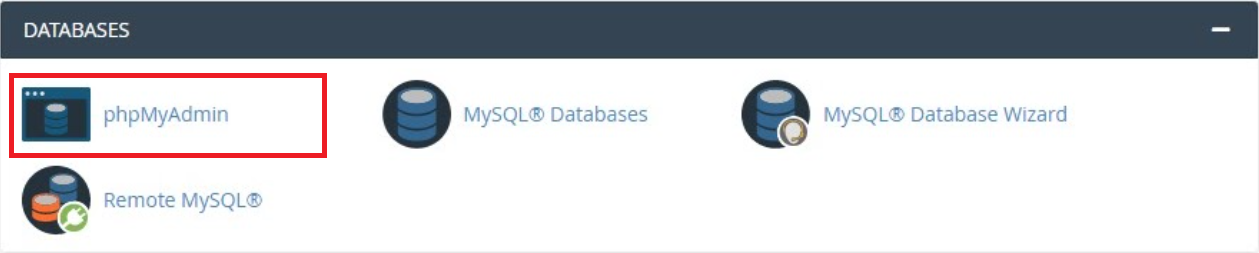
Now we have to import the database file. Search for phpMyAdmin and click on it.
-
Then system will redirect you to the phpMyAdmin where you will be able to find the database we just created
-
Click on that database
-
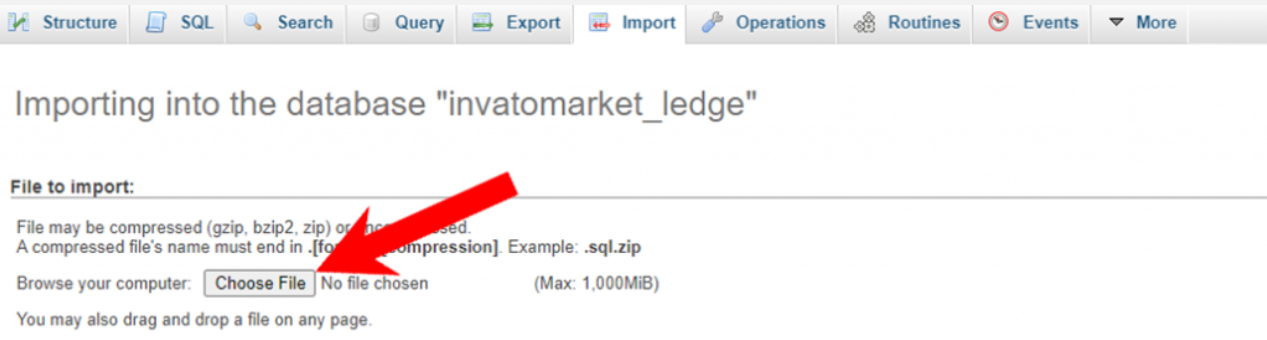
Then find the import button on the Top bar and click on it
-
It will open the page like below
-
Click on Choose File button and load the database.sql file which will be there in the folder you have extracted.
-
Click on import button at the bottom of the page.
-
Now database is ready to use.

Setting Up Database credentials to the project
-
Now come back to the project folder and then extract cutfx_backend.zip file
-
In that folder, find the .env file, open it with any text editor and make the changes as below
-
There in the APP_URL Replace the https://yourdomain.com/ to Your Domain
-
FILES_BASE_URL and Replace the http://yourdomain.com/public/storage/ to Your Domain
-
Change Database Configuration, as shown in the example below
-
And save the file by pressing Ctrl + s
-
Now Go to public/asset/script/env.js and open that file
-
Make the changes like below in that file

DB_DATABASE = database_name
DB_USERNAME = database_username
DB_PASSWORD = "database_password"
var domainUrl = "http://yourdomain.com/"
Setup Notification (FCM)
-
Follow This guide and setup project at firebase and collect .json
-
Open .json file in your text editor.
-
Copy content of .json file from your text editor.
-
Create a new file named googleCredentials.json in your backend folder and paste the content in that file.
-
Once this gets completed, Please subscribe to the Pay as you go Plan of Firebase, it is required for Chat to use a real-time database for more than 100 users. If you don't do that, app will stop working for chats and some other features once it reaches more than 100 users.
Host backend project on server
-
Create a zip of the cutfx_backend folder
-
Upload that folder to your domain-targeted directory on your cPanel provided by your hosting provider. and extract the zip file.
-
Make sure that your targeted directory has the project files directly, and not wrapped in a folder
-
Cheers! Now try accessing your domain, the admin panel should be live there on your domain
Getting the credential
Now web setup is completed and let's collect some credentials for the app setup
-
Admin Panel URL : http://yourdomain.com/
-
Admin Panel User Name : admin
-
Admin Panel Password : admin123
-
Baseurl : http://yourdomain.com/api/
-
apiKey : 123
-
itemBaseURL : http://yourdomain.com/public/storage/
Now save these credentials somewhere and start following the documentation to setup application.
Want to talk with us?
- Telegram (Support Desk) : +91 7990425274
- Email : help.retrytech@gmail.com
- Whatsapp (No Support Here) : +91 7990425274